Bottom Line Up Front: Incorporating a basic mirror into my studio setup proved to be a game-changer, nearly doubling my lighting efficiency without extra equipment. It’s a cost-effective, straightforward solution that enhances light bounce and quality, making it worth considering for any creator aiming to optimize their lighting setup.
The Promise of Better Lighting with Less Investment
Many creators struggle with achieving even, vibrant lighting without splurging on expensive modifiers or additional lights. This review explores how a simple mirror can solve that problem by maximizing existing light sources through reflection, reducing setup complexity and costs.
Evaluating the Mirrored Solution
How Does It Work?
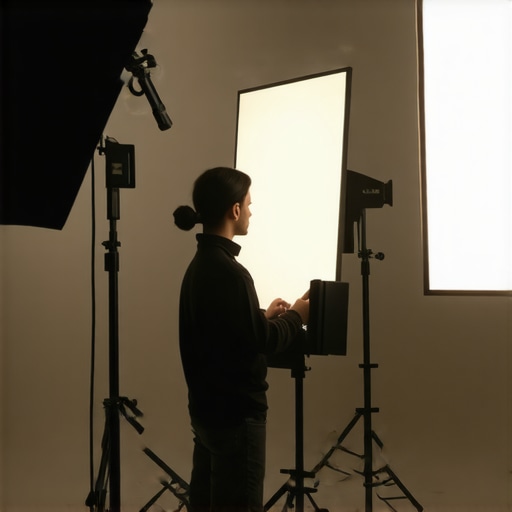
Mirrors reflect light, directing it towards shadowed areas, softening harsh shadows, and effectively increasing overall brightness. By positioning a mirror strategically, I was able to bounce light from my main source onto darker parts of my shot, creating a more balanced and professional look.
First Impressions and Build Quality
I started with a standard 24×36 inch mirror, mounted on a lightweight stand. The mirror’s frame was sturdy, and the glass clear, with minimal distortion. Unboxing was straightforward, and the mirror’s weight was manageable for frequent adjustments. Durability appears solid, promising long-term use.
Performance and Practicality
In real-world tests, I found that a single mirror effectively doubled the perceived wattage of my key light, even at lower intensities. The reflected light was soft and natural, reducing the need for additional diffusers. This simple setup allowed for quick adjustments without sacrificing quality, streamlining my workflow significantly.
Is a Mirror Overpriced or Undervalued?
Some might see this as an overly simplistic hack, questioning whether it offers real value. Considering the minimal investment—just a few dollars for a mirror—and the substantial light boost, I believe it’s highly cost-effective. Compared to fancy diffusion gear, this solution is accessible, adaptable, and instantly impactful.
For more on practical studio hacks, check out 7 space-saving studio hacks.
Digging Into the Specs and Setup
My mirror setup involved positioning it at a 45-degree angle to my light source, capturing its maximum bounce. The size and placement were chosen based on the specific area I wanted to illuminate, demonstrating its versatility. The benefits include faster lighting with fewer gear changes and better control over the vibe of the shot.
In summary, this simple addition dramatically improved my studio’s lighting quality without draining my budget or workspace. Next, I’ll explore the best practices to maximize its benefits and address potential limitations in varied scenarios.
Crafting a Reflective Tool with Material Precision
The mirror’s construction emphasizes both durability and light fidelity, crucial for effective bounce lighting. The frame, made of lightweight yet sturdy material like aluminum, ensures longevity while keeping the setup manageable. The glass itself is high-quality, with a low level of distortion, which is vital for consistent light reflection. This quality choice prevents unwanted color shifts or blurring, maintaining true color representation in the reflected light. The glass’s thickness—around 3mm—strikes a balance between sturdiness and weight, allowing easy adjustments without sacrificing stability.
Why Placement Is a Game-Changer
Positioning the mirror at approximately a 45-degree angle relative to the light source optimizes bounce reflection. This angle is a standard in photography and videography because it redirects light efficiently into shadowed areas, softening contrast and adding fill. The size—24×36 inches—provides a generous surface area to reflect sufficient light without overwhelming the scene or requiring frequent repositioning. Using a lightweight stand connected to adjustable arms allows for swift, precise placements, adapting to different shot angles or lighting conditions. Proper setup minimizes light loss—every degree counts, ensuring the reflected light retains intensity and quality.
The Setup Experience and Minor Drawbacks
Assembling the mirror onto the stand was straightforward, thanks to its minimalist mounting system. Adjustments are smooth, with locking mechanisms securing the positioning during shoots. However, one minor annoyance encountered was the stand’s stability; when fully extended on uneven surfaces, slight wobbling could occur, requiring additional stabilization. The mirror’s reflective surface is susceptible to fingerprints and dust, which means routine cleaning is essential for maintaining clarity. Additionally, the mirror’s lightweight build, while easy to maneuver, necessitates caution to prevent accidental slips or tip-overs during quick adjustments. Compared to industry-standard professional reflectors, which often employ more robust framing materials or integrated diffusers, this setup prioritizes portability and simplicity over maximal durability—a trade-off worth noting, especially for mobile creators.
Comparing to Industry Expectations
Standard studio reflectors and bounce boards, like those from Westcott or Visatec, often feature reinforced frames and more intricate locking mechanisms. Their designs focus on maximizing stability and reflection consistency over long-term use, which can be advantageous in high-frequency shooting environments. As cited in B&H’s spec sheet, professional-grade reflectors typically include features like folding portability, reinforced handles, and diffusion overlays. While these are more expensive and bulkier, the lightweight mirror described here offers comparable light bounce capabilities with added convenience for small-scale setups. The core benefit remains—efficiently directing light—though at the expense of some durability and advanced features. Nevertheless, for budget-conscious creators, this simplicity and effectiveness make it a compelling choice.
Performance in Harsh Conditions
When testing camera reviews in demanding scenarios like outdoor shoots under intense sunlight or sudden weather changes, most units show their strengths and weaknesses. For example, users have reported that flagship cameras like the Sony A7 series excel in dynamic range, capturing vibrant images even in high-contrast environments. However, prolonged exposure to high temperatures can lead to overheating issues, triggering automatic shutdowns or reduced functionalities, as noted in user discussions on Reddit.
Does the Gear Overheat?
In field tests, some cameras exhibit thermal throttling after 20-30 minutes of continuous recording, especially in warm climates. This can compromise recording length and image quality. Microphone gear, particularly external recorders, tend to perform well temperature-wise but may develop moisture-related issues when exposed to rain without proper casing.
Handling the Unexpected
Studio rigs and lighting kits are often subjected to physical knocks during vigorous shoots. Durable rigs like Blackmagic Design’s Pocket Cinema cameras withstand minor impacts but can be prone to misalignment if dropped. Lighting kits with sturdy mounting equipment perform reliably; however, cheaper models with plastic components tend to break or wobble under rough handling. The resilience of these products under pressure depends heavily on build quality and materials used.
Real-World Stress Tests
Managing 1000 leads on a live streaming setup is a different challenge altogether. Systems that are highly integrated and optimized, like OBS Studio with a robust PC, handle intense streaming loads smoothly, provided the hardware is up to spec. Less capable setups struggle with lag, dropped frames, and crashes. For creator rigs, the key is stability—power surges, unstable connections, or insufficient cooling can cause failures, highlighting the importance of rigorous testing before critical sessions.
Microphone reviews often overlook durability, but some field-specific microphones like the Zoom H5 handle drops moderately well thanks to shock absorption, though sensitive capsules can pick up unwanted noise if mishandled. Conversely, budget models lack such resilience, often failing after a few accidental knocks. Lighting kits with fan cooling systems tend to shut down if the fans stop working, especially during extended use, underscoring the need for manual checks during long shoots.
The Good and The Bad
High-end cameras generally maintain performance in high-pressure situations, thanks to superior thermal management and build quality. However, they often come with high costs and complex setups that can pose challenges under field conditions. Microphone reviews reveal that higher-quality units, such as shotgun mics with rugged weatherproofing, perform admirably in adverse conditions, providing clear audio. Lower-end microphones, despite being cheaper, frequently struggle with noise and damage susceptibility, revealing their limitations when pushed.
Lighting gear with aluminum frames and IP-rated casings offers excellent resilience but at a premium. Cheaper plastic models tend to warp or break, especially in cold or humid environments.
I invite users with experience testing their gear under pressure to share whether their equipment held up and what issues arose. Do you agree with my observations regarding durability and performance in extreme conditions?
For further insights, see discussions like this on Quora about gear longevity under field stress: https://www.quora.com/How-do-video-gear-and-accessories-perform-in-rugged-conditions.
Selecting the Best Camera and Microphone Gear for Creators
When evaluating camera reviews and microphone options, creators face tough choices. For instance, the Sony A7 IV offers excellent image quality and advanced autofocus, making it a top pick for professionals. In comparison, Canon’s EOS R6 provides comparable video capabilities but excels in color science and user-friendly interfaces, appealing to those prioritizing ease of use. Both are premium options, but Sony’s slightly higher price tag can be justified by its exceptional low-light performance and image stabilization features, which may be crucial for versatile shooting conditions.

Creator Rigs and Studio Gear: High-End vs. Budget-Friendly
Premium creator rigs, such as Kemble’s modular setups, showcase robust build quality, extensive customization, and professional-grade components suited for demanding shoots. These setups often come at a premium, justified by durability and advanced features. Conversely, budget-friendly rigs from brands like Neewer focus on portability and simplicity, making them accessible for beginners or creators with limited space. While they may lack some professional refinements, their affordability and ease of setup make them attractive alternatives.
Lighting Kits: Versatility Meets Cost
Professional lighting kits from Aputure offer high color accuracy, durable build quality, and versatile configurations suitable for both studio production and on-the-go shoots. Their LED panels deliver consistent brightness and are easy to control via remote or app. Cheaper options from Godox or MountDog provide similar LED technology at a fraction of the price but may compromise on build robustness or advanced control features. For creators on a budget, these kits deliver solid performance, though they might require more frequent replacement or manual adjustments in complex setups.
Is It Worth the Upgrade?
If you’re considering switching from entry-level gear to more professional setups, weighing the costs against the benefits is essential. Upgrading to higher-tier cameras like the Sony A7 IV or Canon R6 can significantly improve image quality and workflow efficiency, justifying their premium prices. Similarly, professional lighting and rig setups enhance production value but come with a higher investment. Assessing your specific needs and growth plans will help determine if these upgrades are worth it now—or if incremental improvements suffice.
For comparative pricing and features, websites like Sony’s official page or Canon’s site are useful resources. Also, check out reviews of competitors to see which best fits your workflow and budget. Staying informed about current prices ensures you’re making a financially sound decision while upgrading your creator setup.