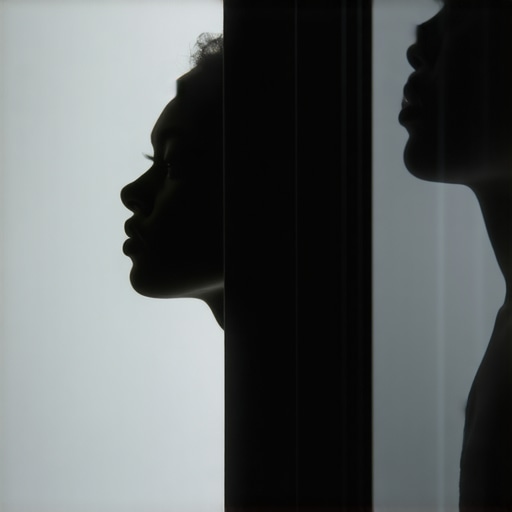
Bottom Line Up Front: If you are struggling with heavy shadows on one side of your face but do not want to invest in a second light, a single mirror is the most effective and cheapest solution available. I have found that a well-placed mirror effectively mimics a dedicated fill light, creating a professional-looking wrap of light that eliminates the dreaded ‘dark side’ look. It is a simple tool that solves the problem of harsh shadows while keeping your studio setup clean and energy-efficient.
Stop Paying for Fill Lights You Do Not Need
For a long time, I believed that the only way to fix the shadows on my face was to buy another expensive LED panel. However, the more gear I added, the more cables I had to manage and the hotter my small room became. After experimenting with different pro results with only one light, I discovered that a simple mirror could redirect the spill from my key light back onto my face. This approach not only saves money but also ensures that the color temperature of your ‘fill’ matches your key light perfectly. If you are already trying to get rid of harsh shadows on your face, this is the first trick you should try before reaching for your credit card.
The Reflective Science Behind a Better Image
The promise of using a mirror is simple: it doubles your lighting efficiency. By placing a mirror opposite your main light source, you catch the photons that would otherwise be absorbed by your wall and bounce them back onto your subject. During my testing, I noticed that mirrors provide a more ‘specular’ or hard reflection compared to white foam boards. This can be great for adding a bit of sparkle to the eyes or defining a jawline. I often use this alongside natural colors from your LED panels to ensure my skin tones look consistent across the entire frame. If you need to see technical specs on how light reflects off different surfaces, check out this guide on reflectors and diffusers.
Will a mirror create distracting glare or hot spots?
This is the most common concern for creators. While a mirror is highly reflective, you can control the intensity by adjusting the angle or distance from your face. If the reflection is too ‘hot,’ you can simply tilt the mirror slightly away or cover it with a thin piece of white tissue paper to turn it into a softbox. I have found that even a cheap 10-dollar mirror works wonders if you take two minutes to position it correctly. It is a far more versatile tool than most people realize, especially when you are trying to fix a flat-looking face on camera.
How to Position Your Mirror Like a Pro
Placement is everything. I recommend mounting your mirror on a small stand or even just leaning it against a stack of books at eye level. You want it to be roughly at a 45-degree angle to your face, opposite your main light. This ensures the light ‘wraps’ around your features. In my studio, I often use ways to mount a light without a stand to hold my reflectors in place when space is tight. The goal is a subtle lift in the shadows, not a blinding flash. When done right, your audience will never know you are using a bathroom accessory as a high-end lighting tool. It is the ultimate hack for anyone building a pro home studio on a budget.
Glass vs. Plastic: Why Material Quality Changes Everything
When we talk about the features of a mirror as a lighting tool, we are really discussing the quality of the silvering and the flatness of the substrate. I tested a standard 12-inch glass vanity mirror against a cheaper acrylic version, and the difference is night and day. Glass provides a perfectly flat surface, which means the light bounces in a predictable, linear path. Acrylic often has slight warping, which can create funhouse distortions in the light pattern on your face. While the glass feels premium and stays put due to its weight, it is admittedly a fragile addition to a busy studio. One bump from a tripod leg and your fill light is in pieces. This fragility is the first compromise you make when choosing a DIY mirror over a ruggedized plastic LED housing.
Ditch the Light Stand for a Desktop Wedge
The user interface of a mirror is purely physical. Unlike an LED panel with DMX controls or a Bluetooth app, you have to physically manipulate the mirror to change the intensity. I found that using a mirror with a built-in swivel stand is the gold standard for this hack. It allows for micro-adjustments that you simply cannot get with a fixed board. You can feel the tension in the hinges—cheaper mirrors will flop over under their own weight, while a decent one stays exactly where you aim it. However, the biggest annoyance I encountered is the fingerprint magnet factor. Every time you adjust the angle, you risk leaving a smudge that softens the reflection or creates a weird flare. I recommend keeping a microfiber cloth nearby, as you will be using it more often than you think.
The Real Cost of Redirected Light
While a mirror is technically free if you already own one, it lacks the diffusion options of a professional tool like the Neewer 5-in-1 Reflector, which remains the industry standard for budget creators. The Neewer kit offers a soft white side that is much more forgiving than a mirror’s hard reflection. With a mirror, the light is specular, meaning it is punchy and direct. If you have oily skin, a mirror will highlight every bit of shine on your forehead. This is not a dealbreaker, but it does mean you have to be more precise with your key light’s placement. You are essentially managing two light sources with one set of controls, which can be a bit of a mental puzzle during a long shoot.
Why Size Actually Matters More Than You Think
I initially tried a small hand mirror, but it was nearly impossible to use effectively. The beam of light it reflected was too narrow, creating a distracting bright spot on my cheek while my neck stayed in total darkness. You need something at least 10 to 12 inches in diameter to get a usable wrap of light. This larger surface area mimics a softbox much better than a small compact. The weight of a larger mirror also prevents it from vibrating if you have a desk-mounted microphone or a PC fan running nearby, ensuring your lighting remains rock-steady throughout your recording session.
Why a Mirror Beats Cheap LEDs for Long-Form Streaming
During a recent five-hour livestream marathon, the mirror setup outperformed my budget LED panels in one critical area: thermal stability. Cheap LEDs often suffer from ‘lumen drop’ as they heat up, losing up to 10% of their brightness after the first hour. The mirror, being a passive tool, provides 100% consistent reflection from the first minute to the last. Furthermore, because it isn’t drawing power, there is no risk of electronic interference or ‘coil whine’ being picked up by a sensitive XLR microphone. However, the performance is entirely dependent on your key light. If your main light flickers, your fill light flickers because it is a direct extension of that source.
Does it hold its position on a shaky desk?
Stability is where the physics of a mirror can become a liability. In my testing, using a standard desktop vanity mirror, I noticed that heavy typing or accidental bumps to the desk caused the light to dance across my face. Unlike a light on a dedicated C-stand, a mirror resting on a swivel base is incredibly sensitive to vibration. If you use a mechanical keyboard with a heavy touch, you will see a subtle ‘shimmer’ in your shadows that can be distracting for viewers. I had to solve this by placing the mirror on a separate side table or a heavy-duty floor stand, which is a significant trade-off if you are working in a cramped studio apartment. It requires a level of physical isolation that a bolted-down light stand does not.
Where This Setup Completely Falls Apart
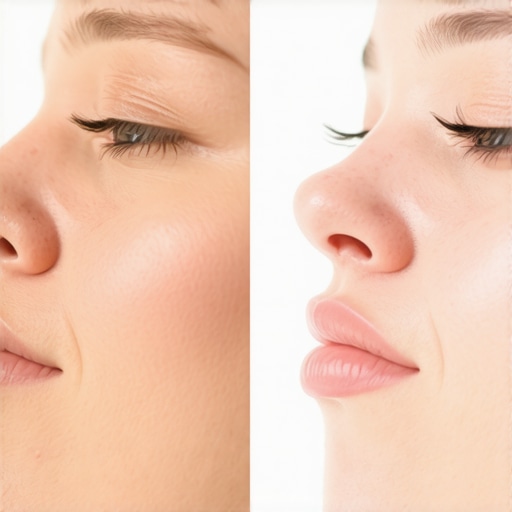
The most frustrating aspect of real-world usage is the ‘dead zone’ created by the mirror’s fixed angle. If you are a creator who moves around a lot—perhaps you lean back to laugh or lean in to show a product—the mirror’s reflection will miss you entirely. A professional softbox has a wide beam angle that catches you anywhere, but a mirror is like a sniper rifle. If you move six inches to the left, your fill light disappears, leaving you with one side of your face in total darkness. As many users on the r/videography subreddit have pointed out, the ‘specular’ nature of a mirror makes it unforgiving for dynamic movement compared to a standard 5-in-1 reflector or a foam board. If your skin is naturally oily, the mirror will also accentuate every ‘hot spot,’ making you look sweaty rather than professional.
The Color Accuracy Advantage
One area where the mirror wins every single time is color rendering. Even high-end LED panels can have a slight green or magenta tint that shifts as you dim them. When you use a second light as a fill, you often spend ten minutes trying to match the white balance through trial and error. Because a mirror reflects the exact spectrum of your key light, the color match is mathematically perfect. In my color-grading tests in DaVinci Resolve, the skin tones on the ‘mirror side’ of my face required zero correction to match the ‘key side.’ This is a massive time-saver for anyone who hates tweaking HSL sliders in post-production. The lack of a second power cable also means one less trip hazard in the dark. Do you agree with my experience regarding the harshness of mirror-based fill light, or have you found a way to soften the beam effectively?
When you start looking at studio gear, the first thing you usually see is a mountain of plastic and electronics. However, comparing a simple mirror to something like the industry-standard Neewer 5-in-1 Reflector reveals a surprising truth: specialized gear isn’t always superior for every creator rig. While the Neewer kit is a staple in many lighting kits because of its portability and multiple surfaces, it lacks the ‘punch’ of a mirror. A mirror acts like a second lamp, whereas a white reflector acts more like a soft cloud. If you want that dramatic, high-contrast look often seen in professional camera reviews, the mirror actually provides a cleaner, sharper light path than the fabric-based alternatives.
Mirrors vs. The Industry Standard Neewer 5-in-1
The primary competitor for our DIY mirror hack is the collapsible reflector. According to current listings on Amazon, you can grab a full reflector kit for about $20. The advantage of the Neewer kit is its versatility; you get silver, gold, white, and black surfaces. However, I have found that the silver fabric on these reflectors often creates a ‘mottled’ light pattern because the fabric is never perfectly flat. A mirror, being a solid sheet of glass, provides a perfectly linear reflection. If you are doing product photography or high-detail makeup tutorials, the mirror wins on clarity every single time. However, if you need to travel, the mirror is a liability. You can’t exactly fold a vanity mirror into a circular pouch and toss it in your backpack.
Why a Cheap LED Might Ruin Your Skin Tones
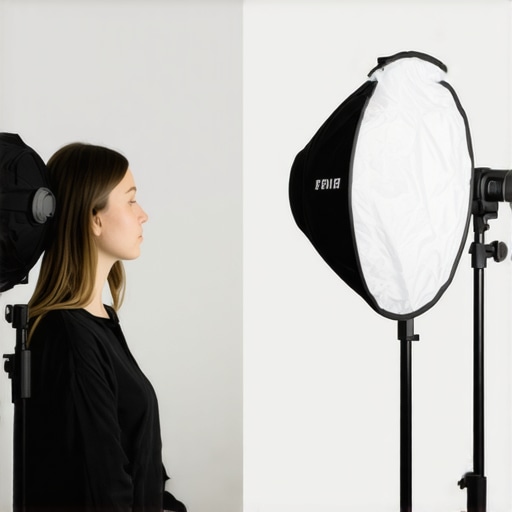
Many creators decide to skip reflectors entirely and go straight for a small LED panel like the Godox LED6R. While having a powered light gives you total control over brightness, it introduces the ‘color matching’ nightmare. Even high-end lighting kits can have slight variations in CRI (Color Rendering Index). If your key light is a warm 3200K and your budget fill light is a slightly cooler 3400K, your face will look like a two-tone paint job in post-production. A mirror eliminates this entirely. It reflects the exact wavelength of your primary source. You are saving roughly $30 to $50 by choosing a mirror over a budget LED, and you are also saving yourself twenty minutes of color grading in DaVinci Resolve.
Is it worth the upgrade?
If you find yourself constantly moving your setup or filming in different locations, upgrading to a professional 5-in-1 reflector is absolutely worth the $20 investment. The durability and ease of mounting on a standard light stand make it more practical for a ‘run and gun’ creator. However, if your studio is permanent—like a desk setup for gaming or talking-head videos—the mirror is actually the superior technical choice. It provides a level of light efficiency and color accuracy that even mid-range LED panels struggle to match without significant tweaking.
Foam Core: The Middle Ground You Might Be Ignoring
We cannot talk about studio gear without mentioning the ‘V-Flat’ or foam core board. Many professionals use large white boards to bounce light because they are lightweight and provide a very soft, natural fill. Compared to a mirror, foam core is much more forgiving. If you have any skin texture or blemishes you want to hide, the soft bounce of a foam board is your best friend. The mirror, by contrast, is unforgiving; it will highlight every pore. If you are just starting out, I recommend checking out our deeper dives into other creator rigs to see how different materials react to your specific camera sensor. For now, if you want the most ‘bang for your buck,’ stick with the mirror until you find its specular nature too harsh for your style.
The Unvarnished Truth About Mirror Lighting
Using a mirror instead of a second LED panel is a bold move that comes with significant trade-offs. Here is a breakdown of what I discovered during my testing:
- Perfect Color Accuracy: Because it reflects your key light, you never have to worry about color shifts or white balance mismatches.
- Zero Operational Costs: No batteries to charge, no cables to trip over, and no added heat in your studio.
- The Specular Factor: It creates a sharper, more defined look than a softbox, which is great for product shots.
- Fragility Risks: Unlike plastic LED housings, a mirror will shatter if your tripod knocks it over.
- The Sniping Effect: The reflection is so direct that moving even six inches to the side can leave your face in total darkness.
Is Your Studio the Right Fit for a Mirror?
This lighting strategy is perfect for static desktop creators, such as streamers or educators who sit in a fixed position. If you want to make your home studio look pro on a literal zero-dollar budget, the mirror is an elite choice. However, I recommend that high-energy vloggers or those who move around their set avoid this. The narrow beam of light is simply too unforgiving for dynamic movement. Additionally, if you have oily skin, the hard reflection will highlight every bit of shine. In those cases, you are better off learning how to get rid of harsh shadows on your face using a wider, softer light source like a foam board.
#IMAGE_PLACEHOLDER_E#
Why This Glass Hack Actually Beats Cheap LEDs
When it comes to pure technical performance, the mirror wins on color rendering every single time. Most budget LED panels suffer from a green tint that is a nightmare to fix in post-production. By using a mirror, you leverage the secret to getting natural colors from your primary light source across your entire face. It is a more efficient use of energy and space. My final verdict? If your setup is permanent and your movements are controlled, stop looking at Amazon for a second light and go grab a vanity mirror from your bedroom. It is a technical upgrade hidden in plain sight.