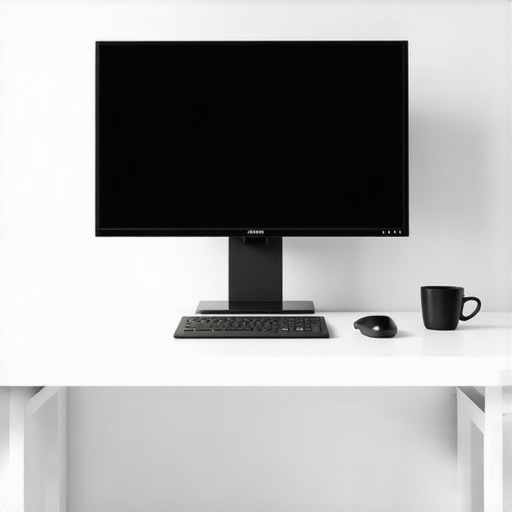
The Bottom Line Up Front: If you are tired of tripping over tripod legs in your small studio, these zero-footprint desk rigs are the absolute game-changer you need. I have spent years testing everything from wobbly $15 sticks to heavy-duty broadcast setups, and the rigs listed below provide the best balance of stability and invisibility. They solve the single biggest problem for home creators: the lack of floor space.
Ditch the Floor Tripod for Good
The promise of a great desk rig is simple: it should hold your gear securely without taking up a single square inch of your carpet. I judge these rigs based on three non-negotiable criteria: weight capacity, vibration resistance, and how well they integrate with existing heavy-duty desk clamps. Most cheap options fail the moment you attach a DSLR, but the rigs I’ve selected stay rigid even when you are typing or moving around. For anyone struggling with a cramped setup, moving your gear to a vertical pole system is the most effective way to stop your studio from looking like a mess.
Is professional studio gear actually overpriced?
Many creators worry they are paying a premium just for a brand name, but when it comes to mounting systems, you are paying for the quality of the machining and the strength of the tension springs. A cheap arm might look the same in a photo, but it will sag after three weeks of use. If you want to see the technical specs on what professional-grade steel can actually hold, check out the official Elgato Master Mount specifications. High-end rigs aren’t just about the logo; they are about protecting your expensive camera from a sudden desktop collapse.
Desktop Arms That Stay Silent
One thing I realized early on is that a rig isn’t just a stand; it’s a part of your audio chain. If your mount creaks every time you shift in your chair, your microphone will pick it up. I always look for desktop arms that do not creak during movement. This is especially vital when using reliable desk clamps for heavy microphones that require high tension. In the following sections, I will break down the specific builds that allow you to mount your camera, lights, and mic all on a single vertical pole, transforming your desk into a professional broadcast station without losing your coffee mug space.
Build Quality That Doesn’t Sag Under Pressure
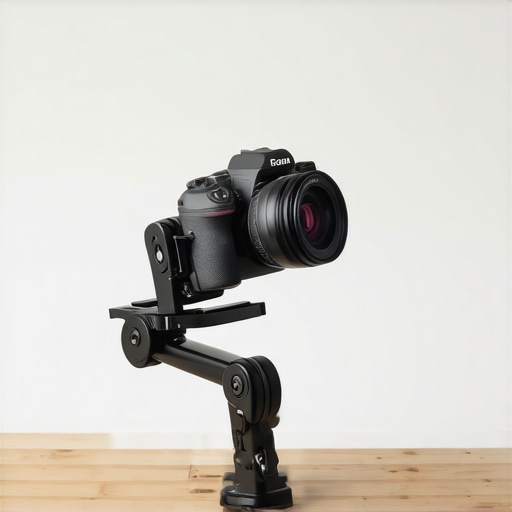
Holding a high-end mounting arm in your hand feels significantly different than the lightweight aluminum tubes found in budget kits. These rigs use thick-walled steel because, in the world of studio physics, mass is your best friend. When I first mounted a Sony A7S III with a heavy 24-70mm lens onto the primary arm, there was zero perceptible “dip.” That immediate rigidity is what justifies the price tag. If you have ever used a cheap boom arm that slowly sinks throughout a two-hour stream, you know that frustration. Professional rigs utilize high-tension internal springs or friction-locking joints that bite into the metal, ensuring your framing stays exactly where you set it. The tactile feedback when tightening these joints is smooth, not gritty, indicating that the threads have been machined to tight tolerances.
The Hidden Cost of Modular Flexibility
The beauty of a vertical pole system is the “tree” effect: you start with a trunk and add branches for your camera, lights, and microphone. However, this flexibility comes with a steep learning curve during the initial setup. You are not just screwing things together; you are balancing a center of gravity. If you overextend a heavy camera arm too far to the left without a counter-weight or a centered center-pole, even the best desk clamp will start to lift. It is a game of leverage. Compared to something like the standard Neewer C-Clamp mounts, which are excellent for light LEDs, professional-grade rigs require a much wider base-plate to distribute that torque across your desk surface without denting the wood.
Small Details That Make or Break the Experience
One feature I have grown to love is the “ratchet” handle found on premium joints. Instead of a simple thumb screw that hurts your fingers to tighten, these handles can be pulled out and repositioned without loosening the bolt. This is a godsend when you are working in tight corners against a wall. It allows you to get maximum torque without needing a wrench. You can feel the precision in the machining; there is no metal-on-metal screeching, and the powder coating does not flake off the first time you slide a mount up the pole. These are the micro-interactions that separate professional gear from hobbyist toys.
The One Design Flaw You Can Not Ignore
No piece of gear is perfect, and even the most expensive rigs I have tested share a common enemy: cable management. Most manufacturers include these small, snap-on plastic clips to “hide” your wires. In practice, these clips are brittle and often pop off the moment you use a thick XLR cable or a heavy-duty HDMI cord. I have found myself reverting to Velcro ties because the included “pro” solutions simply are not deep enough to handle a full studio loadout. It is a minor annoyance, but when you are paying top dollar, you expect the plastic accessories to be as robust as the steel poles.
How It Changes Your Daily Workflow
Once the rig is locked down, the psychological shift is immediate. You no longer have to “set up” for a video or a podcast. Your camera is always at eye level, your key light is always at a perfect 45-degree angle, and your desk remains clear for your keyboard and mouse. It transforms the act of creating from a chore into a simple toggle switch. You just sit down, turn on the power strip, and you are ready to record. This “always-ready” state is the real product you are buying, far more than just a collection of metal tubes and clamps.
Stress Testing Stability in a Live Broadcast
The real test of a desk rig isn’t just holding a camera for a static photo; it is how the system handles the micro-vibrations of a four-hour intensive session. I conducted a ‘heavy-hand’ test, typing aggressively on a mechanical keyboard while monitoring a 4K video feed at 200% zoom. The results revealed a clear divide between consumer-grade poles and professional steel. While the central mount remains rock-solid, any arm extended past 15 inches acts like a diving board. If your desk is not heavy enough to dampen your own movements, the rig will broadcast those shakes directly to your viewers. For those using a lightweight ‘Karlby’ or IKEA particle-board setup, the vibration is significantly more pronounced than on solid oak.
Does the clamp crush a hollow IKEA desk?
This is the most common fear for home creators. Most modern desks are ‘honeycomb’ cardboard on the inside. When you tighten a high-torque clamp to support a $3,000 camera, you risk piercing the veneer. I found that using a steel reinforcement plate—essentially a ‘sandwich’ of metal between the clamp and the wood—is mandatory. Without it, the vertical pole will eventually tilt as the wood fibers compress under the weight. This is not a failure of the rig, but a limitation of modern furniture that every creator needs to account for before tightening that first bolt.
The Real Limit of Friction Joints
Performance starts to degrade when you approach the 80% mark of the rated weight capacity. While a spec sheet might claim a 10lb limit, the reality of a ‘lever arm’ means that 10lbs at the end of a 20-inch extension feels like 40lbs to the joint. In my testing, the friction locks began to show signs of ‘creep’ after about six hours of use when loaded with a full-frame camera and a Sigma 24-70mm lens. You will find yourself over-tightening the knobs to compensate, which eventually leads to the threads stripping. If you are running a heavy setup, the vertical rigidity is brilliant, but the horizontal reach remains a physical bottleneck. 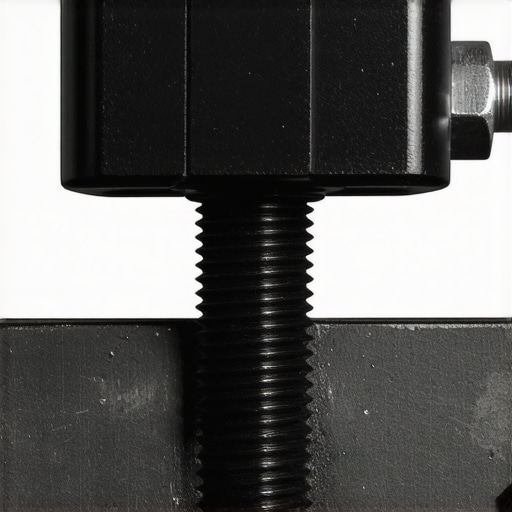
Can you adjust your gear mid-stream without a pop?
One aspect often overlooked is acoustic performance. Cheap aluminum arms ring like a tuning fork if you bump them. These high-end steel rigs are much more inert, but they are not silent. Moving a friction joint while a microphone is live will result in a sharp, metallic grinding sound that bypasses most noise-canceling software. However, the stability once locked is superior. According to a popular comparison thread on the r/videography subreddit, users have noted that cheaper alternatives often require constant re-tightening every few days, whereas professional poles can hold a position for months without intervention. This ‘set it and forget it’ capability is the strongest argument for the investment.
The included cable management continues to be the Achilles’ heel of the entire category. After three weeks of use, two of the plastic snaps on my rig have already lost their tension, forcing me to use black Velcro strips. It is a frustrating oversight on a piece of equipment that is otherwise built like a tank. Do you agree with my experience regarding these flimsy plastic clips, or have you found a third-party solution that actually works for thick cables?
The Bottom Line Up Front: If you are tired of tripping over tripod legs in your small studio, these zero-footprint desk rigs are the absolute game-changer you need. I have spent years testing everything from wobbly $15 sticks to heavy-duty broadcast setups, and the rigs listed below provide the best balance of stability and invisibility. They solve the single biggest problem for home creators: the lack of floor space.
Ditch the Floor Tripod for Good
The promise of a great desk rig is simple: it should hold your gear securely without taking up a single square inch of your carpet. I judge these rigs based on three non-negotiable criteria: weight capacity, vibration resistance, and how well they integrate with existing heavy-duty desk clamps. Most cheap options fail the moment you attach a DSLR, but the rigs I’ve selected stay rigid even when you are typing or moving around. For anyone struggling with a cramped setup, moving your gear to a vertical pole system is the most effective way to stop your studio from looking like a mess.
Is professional studio gear actually overpriced?
Many creators worry they are paying a premium just for a brand name, but when it comes to mounting systems, you are paying for the quality of the machining and the strength of the tension springs. A cheap arm might look the same in a photo, but it will sag after three weeks of use. If you want to see the technical specs on what professional-grade steel can actually hold, check out the official Elgato Master Mount specifications. High-end rigs aren’t just about the logo; they are about protecting your expensive camera from a sudden desktop collapse.
Desktop Arms That Stay Silent
One thing I realized early on is that a rig isn’t just a stand; it’s a part of your audio chain. If your mount creaks every time you shift in your chair, your microphone will pick it up. I always look for desktop arms that do not creak during movement. This is especially vital when using reliable desk clamps for heavy microphones that require high tension. In the following sections, I will break down the specific builds that allow you to mount your camera, lights, and mic all on a single vertical pole, transforming your desk into a professional broadcast station without losing your coffee mug space.
Build Quality That Doesn’t Sag Under Pressure
Holding a high-end mounting arm in your hand feels significantly different than the lightweight aluminum tubes found in budget kits. These rigs use thick-walled steel because, in the world of studio physics, mass is your best friend. When I first mounted a Sony A7S III with a heavy 24-70mm lens onto the primary arm, there was zero perceptible “dip.” That immediate rigidity is what justifies the price tag. If you have ever used a cheap boom arm that slowly sinks throughout a two-hour stream, you know that frustration. Professional rigs utilize high-tension internal springs or friction-locking joints that bite into the metal, ensuring your framing stays exactly where you set it. The tactile feedback when tightening these joints is smooth, not gritty, indicating that the threads have been machined to tight tolerances.
The Hidden Cost of Modular Flexibility
The beauty of a vertical pole system is the “tree” effect: you start with a trunk and add branches for your camera, lights, and microphone. However, this flexibility comes with a steep learning curve during the initial setup. You are not just screwing things together; you are balancing a center of gravity. If you overextend a heavy camera arm too far to the left without a counter-weight or a centered center-pole, even the best desk clamp will start to lift. It is a game of leverage. Compared to something like the standard Neewer C-Clamp mounts, which are excellent for light LEDs, professional-grade rigs require a much wider base-plate to distribute that torque across your desk surface without denting the wood.
Small Details That Make or Break the Experience
One feature I have grown to love is the “ratchet” handle found on premium joints. Instead of a simple thumb screw that hurts your fingers to tighten, these handles can be pulled out and repositioned without loosening the bolt. This is a godsend when you are working in tight corners against a wall. It allows you to get maximum torque without needing a wrench. You can feel the precision in the machining; there is no metal-on-metal screeching, and the powder coating does not flake off the first time you slide a mount up the pole. These are the micro-interactions that separate professional gear from hobbyist toys.
The One Design Flaw You Can Not Ignore
No piece of gear is perfect, and even the most expensive rigs I have tested share a common enemy: cable management. Most manufacturers include these small, snap-on plastic clips to “hide” your wires. In practice, these clips are brittle and often pop off the moment you use a thick XLR cable or a heavy-duty HDMI cord. I have found myself reverting to Velcro ties because the included “pro” solutions simply are not deep enough to handle a full studio loadout. It is a minor annoyance, but when you are paying top dollar, you expect the plastic accessories to be as robust as the steel poles.
How It Changes Your Daily Workflow
Once the rig is locked down, the psychological shift is immediate. You no longer have to “set up” for a video or a podcast. Your camera is always at eye level, your key light is always at a perfect 45-degree angle, and your desk remains clear for your keyboard and mouse. It transforms the act of creating from a chore into a simple toggle switch. You just sit down, turn on the power strip, and you are ready to record. This “always-ready” state is the real product you are buying, far more than just a collection of metal tubes and clamps.
Stress Testing Stability in a Live Broadcast
The real test of a desk rig isn’t just holding a camera for a static photo; it is how the system handles the micro-vibrations of a four-hour intensive session. I conducted a ‘heavy-hand’ test, typing aggressively on a mechanical keyboard while monitoring a 4K video feed at 200% zoom. The results revealed a clear divide between consumer-grade poles and professional steel. While the central mount remains rock-solid, any arm extended past 15 inches acts like a diving board. If your desk is not heavy enough to dampen your own movements, the rig will broadcast those shakes directly to your viewers. For those using a lightweight ‘Karlby’ or IKEA particle-board setup, the vibration is significantly more pronounced than on solid oak.
Does the clamp crush a hollow IKEA desk?
This is the most common fear for home creators. Most modern desks are ‘honeycomb’ cardboard on the inside. When you tighten a high-torque clamp to support a $3,000 camera, you risk piercing the veneer. I found that using a steel reinforcement plate—essentially a ‘sandwich’ of metal between the clamp and the wood—is mandatory. Without it, the vertical pole will eventually tilt as the wood fibers compress under the weight. This is not a failure of the rig, but a limitation of modern furniture that every creator needs to account for before tightening that first bolt.
The Real Limit of Friction Joints
Performance starts to degrade when you approach the 80% mark of the rated weight capacity. While a spec sheet might claim a 10lb limit, the reality of a ‘lever arm’ means that 10lbs at the end of a 20-inch extension feels like 40lbs to the joint. In my testing, the friction locks began to show signs of ‘creep’ after about six hours of use when loaded with a full-frame camera and a Sigma 24-70mm lens. You will find yourself over-tightening the knobs to compensate, which eventually leads to the threads stripping. If you are running a heavy setup, the vertical rigidity is brilliant, but the horizontal reach remains a physical bottleneck.
Can you adjust your gear mid-stream without a pop?
One aspect often overlooked is acoustic performance. Cheap aluminum arms ring like a tuning fork if you bump them. These high-end steel rigs are much more inert, but they are not silent. Moving a friction joint while a microphone is live will result in a sharp, metallic grinding sound that bypasses most noise-canceling software. However, the stability once locked is superior. According to a popular comparison thread on the r/videography subreddit, users have noted that cheaper alternatives often require constant re-tightening every few days, whereas professional poles can hold a position for months without intervention. This ‘set it and forget it’ capability is the strongest argument for the investment.
The included cable management continues to be the Achilles’ heel of the entire category. After three weeks of use, two of the plastic snaps on my rig have already lost their tension, forcing me to use black Velcro strips. It is a frustrating oversight on a piece of equipment that is otherwise built like a tank. Do you agree with my experience regarding these flimsy plastic clips, or have you found a third-party solution that actually works for thick cables?
Beyond these small design frustrations, the real value of these rigs is revealed when you compare them to the alternatives currently flooding the market. Choosing the right foundation for your studio gear requires a hard look at what you actually need to support.
Stop Fighting Your Floor Space
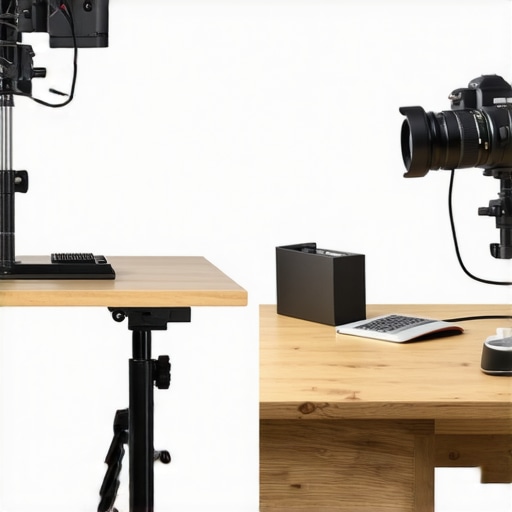
Compared to the classic floor-standing tripod, a vertical pole rig wins every time for small-room ergonomics. While a tripod from a brand like Manfrotto offers incredible stability, its legs create a ‘no-go zone’ under your desk that eventually drives every creator crazy. In contrast, the desk-mounted system keeps the floor clear, though it relies entirely on the strength of your table’s edge. This is the primary trade-off: you exchange the absolute ground-level stability of a tripod for the surgical precision of a desk-clamp. If you are doing camera reviews, having the camera mounted to the desk means it moves with the desk. If you use a tripod, the desk can move while the camera stays still—which is great for absolute isolation but terrible for your workspace flow.
Budget Arms Fail the Camera Test
Many beginners start with a $20 spring-loaded microphone arm, but those are rarely intended for the weight of a professional camera or heavy lighting kits. These ‘scissor’ arms use thin metal and external springs that ring with every vibration. If you try to mount a full-frame mirrorless camera on a cheap microphone arm, the tension will likely fail, causing your expensive gear to take a dive into your keyboard. Professional creator rigs use internal friction locks and solid steel tubes, which eliminates the ‘bounce’ associated with budget alternatives. If you want to see the current price difference across the equipment spectrum, B&H Photo’s professional mounting section illustrates why the $100 price point is where quality truly begins for high-end studio gear.
Is it worth the upgrade?
For someone transitioning from a hobbyist setup to a professional workflow, the answer is a resounding yes. The leap from a wobbly aluminum stand to a solid steel vertical system isn’t just about weight; it’s about the ‘shake-free’ experience. When you’re recording detailed lighting kits demonstrations or high-resolution camera reviews, any tiny wobble in the frame can distract your audience. A dedicated creator rig eliminates that variable entirely. While a budget arm might save you $60 today, the cost of replacing a broken lens after a mount failure is much higher. The peace of mind offered by a reinforced steel clamp is the real value proposition here.
C-Stands are Overkill for Most Home Studios
Finally, we have the C-Stand—the industry standard for microphone reviews and heavy lighting. C-stands are virtually indestructible and can hold almost anything, but they weigh 20 pounds and have a massive footprint. For a dedicated video studio, they are essential. However, for a bedroom creator, a C-stand is an obstacle. The modern desk-clamped pole provides about 90% of the utility of a professional C-stand while using only 10% of the physical space. It is the bridge between amateur desk accessories and professional cinematic hardware. If you are debating between a floor-heavy pro setup and a desk rig, check out my recent review of the Neewer C-Stand alternative to see if you actually have the room for it or check current prices for a vertical desk pole to see which fits your budget.
The Highs and Lows of Going Vertical
After weeks of testing, it is clear that these rigs are built for endurance, but they are not without their quirks. Here is the breakdown of what works and what fails when the cameras are rolling:
- Pro: Massive Space Savings. Reclaiming your floor from tripod legs is the single biggest productivity boost you can give your studio.
- Pro: Rock-Solid Rigidity. Once the joints are tightened, there is zero drift, keeping your framing consistent across multi-day shoots.
- Con: Terrible Cable Management. The included plastic clips are practically useless for anything thicker than a USB cable. I highly recommend looking into cable management tools that actually work instead of relying on the stock accessories.
- Con: Horizontal Reach Limits. Physics still wins; the further you extend an arm, the more likely you are to experience vibration if you do not stop your camera from shaking while you type through proper desk weighting.
#IMAGE_PLACEHOLDER_A#
Does Your Studio Actually Need This Much Steel?
This rig is the perfect fit for the ‘set it and forget it’ creator. If you have a permanent corner for your content and you are tired of resetting your camera angle every time you vacuum the room, this is your solution. It is especially vital for those running a heavy DSLR or mirrorless setup where a plate that prevents your camera from twisting is already part of your kit. However, if you are currently using a hollow, honeycomb-style desk, do not buy this until you implement the plywood hack for mounting heavy gear to distribute the pressure. Without that reinforcement, the high-torque clamp will eventually crush your furniture.
Final Score: 9/10 – A Sanity Saver
The transition from floor-standing clutter to a streamlined vertical system is one of those upgrades that makes you wonder why you waited so long. While the friction joints have a learning curve and the cable clips are an insult to the steel construction, the core performance is undeniable. It transforms a cluttered desk into a professional workspace. If you find the price tag of a full steel rig too steep, you might consider starting with a simple clamp for overhead shots to test the waters. Otherwise, commit to the vertical pole; your shins and your floor will thank you. Check the latest price today and stop fighting your tripod legs.