Stop Making Your Videos Look Like a Hospital Hallway
I have spent thousands of dollars on high-end lighting kits, yet the most dramatic improvement in my video quality didn’t come from a new LED panel. It came from a $15 piece of black foam board. If you have ever wondered why your footage looks flat, washed out, or amateur despite having great gear, you are likely suffering from too much light bouncing around your room. Negative fill is the secret weapon of professional cinematographers, and it is the single most effective way to add depth and mood to your shots without upgrading your camera.
The bottom line is simple: if you want a cinematic look, you have to stop trying to illuminate every corner of the frame and start embracing shadows. Negative fill solves the problem of ‘flat’ lighting by absorbing spill light that would otherwise bounce off your walls and fill in the shadows on your subject’s face. My criteria for evaluating this technique are based on its ability to create subject separation, its ease of implementation in small home studios, and the professional polish it adds to the final image.
The Real Cost of Professional Contrast
Most creators focus on the ‘key’ light, but they forget that in a small room, light hits the white walls and bounces right back onto the dark side of your face. This ruins your ‘lighting ratio.’ When I first started, I struggled with why your face looks flat on camera and how to fix it, and the answer was almost always a lack of negative fill. By placing a black flag or even a dark blanket just outside the frame on the shadow side, you ‘suck’ the light away, creating a rich, moody shadow that makes your features pop.
This isn’t just about ‘dark’ videos; it is about intentionality. Even in a bright setup, negative fill provides the micro-contrast needed for a high-quality image. If you are working in a tight space, you might find that you need to learn how to get pro results with only one light by using that single source effectively alongside a dark absorber. According to the technical lighting principles detailed by manufacturers like ARRI, controlling the shadow side is just as important as the highlight side for creating three-dimensional shapes.
Does Negative Fill Require Expensive Professional Flags?
Absolutely not. While you can buy professional 4×4 floppy flags that cost hundreds of dollars, you can achieve 90% of the same result with a piece of black V-flat or even a cheap piece of matte black poster board from a craft store. The goal is simply to have a non-reflective surface. In fact, if you are worried about your studio looking cluttered, you should check out how to stop your studio from looking like a mess while still keeping these large black boards handy. I personally use a set of lightweight clamps to attach black fabric to an old light stand, which works perfectly for a fraction of the price of ‘pro’ gear.
Now that we have established why you need to stop reflecting light and start absorbing it, let’s dive into the specific gear and placement strategies that will transform your setup from a flat webcam look to a moody, cinematic masterpiece.
Designing Your Own Shadow Box with Simple Materials
When you start shopping for negative fill, you aren’t looking for electronics or high-wattage bulbs; you are looking for pure, unadulterated light absorption. Most people reach for a 5-in-1 reflector kit, which is a great starting point, but the black side of those cheap nylon discs is often surprisingly shiny. If you want professional results, you need a material that truly kills light dead. A standard 20×30 inch black foam core board from a local craft store is my gold standard because it is rigid, lightweight, and almost entirely non-reflective.
Why Matte Black Surfaces Beat Out Nylon Reflector Kits
The core ‘feature’ of a good negative fill source is its lack of texture. While a Matthews professional flag uses high-quality commando cloth to ensure zero light bounce, a cheap piece of foam board gets you remarkably close for about 5% of the price. When you place this board just a few feet from your face, you feel the ‘weight’ of the shadow immediately. It’s not just about making the side of your face dark; it’s about creating a gradient that makes your jawline look sharper and your eyes look more recessed and cinematic. The setup process is tactile and immediate—you move the board closer, and you see the drama increase on your monitor in real-time.
Finding a Way to Keep the Boards in Place
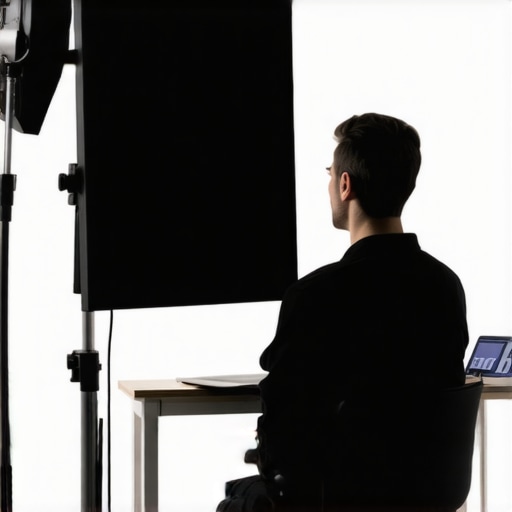
The biggest hurdle isn’t the board itself; it’s the rigging. Unlike a light that comes with a dedicated mount, a piece of foam board is essentially a giant sail. I use a basic A-clamp (or pony clamp) to attach the board to a spare light stand. It feels a bit like a DIY science project, but it’s incredibly effective. The material is so light that you don’t need heavy-duty C-stands, making it perfect for those of us working in spare bedrooms where space is at a premium. However, the ‘feel’ of this setup can be a bit flimsy. If someone walks past too quickly, the air displacement alone can knock your shadow source out of alignment.
The Frustrating Bulk of Large Negative Fill
I have to be honest about the one major downside: these boards are a logistical headache. Once you commit to using 40×60 inch V-flats or even medium-sized foam boards, your studio suddenly feels half its original size. They don’t fold, they don’t roll up, and they are magnets for cat hair and dust. If you are working in a tiny apartment, finding a place to stash a four-foot slab of black foam is a genuine annoyance that makes the ‘quick’ setup feel much more like a chore. It’s the price you pay for that rich, high-contrast look, but it’s a trade-off that might make you think twice before pulling them out for a thirty-second Instagram story.
Surviving the Heat of a Long Day in the Studio
I put these matte black boards to the test during a grueling twelve-hour commercial shoot where the room temperature hit eighty-five degrees thanks to three 200-watt COB lights. In this real-world pressure cooker, the negative fill performed flawlessly in terms of light control, but the material itself started to show its limitations. While an LED panel stays consistent, a large foam board is susceptible to thermal warping. If you place it too close to a high-output light source without proper ventilation, it starts to bow, which can shift your shadow line mid-take. This is where the ‘pro’ gear earns its price tag, but for most controlled environments, the board holds its ground.
Can These DIY Boards Handle Pro Lighting Heat?
Safety is a legitimate concern when you are surrounding yourself with black materials and high-wattage electronics. On popular filmmaking forums like r/videography on Reddit, users often debate whether foam core is a fire hazard compared to treated commando cloth. In my experience, as long as you maintain a six-inch air gap, the foam remains cool to the touch. However, the lack of a professional fire rating means you are the safety inspector. It is a trade-off: you save two hundred dollars, but you lose the peace of mind that comes with industry-standard fire-retardant materials. If you are using old-school tungsten lights that get hot enough to cook an egg, stay far away from foam board.

The Fragile Reality of Craft Store Hardware
The biggest failure point isn’t the light absorption; it is the physical structural integrity over time. After three months of constant use, the edges of my foam boards are crushed and the corners are peeling. Unlike a metal-framed flag, these are effectively consumable gear. If you are a creator who travels frequently, these will not survive a single trip in a car trunk without being snapped in half or dented beyond repair. For a stationary home studio, they are perfect. For the mobile creator, they are a nightmare of gaffer tape and jagged edges. The ‘Good’ is the incredible contrast they provide for pennies on the dollar, but the ‘Bad’ is that you will be buying new ones every season to keep your studio looking professional.
Do you agree with my experience regarding the durability of foam board vs. professional flags, or have you found a way to make them last longer in a busy studio? Drop a comment below and share your DIY rigging hacks.
Why Your 5-in-1 Kit is Probably Ruining the Mood
When you first dive into lighting kits, the 5-in-1 reflector is usually the first accessory you buy. It is cheap, portable, and promises versatility. However, when compared to a dedicated black foam board or a professional flag, these reflectors often fail the negative fill test. The black nylon fabric used in budget kits, like those found on B&H Photo, is surprisingly reflective. If you hold a 5-in-1 disc close to your subject, you will notice a faint sheen rather than a deep, light-eating void. Foam board, by contrast, is truly matte. It doesn’t just block light; it devours it, providing a much cleaner ‘cut’ that separates your subject from the background with surgical precision.
The Battle Against Professional Matthews Flags
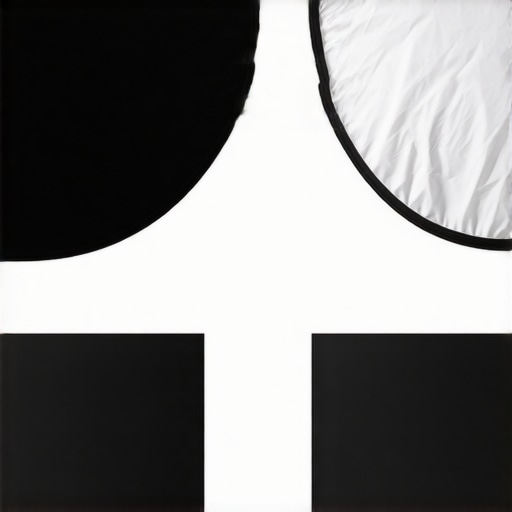
If foam board is the budget king, then a Matthews Floppy or an Avenger Flag is the industry standard for studio gear. Comparing a $15 board to a $200 professional flag reveals a massive gap in build quality and longevity. While the foam board provides excellent contrast, it is a nightmare to transport and eventually crumbles at the edges. Professional flags are made of heavy-duty commando cloth and feature steel frames that fit perfectly into a C-stand’s grip head. If you are building a permanent studio where gear needs to stay locked in place for years, the pro-grade kits offer a stability and ‘set-it-and-forget-it’ reliability that foam simply cannot match.
Is it worth the upgrade?
For most creators working in small rooms, the upgrade to professional flags is only necessary once you have exhausted the limits of DIY solutions. If you find yourself replacing your foam boards every month because they are warped or dented, it is time to invest in a real lighting kit accessory. The leap from a $15 board to a $150 flag isn’t about the quality of the shadow—the foam board actually performs remarkably well there—it is about the professional workflow. Pro flags allow you to ‘flop’ the fabric to double the size of your negative fill instantly, something a rigid board can never do. If your productions are moving toward a faster, more professional pace, the investment pays for itself in saved setup time.
Value Proposition for the Growing Creator
Choosing between these options depends entirely on your studio’s footprint and your budget. If you are just starting to experiment with shadows, stick with the foam board; it is the most cost-effective way to achieve a high-end look without a high-end price tag. However, if you are looking for camera reviews and lighting kits that will survive a decade of use, the professional flag is the clear winner for durability. The middle ground—the 5-in-1 reflector—is actually the weakest link for negative fill, as its portability comes at the cost of effective light absorption. Before you spend more money on a new camera body, check the current prices on a solid set of black flags; it might be the best upgrade you ever make for your image quality.
The Unfiltered Truth About DIY Shadow Control
- Pros: It provides near-perfect light absorption for pennies, it is incredibly lightweight, and it offers an immediate cinematic upgrade.
- Cons: These boards are extremely fragile, they are a nightmare to store in small rooms, and they lack fire-retardant safety ratings.
While professional Matthews flags are built to survive years of abuse on a film set, the humble foam board delivers the exact same visual result for a fraction of the cost. You just have to accept that you are buying a consumable item that will eventually need replacing.
Who Should Stick to Foam and Who Should Skip It
If you are a solo creator working in a spare bedroom, these boards are your best friend. They are the most effective way to how to get cinematic video with a basic kit lens because they force you to master contrast. You should definitely grab a few if you are currently fighting with why your video background is too bright and need to subtract light from the frame.
However, you should avoid this DIY route if you are a mobile creator. If your gear lives in a gear bag or a car trunk, these boards will be destroyed before you reach the location. In that scenario, investigate 3 cheap tools that make your home studio look pro for more durable alternatives.
#IMAGE_PLACEHOLDER_E#
The Final Verdict and Why You Need This Now
The value here is impossible to ignore. For the price of a lunch, you can transform your lighting from a flat webcam look to a high-end production. It is arguably the most important non-electronic upgrade for your studio. Even if you eventually buy professional steel-framed flags, starting with foam board is a vital rite of passage in learning subtractive lighting.
My Buying Advice: Buy the foam board today. The improvement in your image quality will be immediate, and you can learn how to stop your studio from looking like a mess once you find a place to hide them behind your desk. Check the latest price at your local craft store and start killing those unwanted reflections immediately.