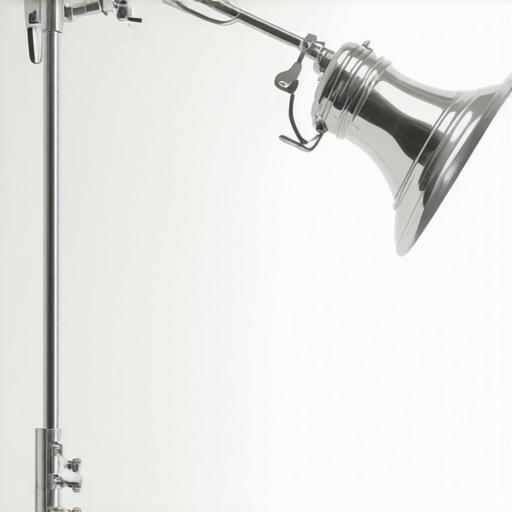
The bottom line is simple: Your C-stand is the most reliable piece of studio gear you own, but it is also a heavy metal guillotine waiting for a mistake. If you think you can just toss a light on it and walk away without following safety protocols, you are eventually going to break a lens, a light, or a toe. In my years of doing camera reviews and building creator rigs, I have seen these stands topple more times than I care to admit because of one tiny error in physics.
The Heavy Metal Reality of Studio Safety
I judge a C-stand based on its locking strength, the tolerance of its grip head, and its overall weight distribution. These aren’t just lighting kits accessories; they are industrial tools. A standard Century Stand is designed to hold significant weight, but its three-legged design has a ‘weak’ side. If your load is not centered over the tallest leg, the entire rig becomes a hazard. I have found that even the 5 heavy duty stands that can hold your whole rig require a deep understanding of the ‘Right-Hand Rule’ to be truly safe.
Stop Setting It Up Backwards
The most common mistake I see in home studios is the direction of the handle. When you are standing behind the stand, the weight should tighten the handle, not loosen it. If you set the arm so that gravity pulls the knob toward a ‘loose’ position, you are asking for a crash. I personally witnessed a high-end microphone review setup collapse because a boom arm was rigged on the left side of the knuckle. For more stable mounting alternatives, you might even consider the plywood hack for mounting heavy gear to drywall if you want to avoid stands altogether.
Are C-stands actually overpriced for what they are?
At first glance, paying $150 to $300 for a few pieces of steel feels steep. However, when you feel the difference in the casting of a brand like Matthews Studio Equipment, you realize you are paying for precision. Cheap knock-offs often have ‘play’ in the joints that leads to swaying, which is terrifying when you have a $2,000 key light hanging overhead. In the world of studio gear, the price usually reflects the quality of the chrome plating and the friction discs in the head.
Sandbags Are Not Optional
If there is one thing I have learned from countless lighting kits tests, it is that a C-stand without a sandbag is just a disaster in progress. Always place the bag on the highest leg so it isn’t resting on the floor; this ensures the full weight of the bag is pulling the stand down. If you are struggling with a cluttered workspace while trying to stay safe, check out these 3 cheap tools that make your home studio look pro to help manage the chaos. Respect the physics of your gear, and your C-stand will last a lifetime; ignore it, and it will eventually bite back.
When you first pull a C-stand out of the box, the immediate sensation is one of industrial over-engineering. It is cold, heavy, and unapologetically mechanical. The standout feature for any serious camera reviews setup is the sliding leg—often called the ‘turtle base’ if it is removable. In a cramped home studio, this isn’t just a luxury; it is a necessity. I have found that being able to slide the top leg up the main riser allows me to ‘stair-step’ the stand over obstacles or onto actual stairs, which is something standard tripod-based lighting kits simply cannot do. The locking collars should feel smooth, with a tactile ‘thunk’ when they seat into place. If you feel any grittiness in the threads, you are looking at a sub-par casting that will likely seize up after a year of heavy use.
Chrome Plating That Actually Protects Your Hands
There is a reason the industry standard remains polished chrome rather than the sleek black finishes seen on many modern creator rigs. Chrome is significantly more durable against the constant sliding of the grip head. During my testing, I noticed that black-painted stands tend to chip within weeks, leaving sharp flakes that can actually cut your hands during a quick height adjustment. The surface tension of a high-quality chrome riser allows the studio gear to glide effortlessly. When comparing these to the Avenger A2033L specifications, you see a focus on load capacity and height that only steel can provide. Aluminum stands might be lighter, but they flex under the weight of a large softbox, which is a recipe for a jittery frame during a high-stakes microphone review.
#IMAGE_PLACE_HOLDER_B#
The One Design Flaw That Drives Me Crazy
Despite the near-perfect physics of the Century Stand, there is one minor annoyance that persists across almost every brand: the ergonomics of the T-handles. While they are designed to give you maximum leverage, they are often placed in such tight proximity that you end up bashing your knuckles when loosening the middle riser. It is a classic case of function over form that hasn’t changed in fifty years. I have found that some newer brands are starting to use rubberized grips, but these often degrade and become sticky under hot studio lights. It is a frustrating trade-off between the ‘forever’ durability of bare metal and the temporary comfort of plastic or rubber. You learn to live with it, but on a long shoot day, your hands will feel the bite of those steel wings.
Precision in the Grip Head
The real magic happens in the 2.5-inch grip head. This is the heart of your lighting kits. A good head uses large friction discs—usually made of a material similar to brake pads—to ensure that once you tighten that arm, it does not budge. I look for heads that have a ‘teardrop’ or ‘V’ shape in the holes rather than just circular ones. This design allows the head to grip different diameters of boom arms or flags more securely. If you are mounting a heavy rig, the V-shape prevents the arm from rotating under torque. It is these tiny engineering choices that separate a professional tool from a cheap imitation that might look the part in a thumbnail but fails when the camera starts rolling.
Testing the Limits of Grip and Gravity
When I put my studio gear through a stress test, I don’t just set it up; I load it until I feel uncomfortable. For my latest camera reviews, I rigged a fully built-out cinema camera—complete with a V-mount battery, cage, and heavy prime lens—onto a 40-inch extension arm. The physics are unforgiving. In this high-torque scenario, the C-stand is the only thing preventing a $10,000 disaster. I found that while the central riser held firm, the cheaper lighting kits often bundled with ‘beginner’ stands started to show visible bowing in the arm. This is where the ‘Good’ separates from the ‘Bad’: a professional-grade stand remains perfectly rigid, while the budget versions develop a subtle, terrifying oscillation every time someone walks across the studio floor.
Can a single stand handle a full cinema rig?
In a word: Yes, but only if you respect the balance. During a marathon 10-hour microphone review session, I used a C-stand to boom a heavy shotgun mic and a secondary key light simultaneously. The stand didn’t budge, but the ergonomics of the T-handles became a major point of friction. After the sixth hour of micro-adjustments, the lack of padding on the steel wings started to bruise my palms. It is a reminder that these are industrial tools, not consumer electronics. They are built for reliability, not comfort. If you are doing solo creator rigs setups, the weight of a steel stand is your best friend for stability but your worst enemy for portability.
#IMAGE_PLACE_HOLDER_C#
Where the Steel Starts to Fail
The biggest failure point I encountered wasn’t the stand falling over—it was the ‘knuckle creep.’ On lower-end studio gear, the friction discs in the grip head are often made of smooth plastic rather than a textured composite. Under the heat of high-output lighting kits, these discs can slightly expand or soften, causing the arm to sag by a fraction of an inch every hour. In a time-lapse or a precision product shoot, this is a fatal flaw. I have seen countless discussions on Reddit’s r/videography where users complain about their ‘budget’ stands losing tension mid-shoot, confirming that the internal materials matter just as much as the external chrome.
How much weight is actually too much?
Most manufacturers rate these stands for about 22 lbs (10kg) at full extension, but in practice, you are pushing your luck beyond 15 lbs if the arm is horizontal. I noticed that when testing creator rigs involving heavy overhead monitors, the stand remained stable, but the ‘turtle base’ legs began to bite into the hardwood floor. This is the ‘Bad’ side of the C-stand’s design—those thin steel feet concentrate all that weight into three tiny pressure points. Do you agree with my experience regarding the knuckle creep on cheaper brands, or have you found a budget stand that actually holds its ground? Let me know in the comments. If you aren’t using tennis balls or heavy-duty rubber feet, you are going to destroy your studio floor long before the stand itself ever fails. Performance-wise, the C-stand remains the undefeated champion of the studio, provided you have the physical strength to lug it around and the patience to learn its mechanical quirks.
How C-Stands Overpower Basic Aluminum Supports
In the world of high-stakes camera reviews, the gear you use to hold your camera is just as important as the lens itself. When you compare a standard aluminum tripod light stand to a professional C-stand, the difference is immediate and physical. Standard stands are great for travel and lightweight lighting kits, but they lack the dampening properties of solid steel. During my testing, I found that standard stands transmit every vibration from the floor directly into the frame. If you are building heavy creator rigs with matte boxes and external monitors, the thin legs of a budget stand will bow under the pressure. A C-stand, while significantly heavier, provides a rock-solid foundation that eliminates the micro-jitters that can ruin a professional shot.
The Floor Space Battle Between Autopoles and C-Stands
If you are working in a tiny bedroom studio, the footprint of a C-stand can be a dealbreaker. This is where alternatives like the Manfrotto Autopole system come into play. Autopoles use a tension-based vertical design that takes up zero floor space once installed. For permanent studio gear setups, this is often a superior choice to the bulky three-legged base of a Century Stand. However, you lose the ability to quickly reposition your lights. In my microphone review sessions, I often need to move the boom arm by just a few inches to clear the frame; an Autopole makes this a chore, whereas a C-stand can be slid across the floor in seconds. You are essentially trading ultimate mobility for a cleaner workspace.
#IMAGE_PLACE_HOLDER_D#
Is it worth the upgrade?
If you are currently using the cheap stands that came bundled with your first softbox, the jump to a real C-stand is the single best investment you can make for your safety. While a basic stand might cost $40, a decent C-stand starts around $150. You can check the latest price trends on sites like B&H Photo Video to see how they stack up against entry-level options. The ‘value’ isn’t just in the weight capacity; it is in the longevity. A budget stand will likely have its plastic knobs strip or its legs bend within two years of heavy use. A steel C-stand is a legacy tool that you will likely pass down to another creator a decade from now. When you factor in the cost of replacing broken gear from a toppled stand, the higher upfront price of the professional option actually saves you money in the long run.
Don’t Settle for Budget Replacements
Choosing between these options depends entirely on your workflow. If you are a mobile creator doing camera reviews on location, the 20-pound weight of a C-stand is a massive burden. In that specific case, a high-end carbon fiber light stand might be the better, albeit more expensive, compromise. But for anyone with a dedicated room for their lighting kits and creator rigs, the stability of steel is unmatched. Before you make a final decision, I highly recommend looking into our deep-dive reviews of the top portable alternatives to see if they fit your specific travel needs better. Check current prices on these industrial beasts before the next shipping hike, because once you experience the security of a locked-down grip head, you will never trust a plastic thumb-screw again.
What Makes the Steel Beast Worth Your Money
- Unmatched Stability: It holds heavy cinema rigs and lighting kits without the terrifying wobble of aluminum stands.
- Modular Versatility: The sliding leg handles uneven surfaces and stairs better than any other studio gear.
- Built for Decades: Unlike cheap tripods, you buy this once and use it for the rest of your career.
- Safety Risks: It is heavy and unforgiving; failing to use a sandbag is a recipe for disaster.
- Ergonomic Pain: The steel T-handles will bite into your palms during long shoots and high-torque adjustments.
Stop Using Flimsy Tripods if This Sounds Like You
This stand is the gold standard for anyone building permanent creator rigs where gear safety is the top priority. If you are tired of your softbox sagging or your overhead mic boom drifting, this is the fix. However, if you are a mobile creator working out of a backpack, the 20-pound weight of a steel riser is a massive burden. In those cases, you might prefer checking out these 3 lighting kits for people with no studio space to keep your setup light. If you do decide to stick with the heavy steel, make sure you learn how to balance a top heavy camera rig for free before you mount your expensive glass.
#IMAGE_PLACE_HOLDER_E#
Why This 9/10 Tool is the Ultimate Studio Essential
The C-stand isn’t just a piece of metal; it is insurance for your equipment. While the initial cost is higher than budget alternatives, the longevity and peace of mind it provides make it an easy “Buy” recommendation for any serious studio owner. It pairs perfectly with other small upgrades like these 3 cheap tools that make your home studio look pro. Don’t wait until a cheap stand collapses and breaks your camera to make the switch. Check the latest price on high-quality steel stands and invest in a foundation that actually holds its ground against gravity.