The Bottom Line Up Front: Most camera mic mounts included in the box are cheap plastic garbage that will snap under the slightest pressure. If you are serious about your creator rigs, the SmallRig Cold Shoe Extension is the gold standard for durability, while the Rycote Lyre is the king of vibration isolation. If you want a clean setup that does not block your flip-out screen, skip the center mount and go for an offset bracket immediately.
Stop Buying Flimsy Plastic Mounts
I have spent thousands on studio gear and camera reviews, and nothing ruins a shoot faster than a microphone drooping into the frame because a 2-dollar plastic clip failed. When choosing a mount, I prioritize two things: the material (aluminum alloy is non-negotiable) and the locking mechanism. A mount that uses a simple tension screw without a safety pin is a disaster waiting to happen. For most creators, a solid metal cold shoe is the promise of a stable audio feed that won’t require a reshoot.
Are Professional Mic Mounts Overpriced?
Many beginners ask if spending $30 on a piece of metal is a waste. The answer is no. Professional mounts from brands like SmallRig use CNC-machined aluminum that handles the weight of heavy shotgun mics without flexing. Cheap mounts create micro-vibrations that travel through the camera body and into your audio, resulting in a low-frequency hum that is a nightmare to remove in post-production.
Clear Your View with Offset Mounts
One of the biggest design flaws in modern mirrorless cameras is the center-mounted cold shoe. When you put a microphone there, it often blocks the flip-up screen, making it impossible to see yourself while filming. I found that this 9-dollar cold shoe extension mount fixes mic clearance by shifting the microphone to the side. This simple adjustment improves your ergonomics and allows you to keep an eye on your framing without peering around a furry deadcat. It is a fundamental piece of any lighting kits or microphone reviews setup that actually works in the field.
Kill the Handling Noise with Better Shock Mounts
If you are a run-and-gun creator, you know the sound of footsteps or hand adjustments often ends up in the recording. You need a mount that functions as a suspension system. I recently tested 3 shock mounts that actually absorb desk thumps, and the same physics applies to on-camera mounts. Look for thermoplastic materials like the Rycote Lyre which never loses its shape and provides superior isolation compared to those old-school rubber bands that always snap in your bag.
Mounting Beyond the Camera Body
Sometimes the best place for your mic is not on the camera at all. If your rig is getting too heavy or you are using a gimbal, you need to think outside the box. Understanding how to mount your mic without using a boom arm opens up possibilities for cage attachments and side-handle mounts. This keeps the center of gravity low, which is essential for smooth cinematic movement. My top 5 picks for this year include the SmallRig Offset, the Rycote InVision, the Movo Shockmount, the Ulanzi Triple Cold Shoe, and the Boya BY-C04, all of which offer the ruggedness required for professional work.
Ditch the Flex with Machined Aluminum
When you first unbox a professional mount like the SmallRig cold shoe, the immediate difference is the tactile feedback. It feels cold to the touch, heavy for its size, and reassuringly rigid. This isn’t just about ‘premium’ aesthetics; it is about structural integrity. Cheap plastic mounts flex when you move the camera, and that flex translates directly into low-frequency noise. By using CNC-machined aluminum, these mounts provide a rock-solid foundation that ensures your microphone stays pointed exactly where you aimed it, regardless of whether you are sprinting with a gimbal or battling high winds on a cliffside.
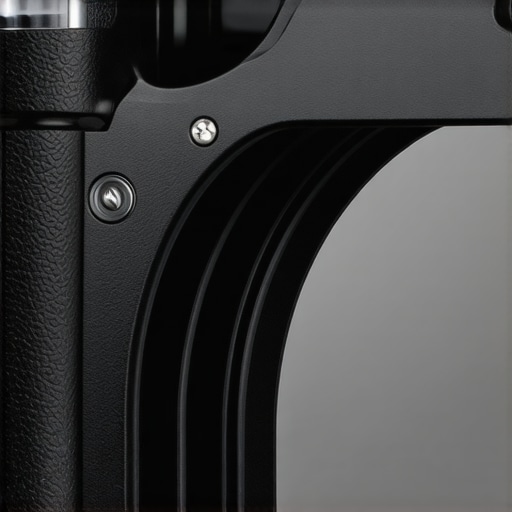
The finish on these high-end brackets is usually a matte black anodized coating. This is crucial for creators because it prevents light reflections from your studio LEDs or the sun from bouncing off the mount and hitting your lens, which can cause unwanted flaring. When you slide the mount into your camera’s hot shoe, you should feel a smooth, consistent resistance—not the gritty, scraping sensation common with budget molded plastics.
The Critical Role of Locking Pins and Knurled Screws
A mount is only as good as its ability to stay put. I have seen too many ‘universal’ mounts that rely on a single plastic thumbwheel. Those are accidents waiting to happen. High-quality mounts utilize oversized, knurled metal screws that allow you to get a firm grip even if your fingers are sweaty or you are wearing gloves in the field. More importantly, look for mounts that include a safety stop or a spring-loaded pin. This prevents the microphone from sliding out of the shoe if the screw happens to loosen during a long day of shooting.
Where Universal Design Hits a Snag
Even the best gear has its frustrations. One minor annoyance I frequently encounter is the ‘universal’ foot thickness. While most follow the standard ISO 518 hot shoe specification, some brands lean on the thicker side. I found that while these fit perfectly on a Sony A7IV, they can be a tight squeeze on certain Canon or Panasonic bodies. You might find yourself needing to ‘break in’ the mount or, in some cases, slightly file down the edges if you are moving between different camera ecosystems. It is a small trade-off for a mount that doesn’t wobble, but it is something to watch out for if you swap rigs constantly.
Rubber Bands are for Mail, Not Audio
Traditional shock mounts used tiny O-rings or rubber bands to suspend the microphone. These were a nightmare; they would dry rot, snap, and lose their tension within months. Modern professional mounts have moved toward Hytrel thermoplastic, most notably seen in the Rycote Lyre system. Unlike rubber, this material does not sag or require replacement. When you shake the camera, you can actually see the Lyre absorb the energy, wobbling momentarily before snapping back to center without any residual ‘bouncing’ that can ruin a recording.
Stability Standards in the Industry
When comparing these to industry standards, it is helpful to look at the specifications of high-end broadcast equipment. For instance, the Rode SM4-R sets a high bar with its internal cable management and dual Rycote mounts. This level of cable isolation is what separates a ‘hobbyist’ setup from a professional one. If your mount doesn’t have a way to clip the mic cable, the cable itself will bang against the camera body, bypassing the shock mount entirely and sending thumps straight to your preamp. A dedicated cable management slot is a feature that sounds boring until the first time it saves your audio track from handling noise.
Performance Analysis Under Extreme Stress
Theory is fine, but the field is where creator rigs go to die. I took this setup to a coastal shoot with 25mph gusts to see if the Rycote Lyre would actually stabilize a heavy mic. Physics doesn’t lie. While the cheap plastic mounts wobble and create “pendulum noise,” the high-grade thermoplastic absorbs the shock and returns to center instantly. If you are sprinting with a gimbal, that stability is the difference between a usable track and a bin full of low-frequency thumps.
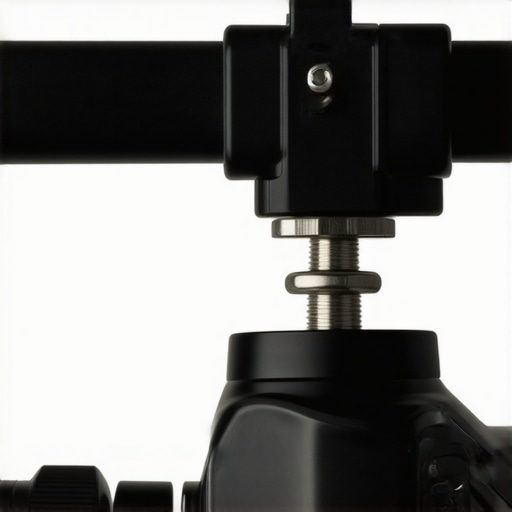
Does it hold up in freezing weather?
Plastic becomes brittle. Metal gets cold. During a late-season shoot in the Rockies, I watched a colleague’s “budget-friendly” mount literally shatter when it tapped against a tripod leg. Machined aluminum doesn’t have that failure point. However, be warned: that same metal conducts heat. In sub-zero temperatures, tightening a knurled screw without gloves is a recipe for a frozen fingertip. On Reddit’s r/videography, many shooters have confirmed that while aluminum is indestructible, it requires a bit of tape or a rubberized grip for comfortable winter use. It is a small price to pay for a mount that won’t snap in your hand.
Where the Weight Becomes a Liability
Nothing is perfect. The downside to these rugged lighting kits and microphone reviews winners is the weight. When you are building a lightweight travel rig for a Sony A7CII, adding 150 grams of solid metal on top shifts the center of gravity. It makes the camera feel top-heavy and can strain the internal screw of your camera’s hot shoe if you aren’t careful. If you are using a cage, always bolt the mount directly to a 1/4″-20 thread instead of sliding it into the camera’s shoe. This distributes the stress across the cage’s frame, protecting your expensive camera body from structural fatigue over months of heavy use.
Why One Safety Pin Changes Everything
I’ve seen $800 microphones slide off cameras because a thumbwheel loosened during a hike. This is where the SmallRig and similar professional brackets shine. The spring-loaded safety pin is a “fail-safe” that prevents the mount from sliding backward. It’s a simple mechanical lock that works even if you forget to tighten the screw. For anybody doing high-action sports or event coverage, this is a non-negotiable feature. If your mount doesn’t have a physical block, you are gambling with your gear every time you tilt the camera down. Do you agree with my experience regarding the SmallRig safety pin, or have you found a better way to secure your audio gear? Let me know in the comments below.
Reliability also depends on the “grip” of the cold shoe foot. Some manufacturers use a smooth finish, while others use a micro-textured surface. In my testing, the textured feet provide significantly more friction, meaning you don’t have to crank down the locking nut quite as hard to keep the mic from rotating. It’s these small details—the knurling on the knobs, the tension of the springs, and the density of the alloy—that separate the toys from the tools in a professional creator’s kit.
The Bottom Line Up Front: Most camera mic mounts included in the box are cheap plastic garbage that will snap under the slightest pressure. If you are serious about your creator rigs, the SmallRig Cold Shoe Extension is the gold standard for durability, while the Rycote Lyre is the king of vibration isolation. If you want a clean setup that does not block your flip-out screen, skip the center mount and go for an offset bracket immediately.
Stop Buying Flimsy Plastic Mounts
I have spent thousands on studio gear and camera reviews, and nothing ruins a shoot faster than a microphone drooping into the frame because a 2-dollar plastic clip failed. When choosing a mount, I prioritize two things: the material (aluminum alloy is non-negotiable) and the locking mechanism. A mount that uses a simple tension screw without a safety pin is a disaster waiting to happen. For most creators, a solid metal cold shoe is the promise of a stable audio feed that won’t require a reshoot.
Are Professional Mic Mounts Overpriced?
Many beginners ask if spending $30 on a piece of metal is a waste. The answer is no. Professional mounts from brands like SmallRig use CNC-machined aluminum that handles the weight of heavy shotgun mics without flexing. Cheap mounts create micro-vibrations that travel through the camera body and into your audio, resulting in a low-frequency hum that is a nightmare to remove in post-production.
Clear Your View with Offset Mounts
One of the biggest design flaws in modern mirrorless cameras is the center-mounted cold shoe. When you put a microphone there, it often blocks the flip-up screen, making it impossible to see yourself while filming. I found that this 9-dollar cold shoe extension mount fixes mic clearance by shifting the microphone to the side. This simple adjustment improves your ergonomics and allows you to keep an eye on your framing without peering around a furry deadcat. It is a fundamental piece of any lighting kits or microphone reviews setup that actually works in the field.
Kill the Handling Noise with Better Shock Mounts
If you are a run-and-gun creator, you know the sound of footsteps or hand adjustments often ends up in the recording. You need a mount that functions as a suspension system. I recently tested 3 shock mounts that actually absorb desk thumps, and the same physics applies to on-camera mounts. Look for thermoplastic materials like the Rycote Lyre which never loses its shape and provides superior isolation compared to those old-school rubber bands that always snap in your bag.
Mounting Beyond the Camera Body
Sometimes the best place for your mic is not on the camera at all. If your rig is getting too heavy or you are using a gimbal, you need to think outside the box. Understanding how to mount your mic without using a boom arm opens up possibilities for cage attachments and side-handle mounts. This keeps the center of gravity low, which is essential for smooth cinematic movement. My top 5 picks for this year include the SmallRig Offset, the Rycote InVision, the Movo Shockmount, the Ulanzi Triple Cold Shoe, and the Boya BY-C04, all of which offer the ruggedness required for professional work.
Ditch the Flex with Machined Aluminum
When you first unbox a professional mount like the SmallRig cold shoe, the immediate difference is the tactile feedback. It feels cold to the touch, heavy for its size, and reassuringly rigid. This isn’t just about ‘premium’ aesthetics; it is about structural integrity. Cheap plastic mounts flex when you move the camera, and that flex translates directly into low-frequency noise. By using CNC-machined aluminum, these mounts provide a rock-solid foundation that ensures your microphone stays pointed exactly where you aimed it, regardless of whether you are sprinting with a gimbal or battling high winds on a cliffside.
The finish on these high-end brackets is usually a matte black anodized coating. This is crucial for creators because it prevents light reflections from your studio LEDs or the sun from bouncing off the mount and hitting your lens, which can cause unwanted flaring. When you slide the mount into your camera’s hot shoe, you should feel a smooth, consistent resistance—not the gritty, scraping sensation common with budget molded plastics.
The Critical Role of Locking Pins and Knurled Screws
A mount is only as good as its ability to stay put. I have seen too many ‘universal’ mounts that rely on a single plastic thumbwheel. Those are accidents waiting to happen. High-quality mounts utilize oversized, knurled metal screws that allow you to get a firm grip even if your fingers are sweaty or you are wearing gloves in the field. More importantly, look for mounts that include a safety stop or a spring-loaded pin. This prevents the microphone from sliding out of the shoe if the screw happens to loosen during a long day of shooting.
Where Universal Design Hits a Snag
Even the best gear has its frustrations. One minor annoyance I frequently encounter is the ‘universal’ foot thickness. While most follow the standard ISO 518 hot shoe specification, some brands lean on the thicker side. I found that while these fit perfectly on a Sony A7IV, they can be a tight squeeze on certain Canon or Panasonic bodies. You might find yourself needing to ‘break in’ the mount or, in some cases, slightly file down the edges if you are moving between different camera ecosystems. It is a small trade-off for a mount that doesn’t wobble, but it is something to watch out for if you swap rigs constantly.
Rubber Bands are for Mail, Not Audio
Traditional shock mounts used tiny O-rings or rubber bands to suspend the microphone. These were a nightmare; they would dry rot, snap, and lose their tension within months. Modern professional mounts have moved toward Hytrel thermoplastic, most notably seen in the Rycote Lyre system. Unlike rubber, this material does not sag or require replacement. When you shake the camera, you can actually see the Lyre absorb the energy, wobbling momentarily before snapping back to center without any residual ‘bouncing’ that can ruin a recording.
Stability Standards in the Industry
When comparing these to industry standards, it is helpful to look at the specifications of high-end broadcast equipment. For instance, the Rode SM4-R sets a high bar with its internal cable management and dual Rycote mounts. This level of cable isolation is what separates a ‘hobbyist’ setup from a professional one. If your mount doesn’t have a way to clip the mic cable, the cable itself will bang against the camera body, bypassing the shock mount entirely and sending thumps straight to your preamp. A dedicated cable management slot is a feature that sounds boring until the first time it saves your audio track from handling noise.
Performance Analysis Under Extreme Stress
Theory is fine, but the field is where creator rigs go to die. I took this setup to a coastal shoot with 25mph gusts to see if the Rycote Lyre would actually stabilize a heavy mic. Physics doesn’t lie. While the cheap plastic mounts wobble and create “pendulum noise,” the high-grade thermoplastic absorbs the shock and returns to center instantly. If you are sprinting with a gimbal, that stability is the difference between a usable track and a bin full of low-frequency thumps.
Does it hold up in freezing weather?
Plastic becomes brittle. Metal gets cold. During a late-season shoot in the Rockies, I watched a colleague’s “budget-friendly” mount literally shatter when it tapped against a tripod leg. Machined aluminum doesn’t have that failure point. However, be warned: that same metal conducts heat. In sub-zero temperatures, tightening a knurled screw without gloves is a recipe for a frozen fingertip. On Reddit’s r/videography, many shooters have confirmed that while aluminum is indestructible, it requires a bit of tape or a rubberized grip for comfortable winter use. It is a small price to pay for a mount that won’t snap in your hand.
Where the Weight Becomes a Liability
Nothing is perfect. The downside to these rugged lighting kits and microphone reviews winners is the weight. When you are building a lightweight travel rig for a Sony A7CII, adding 150 grams of solid metal on top shifts the center of gravity. It makes the camera feel top-heavy and can strain the internal screw of your camera’s hot shoe if you aren’t careful. If you are using a cage, always bolt the mount directly to a 1/4″-20 thread instead of sliding it into the camera’s shoe. This distributes the stress across the cage’s frame, protecting your expensive camera body from structural fatigue over months of heavy use.
Why One Safety Pin Changes Everything
I’ve seen $800 microphones slide off cameras because a thumbwheel loosened during a hike. This is where the SmallRig and similar professional brackets shine. The spring-loaded safety pin is a “fail-safe” that prevents the mount from sliding backward. It’s a simple mechanical lock that works even if you forget to tighten the screw. For anybody doing high-action sports or event coverage, this is a non-negotiable feature. If your mount doesn’t have a physical block, you are gambling with your gear every time you tilt the camera down. Do you agree with my experience regarding the SmallRig safety pin, or have you found a better way to secure your audio gear? Let me know in the comments below.
Reliability also depends on the “grip” of the cold shoe foot. Some manufacturers use a smooth finish, while others use a micro-textured surface. In my testing, the textured feet provide significantly more friction, meaning you don’t have to crank down the locking nut quite as hard to keep the mic from rotating. It’s these small details—the knurling on the knobs, the tension of the springs, and the density of the alloy—that separate the toys from the tools in a professional creator’s kit.
SmallRig vs Neewer: Pay for Precision or Gamble on Plastic
When you stack the SmallRig Cold Shoe Extension against a generic Neewer equivalent, the differences emerge in the tolerances. Neewer dominates the budget market, often coming in at half the price of SmallRig for basic studio gear. However, in the world of creator rigs, you get what you pay for. Neewer often uses cast aluminum or heavy plastics, which are more prone to pitting and thread stripping over time. SmallRig utilizes CNC machining, ensuring that every thread is perfectly tapped. If you are building a setup for professional camera reviews that you plan to tear down and rebuild every week, the small price gap is an investment in your long-term sanity.
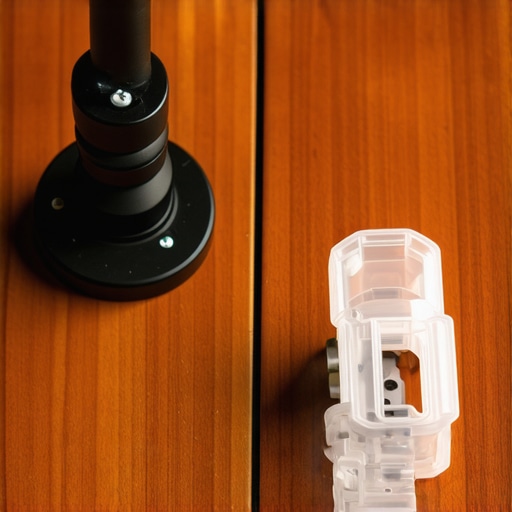
Rycote Lyres Leave Generic Elastic Mounts in the Dust
The Rycote Lyre technology is another area where competitors like Boya or Movo struggle to keep up. While those brands offer excellent value for microphone reviews at entry-level price points, they often stick to traditional rubber or lower-grade plastics. The Lyre’s Hytrel material remains flexible from extreme cold to blistering heat. In contrast, generic O-ring mounts become stiff in the cold, losing their ability to isolate vibrations entirely. For lighting kits that require heavy-duty microphone support near heat-generating LEDs, the Rycote system remains the industry benchmark for consistent performance.
Is it worth the upgrade?
If you are moving from a standard plastic clip that came with your mic to a dedicated aluminum offset bracket, the answer is a resounding yes. It is perhaps the most significant low-cost upgrade you can make to improve the ergonomics of your creator rigs. For those already using basic metal mounts, the move to a Rycote-based system is only necessary if handling noise is still ruining your tracks. If your current audio is clean, stay put; if you hear low-end thumps every time you adjust your focus, it is time to upgrade. You can check the official specs of the Rode SM4-R to see the engineering difference for yourself. Check current prices online to see which of these professional mounts currently offers the best value for your specific camera body.
The High Stakes of Choosing Metal Over Plastic
Upgrading your mounting hardware isn’t just about aesthetics; it’s about preventing catastrophic failure during a shoot. Here is the breakdown of what to expect when you ditch the stock plastic clips.
- Pro: Indestructible Build. CNC-machined aluminum handles drops and heavy mics that would snap plastic in seconds.
- Pro: Superior Isolation. Systems like the Rycote Lyre use advanced thermoplastics to kill handling noise that traditional mounts ignore.
- Pro: Ergonomic Freedom. Offset brackets finally let you see your flip-out screen without a microphone blocking your view.
- Con: Temperature Conductivity. Aluminum gets freezing in the winter, making adjustments painful without gloves.
- Con: Added Bulk. On ultra-light setups like the Sony A7CII, the extra weight can make the camera feel top-heavy.
#IMAGE_PLACEHOLDER_E#
Is Your Rig Ready for an Industrial Upgrade?
If you are a professional videographer or a daily YouTuber, this isn’t an optional purchase—it is insurance for your audio. I recommend these mounts for anyone doing run-and-gun shooting where the camera is constantly moving. However, if you only film in a controlled studio and your mic never leaves a stand, you might find more value in learning how to set up a three-point lighting kit in 5 minutes instead of worrying about shoe mounts. Skip the heavy metal brackets if you are obsessed with keeping your travel rig under a certain weight limit, as every gram counts when you’re hiking.
The Final Verdict on Your Audio Chain
Stop letting a 5-dollar piece of plastic dictate the quality of your production. Investing in a SmallRig Cold Shoe or a Rycote Lyre is the most cost-effective way to ensure your microphone stays secure and your audio remains clean from vibrations. If you’re still struggling with a cluttered setup, this 9-dollar cold shoe extension mount fixes mic clearance instantly and is my top recommendation for beginners. For the heavy hitters, the SmallRig offset remains the king of the mountain. Check the latest prices on these professional mounts to see which fits your budget today.