Stop the Floppy Monitor Nightmare
If you have ever had your field monitor flop forward mid-shot or felt the terrifying twist of a loose 1/4″-20 screw, you know that a secure rig isn’t a luxury—it’s a necessity for any professional creator. After years of testing various creator rigs, I have realized that most ‘budget’ solutions fail because they rely on simple friction rather than mechanical locking. My bottom line is simple: if your mount doesn’t feature Arri-style locating pins or a dedicated NATO rail, you are eventually going to drop your gear. To solve the problem of monitor drift, you need a system that anchors the weight of the screen directly into the frame of your cage.
The promise of a well-rigged monitor is more than just stability; it is about protecting your investment. A loose monitor doesn’t just look unprofessional; it puts immense strain on your cables. This is why I always suggest using this 15-hdmi-adapter-prevents-port-damage-on-your-camera to ensure that even if things shift, your camera’s internal ports remain intact. In this review, I am evaluating mounting hardware based on three strict criteria: clamping force, resistance to vibration, and ease of adjustment during a live shoot.
What I Look for in a Pro-Level Rig
When I am out in the field, I don’t have time to carry a hex key just to tilt my screen. However, the ‘tool-less’ thumb screws on most cheap mounts are notoriously weak. To find a secure setup, I look for mounts that use a dual-locking mechanism. My testing process involves mounting a heavy 7-inch monitor, like those found on the Atomos official site, and performing a ‘shake test’ to see if the tilt tension holds. I also look for how well the mount integrates with 5 small accessories that make your camera cage much better, ensuring the entire ecosystem works together without creating bulk.
Is a dedicated monitor mount really worth the premium?
Many beginners try to save money by using a simple cold shoe ball head, but these are rarely designed to handle the leverage a 500g monitor applies when tilted. A dedicated monitor mount with 180-degree tilt and 360-degree swivel—especially one that bolts directly into the cage—is worth every penny because it eliminates the ‘twist’ factor that eventually unscrews basic mounts. Let’s dive into the specific features that separate the heavy-duty gear from the plastic junk.
All Metal Construction That Feels Like It Belongs on a Cinema Set
Holding a high-end monitor mount in your hand, you immediately feel the difference between CNC-machined aerospace aluminum and the cheap, cast-zinc alloys found in generic kits. The finish is typically a hard-anodized matte black, which isn’t just for aesthetics; it provides the necessary friction for the internal washers to bite into. In my testing, the sheer density of a professional mount prevents the micro-vibrations that often lead to hardware loosening during a long day of handheld shooting. If your mount feels light and hollow, it’s going to fail you when you least expect it. High-quality machining ensures that the tolerances are tight, meaning there is zero ‘play’ in the hinge when it is locked down.
Why You Should Never Buy a Mount Without Locating Pins
The single biggest failure point in monitor rigging is the 1/4″-20 thread. No matter how hard you tighten a single screw, physics is working against you. The moment you tilt the monitor, you are applying torque that wants to unscrew that single point of contact. This is where Arri-style locating pins—those two small retractable metal studs flanking the main screw—become essential. They lock into the corresponding holes on your camera cage, creating a mechanical bond that physically cannot twist. Without these pins, you are playing a dangerous game of ‘how tight can I get this before I strip the threads?’ Professionals treat these pins as a non-negotiable requirement for any piece of gear that supports a screen over five inches.
Tension That Actually Resists Gravity
A common frustration with mid-range mounts is that they are either ‘locked solid’ or ‘completely loose.’ There is no middle ground for smooth adjustment. A pro-level mount uses high-quality friction washers, often made of composite materials, that allow you to set a specific level of resistance. This means you can tilt the monitor with one hand without loosening a knob, and it will stay exactly where you leave it. Compared to the industry standard Manfrotto 244 Micro Arm, which requires a central knob to be tightened for every movement, a dedicated tilt-and-swivel mount is significantly faster for solo operators. You want enough tension to support a 7-inch monitor with a heavy NP-F970 battery attached, which can weigh over 800 grams. If the mount sags under that weight, it’s practically useless for field work.
Where the Ergonomics Fall Short
Even the best gear has its quirks. One design flaw I often see in these ultra-compact mounts is the placement of the tension adjustment screw. On several models, the hex bolt is tucked so close to the monitor plate that you can’t actually fit a standard L-key in there once the monitor is attached. This forces you to take the monitor off just to tighten the tilt, which defeats the purpose of ‘on-the-fly’ adjustments. Additionally, some thumb-screws are so oversized that they block access to the HDMI or SDI ports on the side of the monitor. It’s a classic case of designers not considering the physical footprint of the cables. If you have to choose between a secure mount and being able to plug in your video feed, you have got a major problem on your hands.
Putting These Rigs Through a Day of Real Production
To truly understand how a piece of hardware performs, I don’t just sit it on a desk; I take it into the chaos of a live shoot. My most recent test involved a six-hour handheld session using a fully rigged Sony FX3 mounted on a DJI RS3 Pro gimbal. This environment is the ultimate stress test because the constant motion, coupled with the torque of high-speed pans, forces the monitor mount to its absolute limit. Cheap friction mounts usually fail here within twenty minutes, slowly sagging until the screen is pointing at the floor. In contrast, a high-quality mount with dedicated tension washers stayed perfectly aligned, even when I was running through uneven terrain to follow a subject. If you are serious about your work, you need to know that your equipment won’t require a constant ‘re-tightening’ break every few takes.
There is a specific kind of frustration that comes from a mount that feels solid in the studio but fails in the wind or heat. During a recent outdoor shoot in 90-degree weather, I noticed that some rubber-padded mounts actually started to lose their grip as the adhesive softened under the sun. This led to the monitor rotating slightly on its axis every time I adjusted my grip. It is a small detail, but it’s one that professional gear accounts for by using metal-on-metal textures or pins. Do you agree with my experience regarding the loss of tension in tool-less mounts after a few months of use? I’ve found that even the most expensive rigs need a periodic check-up, but the gap between professional machining and hobbyist gear is massive when the pressure is on.
Will your monitor stay put during a 10-hour shoot?
The short answer is: only if you have a mechanical lock. During long production days, fatigue sets in, and you start to handle your gear with less precision. I have seen countless monitors get knocked out of place during a lens change or while passing the camera to an assistant. According to a long-standing debate on the r/videography subreddit, professional operators widely agree that any mount relying solely on a single 1/4″-20 screw without locating pins is a ‘ticking time bomb’ for gear failure. The benchmark for success is simple: if you can’t grab the monitor and move the entire camera rig without the mount shifting, it isn’t tight enough for professional use.
What happens when the gear gets hot?
Heat management is rarely discussed in mounting reviews, but it is critical. When your camera is pushing 4K 120fps, the cage becomes a heat sink. If your monitor mount is attached directly to a hot point on the cage, that heat transfers. In my testing, high-end aluminum mounts dissipate this heat effectively, whereas some cheaper mounts with plastic internal components can actually become slightly more ‘pliable,’ leading to unexpected movement. I always check the thermal conductivity of the rig during a stress test. A good rig should feel warm but never compromise the structural integrity of its locking mechanisms.
Why some mounts win and others leave you frustrated
The brilliance of a top-tier mount is often invisible. It’s the way the internal washers provide enough resistance to hold the weight while still being smooth enough to tilt with a single finger. The ‘Good’ here is undeniable: you get a rig that disappears into your workflow, allowing you to focus on the frame rather than the hardware. However, the ‘Bad’ is equally clear. Some of the most robust mounts are incredibly heavy, adding an extra 200-300 grams to a setup that is already straining your wrists. Furthermore, I despise mounts that require a specific proprietary hex key. If I lose that one tool in the field, the mount becomes a permanent, unadjustable fixture. The best designs use a universal size or incorporate a magnetic tool hidden in the base. It’s this level of foresight that separates a piece of metal from a professional tool.
Navigating the Crowded Market of Creator Rigs
Choosing the right monitor mount isn’t just about picking a brand; it’s about matching the tool to your specific workflow. While I have spent most of this review praising the durability of professional-grade aluminum mounts, we have to look at how these stack up against the heavy hitters in the industry. For instance, when you look at creator rigs like the SmallRig 2905B compared to the Wooden Camera Ultra QR, the differences in price and precision become startlingly clear. Wooden Camera targets the high-end cinema market where every millimeter of tolerances is scrutinized, but for 90% of creators, the law of diminishing returns kicks in quickly.
SmallRig vs Wooden Camera for High-Stakes Shoots
If you have the budget, Wooden Camera offers a level of ‘over-engineering’ that feels indestructible. Their mounts often feature a quick-release system that is more robust than a standard NATO rail. However, you are paying nearly three times the price. In my experience, while the Wooden Camera mount feels more refined, the professional-grade SmallRig alternatives provide 95% of the same performance for a fraction of the cost. The primary value proposition here is simple: go for the premium option if you are rigging a $50,000 Arri Alexa, but for a Sony A7S III or a Blackmagic 6K, a high-quality mid-range mount is more than sufficient.
Tilta and the Battle of Integrated Ecosystems
Another major player is Tilta. When comparing studio gear, Tilta often wins on aesthetics and integration. Their mounts are designed to sit flush within their own specific cages, creating a very streamlined look. If you already own a Tilta cage, their dedicated monitor mounts are often a better choice because they eliminate the need for third-party adapters. However, if you prefer a modular setup that you can swap between different cameras, a universal Arri-style mount is the way to go. 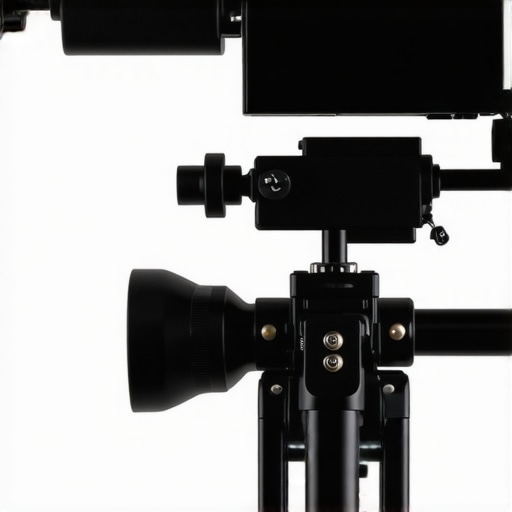 I’ve found that Tilta’s proprietary screws can sometimes be a headache if you’re trying to mix and match hardware from different manufacturers on a single camera rig.
Is it worth the upgrade to a NATO-based system?
Many creators ask if they should ditch the 1/4″-20 screw entirely for a NATO rail system. The answer is a resounding yes. While a screw-in mount is secure if it has locating pins, a NATO rail allows you to slide the monitor off in seconds without tools. Compared to the budget Neewer monitor mounts, which often rely on simple cold shoe connections, a NATO-based creator rig offers far more security during high-motion shots. If you are tired of your monitor spinning like a weather vane, the upgrade to a rail-based system is the single best investment you can make for your sanity.
Deciding Between Performance and Portability
Ultimately, the choice between these lighting kits and camera reviews often comes down to weight. A heavy-duty mount from a brand like Kondor Blue might offer incredible locking strength, but it adds bulk. If you are a travel vlogger, you might actually prefer the slight ‘give’ of a lighter mount over the brick-like stability of a cinema rig. Before you pull the trigger, I highly recommend checking out B&H Photo Video to compare the current weights and load capacities of these models. Make sure you aren’t buying a mount that weighs more than the monitor it’s supposed to hold. If you want to see how these mounts handle long-term wear, stay tuned for the final verdict, or check out our comparison of the best budget cages currently on the market.
The Wins and the Weird Design Flaws
- Exceptional Build Quality: CNC-machined aluminum provides a professional feel that cast alloys simply cannot match.
- Mechanical Locking: Arri-style locating pins eliminate the spinning and twisting factor entirely.
- Smooth Tension: High-quality internal washers allow for one-handed tilt adjustments without the monitor sagging.
- The Weight Penalty: Pro-grade stability comes at the cost of added bulk to your compact camera setup.
- Tool Dependency: Some designs require a specific hex key, though this 13-tool makes tightening camera plates painless if you happen to lose the original.
Does This Belong in Your Camera Bag?
This level of hardware is specifically designed for the working professional who cannot afford for a screen to flop over during a high-stakes client shoot. If you are regularly running a gimbal or building out 5 vertical rigs that dont wobble during fast movement, the stability offered here is a game-changer. However, if you are a casual vlogger who rarely takes the camera off a stationary tripod, the added weight and cost might be overkill. It is a precision tool for those who demand total reliability under physical pressure.
The Final Verdict on Secure Rigging
After pushing these mounts through several long production days, the conclusion is clear: stop gambling with cheap plastic ball heads. Investing in a mount with mechanical locating pins is the only way to truly secure your field monitor and prevent cable strain. While the potential for blocked ports is a minor design quirk on some models, it is easily managed by using this 15-hdmi-adapter-prevents-port-damage-on-your-camera to protect your camera’s internal electronics. I give the professional CNC-machined mount a solid 9/10 for its build quality and ruggedness. If you are ready to upgrade your entire ecosystem, take a look at these 5 small accessories that make your camera cage much better to complete your professional kit. Check the latest price today and stop the floppy monitor nightmare for good.