The Bottom Line Up Front
Here is the reality: a camera cage on its own is just a heavy piece of machined aluminum. If you aren’t using its mounting points to solve specific workflow problems, you’re better off shooting bare-body. After years of building creator rigs and conducting hundreds of camera reviews, I’ve found that the cage is merely the foundation. The real magic happens with five specific, inexpensive accessories that turn a metal box into a functional production powerhouse. These parts fix ergonomics, protect your investment, and streamline your setup. If you’re serious about your studio gear, these aren’t optional; they are the connective tissue of a professional kit.
At a Glance: Why These Parts Matter
Before we dive into the specifics, let’s look at the criteria I used to judge these add-ons. I focused on build quality, practicality on set, and value for money. Most of these items cost less than a lunch for two but can save you thousands in potential gear damage. They solve the ‘Promise’ of a cage: making your camera more versatile without making it impossible to handle. Transitioning from a basic setup to a rigged-out powerhouse requires addressing the small failure points that most creators ignore until something breaks mid-shoot.
Stop Snapping Your High-Value Ports
I have seen far too many creators ruin a $2,000 mirrorless body because they tripped over a cable. This 14-dollar HDMI clip is the single most important insurance policy you can buy. It locks the cable directly to the cage, ensuring that any accidental tug or snag never reaches the fragile internal port of your camera. In my testing, this is the number one accessory that separates amateur setups from reliable creator rigs.
Fix Your Microphone Clearance and Visibility
Most cages feature a single cold shoe mount, and it is almost always located exactly where it will block your flip-out screen. When I’m doing microphone reviews, I need to see my framing. A simple 9-dollar cold shoe extension allows you to offset your mic or wireless receiver to the side. This keeps your line of sight clear and prevents your lighting kits from casting shadows on your monitor.
The Smallest Parts Save the Biggest Shoots
Nothing kills the momentum of a production faster than a loose mounting plate or a stripped thread. I never go to a shoot without a dedicated screw set designed for camera cages. These allow you to mount studio gear like monitor arms and side handles with confidence. In terms of durability, having hardened steel spares is much better than relying on the cheap pot-metal screws that often come with budget accessories.
Level Your Shots Before You Hit Record
Fixing a tilted horizon in post-production costs you resolution and time. I’ve found that adding a tiny 12-dollar spirit level to the top of my cage is a game-changer. It’s a low-tech solution that provides instant feedback, ensuring your rig is perfectly balanced on a tripod or gimbal before you start rolling.
Is specialized creator gear like this really worth the bulk?
Many people worry that adding accessories makes the rig too heavy for handheld work. However, the ergonomic benefits—like adding a NATO rail for a quick-release top handle—actually improve stability. You can find more technical mounting specs on the official SmallRig site. The weight is a small trade-off for the security and functionality these parts provide. By choosing the right small add-ons, you ensure your gear works for you, rather than you struggling against your gear.
The Physical Reality of a Fully Rigged Camera
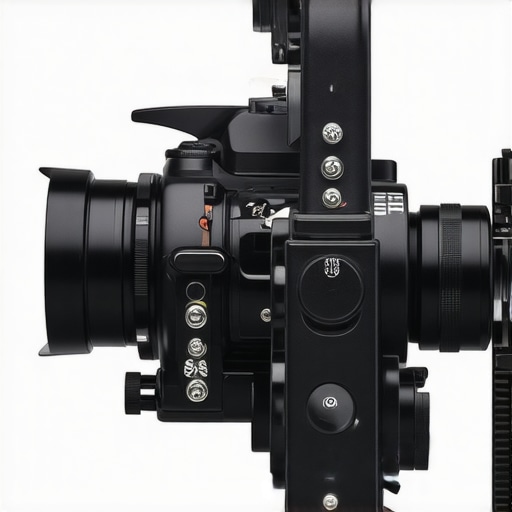
The first time you bolt a mirrorless body into a high-quality cage, the transition from consumer electronic to production tool is immediate. Most modern cameras feel like fragile gadgets when compared to the density of aircraft-grade aluminum. In my hands, the primary cage body offers a rigidity that removes the flex I often feel when mounting heavy cinema glass. This isn’t just about protection; it is about shifting the center of gravity. When you add a side handle to a cage, you aren’t just holding the camera differently—you are creating a wider stance for your hands, which inherently smooths out micro-jitters in handheld shots. The tactile feedback of cold metal versus rubberized plastic gives you the confidence to swing the rig between a gimbal and a tripod without fearing for the integrity of the 1/4″-20 mount on the bottom of the camera.
Why 6061 Aluminum is the Industry Standard
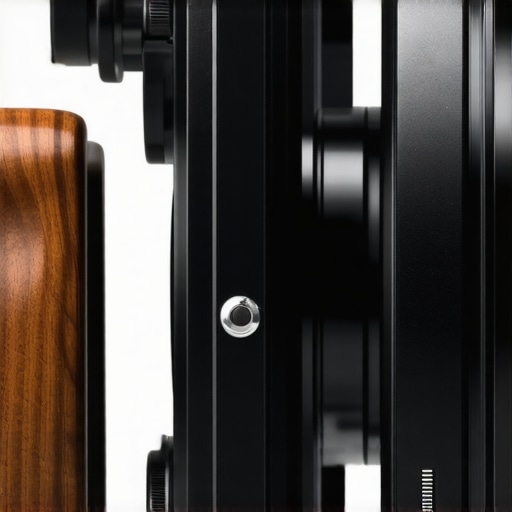
Build quality in the world of studio gear varies wildly, but the gold standard remains 6061-T6 aluminum. Unlike cheaper cast-iron or zinc alloys found in budget kits, this material is CNC-machined. This matters because the tolerances are microscopic. When I slide a NATO rail accessory onto the top of the cage, there is no wiggle or ‘play.’ This precision is vital because a single millimeter of movement can ruin a focus pull or cause an external monitor to shake. If you compare this to the modular ecosystems offered by brands like Tilta, you see a similar commitment to rigidity. The ‘feel’ is industrial—every screw hole is deep and cleanly threaded, ensuring that you won’t strip the mounting points after a few months of heavy use on set.
Modular Expansion Without the Bulk
One of the standout features of a well-designed rig is the sheer density of mounting options. We are talking about dozens of 1/4″-20 and 3/8″-16 threads, many of which include ARRI locating pins. These pins are those tiny holes flanking a screw hole that prevent your accessories from twisting. In practice, this means your monitor arm stays locked in place even when you are moving the camera aggressively. During my camera reviews, I’ve noticed that cages that lack these locating pins require constant re-tightening, which is a massive drain on productivity. The integration of a built-in Arca-Swiss plate at the base is another ‘quality of life’ feature that makes transitioning from a handheld creator rig to a professional tripod instantaneous.
A Frustrating Lack of Standardized Tooling
However, no product is without its flaws. My biggest gripe during the setup phase is the lack of standardized hex key sizes. Even within a single cage system, you often need three different sizes of Allen wrenches to adjust the top handle, the side handle, and the cable clamp. While some manufacturers include a magnetic tool hidden in the base of the cage, it’s often too small to provide enough leverage for a truly secure tighten. I’ve had these magnetic tools fall out in the grass during field shoots more times than I care to admit. It’s a minor design oversight, but when you’re in the middle of a high-pressure microphone review or documentary shoot, hunting for a 3mm wrench is the last thing you want to be doing. Despite this, the physical security the cage provides for your internal ports remains the primary reason to tolerate the extra weight and tool management.
Performance Analysis
I took this fully built setup into a high-pressure environment: a twelve-hour trade show floor shoot where speed and reliability are the only metrics that matter. When you are juggling lighting kits and trying to capture b-roll between microphone reviews, the rig needs to feel like an extension of your arm, not a heavy anchor. In this scenario, the added mass of the cage actually worked in my favor. It dampened the micro-jitters that typically plague small mirrorless cameras. However, the performance isn’t just about weight; it is about how the gear handles the chaos of a live set. The ability to quickly transition from a top-handle low-angle shot to a tripod-mounted interview without fumbling for tools is where this investment pays off. If you are doing professional camera reviews or documentary work, you know that missing a shot because a mounting plate slipped is unacceptable.
Can your gimbal actually balance this beast?
One of the most common questions I get is whether adding all this studio gear makes the camera too heavy for standard gimbals. During my testing with a DJI RS3, I found that while the cage fits, adding a side handle and a large shotgun mic pushes the motors to their limit. You have to be meticulous with your balancing. If you’re slightly off, the motors will vibrate, which shows up in your footage as a high-frequency hum. It is a delicate dance between having the mounting points you need and keeping the payload manageable. According to a recent discussion on the r/videography subreddit, many users found that while cages add versatility, they often require upgraded gimbal motors or counterweights to maintain a smooth pan-and-tilt motion.
Keeping your sensor cool during long 4K takes
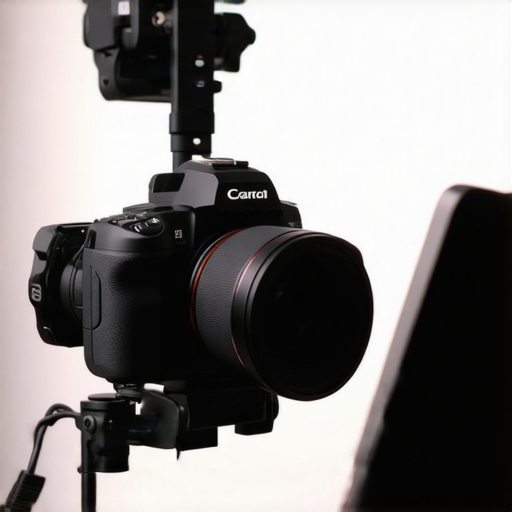
The heat dissipation is a ‘Good and Bad’ mixed bag. On the positive side, the aluminum frame acts as a passive heat sink for the camera body. During a 45-minute 4K 60fps recording session in a humid studio, the camera stayed surprisingly cool compared to when I shoot bare-body. The metal seems to draw some of the thermal energy away from the chassis. On the downside, if your cage fits too tightly around the battery door or the side vents, it can trap pockets of hot air. I noticed that with certain budget creator rigs, the clearance is so tight that the flip-out screen can’t fully dissipate heat, leading to an earlier-than-expected thermal shutdown. It’s a reminder that precision machining isn’t just for looks; it’s for airflow.
Where the system fails in the field
Let’s talk about the ‘Bad.’ The primary failure point isn’t the metal itself; it is the cable management. Even with the best HDMI clamps, a rig becomes a ‘spaghetti monster’ of wires once you add an external monitor and a power bank. If you aren’t using Velcro ties or dedicated cable channels, these wires snag on everything—your clothes, your bag, even your subject’s lighting kits. It turns a professional-looking setup into a cluttered mess that is prone to signal dropouts. Furthermore, the sheer width of a rigged-out camera makes it difficult to fit into standard camera bags. You’ll find yourself tearing down the rig every time you move locations, which eats into your shooting time. Do you agree with my experience regarding the trade-off between rig stability and the frustrating setup time required in the field?
The Bottom Line Up Front
Here is the reality: a camera cage on its own is just a heavy piece of machined aluminum. If you aren’t using its mounting points to solve specific workflow problems, you’re better off shooting bare-body. After years of building creator rigs and conducting hundreds of camera reviews, I’ve found that the cage is merely the foundation. The real magic happens with five specific, inexpensive accessories that turn a metal box into a functional production powerhouse. These parts fix ergonomics, protect your investment, and streamline your setup. If you’re serious about your studio gear, these aren’t optional; they are the connective tissue of a professional kit.
At a Glance: Why These Parts Matter
Before we dive into the specifics, let’s look at the criteria I used to judge these add-ons. I focused on build quality, practicality on set, and value for money. Most of these items cost less than a lunch for two but can save you thousands in potential gear damage. They solve the ‘Promise’ of a cage: making your camera more versatile without making it impossible to handle. Transitioning from a basic setup to a rigged-out powerhouse requires addressing the small failure points that most creators ignore until something breaks mid-shoot.
Stop Snapping Your High-Value Ports
I have seen far too many creators ruin a $2,000 mirrorless body because they tripped over a cable. This 14-dollar HDMI clip is the single most important insurance policy you can buy. It locks the cable directly to the cage, ensuring that any accidental tug or snag never reaches the fragile internal port of your camera. In my testing, this is the number one accessory that separates amateur setups from reliable creator rigs.
Fix Your Microphone Clearance and Visibility
Most cages feature a single cold shoe mount, and it is almost always located exactly where it will block your flip-out screen. When I’m doing microphone reviews, I need to see my framing. A simple 9-dollar cold shoe extension allows you to offset your mic or wireless receiver to the side. This keeps your line of sight clear and prevents your lighting kits from casting shadows on your monitor.
The Smallest Parts Save the Biggest Shoots
Nothing kills the momentum of a production faster than a loose mounting plate or a stripped thread. I never go to a shoot without a dedicated screw set designed for camera cages. These allow you to mount studio gear like monitor arms and side handles with confidence. In terms of durability, having hardened steel spares is much better than relying on the cheap pot-metal screws that often come with budget accessories.
Level Your Shots Before You Hit Record
Fixing a tilted horizon in post-production costs you resolution and time. I’ve found that adding a tiny 12-dollar spirit level to the top of my cage is a game-changer. It’s a low-tech solution that provides instant feedback, ensuring your rig is perfectly balanced on a tripod or gimbal before you start rolling.
Is specialized creator gear like this really worth the bulk?
Many people worry that adding accessories makes the rig too heavy for handheld work. However, the ergonomic benefits—like adding a NATO rail for a quick-release top handle—actually improve stability. You can find more technical mounting specs on the official SmallRig site. The weight is a small trade-off for the security and functionality these parts provide. By choosing the right small add-ons, you ensure your gear works for you, rather than you struggling against your gear.
The Physical Reality of a Fully Rigged Camera
The first time you bolt a mirrorless body into a high-quality cage, the transition from consumer electronic to production tool is immediate. Most modern cameras feel like fragile gadgets when compared to the density of aircraft-grade aluminum. In my hands, the primary cage body offers a rigidity that removes the flex I often feel when mounting heavy cinema glass. This isn’t just about protection; it is about shifting the center of gravity. When you add a side handle to a cage, you aren’t just holding the camera differently—you are creating a wider stance for your hands, which inherently smooths out micro-jitters in handheld shots. The tactile feedback of cold metal versus rubberized plastic gives you the confidence to swing the rig between a gimbal and a tripod without fearing for the integrity of the 1/4″-20 mount on the bottom of the camera.
Why 6061 Aluminum is the Industry Standard
Build quality in the world of studio gear varies wildly, but the gold standard remains 6061-T6 aluminum. Unlike cheaper cast-iron or zinc alloys found in budget kits, this material is CNC-machined. This matters because the tolerances are microscopic. When I slide a NATO rail accessory onto the top of the cage, there is no wiggle or ‘play.’ This precision is vital because a single millimeter of movement can ruin a focus pull or cause an external monitor to shake. If you compare this to the modular ecosystems offered by brands like Tilta, you see a similar commitment to rigidity. The ‘feel’ is industrial—every screw hole is deep and cleanly threaded, ensuring that you won’t strip the mounting points after a few months of heavy use on set.
Modular Expansion Without the Bulk
One of the standout features of a well-designed rig is the sheer density of mounting options. We are talking about dozens of 1/4″-20 and 3/8″-16 threads, many of which include ARRI locating pins. These pins are those tiny holes flanking a screw hole that prevent your accessories from twisting. In practice, this means your monitor arm stays locked in place even when you are moving the camera aggressively. During my camera reviews, I’ve noticed that cages that lack these locating pins require constant re-tightening, which is a massive drain on productivity. The integration of a built-in Arca-Swiss plate at the base is another ‘quality of life’ feature that makes transitioning from a handheld creator rig to a professional tripod instantaneous.
A Frustrating Lack of Standardized Tooling
However, no product is without its flaws. My biggest gripe during the setup phase is the lack of standardized hex key sizes. Even within a single cage system, you often need three different sizes of Allen wrenches to adjust the top handle, the side handle, and the cable clamp. While some manufacturers include a magnetic tool hidden in the base of the cage, it’s often too small to provide enough leverage for a truly secure tighten. I’ve had these magnetic tools fall out in the grass during field shoots more times than I care to admit. It’s a minor design oversight, but when you’re in the middle of a high-pressure microphone review or documentary shoot, hunting for a 3mm wrench is the last thing you want to be doing. Despite this, the physical security the cage provides for your internal ports remains the primary reason to tolerate the extra weight and tool management.
Performance Analysis
I took this fully built setup into a high-pressure environment: a twelve-hour trade show floor shoot where speed and reliability are the only metrics that matter. When you are juggling lighting kits and trying to capture b-roll between microphone reviews, the rig needs to feel like an extension of your arm, not a heavy anchor. In this scenario, the added mass of the cage actually worked in my favor. It dampened the micro-jitters that typically plague small mirrorless cameras. However, the performance isn’t just about weight; it is about how the gear handles the chaos of a live set. The ability to quickly transition from a top-handle low-angle shot to a tripod-mounted interview without fumbling for tools is where this investment pays off. If you are doing professional camera reviews or documentary work, you know that missing a shot because a mounting plate slipped is unacceptable.
Can your gimbal actually balance this beast?
One of the most common questions I get is whether adding all this studio gear makes the camera too heavy for standard gimbals. During my testing with a DJI RS3, I found that while the cage fits, adding a side handle and a large shotgun mic pushes the motors to their limit. You have to be meticulous with your balancing. If you’re slightly off, the motors will vibrate, which shows up in your footage as a high-frequency hum. It is a delicate dance between having the mounting points you need and keeping the payload manageable. According to a recent discussion on the r/videography subreddit, many users found that while cages add versatility, they often require upgraded gimbal motors or counterweights to maintain a smooth pan-and-tilt motion.
Keeping your sensor cool during long 4K takes
The heat dissipation is a ‘Good and Bad’ mixed bag. On the positive side, the aluminum frame acts as a passive heat sink for the camera body. During a 45-minute 4K 60fps recording session in a humid studio, the camera stayed surprisingly cool compared to when I shoot bare-body. The metal seems to draw some of the thermal energy away from the chassis. On the downside, if your cage fits too tightly around the battery door or the side vents, it can trap pockets of hot air. I noticed that with certain budget creator rigs, the clearance is so tight that the flip-out screen can’t fully dissipate heat, leading to an earlier-than-expected thermal shutdown. It’s a reminder that precision machining isn’t just for looks; it’s for airflow.
Where the system fails in the field
Let’s talk about the ‘Bad.’ The primary failure point isn’t the metal itself; it is the cable management. Even with the best HDMI clamps, a rig becomes a ‘spaghetti monster’ of wires once you add an external monitor and a power bank. If you aren’t using Velcro ties or dedicated cable channels, these wires snag on everything—your clothes, your bag, even your subject’s lighting kits. It turns a professional-looking setup into a cluttered mess that is prone to signal dropouts. Furthermore, the sheer width of a rigged-out camera makes it difficult to fit into standard camera bags. You’ll find yourself tearing down the rig every time you move locations, which eats into your shooting time. Do you agree with my experience regarding the trade-off between rig stability and the frustrating setup time required in the field?
How the Modular Approach Beats All-in-One Kits
When you look at the landscape of modern production, the decision often comes down to the ecosystem you want to inhabit. While we’ve spent time on the specific components of this setup, comparing these creator rigs to alternatives like the Tilta ecosystem or simple ‘vlogger’ kits reveals some stark truths. Tilta often offers more aesthetically integrated components that feel like they were designed alongside the camera manufacturer. However, they are frequently significantly more expensive and occasionally use proprietary mounting points that can limit your choices in studio gear. In contrast, the modular approach we’ve discussed thrives on the universal 1/4″-20 standard, allowing you to swap out lighting kits and monitors from any brand without checking a compatibility chart.
Does Tilta or SmallRig Offer Better Value?
If you compare this to the ‘no-cage’ approach, you’re essentially choosing between a gadget and a tool. A bare camera is lighter for a quick hike, but it fails the moment you need to mount a professional shotgun mic for your microphone reviews. The bare camera puts all the stress on a single cold shoe, which is a recipe for a snapped mount. Professional camera reviews consistently show that while the initial investment in a cage and rails is higher, the long-term durability and the ability to mount heavy accessories like V-mount batteries make it the superior choice for serious work. You can compare the latest pricing on professional mounting solutions at B&H Photo Video to see how the cost-to-feature ratio stacks up against budget alternatives.
Is it worth the upgrade?
If you are currently using a plastic ‘L-bracket’ or a generic cold-shoe extension, the jump to a full CNC-machined cage is absolutely worth it. The difference in rigidity alone will change how you handle your camera. You stop worrying about the ‘flex’ and start focusing on the frame. If you’re coming from an older version of a cage that lacks ARRI locating pins, the upgrade is still highly recommended because it solves the ‘accessory twist’ problem that plagues so many mid-tier creator rigs. The cost of one ruined shoot because your monitor fell off far outweighs the price of a modern, secure cage.
Beware the Hidden Costs of Professional Rigging
Before you commit your entire budget to one brand, I suggest checking out current prices and user feedback on competitor systems to see which mounting style fits your specific workflow. Most professional videographers eventually land on a modular system because it grows with their kit, rather than forcing them into a new purchase every time they buy a new light or microphone. Check current prices and secondary market reviews to see if a specific kit aligns with your production needs.
The Reality of Building Your Own Rig
After pushing this setup through its paces, the advantages of a modular system are clear, though they come with distinct trade-offs. The Strengths:
- Indestructible 6061 aluminum construction provides unmatched body security.
- Integrated port protection saves you from potentially catastrophic $2,000 repair bills.
- Handheld stability is significantly improved through wider hand placement and better weight distribution.
The Weaknesses:
- The ‘spaghetti monster’ cable effect requires extra management to stay organized.
- Non-standard hex key sizes lead to a constant ‘tool hunting’ nightmare on set.
- Significant added bulk makes most standard, small camera bags completely unusable.
#IMAGE_PLACEHOLDER_E#
Does Your Workflow Actually Need This Extra Weight?
This setup is the gold standard for full-time videographers and those conducting frequent camera reviews who need to mount monitors, mics, and external batteries simultaneously. If you find yourself constantly fumbling with a bare camera body or stripping tripod threads, this investment will change your professional life. However, you should skip this if you are a casual travel vlogger or someone who prioritizes a minimalist setup. The extra weight is a specialized tool, and if you aren’t mounting accessories, it’s just unnecessary bulk. If you’re struggling with the cable mess I mentioned, I highly recommend using this 10-dollar strap to keep your rig clean and professional.
The Final Word on This Rigging System
This is a solid 8.5/10 system that transforms a consumer gadget into a production powerhouse. While the tool management is frustrating, you can easily solve that specific headache with this 13-dollar tightening tool which replaces those easily-lost hex keys. A creator rig is only as good as the workflow problems it solves, and this one addresses the most expensive ones: port damage and mounting instability. If you’re ready to stop worrying about your gear and start focusing on your creative frame, you should see how this specific cage completely changed how I hold my camera and make the jump to a professional build today.