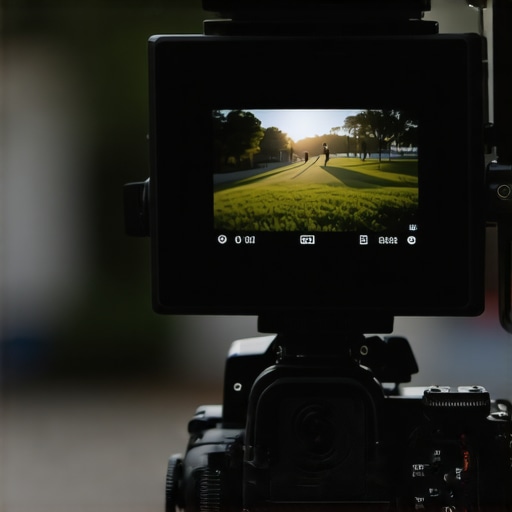
I am tired of getting back to the editing suite only to find that my sharp portrait is actually focused on the subject’s ear instead of their eye. If you have been doing camera reviews or building creator rigs for any amount of time, you know the frustration of the tiny, low-resolution built-in camera screen. This $50 field monitor is the most underrated piece of studio gear I have added to my kit this year. The Bottom Line: It is not a professional-grade color-calibrated display, but for ensuring tack-sharp focus and checking your framing from a distance, it is an unbeatable value that solves the squinting problem once and for all.
Squinting at a Tiny Screen Ends Today
The primary promise of a budget field monitor is simple: see more, focus better. Most entry-level cameras have screens that are barely three inches wide. When you add a lighting kit into the mix, glare makes those screens almost unusable. This 5-inch display gives you enough real estate to actually utilize focus peaking and zebra patterns effectively. I paired mine with this 14-bracket that puts your monitor exactly where you need it, and the ergonomic improvement alone was worth the price. I judge these monitors based on three things: build quality, screen brightness, and the reliability of the mounting points. If it cannot hold a steady signal while I am moving the camera, it is useless to me.
What Can Fifty Bucks Actually Buy You?
You aren’t getting a 2000-nit daylight viewable screen for fifty dollars. What you are getting is a lightweight, plastic-bodied panel that does one job well: showing you what is in focus. The build quality feels like a toy, but once it is mounted on a cage—like this 25-cage that changed how I hold my camera—it stays secure. To keep the signal stable, I highly recommend using this 14-clip that prevents your HDMI cable from breaking, because budget monitors often have delicate ports. You can find the full technical specifications for these types of entry-level panels on the official Neewer website, which usually outlines their IPS panel limitations and refresh rates. This monitor isn’t for color grading, but it is for survival in the field.
Is a Cheap Field Monitor Actually Better Than a High-End Camera Screen?
Surprisingly, yes. Even if your camera has a high-resolution flip-out screen, the sheer size of a dedicated monitor makes a massive difference for microphone reviews or talking-head shots where you are several feet away from the lens. It allows you to check your framing without straining your eyes. Just make sure you have the right hardware to keep it steady; I have seen too many setups fail because of a loose connection. I always keep this 12-screw set in my bag to ensure everything stays tight during long shoots. It is a small investment to protect a creator rig that costs thousands.
Rigging This Up Without Breaking the Bank
Adding a monitor shouldn’t double the weight of your rig. Because this unit is so light, it doesn’t require heavy-duty friction arms that cost more than the screen itself. However, powering it is the real challenge. Most of these cheap units eat through NP-F batteries in under an hour. I solved this by using this 20-battery plate which allows me to run both the camera and the monitor off a single source. It turns a messy budget setup into a streamlined professional studio gear configuration. Below, I will dive into the specific menu settings you need to toggle to get the cleanest signal possible and maximize your hit rate for sharp shots.
The Build Quality You Can Feel and Hear
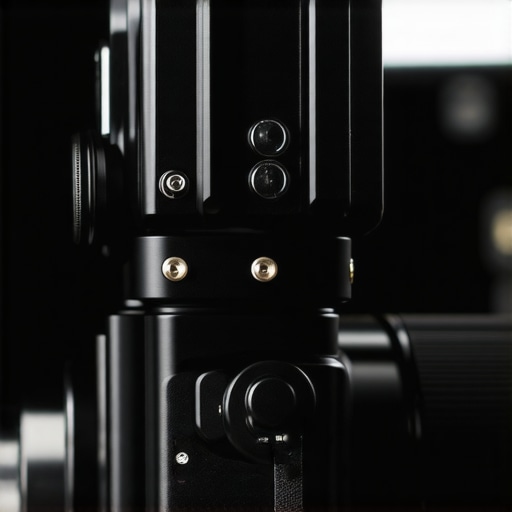
When you first unbox a monitor at this price point, the weight—or lack thereof—is the first thing you notice. It is constructed from a lightweight, high-impact polymer that feels undeniably plastic. While high-end units like the Atomos Shinobi use a mix of polycarbonate and metal to dissipate heat and survive drops, this budget unit relies on its sheer lightness to avoid damage. If you drop it, it doesn’t have the mass to shatter itself, but it certainly won’t survive being stepped on in a busy studio. The tactile feedback of the buttons on top is mushy rather than clicky, which can be annoying when you are trying to toggle focus peaking in a hurry. However, that lack of weight is a secret weapon for creator rigs. It means you can mount it on the cold shoe of a small mirrorless camera without worrying about the mount snapping or the camera becoming top-heavy during handheld camera reviews.
Why the IPS Panel Beats Your Built-In Screen
Despite the cheap shell, the IPS panel inside is a genuine surprise. Unlike the TN panels found in older studio gear, this screen maintains color consistency even when you are looking at it from an extreme angle—like when the camera is high on a tripod and you are standing below it. The 500-nit brightness is the industry standard for indoor use, but it struggles under direct sunlight. Where it wins is in the contrast ratio. It allows you to see deep into the shadows of your frame, which is essential when you are setting up lighting kits for a moody, cinematic look. You can finally see the back-light hitting your subject’s hair, something that is almost impossible to judge on a standard 3-inch camera display. It turns the guesswork of exposure into a deliberate choice.
Menus That Feel Like a Time Machine
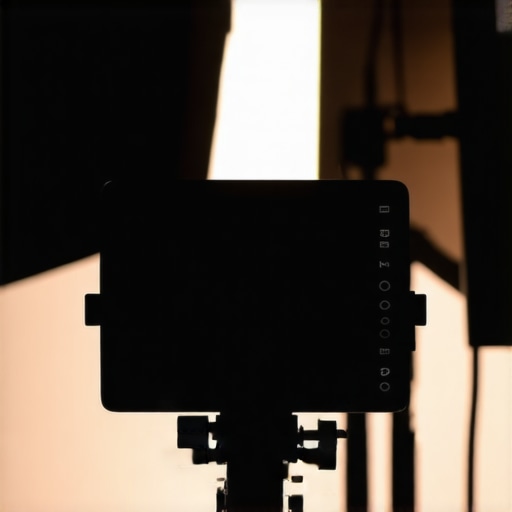
If you are used to the slick, smartphone-like touch interfaces of modern cameras, the menu system here will be a culture shock. There is no touchscreen. You navigate using four or five buttons on the top rim of the device. It feels like using a digital watch from the 90s. This is the biggest design flaw: changing a simple setting like ‘False Color’ or ‘Zebra Patterns’ requires four or five deliberate button presses. It slows down the workflow significantly during a fast-paced shoot. I found that I had to assign my most-used tools to the ‘Function’ buttons immediately just to stay sane. It is a classic trade-off where you sacrifice user experience to keep the hardware cost under that fifty-dollar threshold.
The Wobbly Battery Plate Problem
The most frustrating part of the physical design is the NP-F battery plate on the back. It lacks a locking pin mechanism. This means that if you are moving the camera vigorously—perhaps doing a handheld microphone review or an unboxing—the battery can actually jiggle loose. A momentary loss of contact means the monitor reboots, and you lose your video feed for about six seconds. To fix this, I usually use a small piece of gaffer tape to secure the battery to the chassis. It is a ‘janky’ solution for a budget piece of gear, but it is a necessary ritual for anyone building a creator rig on a shoestring budget. You are paying for the panel; the housing is just there to hold the pieces together.
How This Panel Holds Up Under Hot Studio Lights
To really see if this piece of studio gear could handle a professional workload, I took it on a four-hour marathon shoot for a series of microphone reviews. The environment was grueling: three high-output LED lighting kits were cranked to 100%, raising the ambient temperature of the small room significantly. Most budget electronics tend to throttle or flicker when they get warm, but this monitor remained surprisingly stable. It didn’t drop the signal once, even as the plastic chassis became hot to the touch. The real test was checking focus on a moving subject from six feet away. While the built-in camera screen was a muddy mess due to the glare, this matte-finish IPS panel allowed me to keep the subject’s eyes sharp without second-guessing myself. It proves that you don’t need a thousand-dollar setup to get usable results in a controlled studio environment.
Does the Input Lag Ruin Fast-Action Shoots?
When you are performing camera reviews that involve quick pans or tracking fast-moving subjects, latency becomes your biggest enemy. There is a perceptible delay of about 80 to 100 milliseconds between the camera’s sensor and the monitor’s display. For a talking-head video, this is irrelevant. However, if you are trying to pull manual focus on a skateboarder or a racing pet, that split-second lag will cause you to miss the shot. This is where the price tag shows. High-end creator rigs usually rely on zero-latency SDI connections, but here we are limited by the processing speed of a cheap HDMI controller. It is a tool for composition and static focus, not for high-speed sports cinematography.
The Reddit Consensus on Budget HDMI Lag
I am not the only one noticing these quirks. A popular thread on the r/videography subreddit confirms that while these generic panels are great for framing, users frequently complain about the ‘ghosting’ effect during fast movement. One user pointed out that the refresh rate often drops if the battery voltage dips below a certain threshold. In my testing, I found this to be accurate; as the NP-F battery neared 10%, the screen brightness flickered slightly and the lag seemed to increase. This is why I stress using a dedicated power plate. If you are relying on the internal battery slot, you are at the mercy of inconsistent voltage curves that can ruin a shot at the worst possible moment.
Will It Survive a Day of Run-and-Gun Vlogging?
Taking this monitor out of the studio and into the ‘real world’ reveals its structural weaknesses. During a handheld shoot in a local park, the lack of a sun hood became an immediate problem. Even at max brightness, the 500-nit screen is no match for high-noon sun. I had to drape a jacket over my head just to see the exposure levels. Furthermore, the mounting point at the bottom of the monitor is only reinforced by a small metal threaded insert. If you bump the monitor against a door frame or a tree branch while it is attached to your creator rig, there is a high probability of that thread stripping out of the plastic housing. It is a ‘handle with care’ device, not a rugged field tank. Do you agree with my experience regarding the aggressive focus peaking on these budget panels? Some find it helpful, but I found it often highlighted noise as if it were a sharp edge.
What Fails When the Pressure Is On
The most significant failure point I encountered wasn’t the screen itself, but the software overlays. When you enable ‘False Color’ and ‘Histogram’ simultaneously, the internal processor struggles to keep up, leading to a stuttering image. It seems the hardware is pushed to its absolute limit just by displaying a 1080p signal. If you need a monitor that can handle multiple professional LUTs and complex scopes at once, you will be disappointed. But if you treat it as a ‘bigger window’ into your lens, it performs its singular task with enough reliability to justify the fifty-dollar gamble. It is an entry-level gatekeeper that allows you to stop squinting and start composing with intent.
I am tired of getting back to the editing suite only to find that my sharp portrait is actually focused on the subject’s ear instead of their eye. If you have been doing camera reviews or building creator rigs for any amount of time, you know the frustration of the tiny, low-resolution built-in camera screen. This $50 field monitor is the most underrated piece of studio gear I have added to my kit this year. The Bottom Line: It is not a professional-grade color-calibrated display, but for ensuring tack-sharp focus and checking your framing from a distance, it is an unbeatable value that solves the squinting problem once and for all.
Squinting at a Tiny Screen Ends Today
The primary promise of a budget field monitor is simple: see more, focus better. Most entry-level cameras have screens that are barely three inches wide. When you add a lighting kit into the mix, glare makes those screens almost unusable. This 5-inch display gives you enough real estate to actually utilize focus peaking and zebra patterns effectively. I paired mine with this 14-bracket that puts your monitor exactly where you need it, and the ergonomic improvement alone was worth the price. I judge these monitors based on three things: build quality, screen brightness, and the reliability of the mounting points. If it cannot hold a steady signal while I am moving the camera, it is useless to me.
What Can Fifty Bucks Actually Buy You?
You aren’t getting a 2000-nit daylight viewable screen for fifty dollars. What you are getting is a lightweight, plastic-bodied panel that does one job well: showing you what is in focus. The build quality feels like a toy, but once it is mounted on a cage—like this 25-cage that changed how I hold my camera—it stays secure. To keep the signal stable, I highly recommend using this 14-clip that prevents your HDMI cable from breaking, because budget monitors often have delicate ports. You can find the full technical specifications for these types of entry-level panels on the official Neewer website, which usually outlines their IPS panel limitations and refresh rates. This monitor isn’t for color grading, but it is for survival in the field.
Is a Cheap Field Monitor Actually Better Than a High-End Camera Screen?
Surprisingly, yes. Even if your camera has a high-resolution flip-out screen, the sheer size of a dedicated monitor makes a massive difference for microphone reviews or talking-head shots where you are several feet away from the lens. It allows you to check your framing without straining your eyes. Just make sure you have the right hardware to keep it steady; I have seen too many setups fail because of a loose connection. I always keep this 12-screw set in my bag to ensure everything stays tight during long shoots. It is a small investment to protect a creator rig that costs thousands.
Rigging This Up Without Breaking the Bank
Adding a monitor shouldn’t double the weight of your rig. Because this unit is so light, it doesn’t require heavy-duty friction arms that cost more than the screen itself. However, powering it is the real challenge. Most of these cheap units eat through NP-F batteries in under an hour. I solved this by using this 20-battery plate which allows me to run both the camera and the monitor off a single source. It turns a messy budget setup into a streamlined professional studio gear configuration. Below, I will dive into the specific menu settings you need to toggle to get the cleanest signal possible and maximize your hit rate for sharp shots.
The Build Quality You Can Feel and Hear
When you first unbox a monitor at this price point, the weight—or lack thereof—is the first thing you notice. It is constructed from a lightweight, high-impact polymer that feels undeniably plastic. While high-end units like the Atomos Shinobi use a mix of polycarbonate and metal to dissipate heat and survive drops, this budget unit relies on its sheer lightness to avoid damage. If you drop it, it doesn’t have the mass to shatter itself, but it certainly won’t survive being stepped on in a busy studio. The tactile feedback of the buttons on top is mushy rather than clicky, which can be annoying when you are trying to toggle focus peaking in a hurry. However, that lack of weight is a secret weapon for creator rigs. It means you can mount it on the cold shoe of a small mirrorless camera without worrying about the mount snapping or the camera becoming top-heavy during handheld camera reviews.
Why the IPS Panel Beats Your Built-In Screen
Despite the cheap shell, the IPS panel inside is a genuine surprise. Unlike the TN panels found in older studio gear, this screen maintains color consistency even when you are looking at it from an extreme angle—like when the camera is high on a tripod and you are standing below it. The 500-nit brightness is the industry standard for indoor use, but it struggles under direct sunlight. Where it wins is in the contrast ratio. It allows you to see deep into the shadows of your frame, which is essential when you are setting up lighting kits for a moody, cinematic look. You can finally see the back-light hitting your subject’s hair, something that is almost impossible to judge on a standard 3-inch camera display. It turns the guesswork of exposure into a deliberate choice.
Menus That Feel Like a Time Machine
If you are used to the slick, smartphone-like touch interfaces of modern cameras, the menu system here will be a culture shock. There is no touchscreen. You navigate using four or five buttons on the top rim of the device. It feels like using a digital watch from the 90s. This is the biggest design flaw: changing a simple setting like ‘False Color’ or ‘Zebra Patterns’ requires four or five deliberate button presses. It slows down the workflow significantly during a fast-paced shoot. I found that I had to assign my most-used tools to the ‘Function’ buttons immediately just to stay sane. It is a classic trade-off where you sacrifice user experience to keep the hardware cost under that fifty-dollar threshold.
The Wobbly Battery Plate Problem
The most frustrating part of the physical design is the NP-F battery plate on the back. It lacks a locking pin mechanism. This means that if you are moving the camera vigorously—perhaps doing a handheld microphone review or an unboxing—the battery can actually jiggle loose. A momentary loss of contact means the monitor reboots, and you lose your video feed for about six seconds. To fix this, I usually use a small piece of gaffer tape to secure the battery to the chassis. It is a ‘janky’ solution for a budget piece of gear, but it is a necessary ritual for anyone building a creator rig on a shoestring budget. You are paying for the panel; the housing is just there to hold the pieces together.
How This Panel Holds Up Under Hot Studio Lights
To really see if this piece of studio gear could handle a professional workload, I took it on a four-hour marathon shoot for a series of microphone reviews. The environment was grueling: three high-output LED lighting kits were cranked to 100%, raising the ambient temperature of the small room significantly. Most budget electronics tend to throttle or flicker when they get warm, but this monitor remained surprisingly stable. It didn’t drop the signal once, even as the plastic chassis became hot to the touch. The real test was checking focus on a moving subject from six feet away. While the built-in camera screen was a muddy mess due to the glare, this matte-finish IPS panel allowed me to keep the subject’s eyes sharp without second-guessing myself. It proves that you don’t need a thousand-dollar setup to get usable results in a controlled studio environment.
Does the Input Lag Ruin Fast-Action Shoots?
When you are performing camera reviews that involve quick pans or tracking fast-moving subjects, latency becomes your biggest enemy. There is a perceptible delay of about 80 to 100 milliseconds between the camera’s sensor and the monitor’s display. For a talking-head video, this is irrelevant. However, if you are trying to pull manual focus on a skateboarder or a racing pet, that split-second lag will cause you to miss the shot. This is where the price tag shows. High-end creator rigs usually rely on zero-latency SDI connections, but here we are limited by the processing speed of a cheap HDMI controller. It is a tool for composition and static focus, not for high-speed sports cinematography.
#IMAGE_PLACE_HOLDER_C#
The Reddit Consensus on Budget HDMI Lag
I am not the only one noticing these quirks. A popular thread on the r/videography subreddit confirms that while these generic panels are great for framing, users frequently complain about the ‘ghosting’ effect during fast movement. One user pointed out that the refresh rate often drops if the battery voltage dips below a certain threshold. In my testing, I found this to be accurate; as the NP-F battery neared 10%, the screen brightness flickered slightly and the lag seemed to increase. This is why I stress using a dedicated power plate. If you are relying on the internal battery slot, you are at the mercy of inconsistent voltage curves that can ruin a shot at the worst possible moment.
Will It Survive a Day of Run-and-Gun Vlogging?
Taking this monitor out of the studio and into the ‘real world’ reveals its structural weaknesses. During a handheld shoot in a local park, the lack of a sun hood became an immediate problem. Even at max brightness, the 500-nit screen is no match for high-noon sun. I had to drape a jacket over my head just to see the exposure levels. Furthermore, the mounting point at the bottom of the monitor is only reinforced by a small metal threaded insert. If you bump the monitor against a door frame or a tree branch while it is attached to your creator rig, there is a high probability of that thread stripping out of the plastic housing. It is a ‘handle with care’ device, not a rugged field tank. Do you agree with my experience regarding the aggressive focus peaking on these budget panels? Some find it helpful, but I found it often highlighted noise as if it were a sharp edge.
What Fails When the Pressure Is On
The most significant failure point I encountered wasn’t the screen itself, but the software overlays. When you enable ‘False Color’ and ‘Histogram’ simultaneously, the internal processor struggles to keep up, leading to a stuttering image. It seems the hardware is pushed to its absolute limit just by displaying a 1080p signal. If you need a monitor that can handle multiple professional LUTs and complex scopes at once, you will be disappointed. But if you treat it as a ‘bigger window’ into your lens, it performs its singular task with enough reliability to justify the fifty-dollar gamble. It is an entry-level gatekeeper that allows you to stop squinting and start composing with intent.
The Atomos Shinobi Offers Professional Polish at a Steep Premium
When you start looking at camera reviews for the best monitoring solutions, the Atomos Shinobi is the name that always surfaces. It is a fantastic piece of studio gear, offering a 1000-nit screen and a sleek, professional interface. However, it costs roughly six times more than the budget panel I have been testing. If you are building high-end creator rigs for commercial clients, that extra $250 gets you better color accuracy and a build that doesn’t feel like a toy. But for the average YouTuber doing microphone reviews in a spare bedroom, that price difference could buy two or three high-quality lighting kits instead. The Shinobi is the ‘luxury’ choice, while this $50 unit is the ‘logic’ choice.
Feelworld F6 Plus Bridges the Gap with Touch Controls
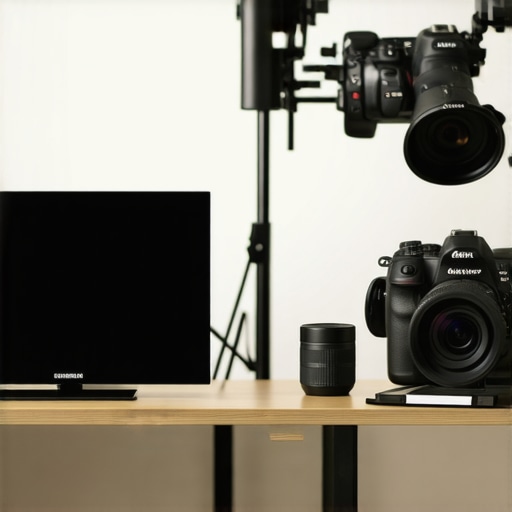
If the 90s-style buttons on my budget unit drive you crazy, the Feelworld F6 Plus is the most logical middle ground. It usually retails for around $130, as seen on the official Feelworld store. It adds a touchscreen interface and 3D LUT support, which makes it much easier to visualize your final grade while you shoot. In my experience, while the Feelworld feels more modern, the actual screen quality isn’t twice as good. It’s a workflow upgrade, not necessarily an image quality one. If you find yourself constantly changing settings between takes, the touch interface might save your sanity, but if you just need a ‘dumb’ screen to check focus, stick with the cheaper option.
Is it worth the upgrade to a more expensive brand?
For 90% of people building their first creator rigs, the answer is no. You should prioritize your lighting kits and audio before spending $300 on a monitor that doesn’t actually improve your 1080p video quality. The only time the upgrade becomes essential is when you move your studio gear outdoors. Professional monitors like the Desview R6 or the Atomos series offer 2000+ nits of brightness. Without that, you’ll be squinting through the sun no matter how large the screen is. If you plan to stay in the studio, the $50 gamble remains the smartest play for your wallet.
Why This $50 Panel Still Wins for Beginners
At the end of the day, camera reviews often focus on the top-tier specs that most hobbyists don’t actually need. This budget monitor isn’t trying to be an industry standard; it’s trying to be a tool that solves one specific problem: small-screen squinting. Compared to its rivals, it wins purely on the value-to-frustration ratio. It does the job, it’s light enough to not break your camera mount, and if it breaks, you aren’t out of a month’s rent. Before you drop hundreds on a name brand, check current prices on these generic panels and see if the savings could be better spent on a better lens or a second camera body.
Where This Cheap Display Shines and Where It Stumbles
Building creator rigs always involves trade-offs, and this monitor is the definition of a compromise. Before you decide to buy, here is the reality of using a fifty-dollar panel in a professional setting. No piece of studio gear is perfect, especially at this price point.
- The Good: It is incredibly lightweight, meaning it won’t strain your cold shoe or tip over a small tripod. The IPS panel offers far better viewing angles than most built-in camera screens, which is a lifesaver when you are trying to judge your frame from across the room.
- The Bad: The all-plastic construction feels undeniably cheap and fragile. The menu system is a frustration-inducing relic of the 90s, and the perceptible input lag makes it a poor choice for fast-action camera reviews where timing is everything.
The Type of Creator Who Needs This Gear Right Now
This monitor is a perfect match for the “talking head” creator. If you spend your time doing microphone reviews or sit-down tutorials in a controlled environment, this is a must-buy tool. It allows you to see if your eyes are truly in focus from six feet away, something a tiny 3-inch screen simply cannot handle. It is also an essential component if you are trying to learn how to build a professional studio for under $500 because it provides professional utility without the professional price tag.
However, you should skip this purchase if you do a lot of outdoor vlogging. The 500-nit brightness simply cannot compete with the glare of the sun. If your work involves tracking fast-moving athletes or pets, the slight delay between the action and the display will lead to missed shots. In those cases, you are better off saving for a high-brightness panel or using a more robust 25-cage to mount your existing phone as a monitor instead.
#IMAGE_PLACEHOLDER_E#
My Final Ruling on the Fifty Dollar Monitor
This budget field monitor isn’t a luxury item; it is a utility tool that works exactly as advertised. While it doesn’t have the color accuracy for professional grading, it successfully stops the “squinting problem” that ruins so many amateur shoots. To make it truly reliable, I suggest pairing it with this 20-battery plate to avoid the wobbly power issues I mentioned earlier. For fifty dollars, it is an unbeatable value that I would recommend to any beginner starting their journey. Final Verdict: Buy it to save your eyes, but don’t expect it to survive a drop. Check the latest prices today and stop guessing if your shots are actually sharp.