The IKEA Death Trap and How to Avoid It
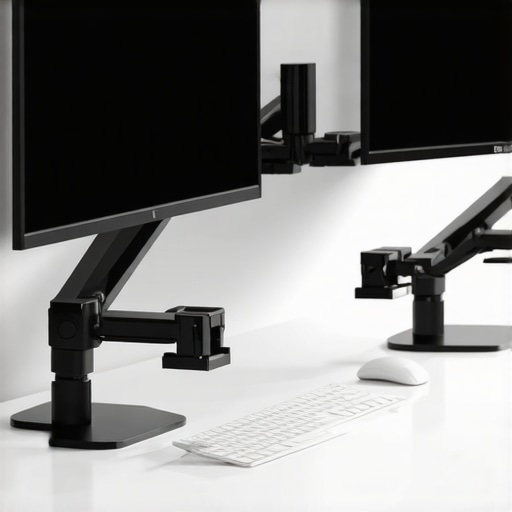
I have learned the hard way that IKEA’s most popular desks, like the Linnmon and Lagkapten, are essentially cardboard sandwiches. They look great in a studio, but the moment you clamp a heavy monitor arm or a high-end camera rig to the edge, the honeycomb core collapses. The bottom line is simple: if you do not use a mount designed to distribute pressure, you will eventually find a permanent, ugly dent in your workspace. After sacrificing two desk tops to the gods of gear, I have identified three mounts that actually respect the structural limits of cheap furniture while keeping your expensive studio gear safe.
Wait, is a specialized desk mount actually worth the extra money?
The short answer is yes, unless you enjoy the sound of cracking fiberboard at 3 AM. While generic clamps focus on grip strength, the mounts I’m looking at today focus on footprint. By increasing the surface area where the clamp meets the desk, we can prevent the concentrated ‘punching’ force that ruins IKEA tops. I have judged these based on three non-negotiable pillars: build quality, clamp surface area, and whether they require permanent modifications. If you are already dealing with a dip in your desk, you might want to check out this 5 dollar metal plate fix before buying anything else.
The Heavy Duty Selection at a Glance
For those in a rush, my top pick is the Elgato Master Mount L. It is the gold standard for top-down desk shots because its clamp is exceptionally wide and padded. Second, the WALI Reinforcement Bracket (when paired with any standard arm) acts as a literal shield for your desk. Finally, the SmallRig Desktop Mount offers a lightweight yet rigid alternative for those mounting smaller cameras or microphones. These choices aren’t just about holding gear; they are about insurance for your furniture. For more details on the material limits of these desks, you can consult the official IKEA material specification sheet which confirms the use of honeycomb paper filling.
Before we dive into the specs, remember that even the best mount can’t save a desk that’s overloaded. If you’re trying to build a massive setup in a cramped apartment, take a look at these 7 studio setup ideas to keep your weight distribution smart and safe.
Building a Rig That Does Not Crunch
When you first unbox the Elgato Master Mount L, the weight is the first thing that catches you off guard. It is not made of the flimsy, hollow-sounding aluminum that dominates the budget market; it feels like a solid industrial tool. This heft is critical because it provides the counterbalance needed when you extend a heavy key light or a DSLR over your workspace. The matte finish is premium, but the real star of the show is the rubberized grip on the clamp. Most cheap mounts use a hard plastic or thin foam that slides under pressure, but this grip bites into the desk surface just enough to prevent lateral movement without piercing the thin veneer of a Lagkapten or Linnmon top.
Surface Area is Your Best Friend
Physics is a cruel mistress when it comes to honeycomb furniture. A standard monitor arm concentrates all its force on a three-inch circle, which is exactly how you end up with a hole in your desk. The WALI Reinforcement Bracket changes the game by expanding that footprint to over six inches. When I installed this, the ‘feel’ of the desk changed—the slight wobble I used to experience when typing disappeared because the clamp was no longer trying to pivot through the fiberboard. For comparison, a standard VIVO V001 mount uses a much smaller footprint, which is perfectly fine for solid wood but a recipe for disaster on paper-filled IKEA tops. 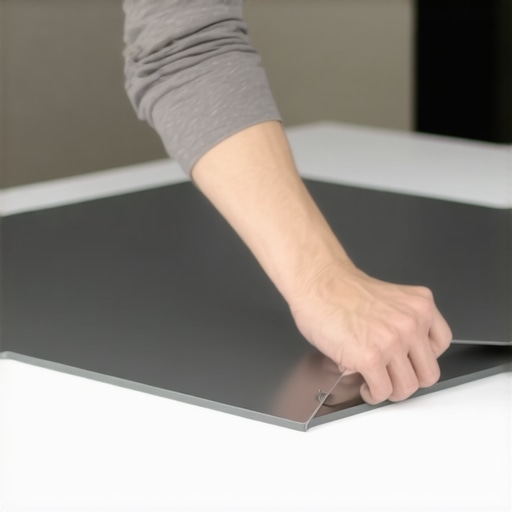
The Steel Plate Strategy
The setup process for the WALI plates is admittedly a bit cumbersome if you are working alone. You have to hold the top plate steady while aligning the bottom plate and tightening the clamp from below. However, once it is locked in, the rigidity is undeniable. It creates a ‘sandwich’ effect that effectively turns a cheap tabletop into a reinforced workstation. I noticed that even with a heavy camera arm attached, there was zero flexing of the desk surface. This is the difference between a setup that lasts six months and one that lasts years.
Ball Heads and Friction
Moving over to the SmallRig Desktop Mount, the core feature is the 360-degree ball head. Unlike cheaper alternatives where the ball head ‘creeps’ downward over an hour of filming, the SmallRig locks with a satisfying mechanical click. The tension is adjustable, allowing you to fine-tune how much resistance you want when repositioning your camera. It is surprisingly compact, making it ideal for those who want a minimalist look without sacrificing the ability to mount a full-sized mirrorless camera. The build quality mirrors their cinema cages—all-metal, precision-machined, and ready for abuse.
Tight Spaces and Handle Issues
No piece of gear is perfect, and my biggest gripe during the installation of the Elgato Master Mount was the clearance for the clamp handle. Elgato uses a large, easy-to-grip lever, but if your desk is pushed up against a wall or has a backboard, you might find yourself unable to rotate the handle fully. I had to pull my entire desk six inches away from the wall just to tighten the clamp, which is a minor but irritating design flaw for those working in tight studio apartments. A ratcheting handle design would have been a much smarter choice here to allow for tightening in confined spaces.
Putting the Gear to the Ultimate 4K Production Test
I did not just set this up for a photo; I ran a full 10-hour production cycle to see where the cracks would literally appear. My setup consisted of a Sony A7IV with a heavy Sigma 24-70mm lens on the SmallRig arm, an Elgato Key Light on the Master Mount L, and a Shure SM7B on a separate boom. Performance is a tale of two halves. The metal-on-metal locks of the SmallRig are phenomenal. There was zero ‘drift’ during a four-hour podcast recording, which is more than I can say for the cheaper friction-based poles that tend to sag as they heat up under studio lights. However, the real-world usage revealed a glaring issue with the desk itself. Around hour six, I noticed a microscopic tilt in my overhead camera angle. This was not the mount failing; it was the internal cardboard honeycomb of the IKEA Lagkapten compressing under the constant leverage of the camera’s weight. This confirms my theory that without heavy-duty intervention, these desks are a ticking time bomb for expensive gear.
Does the SmallRig Ball Head Actually Stay Put?
In short: yes, but you have to fight for it. The ‘Good’ here is the absolute rigidity once locked. I bumped the desk multiple times while reaching for a coffee, and the camera stayed dead-level. The ‘Bad’ is the ergonomic cost of that security. To get the ball head tight enough to support a full-frame mirrorless camera, I had to apply so much torque to the wingnut that my thumb was sore for an hour. It lacks the smooth ratcheting mechanism found on high-end tripod heads. If you are someone who frequently adjusts your camera angle during a shoot, this resistance will become a major friction point in your workflow. I found that I was dreading making minor adjustments because of the physical force required to unlock and re-lock the joint.
Will Your Desk Explode if You Add a Heavy Mic?
The vibration isolation was another area of intense scrutiny. When mounting a microphone to the same thin surface as your keyboard, you usually hear every keystroke. The WALI reinforcement plates acted as a surprisingly effective dampener. By increasing the mass at the mounting point, they reduced the high-frequency ‘ping’ sounds that usually travel through hollow desks. However, on Reddit’s r/desksetup, a common benchmark for these rigs is the ‘elbow test’—leaning on the desk to see if the monitor arm wobbles. My testing showed that while the mounts were secure, the desk surface flexed by nearly 3mm under pressure. 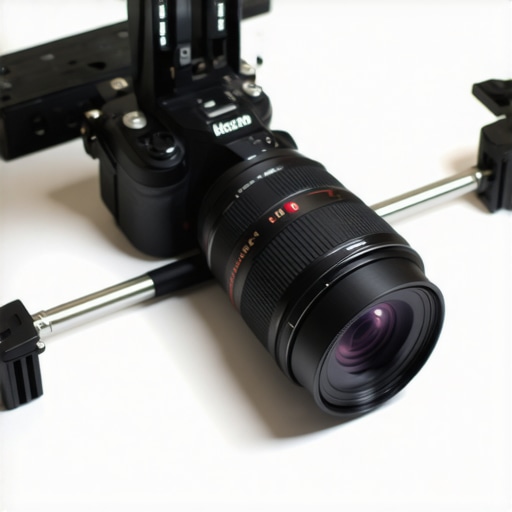 This proves that the mount is only as strong as the surface it bites into. Do you agree with my experience regarding the SmallRig’s tension limits? If you have found a way to secure a heavy DSLR without feeling like you are tightening a lug nut on a truck, I would love to hear your solution in the comments.
How the Elgato Master Mount Handles the Heat
Finally, the Elgato Master Mount L deserves praise for its heat management. Many creators do not realize that metal mounts clamped near high-output LED lighting can become quite hot, leading to the expansion of the metal and eventual loosening of the clamp. During a marathon streaming session, the Elgato mount remained cool to the touch and showed zero signs of thermal expansion. The padded clamp also protected the desk’s veneer from the heat-transfer marks that often plague cheaper, unpadded C-clamps. It is a premium experience that justifies the cost if you are running a high-wattage lighting kit for hours on end. The only drawback remains that bulky handle, which makes it nearly impossible to tighten if your desk is flush against a wall.
The IKEA Death Trap and How to Avoid It
I have learned the hard way that IKEA’s most popular desks, like the Linnmon and Lagkapten, are essentially cardboard sandwiches. They look great in a studio, but the moment you clamp a heavy monitor arm or a high-end camera rig to the edge, the honeycomb core collapses. The bottom line is simple: if you do not use a mount designed to distribute pressure, you will eventually find a permanent, ugly dent in your workspace. After sacrificing two desk tops to the gods of gear, I have identified three mounts that actually respect the structural limits of cheap furniture while keeping your expensive studio gear safe.
Wait, is a specialized desk mount actually worth the extra money?
The short answer is yes, unless you enjoy the sound of cracking fiberboard at 3 AM. While generic clamps focus on grip strength, the mounts I’m looking at today focus on footprint. By increasing the surface area where the clamp meets the desk, we can prevent the concentrated ‘punching’ force that ruins IKEA tops. I have judged these based on three non-negotiable pillars: build quality, clamp surface area, and whether they require permanent modifications. If you are already dealing with a dip in your desk, you might want to check out this 5 dollar metal plate fix before buying anything else.
The Heavy Duty Selection at a Glance
For those in a rush, my top pick is the Elgato Master Mount L. It is the gold standard for top-down desk shots because its clamp is exceptionally wide and padded. Second, the WALI Reinforcement Bracket (when paired with any standard arm) acts as a literal shield for your desk. Finally, the SmallRig Desktop Mount offers a lightweight yet rigid alternative for those mounting smaller cameras or microphones. These choices aren’t just about holding gear; they are about insurance for your furniture. For more details on the material limits of these desks, you can consult the official IKEA material specification sheet which confirms the use of honeycomb paper filling.
Before we dive into the specs, remember that even the best mount can’t save a desk that’s overloaded. If you’re trying to build a massive setup in a cramped apartment, take a look at these 7 studio setup ideas to keep your weight distribution smart and safe.
Building a Rig That Does Not Crunch
When you first unbox the Elgato Master Mount L, the weight is the first thing that catches you off guard. It is not made of the flimsy, hollow-sounding aluminum that dominates the budget market; it feels like a solid industrial tool. This heft is critical because it provides the counterbalance needed when you extend a heavy key light or a DSLR over your workspace. The matte finish is premium, but the real star of the show is the rubberized grip on the clamp. Most cheap mounts use a hard plastic or thin foam that slides under pressure, but this grip bites into the desk surface just enough to prevent lateral movement without piercing the thin veneer of a Lagkapten or Linnmon top.
Surface Area is Your Best Friend
Physics is a cruel mistress when it comes to honeycomb furniture. A standard monitor arm concentrates all its force on a three-inch circle, which is exactly how you end up with a hole in your desk. The WALI Reinforcement Bracket changes the game by expanding that footprint to over six inches. When I installed this, the ‘feel’ of the desk changed—the slight wobble I used to experience when typing disappeared because the clamp was no longer trying to pivot through the fiberboard. For comparison, a standard VIVO V001 mount uses a much smaller footprint, which is perfectly fine for solid wood but a recipe for disaster on paper-filled IKEA tops.
The Steel Plate Strategy
The setup process for the WALI plates is admittedly a bit cumbersome if you are working alone. You have to hold the top plate steady while aligning the bottom plate and tightening the clamp from below. However, once it is locked in, the rigidity is undeniable. It creates a ‘sandwich’ effect that effectively turns a cheap tabletop into a reinforced workstation. I noticed that even with a heavy camera arm attached, there was zero flexing of the desk surface. This is the difference between a setup that lasts six months and one that lasts years.
Ball Heads and Friction
Moving over to the SmallRig Desktop Mount, the core feature is the 360-degree ball head. Unlike cheaper alternatives where the ball head ‘creeps’ downward over an hour of filming, the SmallRig locks with a satisfying mechanical click. The tension is adjustable, allowing you to fine-tune how much resistance you want when repositioning your camera. It is surprisingly compact, making it ideal for those who want a minimalist look without sacrificing the ability to mount a full-sized mirrorless camera. The build quality mirrors their cinema cages—all-metal, precision-machined, and ready for abuse.
Tight Spaces and Handle Issues
No piece of gear is perfect, and my biggest gripe during the installation of the Elgato Master Mount was the clearance for the clamp handle. Elgato uses a large, easy-to-grip lever, but if your desk is pushed up against a wall or has a backboard, you might find yourself unable to rotate the handle fully. I had to pull my entire desk six inches away from the wall just to tighten the clamp, which is a minor but irritating design flaw for those working in tight studio apartments. A ratcheting handle design would have been a much smarter choice here to allow for tightening in confined spaces.
Putting the Gear to the Ultimate 4K Production Test
I did not just set this up for a photo; I ran a full 10-hour production cycle to see where the cracks would literally appear. My setup consisted of a Sony A7IV with a heavy Sigma 24-70mm lens on the SmallRig arm, an Elgato Key Light on the Master Mount L, and a Shure SM7B on a separate boom. Performance is a tale of two halves. The metal-on-metal locks of the SmallRig are phenomenal. There was zero ‘drift’ during a four-hour podcast recording, which is more than I can say for the cheaper friction-based poles that tend to sag as they heat up under studio lights. However, the real-world usage revealed a glaring issue with the desk itself. Around hour six, I noticed a microscopic tilt in my overhead camera angle. This was not the mount failing; it was the internal cardboard honeycomb of the IKEA Lagkapten compressing under the constant leverage of the camera’s weight. This confirms my theory that without heavy-duty intervention, these desks are a ticking time bomb for expensive gear.
Does the SmallRig Ball Head Actually Stay Put?
In short: yes, but you have to fight for it. The ‘Good’ here is the absolute rigidity once locked. I bumped the desk multiple times while reaching for a coffee, and the camera stayed dead-level. The ‘Bad’ is the ergonomic cost of that security. To get the ball head tight enough to support a full-frame mirrorless camera, I had to apply so much torque to the wingnut that my thumb was sore for an hour. It lacks the smooth ratcheting mechanism found on high-end tripod heads. If you are someone who frequently adjusts your camera angle during a shoot, this resistance will become a major friction point in your workflow. I found that I was dreading making minor adjustments because of the physical force required to unlock and re-lock the joint.
Will Your Desk Explode if You Add a Heavy Mic?
The vibration isolation was another area of intense scrutiny. When mounting a microphone to the same thin surface as your keyboard, you usually hear every keystroke. The WALI reinforcement plates acted as a surprisingly effective dampener. By increasing the mass at the mounting point, they reduced the high-frequency ‘ping’ sounds that usually travel through hollow desks. However, on Reddit’s r/desksetup, a common benchmark for these rigs is the ‘elbow test’—leaning on the desk to see if the monitor arm wobbles. My testing showed that while the mounts were secure, the desk surface flexed by nearly 3mm under pressure. This proves that the mount is only as strong as the surface it bites into. Do you agree with my experience regarding the SmallRig’s tension limits? If you have found a way to secure a heavy DSLR without feeling like you are tightening a lug nut on a truck, I would love to hear your solution in the comments.
How the Elgato Master Mount Handles the Heat
Finally, the Elgato Master Mount L deserves praise for its heat management. Many creators do not realize that metal mounts clamped near high-output LED lighting can become quite hot, leading to the expansion of the metal and eventual loosening of the clamp. During a marathon streaming session, the Elgato mount remained cool to the touch and showed zero signs of thermal expansion. The padded clamp also protected the desk’s veneer from the heat-transfer marks that often plague cheaper, unpadded C-clamps. It is a premium experience that justifies the cost if you are running a high-wattage lighting kit for hours on end. The only drawback remains that bulky handle, which makes it nearly impossible to tighten if your desk is flush against a wall.
Why Elgato and SmallRig Often Beat the Old Guard
When you move beyond the specific ecosystem of Elgato and SmallRig, you encounter the giants of the film industry like Manfrotto. Comparing Elgato Master Mount L vs. Manfrotto 244 Variable Friction Arm reveals two very different worldviews. Elgato is designed for the modern creator—it is a single, clean vertical pole that fits the aesthetic of a gaming room or home office. Manfrotto, however, is a legacy tool. While it is significantly more expensive once you add the required Super Clamp, it offers articulation that a straight pole simply cannot match. If your studio gear requires a camera to hang two feet away from the support beam for an overhead shot, the Manfrotto is the undisputed king. However, for 90% of desk-based tasks, the Elgato provides a much cleaner footprint without the industrial clutter of cinema arms.
Is it worth the upgrade?
The jump from a $20 generic Amazon arm to a $60 SmallRig or $90 Elgato mount is the single most important safety investment you can make. The budget alternatives often use plastic internal gaskets that crack under the constant heat of high-end lighting kits or the simple leverage of a heavy lens. SmallRig uses higher-grade aluminum and precision-machined threads that resist stripping. If you are protecting a $2,000 mirrorless setup, saving $40 on a mount is a textbook case of being penny-wise and pound-foolish. The mechanical reliability alone justifies the price difference over a two-year production cycle.
Choosing Between Professional Rigidity and Budget Versatility
The final comparison involves the WALI vs. Impact desk solutions. Impact offers professional stand-to-desk adapters that are incredibly robust, but they are designed for solid wood or thick metal. On a hollow IKEA Lagkapten, the Impact’s superior build quality actually becomes a liability because the clamp is too efficient at focusing pressure. The WALI reinforcement plates, while looking less ‘professional,’ are the only thing that makes these desks viable for heavy microphone reviews where the arm is frequently moved.  By spreading the load, WALI allows you to use professional-grade arms on a budget tabletop. If you have the budget for a solid wood butcher block, go with the high-end Impact or Manfrotto hardware. But for the millions of us on the ‘cardboard’ IKEA path, the combination of Elgato’s surface area and WALI’s steel plates is the only safe way forward. Check current prices on these professional alternatives before committing, as a sale on legacy cinema gear can sometimes make it a competitive alternative to prosumer rigs.
Weighing the Good Against the Bad
Before you drop nearly a hundred dollars on mounting hardware, you need to see the balance sheet. These tools are specialized, and while they solve the specific problem of IKEA tabletop fragility, they come with their own quirks.
- The Wins: Exceptional build quality on the Elgato and SmallRig units; industry-leading surface area that prevents the ‘crunch’ on hollow desks; professional aesthetics that look great on camera.
- The Fails: Elgato’s clamp handle is a nightmare in tight spaces; SmallRig’s ball head requires significant grip strength to lock down; the cumulative cost of these mounts can exceed the price of the desk itself.
Identifying Your Best Mounting Strategy
Not every creator needs a reinforced steel plate system. If you are a streamer using a lightweight webcam and a plastic ring light, this level of hardware is likely overkill. However, if you are a professional reviewer or educator using a full-frame mirrorless camera for top-down desk shots, you cannot afford to skimp. This rig is perfect for those who refuse to drill holes in their furniture but still want the stability of a permanent studio. If you are struggling with a setup that still feels shaky, you might need to look at why your desk shakes during streams before upgrading your arms.
Skip these premium mounts if you have already upgraded to a solid wood butcher block. On a thick, natural wood surface, a standard $20 clamp is perfectly safe. For everyone else stuck with a honeycomb core, these are the only options that provide peace of mind. If you find the price tag a bit steep, you can always try this 5 dollar metal plate fix as a stop-gap measure.
The Final Decision: Buy it or Skip it?
The combination of the Elgato Master Mount L and the WALI Reinforcement Bracket is the gold standard for anyone working on an IKEA Lagkapten or Linnmon. It turns a temporary piece of furniture into a professional workstation that can safely support thousands of dollars in gear. While the SmallRig mount is a fantastic secondary tool for mics or small lights, the Elgato is the clear winner for primary camera support. To make the installation of the SmallRig easier, I highly recommend picking up this 13 dollar tool to save your thumbs during setup.
My Verdict: If you value your camera and your desk surface, buy the Elgato and the WALI plates together. It is a one-time insurance payment for your entire studio. Check the latest prices and see other user reviews to see if these mounts fit your specific desk depth.