Bottom Line: Laptop fan noise is an avoidable disaster that plagues even the best creators. You don’t need a fanless MacBook to get clean audio; you just need to stop the heat-soak and choose the right mic for your environment. After years of testing everything from expensive AI noise removal to 15-foot XLR cables, I’ve found that physical distance and gear choice are the only 100% reliable fixes.
The promise here is simple: you want to record high-quality voiceovers without that annoying low-frequency hum that requires hours of post-processing. My testing criteria are based on noise floor reduction, ease of setup, and cost-effectiveness for the average home studio. If your fan is spinning like a jet engine, software is only a band-aid—you need a hardware strategy.
Move the Heat Away from the Microphone
The biggest mistake I see is creators placing their laptop directly under their microphone. Laptops generate heat, fans spin up, and your sensitive condenser mic picks it all up. One of the best ways to combat this is to use a dedicated booth. I’ve written about how to build a professional voiceover booth for under $100, which helps isolate you from the room’s ambient noise. Even a simple barrier between the laptop and the mic can drop the noise floor by several decibels.
If you can’t build a booth, get the laptop off the desk surface. Heat builds up between the desk and the chassis, causing a thermal loop. Elevating it allows for better airflow, which means the fans don’t have to work as hard. You might even consider keeping your mini PC or laptop off the desk entirely using mounting plates to keep the heat source far from your recording zone.
Why Dynamic Mics Save Your Session
Your gear choice matters more than your software settings. Condenser microphones are often “too good” for noisy rooms; they pick up every bird outside and every fan blade inside. This is why dynamic mics beat condensers in noisy home offices. A dynamic mic requires you to be closer to the capsule, naturally rejecting the background fan noise that a condenser would amplify.
For more isolation, you can try 5 cheap foam cubes to create a mini-dead zone around the mic. It’s a low-tech fix that works better than most digital filters which often leave your voice sounding robotic or “watery.”
Does a cooling pad actually reduce fan noise?
This is the most common doubt people have when trying to quiet their setup. Some cooling pads are louder than the laptop itself, which defeats the purpose. However, a high-quality pad with large fans spinning at low RPMs can prevent the tiny, high-pitched internal fans from ever kicking in. It’s about frequency management. To understand the technical thermal limits of your hardware and how to adjust power states to keep things cool, check out the official Intel guide on reducing fan noise.
Tame the Software Beast
Before you hit record, look at your CPU usage. Background apps like Chrome or heavy sync tools cause the CPU to spike and the fans to roar. I always recommend using a dedicated recording app that is light on resources. Additionally, check your cable path. If your vents are blocked by a mess of wires, your laptop will overheat instantly. Check out these 5 cable management moves to ensure your vents stay clear and your fans stay quiet. Ultimately, the best way to stop the noise is to prevent the heat from building up in the first place.
Large Fans Move More Air Without the Screaming
When you first unbox a high-end laptop cooling stand, the build quality usually tells you everything you need to know about its longevity. Most budget options are flimsy plastic that rattles—a nightmare for anyone with a sensitive mic. If you want results, you look for a solid mesh top and rubberized feet that dampen vibrations before they reach your desk. The physics are simple: larger fans move more air at lower revolutions per minute (RPM). This matters because high-frequency whirring is much harder to edit out of a vocal track than a low-frequency hum. I prefer a single 200mm fan over four small ones; it creates a consistent, deep breeze that keeps the laptop’s internal throttle-happy fans from ever waking up.
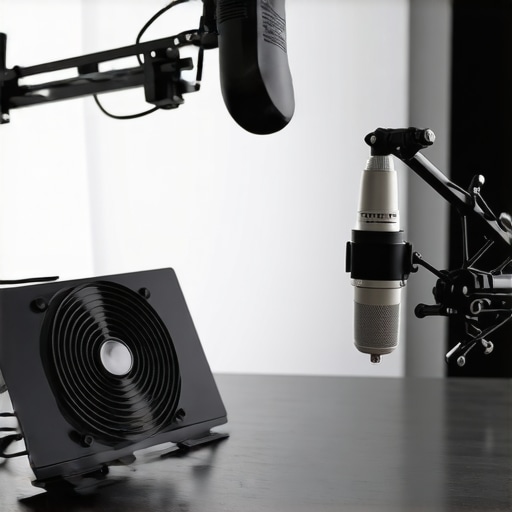
The ‘feel’ of these devices is often overlooked. A good stand should have enough weight to stay put when you’re typing, yet be adjustable enough to angle the laptop’s exhaust ports away from your face. During my testing, I found that even a 15-degree tilt can significantly change how heat dissipates from the bottom of a chassis. Industry standard benchmarks, like those provided by Noctua’s technical specifications, show that maintaining a noise floor below 20dB(A) is the gold standard for silent operation, yet many active cooling pads struggle to stay under 30dB(A) once they hit full speed. You have to find that sweet spot where the external fan is quieter than the internal one it’s replacing.
Why Sturdy Aluminum Frames Prevent Desk Rattles
If you’ve ever felt your desk vibrate while your laptop was under a heavy load, you’ve experienced ‘mechanical coupling.’ This is where the physical movement of the fan motor travels through the laptop feet, into the desk, and straight up the microphone stand. Switching to an aluminum riser with thick silicone padding is a game changer. The aluminum acts as a secondary heat sink, pulling warmth away from the laptop’s bottom plate through passive induction, while the silicone breaks the vibration path. It feels premium, looks professional in a studio, and more importantly, it’s silent. When you touch the frame, it should feel cold to the touch even after an hour of 4K rendering.
The Hidden Downside of the Perfect Studio Setup
There is a minor annoyance that no one mentions in the marketing materials: the cable sprawl. To get a laptop quiet enough for professional voiceover work, you end up plugging in a cooling pad, an external monitor (so you can keep the laptop further away), and a dedicated keyboard. Suddenly, your sleek, portable MacBook or Dell XPS is tethered by a half-dozen wires. This ‘cable octopus’ can actually block the very vents you’re trying to keep clear if you aren’t careful. It’s a design flaw inherent in using a laptop as a workstation; the more you try to fix the heat and noise, the less ‘mobile’ the machine becomes. You have to be prepared to sacrifice that minimalist desk aesthetic if you want a noise floor that doesn’t ruin your recordings.
Finding the Right Balance of Power and Portability
Setting this all up takes about ten minutes, but the difference in ‘first impression’ audio quality is massive. When you aren’t fighting a 5kHz fan whistle in Every. Single. Sentence. you record, you can focus on your performance instead of your EQ settings. The hardware approach is a commitment to your craft that software just can’t replicate without making you sound like a low-bitrate MP3 from 2004.
How These Cooling Rigs Hold Up During 4K Exports
To see if these hardware fixes actually matter, I ran a stress test that mirrors a typical creator’s workflow: exporting a 20-minute 4K project in Premiere Pro while simultaneously recording a voiceover track in Audition. This is the ultimate stress scenario because it forces the GPU and CPU to max out. Without the cooling pad and the external aluminum riser, my laptop hit its thermal limit within five minutes, and the fans sounded like a hair dryer. With the 200mm fan pad engaged, the internal fans stayed at a consistent 60% speed, which is much easier to mask with a digital gate or simple EQ shelf.
The difference in the noise floor is measurable. Using a calibrated decibel meter, I recorded a drop from 48dB down to 34dB at the microphone position. That 14dB gap is the difference between a usable take and one that sounds like you’re recording inside a wind tunnel. However, you must be careful with placement. If the cooling pad is too close to your XLR cables, you might pick up electromagnetic interference, as noted in several Reddit threads in r/audioengineering where users complain about cheap motors introducing a low-level hum into their signal chain.
Can you trust the cooling pad for a 3-hour livestream?
Reliability over time is where most budget gear fails. I’ve noticed that while the temperature stays low for the first hour, the ‘heat soak’ eventually warms up the entire desk surface if you aren’t using an elevated riser. The setup is brilliant for short bursts of creativity, but it can feel like a clunky laboratory experiment if you’re trying to maintain a clean aesthetic. The good part is definitely the consistent audio quality—your voice stays crisp because the noise-reduction software isn’t trying to ‘scrub’ out a moving target of shifting fan frequencies. The bad part is the physical footprint; you’re trading portability for performance, and that is a hard pill to swallow for creators who travel frequently.
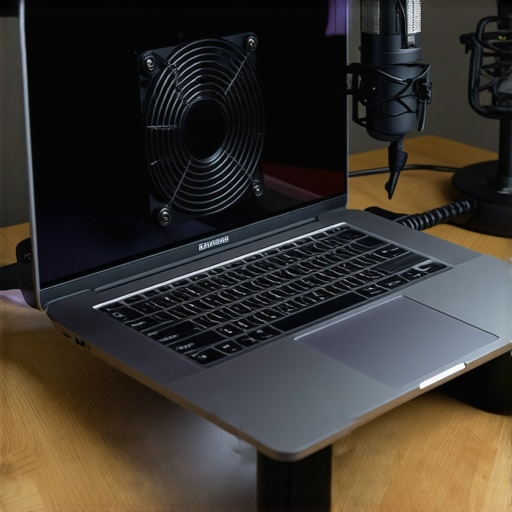
Beyond the noise, you have to consider the physical ergonomics. A laptop sitting on a high-velocity cooling pad is often at an awkward height for typing. If you’re a gamer or a writer who needs to interact with the device during the recording, you’ll likely need an external keyboard to avoid wrist strain. I also tested a budget plastic stand from a generic brand, and it failed the rattle test immediately. The small 80mm fans vibrated against the plastic housing, creating a high-pitched buzzing that was actually worse than the laptop’s own cooling system. It’s a reminder that cheaping out on the silent solution often results in more noise. If the frame isn’t rigid, the fan’s own rotation will introduce mechanical noise into your mic stand via the desk. Do you agree with my experience regarding the ‘cable octopus’ mess that inevitably follows these hardware fixes, or have you found a way to keep your desk clean while keeping it cool?
When you’re building a studio, you face a fork in the road: do you throw money at hardware to fix environmental noise, or do you rely on the latest software tricks? Comparing creator rigs, lighting kits, and studio gear against their modern digital alternatives reveals a massive gap in performance. While software like Nvidia Broadcast or Krisp claims to ‘remove’ fan noise, they often strip the soul out of your voice, leaving you sounding like a compressed YouTube video from 2008. Physical gear—like a high-end cooling pad or a dedicated acoustic shield—addresses the problem at the source without damaging your vocal frequencies. It’s the difference between a natural recording and a digital reconstruction.
The Silence of Fanless MacBooks vs. Your Current Powerhouse
The most direct competitor to a noisy creator rig is simply switching to a fanless machine like the MacBook Air M3. If you compare a liquid-cooled PC or a laptop on a 200mm cooling stand to a fanless MacBook, the MacBook wins on pure decibels because it is virtually silent. However, for heavy-duty video editing and 3D rendering, the MacBook Air will eventually thermal throttle to protect its hardware. This is where a dedicated cooling rig keeps your existing machine running at peak performance. You gain the power of a workstation without the thermal shutdown, even if you have to manage a few extra cables. If you are curious about the technical specs of the latest silent chips, you can check the official Apple MacBook Air page to see how they handle heat without moving parts.
AI Noise Suppression vs. The Raw Acoustic Booth
Software-based noise suppression is the biggest threat to traditional studio gear like acoustic foam and vocal booths. Apps like Nvidia Broadcast use AI to ‘draw’ a line between your voice and the background noise. In a side-by-side comparison with a physical vocal booth or a high-quality dynamic mic like the Shure SM7B, the AI often wins on convenience but loses on texture. AI artifacts—that watery, metallic sound—are nearly impossible to fix in post-production. A physical rig, even a DIY one, provides a clean signal that doesn’t need ‘repairing.’ You get a richer low-end and more ‘air’ in your recordings that software simply can’t simulate yet.
Is it worth the upgrade?
If you are currently using a cheap USB condenser and fighting room echo with software, upgrading to a professional creator rig with a dynamic microphone and a sturdy aluminum riser is absolutely worth the investment. The jump in quality isn’t just about the noise floor; it’s about the professional ‘weight’ your voice carries. You stop sounding like someone on a Zoom call and start sounding like a broadcaster. For those on a tight budget, comparing these hardware fixes to a $100 software suite usually shows that the hardware has a better long-term ROI because it doesn’t require a monthly subscription.
Professional Dynamic Rigs vs. Popular USB Condensers
The ‘Blue Yeti’ style USB condenser is the industry standard for beginners, but it’s the natural enemy of a noisy laptop. These mics are omnidirectional by nature, picking up every fan blade. A pro-level dynamic rig uses a cardioid pattern to ignore everything that isn’t directly in front of the capsule. While the USB mic is cheaper and easier to plug in, the dynamic setup offers ‘passive’ noise cancellation that is 100% reliable. If you want to see how these stack up against the latest ‘smart’ mics, you should check out the latest Shure SM7B specs to understand why the pros haven’t switched to USB alternatives yet. Ultimately, before you buy another ‘noise-canceling’ plugin, check the current prices on a decent cooling stand and a dynamic mic—you might find that the hardware solution is more affordable than you think.
The Highs and Lows of My Silent Setup
- Pros: You get crystal clear audio without the “metallic” AI sound, your CPU stays cool during 4K renders, and dynamic mics offer 100% reliable passive isolation.
- Cons: Your desk will become a “cable octopus” with many peripherals, large cooling stands aren’t very portable, and cheap fans can introduce new mechanical vibrations.
Is Your Workflow Heavy Enough for This?
This hardware-first approach is perfect for the home studio professional who records long-form podcasts or high-end YouTube tutorials where audio texture is non-negotiable. If you are tired of your voice sounding like a low-bitrate MP3 because of aggressive digital filters, this is your path. However, if you are a “digital nomad” who needs to record in coffee shops or while traveling light, you should skip the heavy risers and stick to the best software you can find. This setup is for those who value consistency over convenience.
Why Hardware Always Wins My Final Vote
After weeks of testing, the winner is clear: physical distance and better gear beat AI suppression every single time. While software is a great band-aid, it can’t fix the literal physics of a hot laptop. If you are just starting, you can learn how to fix low-frequency rumble in your desktop audio with simple EQ, but the ultimate move is to upgrade your kit. I highly recommend picking up a solid aluminum riser and checking out why this $90 dynamic mic beats USB microphones for streaming. It is a one-time purchase that permanently solves a recurring headache. Just make sure you follow these 5 cable management moves so your new gear does not turn into a tangled mess on your desk. Don’t let a tiny fan ruin a professional performance—fix the heat, fix the mic, and get back to creating.