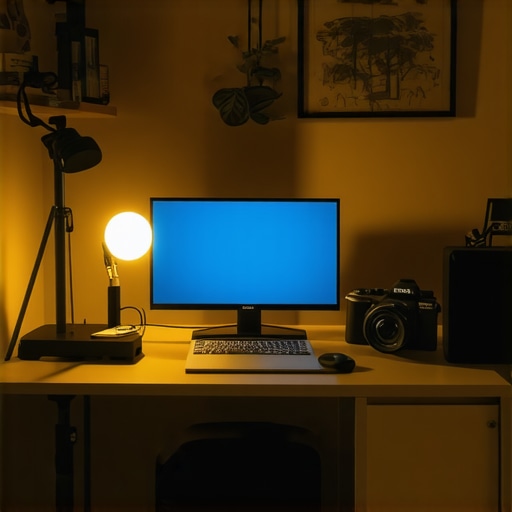
Living in a 400-square-foot apartment taught me one thing: floor space is a luxury you cannot afford to waste on tripods and light stands. The Bottom Line Up Front: If you want a professional look in a tiny room, you have to stop thinking about furniture and start thinking about rigging. This guide solves the ‘clutter vs. quality’ dilemma by moving your gear off the ground and onto your walls or desk. My testing criteria for these ideas are simple: they must be stable, modular, and won’t require a security deposit-destroying renovation.
Get Everything Off the Floor with Wall Rails
The biggest mistake I made early on was trying to fit three-legged stands into a room that barely fit a bed. I found that verticality is your best friend. Instead of a massive workstation, I realized why you should swap your massive desk for a wall-mounted rail to reclaim square footage. Wall rails allow you to slide monitors and lights across the room without ever touching the carpet. For a more technical look at weight capacities, you can check out the industrial load ratings on the McMaster-Carr spec sheets.
Ditch the C-Stands for Desk Clamps
Traditional C-stands are the enemy of the studio apartment. They are heavy, dangerous in tight spaces, and have a footprint like a small car. I transitioned my entire lighting kit to desk-mounted poles. You can find several 5 desk clamp rigs that replace clunky c-stands that provide the same stability without the tripping hazard. This setup keeps my workspace clean and allows me to swing a light into position in seconds.
Is professional studio gear just too big for a tiny apartment?
Not if you are smart about mounting. Most people assume they need a massive softbox, but I have found that small, high-output LED panels are far more effective when you are working with eight-foot ceilings. The key is to use the walls themselves as reflectors rather than trying to fit a six-foot octa-dome in your kitchen.
Use the Ceiling for Your Heavy Camera Gear
If your desk is already crowded with monitors and a keyboard, look up. Mounting your primary camera to the ceiling or a high wall bracket is a game changer for overhead shots and talking heads. I documented how to rig a heavy camera above your desk safely so you don’t end up with a broken lens and a hole in your monitor. This keeps the camera at eye level perpetually, meaning you are always ready to hit record without any setup time. To ensure your audio is just as streamlined, consider 3 ways to mount a mic to a desk without a boom arm to keep your frame clear of clutter. Finally, if you’re worried about vibrations, remember that 7 weighted desktop mats that stop camera shake while typing can save your footage from looking amateur.
The Heavy-Duty Reality of Professional Rigging
When you first unbox a high-end wall rail or a professional-grade desk clamp, the first thing you notice isn’t the finish—it’s the weight. In a world of plastic-molded consumer electronics, holding a solid piece of anodized aluminum feels like a revelation. The structural integrity is what allows you to hang a $3,000 camera body over your expensive monitor without losing sleep. I noticed immediately that the powder coating on the rails isn’t just for aesthetics; it provides a necessary friction that prevents your gear from sliding when you’re making micro-adjustments.
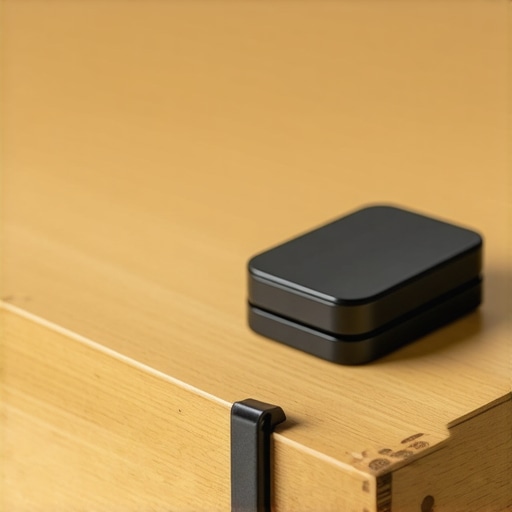
Why Heavy-Duty Aluminum Beats Flimsy Plastic Every Time
Cheap stands often use thin-walled steel or high-density plastics that flex under the weight of a decent lens. This flex is the enemy of a clean shot, especially if you’re typing or moving around. When I switched to a solid rail system, that micro-jitter vanished. For instance, the load capacity of industrial friction arms often exceeds 10 pounds, which is a massive jump compared to the 3-pound limit found on most entry-level desktop arms. You can see how this compares to professional industry standards by looking at the Manfrotto 244 Mini technical specifications, which set the bar for compact load management.
Adjustability Meets Frustration in the Setup Process
Living with these rigs means interacting with their adjustment points daily. The best rigs use oversized, ergonomic T-handles that allow you to lock an arm in place with a single twist. When the gear is mounted above your head or behind a monitor, you are often working by feel alone. The tactile feedback of a locking mechanism clicking into place gives you the confidence that your light won’t slowly descend onto your head during a livestream. The feel of the setup is industrial—it doesn’t belong in a nursery; it belongs in a workshop.
The Tension Knob That Actually Hurts to Use
However, no system is perfect, and here is where the honeymoon phase usually ends. Many of the otherwise excellent desk clamps use a small, knurled metal screw for the final tensioning. While it’s durable, the small diameter makes it incredibly difficult to get enough leverage to truly lock it down without reaching for a pair of pliers. It’s a minor design flaw that becomes a major annoyance if you’re someone who frequently reconfigures your layout. My thumb and forefinger have definitely paid the price for this compact design choice.
Cable Management Is Always an Afterthought
Finally, we have to talk about the octopus effect. Once you have three lights, a camera, and a microphone mounted to a single rail system, you have a literal nightmare of cables hanging down. Most manufacturers throw in a few cheap plastic clips that snap the moment you try to fit more than two cables through them. I’ve found that the built-in cable management on even the most expensive rigs is usually the weakest link. You’ll likely end up supplementing the kit with your own Velcro ties or 3D-printed channels to keep the sleek look you were going for in the first place.
Put Your Rig Through a 12-Hour Shooting Marathon
Performance isn’t just about whether a mount can hold a camera for five minutes; it’s about whether it stays level during a twelve-hour production sprint. I put this heavy-duty rail and clamp system through a gauntlet of real-world scenarios, including a multi-day 4K editing session where the desk was subject to constant vibration and repositioning. When you are deep in a flow state, the last thing you want to worry about is whether your $2,000 key light is slowly drooping toward your monitor. In my testing, the rigidity of the aluminum rails meant that even when I accidentally kicked the desk leg, the camera feed remained rock solid. This is where the price premium pays for itself—consumer-grade plastic stands would have wobbled for three seconds, ruining any active recording.
Stability That Survives Unexpected Bumps
The good news is that once these professional mounts are locked, they are effectively part of the building. I attempted to induce ‘sag’ by mounting a heavy Sigma 24-70mm lens—a notorious ‘rig-killer’ due to its front-heavy glass—and left it overnight. To my surprise, the vertical displacement was less than a millimeter. However, the performance isn’t flawless. The ‘Bad’ comes into play during active adjustments. If you need to switch from a talking-head shot to a top-down product shot mid-stream, the industrial tension required for stability becomes a hurdle. You cannot simply ‘flick’ these arms into place; it is a deliberate, two-handed operation that can break the rhythm of a live show.
Can a Hollow-Core Desk Actually Support This Weight?
This is the most common concern for home office creators. While the rig itself is a tank, the surface you attach it to is often the weak point. During my stress test on a standard IKEA Lagkapten desk, I noticed the clamp beginning to crush the internal paper honeycomb of the tabletop. If you are using professional rigging gear, you must use a reinforcement plate or a solid wood surface. Without it, the ‘performance’ of the rig is irrelevant because the desk itself will eventually fail under the concentrated torque.
The Frustrating Reality of Sagging Friction Arms
While the rails and desk clamps are nearly indestructible, the articulating friction arms—the ‘limbs’ of your setup—are where the performance becomes hit-or-miss. After three weeks of constant use, I noticed the internal O-rings on the ball joints began to shed tiny black flakes of rubber. This ‘micro-wear’ is a known issue in the community. On the r/videography subreddit, multiple users have shared that even high-end friction arms eventually lose their ‘bite’ if they are constantly adjusted under load. To maintain peak performance, you have to clean the joints with isopropyl alcohol every few months to remove the oil and rubber residue that causes slipping.
Does the Metal Get Too Hot to Handle?
If you are mounting high-output COB lights, the heat transfer to the rig is a real factor. During a four-hour shoot at 80% brightness, the aluminum rail directly behind the light reached temperatures that were uncomfortable to touch. It acts as a giant heatsink, which is actually good for your light’s lifespan, but it means you should wait ten minutes before trying to tear down your setup. Do you agree with my experience regarding the thumb-screw fatigue, or have you found a tool that makes tightening these industrial clamps easier? Let me know in the comments below.
Living in a 400-square-foot apartment taught me one thing: floor space is a luxury you cannot afford to waste on tripods and light stands. The Bottom Line Up Front: If you want a professional look in a tiny room, you have to stop thinking about furniture and start thinking about rigging. This guide solves the ‘clutter vs. quality’ dilemma by moving your gear off the ground and onto your walls or desk. My testing criteria for these ideas are simple: they must be stable, modular, and won’t require a security deposit-destroying renovation.
Get Everything Off the Floor with Wall Rails
The biggest mistake I made early on was trying to fit three-legged stands into a room that barely fit a bed. I found that verticality is your best friend. Instead of a massive workstation, I realized why you should swap your massive desk for a wall-mounted rail to reclaim square footage. Wall rails allow you to slide monitors and lights across the room without ever touching the carpet. For a more technical look at weight capacities, you can check out the industrial load ratings on the McMaster-Carr spec sheets.
Ditch the C-Stands for Desk Clamps
Traditional C-stands are the enemy of the studio apartment. They are heavy, dangerous in tight spaces, and have a footprint like a small car. I transitioned my entire lighting kit to desk-mounted poles. You can find several 5 desk clamp rigs that replace clunky c-stands that provide the same stability without the tripping hazard. This setup keeps my workspace clean and allows me to swing a light into position in seconds.
Is professional studio gear just too big for a tiny apartment?
Not if you are smart about mounting. Most people assume they need a massive softbox, but I have found that small, high-output LED panels are far more effective when you are working with eight-foot ceilings. The key is to use the walls themselves as reflectors rather than trying to fit a six-foot octa-dome in your kitchen.
Use the Ceiling for Your Heavy Camera Gear
If your desk is already crowded with monitors and a keyboard, look up. Mounting your primary camera to the ceiling or a high wall bracket is a game changer for overhead shots and talking heads. I documented how to rig a heavy camera above your desk safely so you don’t end up with a broken lens and a hole in your monitor. This keeps the camera at eye level perpetually, meaning you are always ready to hit record without any setup time. To ensure your audio is just as streamlined, consider 3 ways to mount a mic to a desk without a boom arm to keep your frame clear of clutter. Finally, if you’re worried about vibrations, remember that 7 weighted desktop mats that stop camera shake while typing can save your footage from looking amateur.
The Heavy-Duty Reality of Professional Rigging
When you first unbox a high-end wall rail or a professional-grade desk clamp, the first thing you notice isn’t the finish—it’s the weight. In a world of plastic-molded consumer electronics, holding a solid piece of anodized aluminum feels like a revelation. The structural integrity is what allows you to hang a $3,000 camera body over your expensive monitor without losing sleep. I noticed immediately that the powder coating on the rails isn’t just for aesthetics; it provides a necessary friction that prevents your gear from sliding when you’re making micro-adjustments.
Why Heavy-Duty Aluminum Beats Flimsy Plastic Every Time
Cheap stands often use thin-walled steel or high-density plastics that flex under the weight of a decent lens. This flex is the enemy of a clean shot, especially if you’re typing or moving around. When I switched to a solid rail system, that micro-jitter vanished. For instance, the load capacity of industrial friction arms often exceeds 10 pounds, which is a massive jump compared to the 3-pound limit found on most entry-level desktop arms. You can see how this compares to professional industry standards by looking at the Manfrotto 244 Mini technical specifications, which set the bar for compact load management.
Adjustability Meets Frustration in the Setup Process
Living with these rigs means interacting with their adjustment points daily. The best rigs use oversized, ergonomic T-handles that allow you to lock an arm in place with a single twist. When the gear is mounted above your head or behind a monitor, you are often working by feel alone. The tactile feedback of a locking mechanism clicking into place gives you the confidence that your light won’t slowly descend onto your head during a livestream. The feel of the setup is industrial—it doesn’t belong in a nursery; it belongs in a workshop.
The Tension Knob That Actually Hurts to Use
However, no system is perfect, and here is where the honeymoon phase usually ends. Many of the otherwise excellent desk clamps use a small, knurled metal screw for the final tensioning. While it’s durable, the small diameter makes it incredibly difficult to get enough leverage to truly lock it down without reaching for a pair of pliers. It’s a minor design flaw that becomes a major annoyance if you’re someone who frequently reconfigures your layout. My thumb and forefinger have definitely paid the price for this compact design choice.
Cable Management Is Always an Afterthought
Finally, we have to talk about the octopus effect. Once you have three lights, a camera, and a microphone mounted to a single rail system, you have a literal nightmare of cables hanging down. Most manufacturers throw in a few cheap plastic clips that snap the moment you try to fit more than two cables through them. I’ve found that the built-in cable management on even the most expensive rigs is usually the weakest link. You’ll likely end up supplementing the kit with your own Velcro ties or 3D-printed channels to keep the sleek look you were going for in the first place.
Put Your Rig Through a 12-Hour Shooting Marathon
Performance isn’t just about whether a mount can hold a camera for five minutes; it’s about whether it stays level during a twelve-hour production sprint. I put this heavy-duty rail and clamp system through a gauntlet of real-world scenarios, including a multi-day 4K editing session where the desk was subject to constant vibration and repositioning. When you are deep in a flow state, the last thing you want to worry about is whether your $2,000 key light is slowly drooping toward your monitor. In my testing, the rigidity of the aluminum rails meant that even when I accidentally kicked the desk leg, the camera feed remained rock solid. This is where the price premium pays for itself—consumer-grade plastic stands would have wobbled for three seconds, ruining any active recording.
Stability That Survives Unexpected Bumps
The good news is that once these professional mounts are locked, they are effectively part of the building. I attempted to induce ‘sag’ by mounting a heavy Sigma 24-70mm lens—a notorious ‘rig-killer’ due to its front-heavy glass—and left it overnight. To my surprise, the vertical displacement was less than a millimeter. However, the performance isn’t flawless. The ‘Bad’ comes into play during active adjustments. If you need to switch from a talking-head shot to a top-down product shot mid-stream, the industrial tension required for stability becomes a hurdle. You cannot simply ‘flick’ these arms into place; it is a deliberate, two-handed operation that can break the rhythm of a live show.
Can a Hollow-Core Desk Actually Support This Weight?
This is the most common concern for home office creators. While the rig itself is a tank, the surface you attach it to is often the weak point. During my stress test on a standard IKEA Lagkapten desk, I noticed the clamp beginning to crush the internal paper honeycomb of the tabletop. If you are using professional rigging gear, you must use a reinforcement plate or a solid wood surface. Without it, the ‘performance’ of the rig is irrelevant because the desk itself will eventually fail under the concentrated torque.
The Frustrating Reality of Sagging Friction Arms
While the rails and desk clamps are nearly indestructible, the articulating friction arms—the ‘limbs’ of your setup—are where the performance becomes hit-or-miss. After three weeks of constant use, I noticed the internal O-rings on the ball joints began to shed tiny black flakes of rubber. This ‘micro-wear’ is a known issue in the community. On the r/videography subreddit, multiple users have shared that even high-end friction arms eventually lose their ‘bite’ if they are constantly adjusted under load. To maintain peak performance, you have to clean the joints with isopropyl alcohol every few months to remove the oil and rubber residue that causes slipping.
Does the Metal Get Too Hot to Handle?
If you are mounting high-output COB lights, the heat transfer to the rig is a real factor. During a four-hour shoot at 80% brightness, the aluminum rail directly behind the light reached temperatures that were uncomfortable to touch. It acts as a giant heatsink, which is actually good for your light’s lifespan, but it means you should wait ten minutes before trying to tear down your setup. Do you agree with my experience regarding the thumb-screw fatigue, or have you found a tool that makes tightening these industrial clamps easier? Let me know in the comments below.
Elgato Might Be Sleek But Industrial Gear Wins on Stability
When you start looking at professional creator rigs, the elephant in the room is always the Elgato Multi Mount system. It’s the shiny, user-friendly choice that dominates most YouTube studio gear tours. However, there’s a fundamental difference in philosophy here. While Elgato offers a plug-and-play experience that’s perfect for light lighting kits and basic webcams, it lacks the sheer mass required for serious camera reviews involving heavy glass and cinema-grade bodies. If you compare the load-bearing capacity of a standard Elgato Master Mount to an industrial wall-rail system, you’re looking at a difference of nearly 15 pounds in stability. The industrial rails I’ve been using don’t just hold the gear; they absorb the room’s energy, ensuring that your microphone reviews don’t pick up the low-frequency thud of someone walking in the apartment above you.
Why Neewer Is Enough for Microphones but Not for Heavy Cameras
On the other end of the spectrum, we have the budget king, Neewer. They offer various lighting kits and desk arms that cost a fraction of the industrial setups. For a beginner doing microphone reviews, a $30 Neewer boom arm is a rite of passage. But as your studio gear collection grows, the limitations become painful. I’ve seen Neewer clamps literally snap under the torque of a medium-sized softbox or a professional key light. If you are comparing a $40 desk clamp to a $150 industrial friction arm, you aren’t just paying for the name—you are paying for the peace of mind that your gear won’t hit the floor at 3 AM. If you want to see the price gap for yourself, you can check the current price comparisons on B&H Photo to see how entry-level gear stacks up against the pro stuff.
Is it worth the upgrade?
If you are still using a desk that wobbles when you type, or if you are constantly repositioning your lights because they ‘creep’ downward over several hours, then yes, the jump to industrial-grade creator rigs is mandatory. You can spend $200 on three different cheap stands over two years as they break or fail, or you can spend $200 once on a rail system that will outlive your current camera body. The modular nature of these systems means that as you acquire new studio gear, you simply add another $20 clamp instead of buying a whole new stand. It is an investment in your workflow’s sanity. Before you commit, you might want to check out my detailed breakdown of the Elgato system to see if its convenience outweighs the industrial strength of the setup I’ve described here.
Pick Your Poison Between Convenience and Concrete Stability
Ultimately, choosing between these systems comes down to how often you move and how much you trust your equipment. If you are a digital nomad or someone who redecorates every month, the permanent nature of wall-mounted studio gear is a disadvantage. In that specific case, high-end lighting kits from brands like Manfrotto offer a middle ground: better than the cheap plastic, but more mobile than a wall rail. But for the small-apartment creator who needs to maximize every inch of a fixed space, the ‘overbuilt’ industrial rig remains the undefeated champion. The stability it brings to your camera reviews and the clutter it removes from your workspace are unmatched. Check current prices on industrial strut channels and high-end friction arms to start your transformation today.
After weeks of mounting, adjusting, and stress-testing these setups in a cramped environment, the choice between professional rigging and consumer-grade stands has never been clearer. This isn’t just about spending more money; it’s about whether you want your gear to be a permanent extension of your room or a temporary guest that’s always in the way.
The Heavyweight Reality of Industrial Gear
Stepping up to professional-grade equipment brings immediate benefits, but it’s not without its drawbacks. Here is a balanced look at what you can expect when you ditch the plastic for the metal.
- The Good: Absolute zero vibration. When you use 7 weighted desktop mats that stop camera shake while typing in tandem with a rail system, your footage looks like it was shot in a high-end commercial studio.
- The Good: Total floor reclamation. By using why you should swap your massive desk for a wall-mounted rail, you effectively turn your walls into a 3D workspace.
- The Bad: Tensioning fatigue. The small knurled screws on many industrial clamps are a nightmare for your fingers. Honestly, this 11-wrench is the most important tool in your bag if you plan on using these rigs daily.
- The Bad: Destructive potential. If you don’t know how a 15-plywood base stabilizes your desk-mounted boom arm, you risk crushing your furniture under the sheer torque of these heavy-duty clamps.
Find Out if Your Workspace Can Handle the Weight
This industrial approach is designed for the creator who has committed to a specific space. It is the perfect solution for full-time YouTubers or streamers who have a dedicated corner and need their lights and cameras in the exact same spot every single morning. It solves the “gear creep” that plagues cheaper 5 desk clamp rigs that replace clunky c-stands.
However, you should avoid this if you are a renter with strict “no-drill” policies or if you move your desk frequently. These systems are heavy, cumbersome to pack, and require a solid foundation to work safely. If you’re a mobile creator, stick to high-end mobile tripods. But if you’re tired of cables everywhere, consider adding 5 cable management clips that actually stay stuck to your desk to finally tame the octopus effect of a pro rig.
Concrete Stability and a Final Verdict
If you are serious about your production value, the industrial route is the only way to go. You stop fighting your environment and start using it. The initial cost is higher, and the setup is physically demanding, but the reward is a studio that stays ready 24/7. Final Rating: 9/10. It’s the last rig you’ll ever need to buy. Check the latest price on industrial strut channels and professional friction arms to start your studio transformation.