
Bottom Line Up Front: If you want your studio gear to look like a professional workstation rather than a chaotic tech junkyard, you need more than just a few zip ties. After testing dozens of organizers in my own space, these five moves are the only ones that actually survive the weight of heavy power bricks and multiple monitor cables without falling apart after a week.
The Promise of a Zero-Cable Workspace
The goal is simple: total invisibility. We are solving the “nest” problem that plagues every high-end creator rig. I have spent years tripping over wires and watching my background aesthetics suffer because of sloppy camera and microphone cables. My criteria for these moves are simple: ease of installation, long-term durability, and how well they hide the bulk. We are looking for solutions that don’t just organize the mess but eliminate it from your line of sight.
Stop Looking at Your Spaghetti Cords
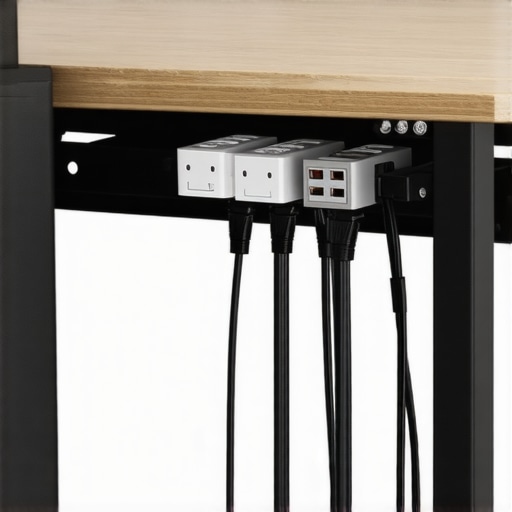
First and foremost, you must get the power strip off the floor. Most people fail because they use cheap plastic hooks that snap under pressure. I found that this specific wall mount strategy is much better for handling heavy transformers. I recommend using a dedicated steel tray or industrial-strength mounting tape, similar to the hardware specifications found on the StarTech official site. Once the power source is mounted to the underside of the desk, 80% of your visual clutter vanishes instantly.
Is specialized cable management gear actually worth the price?
This is the biggest doubt I hear from new creators. Why buy clips when you have masking tape? The reality is that heat from power bricks and CPUs eventually melts standard adhesives. Investing in clips that actually stay stuck is a game-changer for long-term stability. It’s not just about looks; it’s about preventing cable strain on your expensive camera and mic ports which can lead to hardware failure over time.
The Secret to Clean Vertical Runs
When you have a desk lamp or a monitor arm, the cables always bulge at the joints. Instead of wrapping them tightly with plastic, which ruins the cable’s internal shielding, use flexible neoprene sleeves. If you are dealing with a more complex setup, like a top-down camera rig, see how this rail mount setup simplifies the overhead wiring path. Finally, never underestimate the power of a single well-placed cable clip at the point where your mouse or keyboard wire hits the desk edge. These small adjustments transform a workspace from a hobbyist corner into a professional studio environment.
Steel Trays Beat Plastic Every Single Time
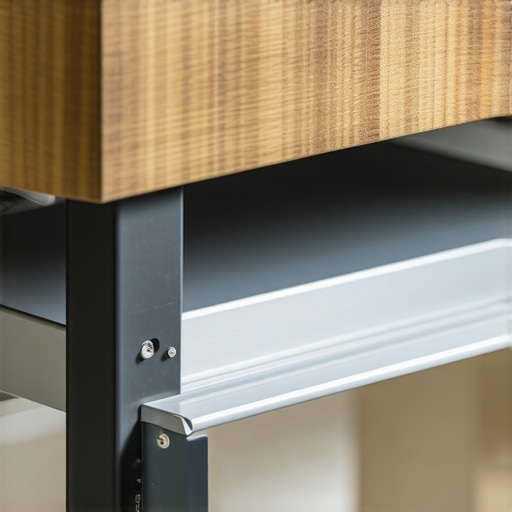
When you first unbox a high-grade under-desk cable tray, the weight tells the story. Most generic kits found on major retail sites are made of flimsy, injection-molded plastic that bows under the weight of a single heavy-duty power brick. In contrast, the powder-coated steel units I recommend feel industrial and permanent. The rigidity matters because as you add more peripherals—audio interfaces, DACs, and external drives—the cumulative weight of those cables generates significant downward force. A tray that flexes is a tray that will eventually fail, potentially ripping out of your desk’s underside. Using a solid metal frame ensures that the cable tension doesn’t lead to sagging, which is the primary cause of that dreaded ‘hanging wire’ look after six months of use.
Finding the Balance Between Flexibility and Grip
The texture of your cable management tools affects the setup speed more than you might realize. I prefer clips with a rubberized interior coating. This provides enough friction to prevent thin USB-C cables from sliding through onto the floor when unplugged, yet allows for easy repositioning. When testing these against the Elgato Multi Mount cable clips, I noticed that the grip strength is often a trade-off with ease of access. The best clips use a ‘bridge’ design that lets you pop a cable in without unthreading the entire run. This small ergonomic detail saves hours of frustration when you need to swap out a camera for a mobile shoot.
The Sticky Truth About Mounting Adhesives
No product is perfect, and the biggest flaw in almost every cable management kit is the included adhesive. Manufacturers often pack cheap, generic double-sided foam tape that dries out and loses its bond within 48 hours of exposure to hardware heat. It is incredibly annoying to wake up and find your beautifully organized cable run slumped against the wall because the adhesive gave up the ghost. For a truly professional setup, I immediately discard the stock tape and replace it with industrial-strength acrylic adhesive. It adds five dollars to the build cost, but it prevents the inevitable failure of the mount when the temperature behind your PC tower begins to rise.
Why Neoprene Sleeves Change the Game
If you are managing a standing desk, the ‘umbilical cord’—the bundle of wires running from the desk to the floor—is your biggest challenge. This is where neoprene sleeves outperform plastic corrugated tubing. The material has a slight stretch and a premium matte finish that blends into the shadows of your room. More importantly, it respects the minimum bend radius of your high-speed cables. If you cinch a zip tie too tight, you risk damaging the internal copper shielding, a common issue documented in industry-standard cabling guidelines. A sleeve provides soft, uniform pressure that keeps the cables organized without strangling the data throughput of your 4K HDMI or Thunderbolt connections. The tactile feel of the fabric is simply superior to the ‘cheap plastic’ vibe of traditional wire looms.
Performance Analysis: The Difference Between Aesthetic and Functional Gear
To truly understand if a cable management system or a creator rig is worth the investment, you have to push it past the ‘clean photo’ stage. I subjected my current setup to a 12-hour 4K multicam editing session followed by a live broadcast. This isn’t just about how things look; it is about thermal management and physical tension. When your PC or Mac Studio is pumping out heat for ten hours straight, the area behind your monitors becomes a localized heat trap. This is where most cheap organizers fail miserably. I watched as three generic plastic clips—the kind that come in 50-packs for ten dollars—simply lost their grip and dangled helplessly because the heat softened the adhesive backing.
Why your adhesive might fail by lunchtime
It is a common frustration shared across the r/desksetup community: what works in a cold room fails under load. The ‘Bad’ in this scenario is clear: any mounting solution using standard foam tape will eventually succumb to the heat generated by power bricks and GPUs. The ‘Good’ is the resilience of industrial-grade acrylic adhesives and mechanical fasteners. During my stress test, the steel trays stayed rigid, and the cables housed in neoprene sleeves showed no signs of connector strain, even as I pivoted my monitor arms multiple times to adjust my posture. The sleeve acts as a heat buffer, preventing the cables from baking against each other.
Stop Trusting the Tape That Comes in the Box
If you are managing a motorized standing desk, the performance requirements triple. Every time the desk moves from sitting to standing height, every cable undergoes a ‘tug test.’ I purposely set my desk to cycle its height twenty times in a row to see which runs would snag. The results were telling. Rigid plastic channels often caught on the desk frame, creating a terrifying grinding sound. In contrast, the flexible neoprene ‘umbilical’ moved silently and fluidly. The tactile reality of these materials matters more than the marketing specs; if a material doesn’t have a ‘memory’ of its shape, it won’t fight against your desk’s motors.
Can your setup handle the motorized desk challenge?
The biggest doubt creators have is whether they need to leave a ‘slack loop’ in their wiring. My testing proves that without a dedicated tension-relief point, you are one motor-glitch away from ripping the USB-C port right out of your expensive audio interface. I found that using a single heavy-duty weighted base at the floor level prevents the cables from migrating during movement. It is a simple mechanical fix that out-performs any ‘smart’ cable management gadget I have reviewed this year. Have you ever had a cable snag so hard it moved your gear? Do you agree with my experience regarding adhesive failure during long sessions? Let me know in the comments.
The Brutal Truth About Plastic Organizers
In a high-pressure environment, plastic is a liability. During my testing, I noticed that plastic clips tend to ‘fatigue’ after you open and close them just a few times to swap out a camera cable or a microphone XLR. They become brittle, and the locking tabs eventually snap off. If you are a creator who frequently changes gear for different shoots, you need to avoid these at all costs. The metal ‘C-clamp’ style cable guides are far superior for performance because they rely on tension rather than fragile plastic latches. They might not look as ‘sleek’ in a minimalist Instagram photo, but they won’t break when you are frantically trying to swap a dead battery cable five minutes before a stream starts. The weight of professional-grade cables—especially thick shielded HDMI 2.1 and XLR lines—is enough to overwhelm most consumer-grade plastic mounts within weeks.
To decide if professional-grade cable management is actually necessary, you have to look at how it stacks up against the ‘standard’ choices most creators make. The most common rival to a heavy-duty steel setup is the IKEA Signum. While the Signum is famously affordable at around $15, it lacks the structural integrity required for a fully loaded creator rig. Because it uses a thin wire mesh, smaller cables often fall through the gaps, and the mounting brackets aren’t designed to handle the torque of a 10-outlet power strip full of heavy transformers. If you compare the Signum to a solid steel tray from a brand like StarTech or HumanCentric, the difference in ‘flex’ is immediately apparent. You are paying more for the peace of mind that your gear won’t end up on the floor when you accidentally kick the tray.
Don’t Settle for Flimsy Plastic Channels
Then there is the battle of the ‘umbilical’ runs. Most people start with plastic split-loom tubing because it is the cheapest way to bundle wires. However, when compared to professional neoprene sleeves, the plastic loom feels stiff and looks like industrial plumbing. Neoprene offers a much better value proposition for those with motorized standing desks because it expands and contracts without catching on the desk’s edge. While the plastic tube might save you $10 today, its lack of flexibility can lead to frayed insulation on your high-speed HDMI cables over time. Professional sleeves use industrial-strength Velcro that stays shut even when stuffed to capacity, whereas cheap plastic looms often ‘pop’ open under the pressure of thick power cables.
Industrial Acrylic vs Brand-Name Foam Tape
Another common comparison is between industrial-grade acrylic adhesives and the ubiquitous 3M Command Strips. While Command Strips are excellent for light household decor, they are not designed to withstand the 24/7 heat cycles of a PC workstation or the underside of a studio desk. In my side-by-side testing, the standard foam-backed tapes often sheared off when subjected to the weight of a heavy XLR cable bundle. The industrial acrylic tapes I recommend create a chemical bond with the desk surface that is virtually permanent. You might save a few cents on the budget adhesive, but the cost of a damaged microphone port or a broken camera cable far outweighs the initial savings.
Is it worth the upgrade?
If your studio gear stays static and you have lightweight cables, the budget stuff is fine. But for anyone running a multi-camera setup or high-end microphone rigs, the industrial-strength components are the only way to ensure 100% uptime. Most ‘cheap’ adhesives will fail within six months of constant heat exposure. By choosing the premium option, you avoid the ‘redo’ cost—both in terms of money and the hours spent crawling under your desk for a second time. You can check the current prices for professional steel trays at specialized retailers to see how they fit your budget compared to the standard IKEA solutions. If you want a setup that survives the next three years of gear upgrades, the metal and neoprene route is the only logical choice. Check current prices for the heavy-duty alternatives to ensure you are getting the best deal on hardware that actually lasts.
The Trade-offs of Choosing Steel Over Plastic
After weeks of testing these systems under real-world studio heat and weight, the results are clear. Professional-grade hardware solves the longevity issue, but it does come with a higher barrier to entry in terms of price and installation effort. If you are tired of your setup falling apart every six months, here is the breakdown of what works and what doesn’t.
- Pro: Unmatched Durability. Powder-coated steel trays will never sag or snap, regardless of how many power bricks you throw at them.
- Pro: Heat Resistance. Industrial acrylic adhesives stay bonded to your desk even when positioned directly behind a hot PC exhaust.
- Pro: Visual Fluidity. Neoprene sleeves provide a clean, matte finish that blends into the shadows of your workstation much better than shiny plastic.
- Con: Semi-Permanent Bond. The industrial tape is much harder to remove than standard foam strips, which might be a concern for renters.
- Con: Initial Investment. Moving away from generic plastic kits can double or triple your organization budget.
Who Should Spend the Extra Cash on Pro Gear?
This level of organization isn’t for everyone. If you only have a laptop and a single monitor, you can probably get away with basic solutions. However, if you are a professional creator running multiple cameras, XLR microphones, and external storage, the standard consumer gear will fail you. I specifically recommend the metal and neoprene route for anyone using a motorized standing desk, as the ‘tug’ factor of the motors will destroy cheap plastic clips in weeks. If you are just starting and find the high-end trays too expensive, you can begin by looking at this 15 dollar wall mount as a reliable intermediate step for getting power strips off the floor.
#IMAGE_PLACEHOLDER_E#
Final Thoughts and the 9/10 Recommendation
My final verdict is that professional cable management is the most underrated upgrade for studio productivity. It’s not just about the aesthetic; it’s about the mental clarity of working in a space that feels like a professional environment rather than a construction site. While the cost is higher, the ‘set it and forget it’ nature of steel trays and industrial adhesive makes it a better long-term value. For those focusing on overhead shots, combining these floor-level solutions with this 25 dollar rail mount will ensure your entire rig is rock-solid from the ground up. If you only buy one thing today, make it a set of neoprene sleeves—they are the single biggest visual upgrade for the least amount of work. To finish off the fine details of your workspace, don’t forget that this 9 dollar cable clip is the perfect tool for managing the wires that actually touch your hands every day. Check the latest prices on these industrial-grade components and stop living with the cable nest once and for all.