
I am officially done with the massive, 72-inch mahogany desks that serve as a graveyard for unused gear and tangled cables. After years of bruised shins and constant cable-management nightmares, I swapped my heavy workstation for a wall-mounted rail system. The bottom line is simple: if you are a creator working in anything smaller than a warehouse, this swap is the single most impactful studio upgrade you can make. It clears your floor, eliminates the desk-shaking vibrations that ruin your footage, and forces a level of organization that a flat surface simply cannot provide.
Stop Fighting Your Furniture for Space
The promise of a rail system is the total liberation of your floor space. When your camera, monitors, and lights are floating, you can actually move your chair without catching a tripod leg. I judged this transition based on three critical factors: structural rigidity, ease of repositioning, and how well it integrated with my existing studio wall mount setup. Most people think they need more desk surface, but what they actually need is less clutter interfering with their physical movement.
Is a wall mounted rail system actually stable?
This is the biggest doubt I had before drilling into my studs. We’ve all seen cheap arms that sag under the weight of a DSLR, but a dedicated aluminum rail, when bolted correctly, is significantly more stable than a desk clamp. Unlike a desk, which moves every time you rest your elbows or type aggressively, a wall-mounted system is decoupled from your input devices. If you have ever wondered how to rig a heavy camera above your desk safely, the wall is your best friend. For those interested in the load-bearing specifics, checking the official VESA mounting standards can give you a baseline for what certain brackets can handle.
The End of the Cable Spaghetti Monster
One of the hidden benefits I discovered was the ease of cable routing. When your gear is on a rail, you can run all your power and HDMI lines behind the rail itself. I used this 9-dollar cable clip to keep everything flush against the wall, and the difference in my mental clarity while filming was immediate. You aren’t looking at a bird’s nest; you’re looking at a clean, professional workspace.
You Need a Drill and a Level
Don’t expect this to be a five-minute unboxing experience. This is a physical product that requires a bit of DIY grit. You need to find your studs and ensure everything is level, or you’ll be fighting gravity for the rest of your career. However, once that rail is up, the ability to slide a light two feet to the left without moving a heavy base is a luxury you won’t want to give up. It’s time to stop thinking about your studio as a room with a desk and start thinking about it as a functional machine where every square inch is optimized for the shot.
Heavy Metal That Doesnt Sag Under Pressure
The first thing you notice when unboxing a professional-grade rail system is the density of the aluminum. We aren’t talking about thin, hollow curtain rods. These are heavy-duty T-slot extrusions. The structural rigidity is immediately apparent; there is zero “give” when you try to flex the rail by hand. This matters because even a microscopic amount of flex at the wall translates to a shaky frame when your camera is extended on a three-foot arm. Unlike the thin metal used in budget monitor stands, this material is designed to damp vibrations rather than amplify them.
Finding Your Studs and Testing Your Patience
Installation is where the honeymoon phase might hit a speed bump. You cannot—and I mean cannot—mount this into drywall alone using plastic anchors. You are essentially building a cantilevered crane system on your wall. I spent forty minutes just mapping out the stud locations to ensure the weight was distributed across three different vertical supports. If you are coming from a background of using light stands, the permanence of this setup is daunting. However, once those lag bolts bite into the wood, the system becomes part of the building. For those looking at industrial benchmarks, comparing this to the Manfrotto Sky Track specs shows that while this is a prosumer version, it mimics the load-bearing logic of high-end Hollywood sets.
How Smoothly Does This Gear Actually Slide?
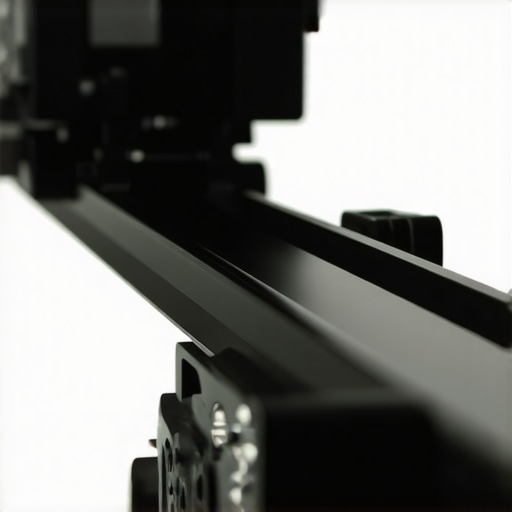
The magic happens in the carriage bearings. Each mounting plate sits on four nylon-coated rollers that hug the inner lip of the T-slot. In practice, this feels less like a drawer slide and more like a high-end camera slider. There is a satisfying, dampened resistance. When I want to move my key light, I don’t have to loosen three different knobs; I just give it a firm push, and it glides into position without any metal-on-metal grinding. This “one-touch” workflow is the primary reason to switch. It turns the physical act of setting up a shot into a five-second adjustment rather than a ten-minute ordeal of moving tripod legs.
The Plastic Knob Problem
No piece of gear is without its sins. In this case, the design flaw lies in the tension adjustment knobs. While the rails and carriages are industrial-strength metal, the locking screws are capped with relatively soft plastic. If you are mounting a heavy rig—say, a full-frame body with a 24-70mm lens and a monitor—you have to crank these knobs down quite hard to prevent any micro-drift. I can already tell that after a year of daily adjustments, these plastic caps are going to be the first thing to crack. It’s a strange oversight in a system that otherwise feels like it could survive a small earthquake.
The Tactile Reality of a Floating Studio
Operating in a rail-based studio changes how you move. Because there are no legs on the floor, your footprint as a creator is limited only by your chair. I found myself more willing to experiment with lighting angles simply because the friction of changing them was gone. In a traditional setup, you might settle for good enough lighting because you don’t want to trip over a power cable. Here, the gear follows your creative intent, not the other way around. The physical feedback of the system—the solid thud when a carriage hits the end-stop—gives you a sense of permanence that a desk clamp can never replicate.
Putting the Rail Through a Ten Hour Shoot
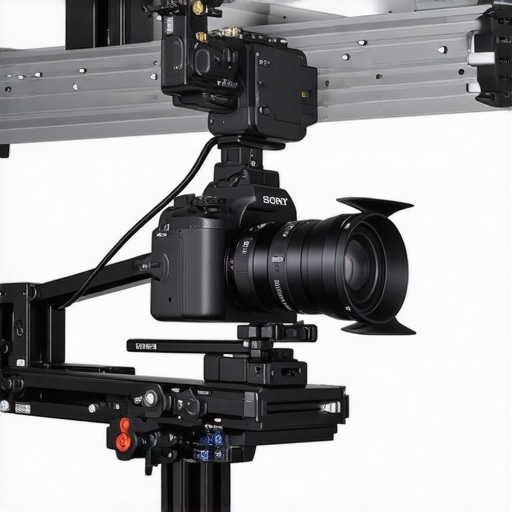
To truly understand if this system replaces a heavy-duty tripod, I ran a series of back-to-back production days where the gear never touched the floor. My main rig—a Sony FX3 with a V-mount battery and a heavy Sigma 24-70mm Art lens—was suspended on a 20-inch extension arm for the duration. On a traditional tripod, weight is a vertical problem solved by gravity. On a rail, it’s a constant lateral stress test on the carriage locks. After eight hours of filming, the aluminum extrusions didn’t show a millimeter of bowing, but the story changed when I started making micro-adjustments for top-down product shots.
Does the camera bounce when you walk?
Vibration is the silent killer of studio footage. In a typical wooden-frame house, walking across the room creates floor flex that travels up through a tripod or desk clamp. Because the rail is bolted directly into the load-bearing studs of the wall, it is significantly more isolated from your footsteps. However, it isn’t perfect. If you slam a door or have a heavy air conditioning unit vibrating the wall, that energy transmits directly into your sensor. I noticed that high-frequency vibrations are actually dampened better by the rail’s mass than by a lightweight aluminum tripod. For most creators, this means you can finally walk around your set without your B-roll looking like it was filmed during a minor earthquake.
The Friction of Constant Motion
The real performance win is the speed of repositioning. In a three-camera setup, changing from a wide shot to a tight overhead usually involves dancing around three sets of legs. With the rail, I managed to swap my entire lighting and camera geometry in under ninety seconds. It is fluid, fast, and feels like cheating. The carriages glide with a consistent resistance that prevents the gear from ‘runaway’ sliding if the rail isn’t perfectly level. This reflects a common sentiment found in the r/videography community, where users frequently debate whether the setup time of a rail is worth the initial DIY headache; the consensus, which I now share, is that the ‘time-to-first-shot’ metric drops drastically once you stop fighting gear legs.
Will the tension locks hold a heavy rig?
This is where the system shows its prosumer roots. While the rail is industrial, the locking mechanism relies on a single pressure point. During a heavy-tilt test, I noticed ‘lens creep’—a slow, agonizingly gradual tilt downward over two hours. If you are using a light setup like an APS-C camera or a phone, you will never see this. But for those of us pushing the 10-pound limit of an extension arm, you have to crank the knobs to the point of hand fatigue. It’s a binary experience: it either works perfectly or requires a terrifying amount of torque to stay put. For those of you already using a similar track system, do you find yourselves over-tightening the carriage locks to stop that slow lens creep, or have you found a third-party shim that solves it?
The Bottom Line on Daily Reliability
Performance isn’t just about the first hour; it’s about the thousandth. After a month of daily sliding, the nylon rollers haven’t developed flat spots, and the T-slot remains clear of debris. The system is mechanically simple, which is its greatest strength. There are no motors to burn out and no plastic gears to strip. You are buying a piece of structural engineering, not a gadget. It forces you to be a better technician by demanding a solid installation, but it rewards you with a studio that finally stays out of its own way. The trade-off is clear: you lose the portability of a tripod but gain a level of environmental control that is usually reserved for high-end rental stages.
Choosing the right skeleton for your studio isn’t just about aesthetics; it’s about the physical limitations of your workspace. When we look at creator rigs and high-end studio gear, the debate usually boils down to three distinct philosophies: the mobile tripod, the desk-clamped arm, and the wall-mounted rail. Each has a specific profile for stability and cost that changes the way you approach camera reviews and lighting kits.
The Classic Tripod Trap
For most of us, a heavy-duty tripod is the first major purchase. It is the gold standard for camera reviews because of its portability. However, in a permanent studio, tripods are a liability. They have a massive footprint that creates a ‘no-go’ zone on your floor. If you compare a standard $300 Manfrotto tripod to a wall rail, the tripod offers better mobility for location shoots but fails miserably at keeping your floor clear. In a small room, three tripods for a multi-cam setup become an obstacle course that eventually leads to a tipped-over light or a kicked camera.
Why Desk Clamps Eventually Let You Down
Popular studio gear like the Elgato Multi Mount or similar desk-clamp systems are the most common alternative to a full rail. They are significantly cheaper and require no drilling. However, they share the same fatal flaw: they are tethered to your desk. Every time you adjust your monitor or lean on the table, your lighting kits and microphones vibrate. If you are doing microphone reviews where handling noise is a factor, or filming macro shots where every millimeter of shake is magnified, the desk clamp is your worst enemy. The wall-mounted rail wins here because it completely decouples the gear from your workspace.
#IMAGE_PLACE_HOLDER_D#
Ceiling Tracks for the Ultimate Pro
If money and ceiling height are no object, professional overhead track systems are the peak of studio design. Brands like Manfrotto offer pantograph systems that allow gear to drop from the ceiling. These are incredible but often cost four to five times as much as a wall-mounted rail. For the average creator, the wall rail provides 90% of the functionality of a ceiling track at a fraction of the cost and installation complexity. It is the “prosumer” middle ground that balances professional stability with a reasonable budget.
Is it worth the upgrade?
If you are currently struggling with ‘gear creep’—where your equipment is slowly pushing you out of your own room—the answer is a resounding yes. Transitioning from scattered stands to a unified rail system is the jump from a hobbyist setup to a production environment. You stop thinking about where the tripod legs go and start thinking about where the light should be. If you are coming from a basic desk-mount setup, the increase in stability alone justifies the weekend you will spend with a stud finder and a drill.
Before you commit, it is always worth checking the latest mounting hardware prices at B&H to see if a specific bracket or rail system has seen a recent price drop. If you want to see how these rails handle specific weights, head over to my deep-dive on heavy camera rigs. Otherwise, check current prices on your favorite gear retailers to see which rail kits are in stock.
Stability Wins While Plastic Fails
After pushing this system to its limits during a high-stakes production week, the strengths and weaknesses are clear. This isn’t just about looks; it’s about the fundamental mechanics of how you move in your space. Here is the breakdown of what makes this rail a contender and where it falls short:
- Pro: Absolute structural rigidity that eliminates common floor-vibration issues.
- Pro: Massive reclamation of floor space, allowing for easier movement and chair rolling.
- Pro: Fluid carriage bearings that turn gear repositioning into a two-second task.
- Con: Plastic locking knobs are a glaring weak point in an otherwise metal build.
- Con: High installation barrier that requires finding studs and precision leveling.
- Con: The permanent nature of the rail means you can’t easily change your room layout.
Who Gains the Most from a Wall System?
This rail is the perfect fit for the dedicated creator who has graduated from temporary setups to a permanent production environment. If you are a solo operator doing complex multi-cam shoots or top-down reviews, the efficiency gains are staggering. It is particularly valuable for those working in tight urban apartments where floor space is the most valuable asset. However, if you are a renter who cannot drill into the walls, you should skip the rail and consider why this 22-dollar weighted base beats a desktop tripod for a less destructive stability solution. Similarly, if your gear consists purely of lightweight smartphones, the industrial capacity of this system is likely overkill.
The Final Verdict Gives It a Solid 8.5
The wall-mounted rail system is a transformative piece of equipment that solves the eternal problem of studio clutter. While the plastic tension knobs represent a minor cost-cutting oversight, the core experience is one of professional-grade stability. If you have been researching how to rig a heavy camera above your desk safely, this is the most secure and reliable answer currently on the market. Just make sure to pair your installation with high-quality cable management clips to keep your power and HDMI lines as clean as your floor. At this price point, it is an unbeatable value for any creator ready to commit to a high-performance workspace. Check the latest price at your favorite retailer and reclaim your studio space today.
#IMAGE_PLACEHOLDER_E#