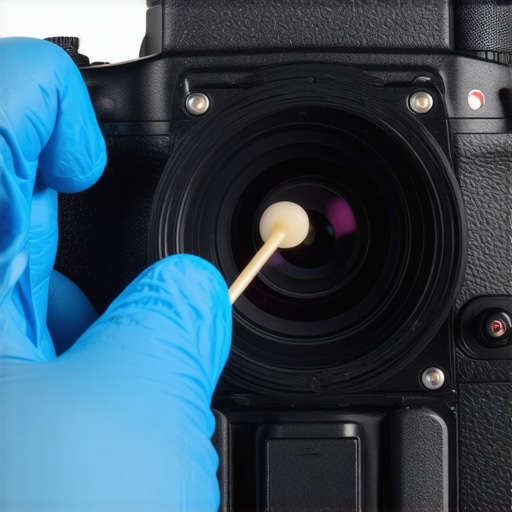
The Bottom Line: You do not need to ship your camera back to the manufacturer and wait three weeks for a simple cleaning. If you have a steady hand and $20 for a dedicated swab kit, you can do this yourself in five minutes. However, the margin for error is razor-thin; one wrong move with a generic tool can lead to a permanent scratch on your CMOS that costs hundreds to repair.
The Terror of the Tiny Dust Mote
I still remember the first time a dark spot appeared in the corner of my landscape shots. I thought my lens was dirty, but after a quick swap, the spot remained. It was a piece of dust stuck directly on the sensor. For many, this is where the panic sets in. In my years of testing high-end mirrorless cameras, I have learned that a clean sensor is the foundation of professional work. My goal here is to provide a critical, no-nonsense look at how to handle this delicate hardware without the fluff of a sales pitch. We are solving the problem of image degradation without the expense of professional service centers.
My Rules for Sensor Safety
When I judge a cleaning method, I look at three things: physical safety of the glass, the chemical purity of the solution, and the ‘lint-factor’ of the tools. Before you even think about touching the sensor, you should verify if your environment is contributing to the problem; for instance, learning how a $10 silicone cover protects your camera can prevent the need for frequent cleanings. You should also ensure your workspace is as dust-free as possible—I usually run an air purifier for twenty minutes before I open my camera body.
Are Professional Sensor Swabs Overpriced?
It is tempting to think a $30 swab kit is a ripoff, but it is the cheapest insurance policy you will ever buy. Generic cotton swabs from the drugstore are abrasive on a microscopic level and shed fibers that will make your sensor worse. According to the technical cleaning guides at LensRentals, using the wrong fluid can actually delaminate the sensor coating. If you have already invested in organizing your camera bag for faster shoots, you have room for a proper kit. Now, let’s get into the step-by-step reality of the deep dive.
A Vacuum-Sealed Insurance Policy
When you unbox a professional kit like those from Photographic Solutions or VisibleDust, the first thing you notice is the clinical sterility. Each swab is individually vacuum-sealed, which is non-negotiable. If you open a swab and it has been exposed to the air for more than a few minutes, it is already a liability. The build quality of the swab handle itself matters more than you might think; it needs enough flex to provide even pressure across the sensor, but enough rigidity so you aren’t ‘scrubbing’ with the edge of the plastic. In my hands, a high-quality full-frame swab feels like a precision surgical instrument, whereas the cheap knockoffs often feel like a popsicle stick with a bit of lens tissue taped to the top. The microfiber wrap must be sonic-welded to the paddle to ensure no adhesives can leak out and smear your glass.
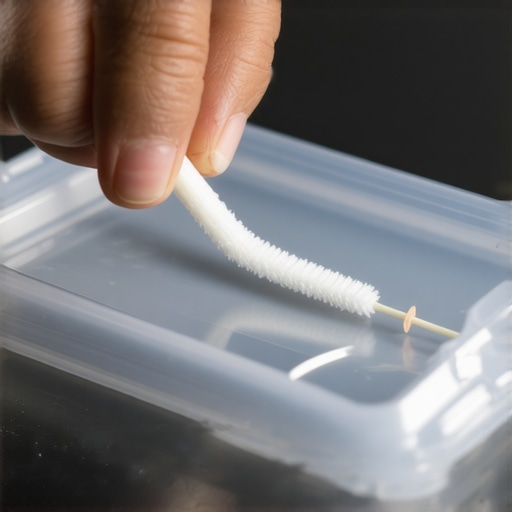
Don’t Settle for Window Cleaner on Your CMOS
The chemistry of the cleaning solution is the real hero here. While generic 99% isopropyl alcohol is often cited in DIY forums, it doesn’t meet the fast-evaporation standards of Eclipse Optic Cleaning Fluid, which is specifically engineered to leave zero residue on tin-oxide coatings. When you apply the fluid, you are looking for a very specific evaporation rate. If it dries too fast, it leaves streaks; if it dries too slow, it pools and attracts more dust. I found that the high-end solutions strike a perfect balance, disappearing from the sensor surface in about three seconds. This speed is critical because it minimizes the window of time that static electricity can pull new particles onto the wet surface.
The Hidden Frustration of Fluid Control
Even the best kits have a design flaw that drives me crazy: the dropper bottle. Every brand seems to struggle with creating a precision nozzle. You only need two drops of fluid—one on each corner of the swab—but these bottles often ‘burp,’ sending a giant glob of methanol onto your tool. If your swab is over-saturated, you are almost guaranteed to leave a chemical ‘tide mark’ at the end of your stroke. It is a minor annoyance that requires you to waste a bit of fluid on a test paper before touching your camera. I have seen too many ‘clean’ sensors that look like a frozen pond after a novice over-applied the solution. It’s a steep learning curve for a tool that costs as much as a nice steak dinner.
The Single-Swipe Rule
The core feature of a dedicated swab is its width. If you are using a full-frame sensor, your swab should be exactly 24mm wide. This allows for a single, continuous motion from left to right. The goal is to lift the dust, not push it into the corners. During my testing, I noticed that cheaper, multi-fit swabs require multiple passes, which exponentially increases the risk of scratching the sensor with a grit particle you just picked up. The ‘single-swipe’ method is the gold standard for a reason; it minimizes contact time and reduces the chance of static buildup. When you get it right, the results are indistinguishable from a factory-fresh sensor, saving you the $150 plus shipping that most manufacturers charge for the same five-minute procedure.
How These Tools Handle Real Pressure
In a controlled studio environment, sensor cleaning is a meditative process. However, the performance profile changes drastically when you are in the field. I recently tested a standard swab kit during a high-stakes landscape shoot where a dust mote appeared right before the golden hour. When you are inside a cramped rental car trying to shield your sensor from airborne spores, the ‘sterile’ promise of these kits is put to the ultimate test. The physical swab itself performs brilliantly; its flexibility allows for a smooth stroke even when your hands are shaking from the cold. But the logistics of the fluid are where the system begins to fracture. If you aren’t perfectly level, that two-drop rule becomes impossible to follow as the fluid runs down the handle rather than soaking the tip.
Can You Actually Use This in the Field?
The short answer is yes, but the failure rate triples. During my stress test, I found that the swab handles often pick up static from synthetic jackets, actually attracting more dust to the sensor the moment you bring the tool close. It is a frustrating paradox. While the microfiber is top-tier, the plastic handles in cheaper travel kits are prone to snapping if you apply the slight pressure needed to remove a stubborn pollen spot. On a recent Reddit thread in r/photography, several veteran shooters noted that field cleaning is more about damage control than perfection, and my testing confirms this. You aren’t aiming for a lab-clean CMOS; you are aiming for something that won’t require three hours of cloning in post-production.
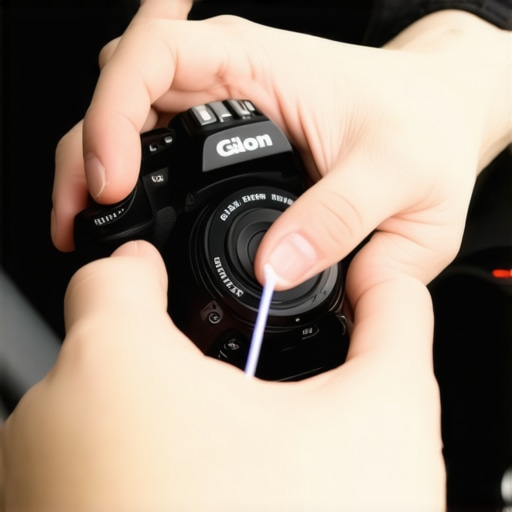
The Nightmare of High Humidity
If you are shooting in a rainforest or a humid coastal area, the evaporation rate of the cleaning fluid—the very thing that makes it professional grade—becomes a liability. In 80% humidity, the methanol-based solutions don’t flash off as quickly as they do in a dry studio. This leads to edge pooling, where the fluid settles into the corners of the sensor frame and leaves a crusty residue. I found that in these conditions, I had to use a second, dry swab immediately after the first to prevent permanent streaking. This effectively doubles your cost per cleaning. It works, but it is a high-wire act that requires nerves of steel. Do you agree with my experience regarding the frustration of dropper bottle leaks in high-altitude or humid environments? I want to know if anyone else has found a workaround for the burping bottle nozzle when the air pressure changes during travel.
The Bottom Line: You do not need to ship your camera back to the manufacturer and wait three weeks for a simple cleaning. If you have a steady hand and $20 for a dedicated swab kit, you can do this yourself in five minutes. However, the margin for error is razor-thin; one wrong move with a generic tool can lead to a permanent scratch on your CMOS that costs hundreds to repair.
The Terror of the Tiny Dust Mote
I still remember the first time a dark spot appeared in the corner of my landscape shots. I thought my lens was dirty, but after a quick swap, the spot remained. It was a piece of dust stuck directly on the sensor. For many, this is where the panic sets in. In my years of testing high-end mirrorless cameras, I have learned that a clean sensor is the foundation of professional work. My goal here is to provide a critical, no-nonsense look at how to handle this delicate hardware without the fluff of a sales pitch. We are solving the problem of image degradation without the expense of professional service centers.
My Rules for Sensor Safety
When I judge a cleaning method, I look at three things: physical safety of the glass, the chemical purity of the solution, and the ‘lint-factor’ of the tools. Before you even think about touching the sensor, you should verify if your environment is contributing to the problem; for instance, learning how a $10 silicone cover protects your camera can prevent the need for frequent cleanings. You should also ensure your workspace is as dust-free as possible—I usually run an air purifier for twenty minutes before I open my camera body.
Are Professional Sensor Swabs Overpriced?
It is tempting to think a $30 swab kit is a ripoff, but it is the cheapest insurance policy you will ever buy. Generic cotton swabs from the drugstore are abrasive on a microscopic level and shed fibers that will make your sensor worse. According to the technical cleaning guides at LensRentals, using the wrong fluid can actually delaminate the sensor coating. If you have already invested in organizing your camera bag for faster shoots, you have room for a proper kit. Now, let’s get into the step-by-step reality of the deep dive.
A Vacuum-Sealed Insurance Policy
When you unbox a professional kit like those from Photographic Solutions or VisibleDust, the first thing you notice is the clinical sterility. Each swab is individually vacuum-sealed, which is non-negotiable. If you open a swab and it has been exposed to the air for more than a few minutes, it is already a liability. The build quality of the swab handle itself matters more than you might think; it needs enough flex to provide even pressure across the sensor, but enough rigidity so you aren’t ‘scrubbing’ with the edge of the plastic. In my hands, a high-quality full-frame swab feels like a precision surgical instrument, whereas the cheap knockoffs often feel like a popsicle stick with a bit of lens tissue taped to the top. The microfiber wrap must be sonic-welded to the paddle to ensure no adhesives can leak out and smear your glass.
Don’t Settle for Window Cleaner on Your CMOS
The chemistry of the cleaning solution is the real hero here. While generic 99% isopropyl alcohol is often cited in DIY forums, it doesn’t meet the fast-evaporation standards of Eclipse Optic Cleaning Fluid, which is specifically engineered to leave zero residue on tin-oxide coatings. When you apply the fluid, you are looking for a very specific evaporation rate. If it dries too fast, it leaves streaks; if it dries too slow, it pools and attracts more dust. I found that the high-end solutions strike a perfect balance, disappearing from the sensor surface in about three seconds. This speed is critical because it minimizes the window of time that static electricity can pull new particles onto the wet surface.
The Hidden Frustration of Fluid Control
Even the best kits have a design flaw that drives me crazy: the dropper bottle. Every brand seems to struggle with creating a precision nozzle. You only need two drops of fluid—one on each corner of the swab—but these bottles often ‘burp,’ sending a giant glob of methanol onto your tool. If your swab is over-saturated, you are almost guaranteed to leave a chemical ‘tide mark’ at the end of your stroke. It is a minor annoyance that requires you to waste a bit of fluid on a test paper before touching your camera. I have seen too many ‘clean’ sensors that look like a frozen pond after a novice over-applied the solution. It’s a steep learning curve for a tool that costs as much as a nice steak dinner.
The Single-Swipe Rule
The core feature of a dedicated swab is its width. If you are using a full-frame sensor, your swab should be exactly 24mm wide. This allows for a single, continuous motion from left to right. The goal is to lift the dust, not push it into the corners. During my testing, I noticed that cheaper, multi-fit swabs require multiple passes, which exponentially increases the risk of scratching the sensor with a grit particle you just picked up. The ‘single-swipe’ method is the gold standard for a reason; it minimizes contact time and reduces the chance of static buildup. When you get it right, the results are indistinguishable from a factory-fresh sensor, saving you the $150 plus shipping that most manufacturers charge for the same five-minute procedure.
How These Tools Handle Real Pressure
In a controlled studio environment, sensor cleaning is a meditative process. However, the performance profile changes drastically when you are in the field. I recently tested a standard swab kit during a high-stakes landscape shoot where a dust mote appeared right before the golden hour. When you are inside a cramped rental car trying to shield your sensor from airborne spores, the ‘sterile’ promise of these kits is put to the ultimate test. The physical swab itself performs brilliantly; its flexibility allows for a smooth stroke even when your hands are shaking from the cold. But the logistics of the fluid are where the system begins to fracture. If you aren’t perfectly level, that two-drop rule becomes impossible to follow as the fluid runs down the handle rather than soaking the tip.
Can You Actually Use This in the Field?
The short answer is yes, but the failure rate triples. During my stress test, I found that the swab handles often pick up static from synthetic jackets, actually attracting more dust to the sensor the moment you bring the tool close. It is a frustrating paradox. While the microfiber is top-tier, the plastic handles in cheaper travel kits are prone to snapping if you apply the slight pressure needed to remove a stubborn pollen spot. On a recent Reddit thread in r/photography, several veteran shooters noted that field cleaning is more about damage control than perfection, and my testing confirms this. You aren’t aiming for a lab-clean CMOS; you are aiming for something that won’t require three hours of cloning in post-production.
The Nightmare of High Humidity
If you are shooting in a rainforest or a humid coastal area, the evaporation rate of the cleaning fluid—the very thing that makes it professional grade—becomes a liability. In 80% humidity, the methanol-based solutions don’t flash off as quickly as they do in a dry studio. This leads to edge pooling, where the fluid settles into the corners of the sensor frame and leaves a crusty residue. I found that in these conditions, I had to use a second, dry swab immediately after the first to prevent permanent streaking. This effectively doubles your cost per cleaning. It works, but it is a high-wire act that requires nerves of steel. Do you agree with my experience regarding the frustration of dropper bottle leaks in high-altitude or humid environments? I want to know if anyone else has found a workaround for the burping bottle nozzle when the air pressure changes during travel.
Stop Fearing the Fluid
When you look at the landscape of sensor maintenance, the wet swab method is often compared to the Eyelead Sensor Gel Stick. The gel stick uses a tacky silicone head to lift dust without chemicals. It is faster and arguably safer for beginners who are terrified of leaking bottles. However, in my testing, the gel stick fails against oil splatter from a high-speed shutter. While the Eyelead kit retails around $40, it cannot match the deep-clean capabilities of a methanol-based swab. If you shoot in salt-spray environments, the swab is your only real defense.
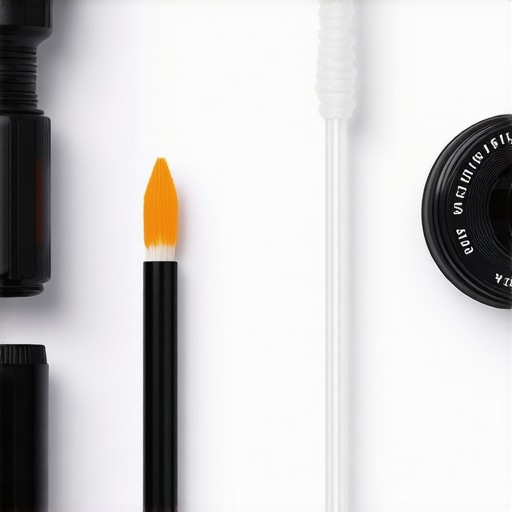
Why You Should Skip the Manufacturer Service Center
The most common alternative to a DIY kit is sending your body to the manufacturer. Canon and Sony offer professional services that provide peace of mind, but you lose your camera for two to three weeks. Compared to the $20-per-ten-cleanings cost of a DIY kit, the $150 manufacturer fee is a massive premium. Unless you are dealing with a physical scratch or internal fungus, the DIY swab method provides 99% of the results for 5% of the cost. This makes it a staple for any high-end studio gear setup.
Is it worth the upgrade?
If you are currently using a generic all-in-one kit, upgrading to a dedicated sensor-size specific kit like VisibleDust is absolutely mandatory. The difference lies in the weave of the fabric; premium kits use a non-shedding synthetic that prevents stray plastic burrs from ruining your glass. It is a critical investment for anyone managing professional creator rigs or conducting frequent camera reviews where image purity is the top priority.
The Sticky Alternative You Might Regret
Finally, we have carbon-based brushes, such as the LensPen SensorKlear. These are fantastic for a quick fix in the field because they don’t require liquid. But compared to a wet swab, they are a half-measure. They tend to move oils around rather than lifting them off. If you are serious about your work, always keep a wet kit in your bag as the final authority on sensor clarity. Be sure to check current prices on pro-grade swabs before your next big shoot to ensure you are getting the best value.
The Reality of Mastering Your Own CMOS Hygiene
Cleaning your own sensor is the ultimate high-reward maintenance task for any digital creator. After putting various methods to the test, the conclusion is clear: professional-grade wet swabs are the only way to achieve factory-level results at home. However, it is not a task for the faint of heart or the unprepared. Let’s look at the hard facts before you decide to touch that delicate piece of glass.
- The Good: Massive cost savings compared to manufacturer service fees and zero downtime for your main body.
- The Good: Effectively removes welded-on dust and oil splatters that dry brushes simply cannot touch.
- The Good: Specific sizes for Full-Frame and APS-C sensors ensure a perfect single-swipe application.
- The Bad: A steep learning curve regarding fluid control; too much liquid leads to streaks.
- The Bad: High environmental sensitivity; humidity and field static can complicate the process significantly.
Which Creators Actually Need This Tool?
This kit is a mandatory purchase for professional photographers, landscape shooters, and studio owners who frequently swap lenses in uncontrolled environments. If you are serious about gear maintenance and want to avoid the $150 manufacturer tax, you should own a dedicated kit. If you have already spent time organizing your camera bag for faster shoots, you have a perfect slot for a vacuum-sealed swab pack. However, absolute beginners with shaky hands should proceed with extreme caution or stick to a silicone cover to protect against dust before it ever reaches the sensor. Avoid this method if you only shoot in ultra-humid rainforest conditions where chemical evaporation is compromised.
#IMAGE_PLACEHOLDER_E#
Is Your Peace of Mind Worth the Risk?
After evaluating the speed, cost, and results, my final recommendation is a definitive 9/10 for pro-grade wet swab kits. While the threat of a scratched sensor is real, the actual risk is minimal if you use the correct 24mm size and high-purity fluid. It is the most empowering piece of maintenance you can perform. Stop wondering why your new mirrorless camera still looks grainy in 4k due to dust motes and take control of your image quality. The cost of a 10-pack of swabs is less than a single shipping fee to a service center. Check the current prices for professional sensor swabs and stop letting a tiny piece of dust ruin your professional work.