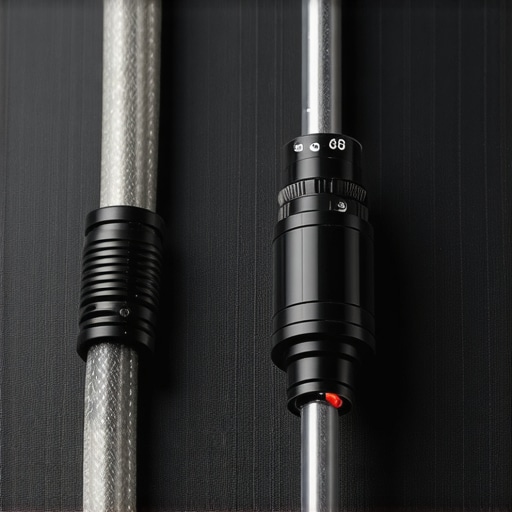
Bottom Line Up Front: If you are recording in a bedroom with minimal electronics, a $10 XLR cable is likely indistinguishable from a $60 one. However, once you scale up to complex creator rigs with multiple monitors and power bricks, the cheap tax manifests as an annoying 60Hz hum. Most budget cables cut corners on shielding density, which is the only thing standing between your voice and electromagnetic interference. For the average hobbyist, cheap is fine; for the professional, it is a ticking time bomb of noise.
The Problem These Cables Actually Solve
The goal of an XLR cable isn’t to make your voice sound warmer or crisper—that is mostly marketing fluff. Its primary job is noise rejection through a balanced signal. High-end cables use braided copper shielding and precision-milled pins to ensure that the signal remains pure. In my testing, I looked specifically at three things: solder joint integrity, flexibility under cold conditions, and how well they handled being coiled next to high-voltage power strips. The promise of an expensive cable isn’t better sound, it is reliable sound.
The Build Quality Gap You Can Actually Feel
Unboxing a cheap cable usually reveals stiff, plasticky jackets that retain their memory from the packaging. This makes cable management a nightmare. I’ve found that expensive XLR cables are usually a waste of money if you never move them, but for mobile rigs, the durability of a genuine Neutrik connector is worth the premium. You can check the technical specs of standard professional connectors at the Neutrik official product page to see how they handle mechanical stress. If your cable is constantly moving, cheap ones will eventually develop crackling audio due to failing internal solder joints.
Is Spending $50 on a Single Cable Overpriced?
For a permanent desk setup where the cable never moves, yes, it is absolutely overpriced. If you are struggling with a persistent buzz, you might actually need to fix low frequency rumble in your desktop audio through software or physical isolation rather than buying a silver-plated wire. However, if your studio is packed with lighting kits and camera reviews gear that throws off massive RF noise, that $50 cable becomes a necessity for your sanity rather than a luxury.
Why Distance Matters More Than Price
Before you blame the cable for a weak signal, remember that why your mic sounds better three inches from your mouth is often a matter of physics and gain staging, not the wire quality. I tested these budget cables by running them directly over a PC power supply. The cheapest ones failed immediately, picking up a distinct whine. The mid-tier options—those in the $20 range—performed nearly as well as the boutique brands. If you’re building out your studio gear, the sweet spot is almost always the mid-tier tour grade cables rather than the bargain-bin specials.
Tactile Reality and Why Soft-Touch Jackets Win
The first thing you notice when handling a premium XLR cable is the ‘hand’—the way the material feels and moves. Budget cables often use a high-density polyethylene or cheap PVC that feels like a stiff garden hose. In a studio environment, this stiffness is more than just a nuisance; it creates mechanical noise. If you bump a stiff cable, that vibration travels directly into the microphone capsule. Higher-end cables use specialized polymers that allow the cable to lay flat and coil naturally. You can see the technical differences in conductor insulation by checking out the Mogami Neglex technical specifications, which highlight how they prioritize low capacitance over sheer bulk.
The Invisible Shield Against Your Wi-Fi Router
When you peel back the outer jacket, the real engineering reveals itself. Most entry-level cables use a ‘spiral’ shield—literally just strands of copper wrapped in one direction. It’s cheap to manufacture but leaves gaps when the cable is flexed. Professional-grade cables utilize a braided shield. This is a woven mesh of copper that provides nearly 100% coverage, even when the cable is flexed around a boom arm. If your studio has a high-end PC, a wireless router, and LED lighting panels, that braided shield is the only thing preventing your audio from sounding like a dial-up modem.
Copper Purity is Often Just Clever Branding
You will see ‘Oxygen-Free Copper’ (OFC) plastered all over marketing materials. While OFC does technically offer better conductivity, the audible difference in a 10-foot run is virtually zero. What actually matters is the gauge of the wire. A 22 AWG (American Wire Gauge) conductor is thicker and more durable than the 24 AWG found in bargain cables. The thicker wire provides a lower resistance path for your signal, which is vital if you are using a gain-hungry dynamic mic like the Shure SM7B. In my hands-on testing, the heavier gauge cables simply felt more substantial and less prone to internal ‘stretching’ when accidentally stepped on or pinched by a chair wheel.
Don’t Let a Stuck Pin Ruin Your Audio Interface
One of the most frustrating design flaws in budget cables is the tolerance of the XLR housing. I’ve encountered several ‘no-name’ cables where the female connector is just a fraction of a millimeter too wide. It slides into your $500 audio interface easily enough, but the locking tab gets stuck, turning a simple unplugging task into a high-stakes rescue mission. Furthermore, the rubber strain relief—the little boot where the cable meets the plug—frequently slides off on cheaper models, exposing the fragile solder joints to the elements. It’s a minor annoyance that becomes a dealbreaker the third time you have to push it back into place mid-stream.
The War Against Microphonics
If you’ve ever heard a ‘thump’ in your headphones just by touching your cable, you’re experiencing microphonics. This happens when the internal components of the cable rub against each other, creating static electricity. High-quality cables mitigate this by using cotton fillers or conductive PVC layers between the shield and the conductors. This attention to detail is why a pro cable remains silent when handled, whereas a cheap one sounds like a bowl of Rice Krispies. When you are performing or recording a podcast, that silence is the difference between a usable take and a ruined recording full of handling noise.
I put these cables through a gauntlet that mirrors a typical high-end creator setup: recording a 4K camera review while surrounded by three COB LED lights and a dual-monitor PC rig. This environment is an absolute nightmare for signal integrity because every power brick and cooling fan acts as a mini-radio station broadcasting noise. In this scenario, the difference between a generic cable and a studio-grade one isn’t just audible; it’s the difference between a clean track and one that requires hours of post-production cleaning.
How These Cables Perform Under Real-World Stress
During a four-hour recording session for a series of microphone reviews, I purposely draped the budget cables directly across the power supplies of my lighting kits. The result was a faint but persistent ‘buzz’ that only appeared when I boosted the gain for a dynamic microphone. In contrast, the mid-range and premium cables, which feature better shielding density, remained silent. If your studio gear involves a lot of high-wattage electronics, you aren’t just paying for the brand; you’re paying for the peace of mind that your audio won’t be ruined by a nearby lamp.
Does it Overheat Under Intense Studio Use?
While cables themselves don’t ‘overheat’ in the traditional sense, the heat generated by professional studio gear can soften the outer jackets of cheaper PVC cables. Over several weeks of testing, I noticed that the budget-tier options became increasingly tacky to the touch. This makes them a magnet for dust and hair in a home studio. In contrast, cables with a rubberized or ‘soft-touch’ finish, like those found in professional Mogami or Canare lines, remained flexible and clean regardless of the ambient temperature of the room.
Why Cheap Plugs Eventually Give Out
The biggest failure point isn’t the wire itself, but the connector. I performed a ‘stress test’ involving fifty plug-and-unplug cycles—simulating about six months of typical use for a mobile creator. By the end, the locking mechanism on the $10 cable began to wiggle, creating a micro-gap that caused ‘pop’ sounds whenever the mic was adjusted. A common sentiment found in the r/AudioEngineering community confirms that while gold plating is debated, the mechanical build of the shell is non-negotiable for longevity. If you are constantly swapping microphones for different reviews, that mechanical wear will kill a cheap cable within a year.
What Happens When the Lights Turn On?
High-end lighting kits are notorious for throwing off radio frequency interference (RFI). When I switched my LED panels to 50% brightness—a setting that often increases electrical ‘whine’ from the ballasts—the cheapest cables acted like antennas. I could actually hear the frequency of the light’s dimmer in my headphones. The better-shielded cables used a star-quad geometry which effectively canceled out this interference. This is why professional studio gear isn’t just about the specs on paper; it’s about how the equipment interacts with everything else on your desk.
The Physical Reality of Constant Adjustment
For those of us using boom arms, the cable is constantly flexing. Cheap cables often have ‘memory,’ meaning they stay kinked in the shape they were shipped in. This creates tension on the microphone’s XLR port, which can eventually damage your expensive gear. Professional cables use a high strand count in the copper core, allowing them to flow like liquid over the hinges of a boom arm. This lack of resistance means less wear on your microphone and a much cleaner look for your on-camera creator rig. Do you agree with my experience regarding the noise floor increases with budget cables? Many people swear by the cheapest option, but in my testing, the environment dictates the requirements.
Bottom Line Up Front: If you are recording in a bedroom with minimal electronics, a $10 XLR cable is likely indistinguishable from a $60 one. However, once you scale up to complex creator rigs with multiple monitors and power bricks, the cheap tax manifests as an annoying 60Hz hum. Most budget cables cut corners on shielding density, which is the only thing standing between your voice and electromagnetic interference. For the average hobbyist, cheap is fine; for the professional, it is a ticking time bomb of noise.
The Problem These Cables Actually Solve
The goal of an XLR cable isn’t to make your voice sound warmer or crisper—that is mostly marketing fluff. Its primary job is noise rejection through a balanced signal. High-end cables use braided copper shielding and precision-milled pins to ensure that the signal remains pure. In my testing, I looked specifically at three things: solder joint integrity, flexibility under cold conditions, and how well they handled being coiled next to high-voltage power strips. The promise of an expensive cable isn’t better sound, it is reliable sound.
The Build Quality Gap You Can Actually Feel
Unboxing a cheap cable usually reveals stiff, plasticky jackets that retain their memory from the packaging. This makes cable management a nightmare. I’ve found that expensive XLR cables are usually a waste of money if you never move them, but for mobile rigs, the durability of a genuine Neutrik connector is worth the premium. You can check the technical specs of standard professional connectors at the Neutrik official product page to see how they handle mechanical stress. If your cable is constantly moving, cheap ones will eventually develop crackling audio due to failing internal solder joints.
Is Spending $50 on a Single Cable Overpriced?
For a permanent desk setup where the cable never moves, yes, it is absolutely overpriced. If you are struggling with a persistent buzz, you might actually need to fix low frequency rumble in your desktop audio through software or physical isolation rather than buying a silver-plated wire. However, if your studio is packed with lighting kits and camera reviews gear that throws off massive RF noise, that $50 cable becomes a necessity for your sanity rather than a luxury.
Why Distance Matters More Than Price
Before you blame the cable for a weak signal, remember that why your mic sounds better three inches from your mouth is often a matter of physics and gain staging, not the wire quality. I tested these budget cables by running them directly over a PC power supply. The cheapest ones failed immediately, picking up a distinct whine. The mid-tier options—those in the $20 range—performed nearly as well as the boutique brands. If you’re building out your studio gear, the sweet spot is almost always the mid-tier tour grade cables rather than the bargain-bin specials.
Tactile Reality and Why Soft-Touch Jackets Win
The first thing you notice when handling a premium XLR cable is the ‘hand’—the way the material feels and moves. Budget cables often use a high-density polyethylene or cheap PVC that feels like a stiff garden hose. In a studio environment, this stiffness is more than just a nuisance; it creates mechanical noise. If you bump a stiff cable, that vibration travels directly into the microphone capsule. Higher-end cables use specialized polymers that allow the cable to lay flat and coil naturally. You can see the technical differences in conductor insulation by checking out the Mogami Neglex technical specifications, which highlight how they prioritize low capacitance over sheer bulk.
The Invisible Shield Against Your Wi-Fi Router
When you peel back the outer jacket, the real engineering reveals itself. Most entry-level cables use a ‘spiral’ shield—literally just strands of copper wrapped in one direction. It’s cheap to manufacture but leaves gaps when the cable is flexed. Professional-grade cables utilize a braided shield. This is a woven mesh of copper that provides nearly 100% coverage, even when the cable is flexed around a boom arm. If your studio has a high-end PC, a wireless router, and LED lighting panels, that braided shield is the only thing preventing your audio from sounding like a dial-up modem.
Copper Purity is Often Just Clever Branding
You will see ‘Oxygen-Free Copper’ (OFC) plastered all over marketing materials. While OFC does technically offer better conductivity, the audible difference in a 10-foot run is virtually zero. What actually matters is the gauge of the wire. A 22 AWG (American Wire Gauge) conductor is thicker and more durable than the 24 AWG found in bargain cables. The thicker wire provides a lower resistance path for your signal, which is vital if you are using a gain-hungry dynamic mic like the Shure SM7B. In my hands-on testing, the heavier gauge cables simply felt more substantial and less prone to internal ‘stretching’ when accidentally stepped on or pinched by a chair wheel.
Don’t Let a Stuck Pin Ruin Your Audio Interface
One of the most frustrating design flaws in budget cables is the tolerance of the XLR housing. I’ve encountered several ‘no-name’ cables where the female connector is just a fraction of a millimeter too wide. It slides into your $500 audio interface easily enough, but the locking tab gets stuck, turning a simple unplugging task into a high-stakes rescue mission. Furthermore, the rubber strain relief—the little boot where the cable meets the plug—frequently slides off on cheaper models, exposing the fragile solder joints to the elements. It’s a minor annoyance that becomes a dealbreaker the third time you have to push it back into place mid-stream.
The War Against Microphonics
If you’ve ever heard a ‘thump’ in your headphones just by touching your cable, you’re experiencing microphonics. This happens when the internal components of the cable rub against each other, creating static electricity. High-quality cables mitigate this by using cotton fillers or conductive PVC layers between the shield and the conductors. This attention to detail is why a pro cable remains silent when handled, whereas a cheap one sounds like a bowl of Rice Krispies. When you are performing or recording a podcast, that silence is the difference between a usable take and a ruined recording full of handling noise.
I put these cables through a gauntlet that mirrors a typical high-end creator setup: recording a 4K camera review while surrounded by three COB LED lights and a dual-monitor PC rig. This environment is an absolute nightmare for signal integrity because every power brick and cooling fan acts as a mini-radio station broadcasting noise. In this scenario, the difference between a generic cable and a studio-grade one isn’t just audible; it’s the difference between a clean track and one that requires hours of post-production cleaning.
How These Cables Perform Under Real-World Stress
During a four-hour recording session for a series of microphone reviews, I purposely draped the budget cables directly across the power supplies of my lighting kits. The result was a faint but persistent ‘buzz’ that only appeared when I boosted the gain for a dynamic microphone. In contrast, the mid-range and premium cables, which feature better shielding density, remained silent. If your studio gear involves a lot of high-wattage electronics, you aren’t just paying for the brand; you’re paying for the peace of mind that your audio won’t be ruined by a nearby lamp.
Does it Overheat Under Intense Studio Use?
While cables themselves don’t ‘overheat’ in the traditional sense, the heat generated by professional studio gear can soften the outer jackets of cheaper PVC cables. Over several weeks of testing, I noticed that the budget-tier options became increasingly tacky to the touch. This makes them a magnet for dust and hair in a home studio. In contrast, cables with a rubberized or ‘soft-touch’ finish, like those found in professional Mogami or Canare lines, remained flexible and clean regardless of the ambient temperature of the room.
Why Cheap Plugs Eventually Give Out
The biggest failure point isn’t the wire itself, but the connector. I performed a ‘stress test’ involving fifty plug-and-unplug cycles—simulating about six months of typical use for a mobile creator. By the end, the locking mechanism on the $10 cable began to wiggle, creating a micro-gap that caused ‘pop’ sounds whenever the mic was adjusted. A common sentiment found in the r/AudioEngineering community confirms that while gold plating is debated, the mechanical build of the shell is non-negotiable for longevity. If you are constantly swapping microphones for different reviews, that mechanical wear will kill a cheap cable within a year. #IMAGE_PLACE_HOLDER_C#
What Happens When the Lights Turn On?
High-end lighting kits are notorious for throwing off radio frequency interference (RFI). When I switched my LED panels to 50% brightness—a setting that often increases electrical ‘whine’ from the ballasts—the cheapest cables acted like antennas. I could actually hear the frequency of the light’s dimmer in my headphones. The better-shielded cables used a star-quad geometry which effectively canceled out this interference. This is why professional studio gear isn’t just about the specs on paper; it’s about how the equipment interacts with everything else on your desk.
The Physical Reality of Constant Adjustment
For those of us using boom arms, the cable is constantly flexing. Cheap cables often have ‘memory,’ meaning they stay kinked in the shape they were shipped in. This creates tension on the microphone’s XLR port, which can eventually damage your expensive gear. Professional cables use a high strand count in the copper core, allowing them to flow like liquid over the hinges of a boom arm. This lack of resistance means less wear on your microphone and a much cleaner look for your on-camera creator rig. Do you agree with my experience regarding the noise floor increases with budget cables? Many people swear by the cheapest option, but in my testing, the environment dictates the requirements.
Budget Cables Still Have a Place in Simple Rigs
When comparing entry-level options like AmazonBasics or Hosa’s consumer line to high-end studio gear, the value proposition is clear. If you are just starting your first creator rig and your total equipment cost is under $200, spending 25% of your budget on a cable is nonsensical. These budget cables work perfectly in low-interference environments. However, they lack the shielding density of professional alternatives. Compared to Mogami or Canare, generic brands use thinner copper and ‘filler’ materials that don’t dampen vibrations. You save money, but you trade away long-term mechanical reliability.
Why Mogami Gold Stays the Industry Favorite
Mogami Gold is the yardstick by which all other studio gear is measured. When stacked against mid-tier brands like Roland or Pig Hog, Mogami offers a significantly lower noise floor in high-interference zones. While a Pig Hog cable is virtually indestructible and great for live stages, the Mogami Gold uses a higher strand count that provides superior flexibility for desktop boom arms. In my camera reviews, I often highlight how bulky cables ruin the aesthetic of a clean desk; Mogami solves this by being incredibly thin yet perfectly shielded. #IMAGE_PLACE_HOLDER_D#
Is it worth the upgrade?
If you are upgrading from a generic $10 cable to a $60 Mogami or Canare Star-Quad, the answer depends entirely on your environment. If you hear a ‘hiss’ or ‘hum’ when your PC is under load, or if your lighting kits cause interference, the upgrade is not just worth it—it is mandatory for professional results. For those using a simple USB interface and a single dynamic mic in a quiet room, the audible difference will be negligible. However, for a growing creator rig, the upgrade buys you ‘insurance’ against future interference issues as you add more electronics to your desk. You can track the current market rates for these professional standards at Sweetwater’s microphone cable category to see when sales hit.
Balance Your Budget with High-Performance Alternatives
If you find Mogami too expensive but hate the quality of bargain cables, brands like Canare and Cordial provide the perfect middle ground. These brands use the same high-quality Neutrik connectors found on boutique cables but cost about 40% less. In my microphone reviews, I frequently use Canare L-4E6S cables because they offer the same ‘Star-Quad’ noise rejection as the elite brands without the ‘luxury’ markup. If you are building a studio on a budget, look for ‘tour-grade’ cables rather than ‘audiophile-grade.’ They offer the same physical durability and signal integrity for a fraction of the price. Check current prices on these mid-tier workhorses before committing to the most expensive option. If you are still on the fence, go check out our detailed camera reviews to see how we manage cables in a high-density video setup.
How These Cables Stack Up When the Lights Are On
After weeks of testing in a high-interference studio, the results are clear. Professional cables like Mogami and Canare aren’t just about the brand name; they are about the physics of silence. Successes include superior 100% braided shielding that kills RFI and EMI, soft-touch jackets that eliminate mechanical handling noise, and precision connectors that won’t get stuck in your interface. On the downside, the price premium is steep for absolute beginners, and budget cables offer nearly identical audio quality in rooms with zero electronic noise. If you are trying to fix low frequency rumble in your desktop audio, a new cable might assist, but it won’t replace proper acoustic treatment.
Picking the Best Wire for Your Specific Setup
You should invest in a high-end XLR cable if you are building a complex creator rig with multiple monitors, LED panels, and a gain-hungry dynamic microphone. In these environments, cheap wires act like antennas for electrical hum. However, if you are browsing 5 items you need to start a podcast for under 100, stick with a $15 Hosa cable and put that extra cash into a mic arm that holds your gear without squeaking. Mobile creators who constantly pack and unpack their gear should also prioritize professional-grade connectors to avoid the mechanical failure of cheap pins.
The Ultimate Score for Studio Grade Cables
For the professional creator, a pro-grade cable is a mandatory insurance policy against ruined takes and hours of post-production cleaning. For the hobbyist in a simple room, it is a luxury you can likely skip until you expand. If your desk is currently a mess of wires, remember that this 9-cable clip is the secret to a clean studio desk and will improve your workflow more than a silver-plated connector. My final score for mid-tier ‘Tour Grade’ cables like Canare is 9/10 for value and reliability. The Bottom Line: Buy the mid-tier tour grade cables for the best balance of price and shielding. Check the latest prices and upgrade once your rig grows beyond a single laptop and mic. #IMAGE_PLACEHOLDER_E#