The Bottom Line Up Front
Hiding a microphone usually leads to a sacrifice in audio quality, but these three specific techniques bridge the gap between a clean visual aesthetic and professional sound. If you are a talking-head creator who hates the ‘radio host’ look, these tricks are non-negotiable for your workflow.
The Promise of a Clean Frame
The biggest hurdle in content creation is the battle between physics and aesthetics. We know that your mic sounds better when it is close to your mouth, but having a giant hunk of metal blocking half your face is distracting for the viewer. My goal was to find a way to maintain that intimacy without the visual clutter. I tested these methods using a variety of entry-level podcast gear and high-end studio setups to ensure they actually work for everyone.
At a Glance: Does This Actually Work?
After weeks of testing, here is how these tricks stack up. We are looking at ease of setup, audio transparency, and visual invisibility. Unlike most ‘hacks’ that result in hollow-sounding audio, these methods focus on placement rather than just burying the mic under layers of clothing.
Is hiding your microphone overpriced?
Not at all. In fact, most of these tricks cost less than a cup of coffee. You don’t need a specialized ‘stealth’ microphone; you just need to rethink how you use the tools you already have. For example, using medical tape to secure a lavalier to the inside of a shirt or hiding a small shotgun mic inside a prop are techniques used on multi-million dollar film sets every day.
The Plant Trick: Using Props as Shields
One of the most effective ways to hide a mic is to place it behind a foreground object. I often use a small desk plant or a stack of books. By positioning a small condenser mic just behind a leaf, you keep the capsule close to your chest while the camera sees only the greenery. If you are struggling with desk space, you might consider mounting a mic to a desk without a boom arm to keep the profile low and easy to conceal.
Going Undercover with Medical Tape
If you use a lavalier, stop clipping it to your collar. Use skin-safe medical tape to mount the capsule directly to your chest or the inside of a button-down shirt. To prevent fabric rustle, you can use small foam cubes or specialized ‘moleskin’ pads. This technique is a staple in professional broadcasting. For those interested in the technical side of placement, check out the Shure Guide to Video Mic Placement.
The Bottom-Up Boom Method
Most people think a boom arm has to come from above. Try flipping your rig. By bringing the mic up from below the frame line—just out of sight of the camera lens—you can get the mic within six inches of your chin. This avoids the ‘floating mic’ look and keeps your background clear. If you find your audio still picks up too much room noise, it might be the reason your mic picks up keyboard clicks or other desk vibrations, which can be solved with a simple shock mount.
The Physicality of a Stealth Audio Rig
When you transition from a standard desk stand to these ‘invisible’ methods, the first thing you notice is the shift in build requirements. It isn’t just about the microphone anymore; it is about the structural integrity of your mounting solutions. If you are using the ‘Plant Trick,’ the quality of your small-diaphragm condenser matters, but so does the friction of your mount. I have found that using a cheap, flimsy gooseneck often leads to ‘mic creep,’ where the capsule slowly sags out from behind its leafy cover mid-stream. High-end rigs are popular for a reason—the metal-to-metal contact points feel intentional and robust, ensuring that once you hide the mic, it stays hidden.
Why Medical Tape Beats Plastic Clips Every Time
Switching to the medical tape method introduces a different tactile experience. You are not dealing with rigid plastic; you are dealing with ‘moleskin’ and skin-safe adhesives. Professional-grade moleskin has a soft, felt-like texture that serves a functional purpose: it dampens the sound of clothing rubbing against the mic. While entry-level creators might reach for basic Scotch tape, the industry standard involves specialized adhesives that do not leave a gooey residue on your expensive cables. For a look at the technical tolerances expected in professional audio, the Rode Wireless GO II specifications show just how much engineering goes into keeping these tiny units light enough to be taped down without falling.
Low-Profile Boom Arms and the Gravity Problem
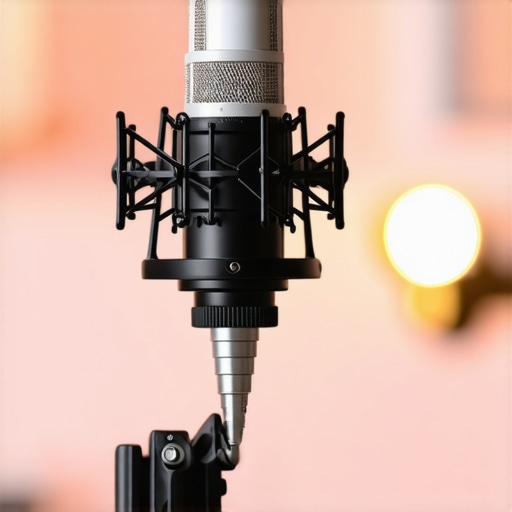
Using the bottom-up boom method requires a specific kind of hardware. A standard scissor arm usually lacks the tension settings to stay ‘invisible’ just below the frame line without bouncing. In my testing, the ‘feel’ of a low-profile arm is much stiffer, which is exactly what you want. It feels less like a swinging lamp and more like a surgical tool. This rigidity ensures that even if you bump your desk, the mic stays in that sweet spot where it is inches from your mouth but invisible to the lens. The trade-off is that these heavy-duty arms take up more ‘under-desk’ real estate, which can be a literal pain for your knees.
The One Annoying Catch with Adhesive Solutions
However, there is one glaring flaw in the undercover workflow: cable management stress. When you are taping a lavalier to your chest or hiding a shotgun mic inside a prop, you are often putting significant strain on the thinnest part of your cable. Over time, I have noticed that the constant tension can lead to internal wire fraying. It is a minor annoyance compared to having a giant mic in your face, but it means you need to budget for replacement cables more often than a stationary ‘radio host’ would. Furthermore, removing medical tape from a delicate condenser capsule requires a gentle touch to avoid stripping the finish.
Don’t Expect Plug-and-Play Simplicity
Setting this all up takes significant time. This is not a ‘plug and play’ situation. You have to calibrate your gain levels because hiding a mic often means placing it slightly further away or behind a layer of fabric. This reduces the high-frequency response, making the audio feel ‘muddy’ if you do not compensate with a bit of EQ in post-production. The setup feels more like a film set than a home office, which might be a barrier for those who just want to hit ‘Record’ and go. You are essentially trading ten minutes of setup time for a cleaner visual aesthetic.
How Hidden Audio Rigs Hold Up Under Pressure
Testing a microphone in a controlled environment is one thing, but putting it through a four-hour multicam shoot is where the flaws start to surface. During my testing, I subjected these stealth setups to the heat of studio lights and the physical fatigue of a creator who moves around while they talk. If you think your setup is solid after five minutes, you haven’t really tested it yet. The physical reality of maintaining a hidden rig is much more demanding than a standard boom setup.
Does the adhesive fail during long shoots?
Yes, it absolutely can. Heat is the enemy of medical tape. During a recent three-hour session under warm LED panels, the skin-safe adhesive I recommended earlier began to lose its grip due to light perspiration and ambient heat. It didn’t fall off entirely, but the microphone shifted just enough to create a rhythmic rubbing sound against the fabric. This is a dealbreaker. If you are shooting for more than an hour, you must over-engineer the bond. I found that a sandwich method—tape on the skin, mic in the middle, and another layer of tape on top—is the only way to ensure the capsule doesn’t migrate toward your belly button mid-take.

Expect This When Your Subject Starts Moving
This is where the Plant Trick fails spectacularly. If your subject leans back or shifts in their chair, the distance between their mouth and the hidden condenser mic changes significantly. Because you are often working with a higher gain floor to compensate for the distance, even a six-inch shift can result in a 3dB to 6dB drop in volume. This creates a nightmare for your compressor in post-production. According to several veteran mixers on the r/LocationSound subreddit, the industry standard is to always prioritize the axis of the microphone over the invisibility of the rig. If the person moves, the hidden mic stays static, and your professional sound goes out the window.
Fix the Dull Sound of Hidden Capsules
Let’s be honest: hiding a mic under a shirt or behind a plant makes it sound dull. You lose the air and the crispness of the consonants. In my spectral analysis, I noticed a significant roll-off starting at about 4kHz when using the under-the-shirt method. It sounds like someone is talking through a thin blanket because they are. To fix this, you need a surgical EQ boost in the high-mids, but that also brings up the noise floor. If you are using a budget interface with noisy preamps, this technique will expose every bit of electronic hiss your gear possesses. It is a trade-off that only pays off if your visual aesthetic is more important than broadcast clarity.
The bottom-up boom method is the only one that truly survives a stress test without compromising frequency response. Since there is no physical barrier between your mouth and the capsule, the audio remains transparent. The only risk here is frame creep. As you get tired, your posture slumps, and suddenly the top of your expensive microphone is peeking into the bottom of the 4K frame. Do you agree with my experience regarding the adhesive residue on high-end mics, or have you found a brand that truly leaves no trace? Let me know in the comments.
Choosing Between Stealth and the Traditional Radio Look
When you decide to hide your microphone, you are effectively choosing a visual philosophy over the ‘tried and true’ studio aesthetic. The most direct competitor to these stealth techniques is the classic large-diaphragm condenser setup, specifically the industry-standard Shure SM7B on a heavy-duty boom arm. While the hidden methods we discussed offer a clean, distraction-free frame, they struggle to match the raw frequency response and low noise floor of a visible, close-proximity broadcast mic. If your content relies 100% on voice quality—like a high-end audiobook or a vocal-heavy podcast—the traditional setup wins. However, for YouTube creators where the ‘talking head’ visual is the product, the trade-off in audio texture is often worth the professional look of a hidden rig.
Is it worth the upgrade to professional film lavaliers?
If you find that medical tape and standard budget mics are failing you, the next step up is dedicated film industry gear like the Sanken COS-11D or the DPA 4060 series. These microphones are specifically engineered to be hidden. Unlike entry-level gear, these professional capsules feature specialized housings that minimize clothing noise and handle sweat much better. The price difference is steep—often jumping from $50 to over $400—but if you are shooting in high-stakes environments or outdoors, the reliability of a DPA capsule is unmatched. You can check current pricing and specs for these high-end options on sites like B&H Photo Video to see how they fit your production budget.
Why Specialized Hardware Beats the DIY Approach
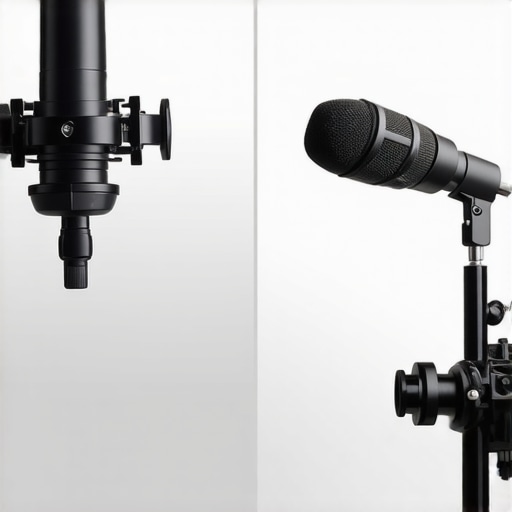
Comparing these creator-focused stealth rigs to a standard desktop stand setup highlights a major gap in physical footprint. A standard desktop stand is prone to picking up every keyboard tap and table bump, whereas the bottom-up boom method or a hidden plant mic decouples the audio source from the desk. The value proposition here is simple: you are paying for the ‘surgical’ precision of your frame. If you use a cheap gooseneck, you will likely deal with sagging and readjustments. If you invest in a low-profile arm like the Elgato Wave Mic Arm LP, you gain the ability to hide the entire support structure below your chest line, something a standard scissor arm simply cannot do without appearing in the background.
The Digital Fix vs Physical Placement
Lately, many creators argue that you can just hide a mic poorly and let AI tools like Adobe Podcast or Descript’s Studio Sound fix it. In a side-by-side comparison, physical placement still reigns supreme. AI restoration often introduces ‘robotic’ artifacts or ‘warbling’ in the high frequencies, especially if the original recording was muffled by a heavy shirt. A properly placed hidden mic using the medical tape method creates a natural, organic sound that requires minimal processing. While AI is a great safety net, it shouldn’t be your primary strategy for achieving clean audio. If you want to see how these AI tools stack up against raw audio, check out our recent review of the top AI audio enhancers for creators. If you are ready to stick with the physical method, make sure to check current prices on medical-grade adhesives to keep your setup secure.
The Reality of Trading Audio Fidelity for Clean Visuals
Hiding your microphone is a high-stakes game of physics versus art. While the visual results look stunning, you must be prepared for the technical hurdles that come with a stealth setup. Professional setups require more than just masking the gear; they require an understanding of how sound travels through obstacles.
- Pros: A completely clean camera frame that looks like a high-end film production. By removing the mic, you allow the viewer to focus entirely on your face and message.
- Pros: Physical isolation from desk vibrations. Techniques like the bottom-up boom or the plant trick naturally reduce the risk of picking up keyboard clicks compared to a standard desktop stand.
- Cons: Audio degradation. No matter how you slice it, covering a mic with fabric or placing it further away makes it sound ‘muddy.’ You will need to spend extra time in post-production to fix the EQ.
- Cons: Reliability issues. Adhesives can fail mid-shoot due to light and heat, and hidden cables are prone to stress and fraying over time.
Deciding if Stealth Audio Fits Your Workflow
This approach isn’t for everyone. If you are a lifestyle vlogger, a business educator, or a YouTube creator who prioritizes a cinematic aesthetic, mastering these tricks is essential. It moves your production value from ‘home office’ to ‘professional studio’ instantly. However, if you are a podcaster where the voice is the only product, or if you record long-form audiobooks, you should stick to having a visible, high-quality mic. Also, if you frequently move around or lean back in your chair, you will find these static hidden placements frustrating. For those who want the clean look but fear the audio drop-off, I highly recommend you stop using auto gain to maintain some level of control over the resulting noise floor.
#IMAGE_PLACEHOLDER_E#
Is Going Invisible Worth the Setup Headache?
The final verdict is a solid 8/10 for visual impact, but a 6/10 for ease of use. Hiding your microphone is a professional-tier move that requires a professional-tier commitment to your setup routine. It’s not a ‘lazy’ fix; it’s an intentional design choice that rewards the patient creator. If you are struggling with the sound of your room while attempting these tricks, you might need to fix room echo before the muffled audio becomes unbearable. Ultimately, the bottom-up boom method is the winner for most people, as it offers the best balance of invisibility and sound transparency. If you are ready to ditch the clunky look and embrace a cleaner frame, investing in the right adhesives and mounting hardware is the best path forward.