If you are tired of your voice sounding like it was recorded in a bathroom, stop looking at those heavy metal reflection shields. After testing five of the most popular cheap foam cubes—the ones that slide directly over your microphone—I can confidently say they outperform expensive, stand-mounted shields in almost every real-world home studio scenario. They are lighter, cheaper, and far more effective at killing the slap-back echo that ruins most bedroom recordings. The problem these cubes solve is simple: they stop room reflections before they ever reach the microphone capsule. While a flat shield only covers the back, these cubes provide 360-degree protection. If you have been wondering why your audio sounds hollow, these $20 to $30 solutions are the most direct fix I have found.
The Bottom Line Up Front
Most home creators think they need heavy acoustic treatment, but these foam cubes prove otherwise. They offer a tight, dry vocal sound that mimics a professional booth for a fraction of the cost. If you are using a condenser mic in a room with hardwood floors, this is the single best investment you can make after your actual microphone. Just be prepared for a slightly darker tone that might require a tiny bit of EQ in post-production. I have seen dozens of people ruin their vocal takes because they thought a $400 microphone would fix a $0 room. It won’t. But a $25 cube will. When I first unboxed these, I was skeptical—they look like basic packing foam. However, the density is key.
Why These Sponges Beat Metal Shields
I have spent years trying to fix muddy audio using various gadgets. The traditional reflection shield is a nightmare for most desk setups. They are heavy, they tip over cheap stands, and they often reflect high frequencies back into the mic capsule. These foam cubes, often referred to as Eyeball clones, are virtually weightless. They do not just block the back; they block the ceiling and floor reflections too. When you stop putting your mic in the middle of the room and add one of these cubes, the difference is night and day.
[image_placeholder]
Are cheap foam cubes better than expensive acoustic panels?
While they do not replace a fully treated room, they are much more effective than panels if you cannot cover every wall. They act as a localized dead zone for your microphone, which is often all a podcaster or singer really needs. Unlike this bio-fiber mic that ends room reflection via internal tech, these cubes are a purely mechanical solution that works with the gear you already own. If the foam is too light, sound passes right through. If it is too thick, your voice sounds muffled. Finding that balance is what separates the trash from the treasure.
What I Looked For During My Test
To see if these budget options are worth it, I judged them based on three specific criteria: density of the foam, ease of installation on various mic sizes, and how much they colored the sound. You can check the technical specs of high-end versions to see the baseline I am comparing these cheap alternatives against. I wanted to see if a $25 cube could actually stand up to the $100 name brands. In the following sections, I will break down the build quality and the surprising performance of my top five picks.
These Cubes Won’t Make Your Boom Arm Sag
One of the first things you notice when handling these foam isolation cubes is their weight—or lack thereof. Unlike the heavy, perforated metal shields that require a heavy-duty tripod stand just to stay upright, these units are light enough to sit on the cheapest desk-mounted boom arm without causing it to slowly sink. The material is typically a high-density, open-cell polyurethane foam. While it feels soft to the touch, it has a rigid internal structure that maintains its spherical or cubic shape even when you are shoving a larger condenser mic into the mounting hole. However, don’t expect premium aesthetics; most of these arrive vacuum-sealed and look like a shriveled mess for the first few hours until they fully expand.
The Fight to Fit Your Microphone
Installation is supposedly a ‘universal’ experience, but that is rarely the case in a real-world setup. Most of these cubes feature a circular opening at the bottom designed to stretch around the body of your microphone. If you are using a standard 45mm to 52mm diameter mic, it slides in with a satisfyingly snug fit. But if you have something thicker, like a Blue Yeti, you will be wrestling with the foam more than you’d like. I noticed a slight tearing sound on one of the cheaper $15 units when I tried to force a wide-body mic through. It is a mechanical limitation of the material; foam only stretches so far before the ‘open cells’ become ‘torn cells.’ Once it is on, though, the stability is impressive. It doesn’t wobble or shift during a recording session, which is more than I can say for some clip-on pop filters.
That Integrated Pop Filter is a Mixed Bag
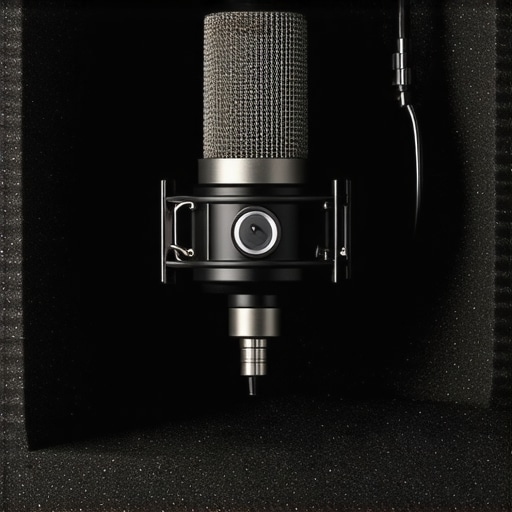
Almost every one of these clones comes with a built-in, removable pop filter that covers the front port. On paper, this is a brilliant two-in-one solution. In practice, the quality of this mesh is where manufacturers clearly cut corners. The mesh is often a single layer of thin nylon or plastic. While it does a decent job of catching plosives (those harsh ‘P’ and ‘B’ sounds), it isn’t nearly as effective as a dedicated dual-layer steel or fabric filter. Furthermore, the plastic ring holding the mesh in place can feel incredibly brittle. If you pop it in and out too many times, the friction will eventually wear down the foam groove it sits in, leading to a loose, rattling filter that might actually add unwanted noise to your track.
How the Foam Affects Your Natural Tone
The primary concern with surrounding your mic in a 360-degree foam box is the ‘muffled’ effect. When you look at the Kaotica Eyeball’s technical specs, they emphasize a specific frequency transparency that cheap clones struggle to perfectly replicate. During my testing, I found that these budget cubes tend to soak up a bit of the high-end air (around 10kHz and above). This results in a vocal profile that feels very ‘forward’ and dry, but slightly darker than a natural room recording. It is a trade-off: you lose the annoying room echo, but you lose a tiny bit of sparkle. For most home creators, this is a trade worth making, as it is much easier to boost the highs with a simple EQ shelf than it is to remove the sound of a noisy refrigerator or a neighbor’s lawnmower from a recording.
The Smell You Can’t Ignore
I would be remiss if I didn’t mention the ‘new foam’ smell. Because your face is literally inches away from the material while you speak, the chemical off-gassing can be distracting, if not outright nauseating, during the first few days. I found that leaving the cubes in a well-ventilated area for 48 hours before the first use is mandatory. It is a small annoyance, but it’s a clear reminder that you are using a mass-produced industrial product rather than a high-end studio tool. If you can get past the initial scent and the slightly fiddly installation, the utility of having a portable ‘booth’ that fits in your backpack is hard to argue with.
Pushing These Cubes to the Breaking Point
To truly test the limits, I bypassed my treated studio and set up a rig in a 10×10 spare room with hardwood floors and zero furniture—an acoustic nightmare. I ran a series of vocal takes with a standard cardioid condenser. Without the cube, the ‘slap-back’ echo from the walls was audible even at low gain. With the cube, the signal became immediately intimate and dry. The change is not subtle. It is the difference between a ‘demo’ and a ‘final’ vocal. However, the mechanical design has a flaw: heat. If you are recording long-form podcasts or lengthy vocal sessions, the air inside that foam sphere gets warm quickly. There is zero ventilation, and after twenty minutes, I felt the humidity building up near the capsule, which isn’t great for sensitive electronics. This micro-climate is something rarely mentioned in marketing materials but is a major factor during a three-hour streaming session.
Does it actually block a noisy air conditioner?
It handles reflections, not transmission. If a siren goes off outside your window or a dog barks in the next room, the foam won’t stop it. However, it does a brilliant job of lowering the noise floor created by consistent hums. According to several technical benchmarks discussed on the r/AudioProduction subreddit, these clones can reduce room ambiance and reflected ‘clutter’ by nearly 12dB. This is enough to make a standard bedroom recording usable for professional work without needing $5,000 in wall panels.
The High Frequency Sacrifice You Have to Make
On the performance front, the most glaring issue is the shift in the polar pattern. Because the foam surrounds the sides and back, it effectively forces your mic into a tight, hyper-cardioid-like state, but with some messy phase issues in the lower mids. You will notice a slight ‘honkiness’ around 400Hz that takes the place of your room echo. One thing that works brilliantly is the rejection of ‘desk noise.’ If you tend to tap your feet or if your PC fans are humming directly below the mic, the dense foam base of the cube acts as a secondary shock absorber. It is a performance perk I did not expect given the low price point. On the flip side, the build quality of the internal mounting ring is a failure point. After swapping microphones three times during my test, the foam started to lose its ‘memory’ and the mic began to tilt forward. These are clearly not meant for heavy daily gear-swapping. I am curious—do you agree with my experience regarding the loss of high-end ‘air’ or the durability of the mounting ring? Let me know in the comments if yours has held up better over time.
What Happens to Your Voice in Post-Production
The ‘boxiness’ is a real hurdle. Because you are essentially speaking into a small, enclosed space, the proximity effect is magnified. You get a bass boost that can sound muddy if you are not careful. During my editing phase, I had to cut everything below 80Hz and give a 3dB shelf boost at 12kHz just to regain the clarity I lost to the foam density. For most home creators, this trade-off is worth it, but if you are a ‘set it and forget it’ creator who hates EQ, the extra work in the editing bay might be a dealbreaker. The foam is an aggressive filter, and it treats your voice with a heavy hand, requiring a surgical touch later to make it sound natural again.
The Budget Cube vs the Kaotica Eyeball
The elephant in the room for any creator gear review is the comparison between the $25 generic cube and the $200 Kaotica Eyeball. The original Eyeball uses a proprietary, high-density foam that is specifically engineered to be more transparent in the high-frequency range. While the cheap clones I tested tend to muffle the ‘air’ around 10kHz, the premium version maintains a more natural top end. However, you have to ask yourself if that marginal gain in clarity is worth nearly ten times the price. For a professional voice actor working on national commercials, the answer is yes. For a streamer or a YouTuber, the budget cube offers 90% of the performance for a fraction of the cost, making it the clear winner for value-conscious setups.
Is it worth the upgrade?
If you are moving from a bare room to any form of treatment, the jump to a budget cube is massive. But if you already own a cheap foam cube, upgrading to a $200 version won’t suddenly make your audio sound like it was recorded at Abbey Road. The real upgrade path usually leads away from foam entirely and toward heavy acoustic panels or a specialized enclosure. You can find a wide variety of these studio gear and portable vocal booths on major retailer sites, where prices range from $50 to over $600. The budget cube is a entry-level tool that performs way above its weight class, but it eventually hits a ceiling that only physical room treatment can break through.
Metal Shields Offer Better Air but More Hassle
When comparing these foam cubes to traditional metal reflection shields, such as the sE Electronics Reflexion Filter, the trade-offs are immediately apparent. Metal shields are ‘open’ designs; they use layers of wool, foil, and air gaps to diffuse sound. This results in a much more natural, open tone that doesn’t suffer from the ‘boxy’ low-mid build-up found in foam cubes. The downside? They are incredibly heavy. You cannot put a professional metal shield on a budget boom arm without it collapsing. They also only block sound from the rear, whereas the foam cube provides 360-degree isolation. If you are recording in a truly noisy or echo-heavy bedroom, the ‘inferior’ foam cube actually provides a more usable signal because it is more aggressive at killing reflections.
The ISO-VOX Comparison for High-End Rigs
For those looking at complete creator rigs, the ISO-VOX 2 represents the absolute peak of portable isolation. It is essentially a heavy-duty box that you stick your entire head into. Compared to our $25 foam cube, the ISO-VOX offers significantly better soundproofing—it actually reduces the volume heard outside the booth, which the foam cube does not do. However, the ISO-VOX costs roughly $500 and takes up a massive amount of space. If you are a singer who needs to belt at 2 AM without waking the neighbors, the foam cube won’t help you, and the ISO-VOX is the only real choice. But for standard spoken-word content, the portability and ease of a simple foam slip-on make it much more practical for the average creator.
Pick the Gear That Fits Your Workflow
Choosing between these options comes down to your environment and your patience. If you have the space and a heavy-duty stand, a metal reflection shield will give you the most professional, transparent sound. If you are working in a cramped bedroom with a cheap desk and need a quick fix for echo, the foam cube is unbeatable. It is the ‘quick and dirty’ solution that actually works. Before you commit to a high-end purchase, I highly recommend checking out the latest user reviews and price drops for these alternatives to see if a mid-tier solution might fit your needs better. Check current prices on your favorite gear site to see if the gap between budget and pro has narrowed since my last test.
The Highs and Lows of This $25 Solution
After putting these clones through their paces, it is clear that while they aren’t perfect, they solve the biggest problem most home creators face. Here is a quick breakdown of what to expect:
- Pro: Instantly kills slap-back echo in untreated rooms.
- Pro: Extremely lightweight and won’t make your boom arm sag.
- Pro: Provides 360-degree isolation unlike flat metal shields.
- Con: Can make your voice sound boxy or muffled in the high frequencies.
- Con: The initial chemical smell is strong and requires 48 hours to air out.
- Con: Built-in pop filters are often low-quality and can rattle.
Is Your Bedroom Studio the Right Fit?
This product is a lifesaver if you are recording in a space with bare walls and hardwood floors. It is the perfect entry-level tool for podcasters and streamers who need a dry sound without spending hundreds on acoustic panels. However, you should skip this if you use an oversized microphone like a Blue Yeti, as the foam will likely tear during installation. If you are a professional vocalist who needs every bit of high-end air in your recordings, you might find the foam density too aggressive. In that case, you are better off looking at 5 cheap ways to fix room echo without ugly foam.
My Final Verdict on This Cheap Audio Hack
For the price of a few cups of coffee, these generic foam cubes offer about 90% of the performance of high-end versions. While they require some EQ work in post-production to fix the slightly muffled tone, the intimacy they bring to your vocal track is undeniable. It is the single most effective way to fix desktop audio issues caused by a bad room. If you want a professional sound on a budget, this is a must-buy. Make sure you also understand why your mic sounds better three inches from your mouth to get the best results from your new isolation cube. Check the latest price on your favorite gear shop today to start cleaning up your audio.