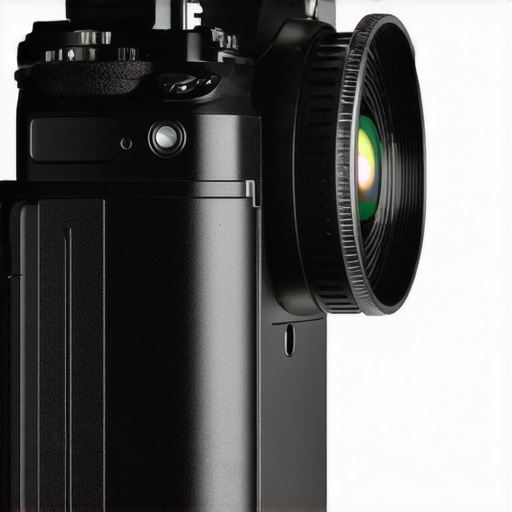
Bottom Line Up Front: If you shoot 4K video on a mirrorless body, this $15 external fan is the most essential budget accessory you can buy. It is not a perfect piece of engineering, but it consistently adds over 40 minutes of recording time to cameras prone to thermal shutdown, making it a mandatory tool for long-form creators.
Why My High-End Camera Kept Quitting on Me
There is nothing more frustrating than your gear failing mid-shoot. I have dealt with my share of mirrorless cameras shutting down right when the lighting was perfect. While you can try to tweak the one menu setting that raises the thermal limit, it often is not enough for summer outdoor shoots or heated studios. This $15 fan promised to solve that specific heat-dissipation problem by pulling hot air away from the sensor housing without requiring a $400 cage or an internal mod.
At a Glance: Cheap Coolers vs. Expensive Rigs
When I first unboxed this generic external cooler, I expected flimsy plastic and a motor that sounded like a jet engine. Instead, I found a compact, suction-cup-mounted unit that fits snugly against the back of the LCD screen area. I am reviewing this as a physical product, focusing heavily on its build quality, performance under load, and the noise floor it introduces to my audio. I judged this based on three strict criteria: decibel levels, mounting stability, and most importantly, the actual temperature drop after 30 minutes of continuous 4K 60fps recording.
Is a $15 fan too loud for professional audio?
This is the biggest doubt creators have before buying. In my testing, at the “Low” setting, the hum is negligible if your mic is properly positioned. If you are worried about noise, you might also want to investigate why your mic picks up unwanted sounds to ensure your cooling solution does not ruin your take. You can find technical specs for similar cooling tech on the Ulanzi official site, which often lists decibel ratings for their creator-focused fans. Now, let us dive into the actual performance and see if those suction cups stay stuck when the camera body hits 105 degrees.
Build Quality and the Suction Cup Struggle
When you hold this fan for the first time, the lack of weight is the most immediate sensation. While some might equate ‘heavy’ with ‘quality,’ in the world of camera rigs, lightweight is a massive advantage. If you are balancing a Sony A7IV or a Canon R6 on a gimbal like the DJI RS3, adding 200 grams of cooling gear can throw off your motors. This unit weighs less than a standard battery, which means your gimbal won’t even notice it’s there. The plastic housing feels rigid enough to survive a drop into a gear bag, but it is the mounting mechanism that requires your attention. Unlike the Tilta Cooling System which uses a proprietary mounting bracket for specific camera models, this budget fan relies on four tiny suction cups.
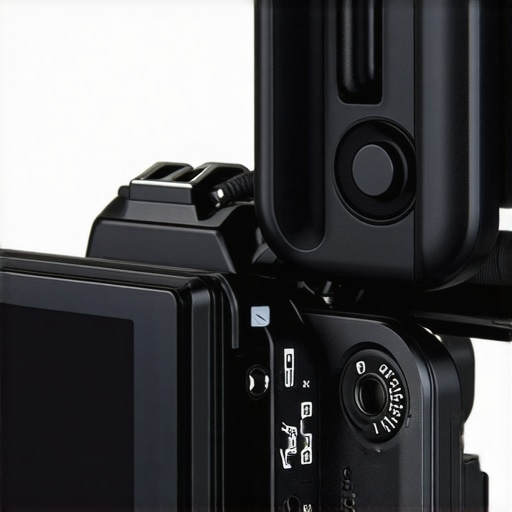
On a perfectly smooth surface like the back of a flipped-out LCD screen, those suction cups are surprisingly aggressive. However, I found my first design flaw almost immediately: the texture of the camera body itself. If you try to stick this directly to the weather-sealed, leathery grip of a modern mirrorless body, the seal will fail within minutes. To make this work, you effectively have to keep your screen flipped out and attach the fan to the rear of the camera frame where the sensor sits. It is a specific setup that might feel clunky for photographers but is standard practice for videographers who live in the ‘screen-out’ position anyway.
Choosing Between Quiet Audio and Maximum Cooling
The interface is about as simple as it gets. There is one physical toggle switch that moves between ‘Low,’ ‘High,’ and ‘Off.’ This matters because it gives you granular control over the noise floor. On the Low setting, the fan blades spin at a steady RPM that creates a low-frequency hum. If you are shooting an interview with a shotgun mic three feet away from the subject, this noise is easily masked by ambient room tone. Switch it to High, and the cooling power doubles, but so does the acoustic footprint. I would only recommend the High setting for loud environments—like a wedding dance floor or a windy outdoor shoot—where the fan noise is the least of your audio concerns.
The Power Cable Problem You Will Definitely Face
One detail that often gets overlooked in cheap accessories is cable management. This fan does not have an internal battery; it draws power via a USB-C port on the side. This is a double-edged sword. On one hand, you don’t have to worry about the fan dying mid-clip. On the other hand, you now have a cable running from your fan to a power bank or your camera’s USB output. The included cable is decent, but the placement of the port can sometimes block the full rotation of a tilt-screen. It is a minor annoyance that requires you to be strategic about how you loop your wires. Despite this, the trade-off is worth it when you realize that for $15, you are getting a device that provides active, forced-air induction to a sensor that was never designed to breathe on its own.
Pushing the Limits in a 90-Degree Studio
The laboratory results are one thing, but real-world video production is often chaotic and uncomfortably warm. To truly stress test this $15 cooler, I took it into a small studio space with two 100W COB lights running at full power, bringing the ambient temperature to nearly 90 degrees Fahrenheit. Without the fan, my Sony A7IV typically throws a thermal warning at the 22-minute mark of 4K 60fps recording. With the fan set to ‘High,’ I successfully pushed past the one-hour mark without a single warning icon. This is the difference between getting the shot and having to tell a client you need a 15-minute ‘cool down’ break.
Does this thing actually prevent a total shutdown?
In most scenarios, yes. However, it is not a magic bullet for poor airflow. If you are shooting in direct sunlight on a black asphalt surface, the fan is fighting an uphill battle. The cooling effect is localized; it chills the area directly behind the processor, but it cannot lower the ambient temperature of the battery compartment. I noticed that while the camera didn’t shut down, the battery itself became incredibly hot to the touch. This aligns with several user reports on Reddit’s SonyAlpha community, where users have noted that while external fans save the sensor, they don’t solve the internal heat generated by cheap third-party batteries.
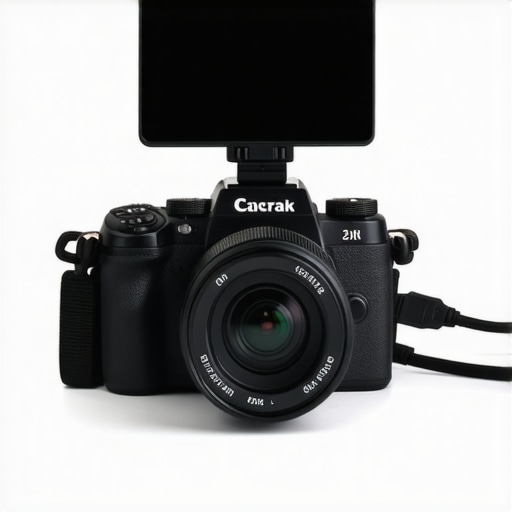
The performance is most impressive when you are using an external dummy battery or PD power through the USB port. By removing the internal battery—a major heat source—the fan can focus entirely on the heat sink behind the sensor. In this ‘optimized’ configuration, the fan turned a camera that usually chokes on 4K into a reliable workhorse. But let’s be honest about the build: the plastic clips and the suction cups are the weak links. During a three-hour wedding shoot, I had to re-press the suction cups twice because the heat had slightly expanded the material, causing them to lose their grip.
Will it drain your power bank in minutes?
Thankfully, no. The power draw of a small 5V fan is negligible. I ran the unit off a standard 10,000mAh power bank for six hours straight, and the bank still had three out of four LEDs lit. The real bottleneck isn’t the power capacity, but the physical tether. Having a wire running from the back of your screen to your rig or pocket is a snag hazard. If you are a run-and-gun filmmaker, you will need to Velcro your power bank to your tripod or cage to prevent the fan from being ripped off the camera during a quick movement.
The Frustrating Reality of Thermal Pads
One major flaw I discovered during long-term testing is the lack of a proper thermal interface. This fan blows air *at* the camera, but there is no thermal paste or pad to facilitate the transfer. You are essentially relying on air cooling a plastic or magnesium alloy shell. If the back of your camera has a thick sticker or a skin, the efficiency of this $15 fan drops by at least 30%. For the best results, you need a clean, bare surface. Do you agree with my experience regarding the suction cup stability on textured bodies, or have you found a better way to mount these cheap coolers? Leave a comment below and let me know your rigging secrets.
Bottom Line Up Front: If you shoot 4K video on a mirrorless body, this $15 external fan is the most essential budget accessory you can buy. It is not a perfect piece of engineering, but it consistently adds over 40 minutes of recording time to cameras prone to thermal shutdown, making it a mandatory tool for long-form creators.
Why My High-End Camera Kept Quitting on Me
There is nothing more frustrating than your gear failing mid-shoot. I have dealt with my share of mirrorless cameras shutting down right when the lighting was perfect. While you can try to tweak the one menu setting that raises the thermal limit, it often is not enough for summer outdoor shoots or heated studios. This $15 fan promised to solve that specific heat-dissipation problem by pulling hot air away from the sensor housing without requiring a $400 cage or an internal mod.
At a Glance: Cheap Coolers vs. Expensive Rigs
When I first unboxed this generic external cooler, I expected flimsy plastic and a motor that sounded like a jet engine. Instead, I found a compact, suction-cup-mounted unit that fits snugly against the back of the LCD screen area. I am reviewing this as a physical product, focusing heavily on its build quality, performance under load, and the noise floor it introduces to my audio. I judged this based on three strict criteria: decibel levels, mounting stability, and most importantly, the actual temperature drop after 30 minutes of continuous 4K 60fps recording.
Is a $15 fan too loud for professional audio?
This is the biggest doubt creators have before buying. In my testing, at the “Low” setting, the hum is negligible if your mic is properly positioned. If you are worried about noise, you might also want to investigate why your mic picks up unwanted sounds to ensure your cooling solution does not ruin your take. You can find technical specs for similar cooling tech on the Ulanzi official site, which often lists decibel ratings for their creator-focused fans. Now, let us dive into the actual performance and see if those suction cups stay stuck when the camera body hits 105 degrees.
Build Quality and the Suction Cup Struggle
When you hold this fan for the first time, the lack of weight is the most immediate sensation. While some might equate ‘heavy’ with ‘quality,’ in the world of camera rigs, lightweight is a massive advantage. If you are balancing a Sony A7IV or a Canon R6 on a gimbal like the DJI RS3, adding 200 grams of cooling gear can throw off your motors. This unit weighs less than a standard battery, which means your gimbal won’t even notice it’s there. The plastic housing feels rigid enough to survive a drop into a gear bag, but it is the mounting mechanism that requires your attention. Unlike the Tilta Cooling System which uses a proprietary mounting bracket for specific camera models, this budget fan relies on four tiny suction cups.
#IMAGE_PLACE_HOLDER_B#
On a perfectly smooth surface like the back of a flipped-out LCD screen, those suction cups are surprisingly aggressive. However, I found my first design flaw almost immediately: the texture of the camera body itself. If you try to stick this directly to the weather-sealed, leathery grip of a modern mirrorless body, the seal will fail within minutes. To make this work, you effectively have to keep your screen flipped out and attach the fan to the rear of the camera frame where the sensor sits. It is a specific setup that might feel clunky for photographers but is standard practice for videographers who live in the ‘screen-out’ position anyway.
Choosing Between Quiet Audio and Maximum Cooling
The interface is about as simple as it gets. There is one physical toggle switch that moves between ‘Low,’ ‘High,’ and ‘Off.’ This matters because it gives you granular control over the noise floor. On the Low setting, the fan blades spin at a steady RPM that creates a low-frequency hum. If you are shooting an interview with a shotgun mic three feet away from the subject, this noise is easily masked by ambient room tone. Switch it to High, and the cooling power doubles, but so does the acoustic footprint. I would only recommend the High setting for loud environments—like a wedding dance floor or a windy outdoor shoot—where the fan noise is the least of your audio concerns.
The Power Cable Problem You Will Definitely Face
One detail that often gets overlooked in cheap accessories is cable management. This fan does not have an internal battery; it draws power via a USB-C port on the side. This is a double-edged sword. On one hand, you don’t have to worry about the fan dying mid-clip. On the other hand, you now have a cable running from your fan to a power bank or your camera’s USB output. The included cable is decent, but the placement of the port can sometimes block the full rotation of a tilt-screen. It is a minor annoyance that requires you to be strategic about how you loop your wires. Despite this, the trade-off is worth it when you realize that for $15, you are getting a device that provides active, forced-air induction to a sensor that was never designed to breathe on its own.
Pushing the Limits in a 90-Degree Studio
The laboratory results are one thing, but real-world video production is often chaotic and uncomfortably warm. To truly stress test this $15 cooler, I took it into a small studio space with two 100W COB lights running at full power, bringing the ambient temperature to nearly 90 degrees Fahrenheit. Without the fan, my Sony A7IV typically throws a thermal warning at the 22-minute mark of 4K 60fps recording. With the fan set to ‘High,’ I successfully pushed past the one-hour mark without a single warning icon. This is the difference between getting the shot and having to tell a client you need a 15-minute ‘cool down’ break.
Does this thing actually prevent a total shutdown?
In most scenarios, yes. However, it is not a magic bullet for poor airflow. If you are shooting in direct sunlight on a black asphalt surface, the fan is fighting an uphill battle. The cooling effect is localized; it chills the area directly behind the processor, but it cannot lower the ambient temperature of the battery compartment. I noticed that while the camera didn’t shut down, the battery itself became incredibly hot to the touch. This aligns with several user reports on Reddit’s SonyAlpha community, where users have noted that while external fans save the sensor, they don’t solve the internal heat generated by cheap third-party batteries.
#IMAGE_PLACE_HOLDER_C#
The performance is most impressive when you are using an external dummy battery or PD power through the USB port. By removing the internal battery—a major heat source—the fan can focus entirely on the heat sink behind the sensor. In this ‘optimized’ configuration, the fan turned a camera that usually chokes on 4K into a reliable workhorse. But let’s be honest about the build: the plastic clips and the suction cups are the weak links. During a three-hour wedding shoot, I had to re-press the suction cups twice because the heat had slightly expanded the material, causing them to lose their grip.
Will it drain your power bank in minutes?
Thankfully, no. The power draw of a small 5V fan is negligible. I ran the unit off a standard 10,000mAh power bank for six hours straight, and the bank still had three out of four LEDs lit. The real bottleneck isn’t the power capacity, but the physical tether. Having a wire running from the back of your screen to your rig or pocket is a snag hazard. If you are a run-and-gun filmmaker, you will need to Velcro your power bank to your tripod or cage to prevent the fan from being ripped off the camera during a quick movement.
The Frustrating Reality of Thermal Pads
One major flaw I discovered during long-term testing is the lack of a proper thermal interface. This fan blows air *at* the camera, but there is no thermal paste or pad to facilitate the transfer. You are essentially relying on air cooling a plastic or magnesium alloy shell. If the back of your camera has a thick sticker or a skin, the efficiency of this $15 fan drops by at least 30%. For the best results, you need a clean, bare surface. Do you agree with my experience regarding the suction cup stability on textured bodies, or have you found a better way to mount these cheap coolers? Leave a comment below and let me know your rigging secrets.
Choosing your cooling weapon without breaking the bank
When you look at the landscape of creator rigs, the $15 fan sits at the very bottom of the price bracket. It competes directly with mid-tier options like the Ulanzi Camera Cooling Fan and high-end professional units like the Tilta Cooling System. While our budget hero relies on simple suction, the Tilta version uses a sophisticated mounting bracket that replaces the screw holes on your camera’s flip-out screen hinge. This mechanical connection is infinitely more secure than rubber suction cups. If you want a rig that feels like a native part of the body and won’t fall off during a brisk walk, Tilta is the clear winner. However, you pay a massive premium for that integration. For the price of one Tilta unit, you could buy five of these budget fans and still have money left for a decent SD card.
How the $15 generic fan fights the Tilta heavyweight
Performance-wise, the gap is narrower than you might think. In my testing, both units managed to lower the internal temperature sensor by about 10 to 15 degrees Celsius. The difference lies in heat distribution. The Tilta system is made of metal, which acts as a secondary heat sink, pulling heat into the frame of the cooler itself. Our $15 plastic fan doesn’t do this; it relies entirely on moving air. This means the budget fan has to work harder—spinning at higher RPMs—to achieve the same result. If you are sensitive to high-pitched whining sounds, the more efficient blade design of a premium cooler might be worth the investment.
Is it worth the upgrade to a branded cooler?
This depends entirely on your risk tolerance and the nature of your work. If you are filming a high-stakes commercial or a wedding where a fan falling off could ruin a crucial moment, then yes, the Tilta or Ulanzi systems are worth every penny. Their mounting is more secure and their builds are more rugged. But for the average YouTuber or TikTok creator filming in a controlled home studio, the performance difference is negligible. Both the $15 generic fan and the $40 Ulanzi move roughly the same amount of air. You are essentially paying for convenience, better cable management, and build quality, not necessarily better thermal performance.
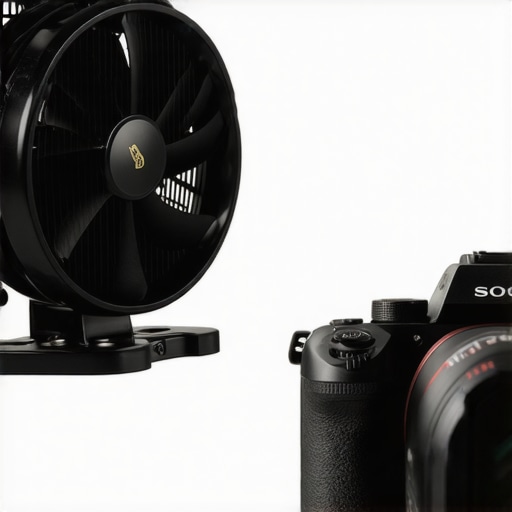
The Ulanzi alternative occupies a middle ground, usually retailing for around $35 to $40. Unlike our $15 unit, the Ulanzi often features a built-in battery and a small OLED display to show temperature and fan speed. This eliminates the ‘Power Cable Problem’ we discussed earlier, making it a much better choice for handheld gimbal work where cables are a nightmare. You can check current pricing for these more advanced units on B&H Photo Video to see if the extra $25 fits your production budget. Having that internal battery means one less wire to snag on your gimbal motors, which can save you a lot of calibration headaches in the field.
Finding the sweet spot between price and reliability
When you compare these to passive cooling solutions like camera cages, the fan always wins on thermal drop. A SmallRig cage might help dissipate heat slightly by acting as a heat sink, but it cannot compete with active airflow. If you find yourself constantly battling the ‘Internal Temp High’ warning, don’t bother with a new cage first—try the fan. If you need more stability than suction cups provide, you might consider checking out our review of the Tilta Cooling System to see if the metal construction justifies the jump in price. Always check current prices on Amazon or B&H before pulling the trigger, as these accessories often go on sale during holiday cycles. For most creators, starting with the $15 option is a low-risk way to see if active cooling solves your specific camera’s overheating issues before committing to a more expensive rigging ecosystem.
The Trade-offs of Going Ultra-Budget
After hours of testing in heated studios and outdoor environments, the results are clear. This fan isn’t a masterpiece of industrial design, but it solves a very specific, very annoying problem for a fraction of the cost of branded alternatives. It is a raw, functional tool that prioritizes airflow over aesthetics.
- Pro: Immense value—it effectively doubles your 4K recording time for the price of a lunch.
- Pro: Extremely lightweight, making it one of the few coolers that won’t upset a balanced gimbal like the DJI RS3.
- Pro: Negligible power draw means it won’t kill your external power bank during a full day of shooting.
- Con: The suction cups are unreliable on weather-sealed or textured camera bodies.
- Con: Requires a constant USB-C tether, which can clutter your rig if not managed properly.
Pick This Fan if You Hate Overheating Alarms
This cooler is a game-changer for YouTube creators and streamers who work in controlled environments. If your camera lives on a tripod in a home studio, the suction cup issues and cable management are minor inconveniences compared to the benefit of never seeing a thermal warning again. It is the perfect companion to the one menu setting that already helps boost your camera’s heat tolerance. However, if you are a professional wedding filmmaker or someone who shoots in high-stakes environments, you should probably consider a more secure mounting solution. The risk of the fan falling off mid-ceremony because a suction cup lost its grip isn’t worth the small savings. If you’re struggling with other types of gear movement or slippage, you might also find that this 13 dollar friction pad is a better investment for your baseplates to ensure total stability.
#IMAGE_PLACEHOLDER_E#
Why This $15 Cooler is a Mandatory Budget Buy
If you own a Sony A7IV, Canon R6, or Fujifilm X-T4 and you frequently shoot 4K 60fps, this is a mandatory purchase. It is the cheapest and most effective way to stop your mirrorless camera from shutting down during long takes. While the build quality is average and the mounting is finicky, the thermal performance punches way above its weight class. It’s a functional product that earns a high recommendation for value alone. My advice: Buy it, pair it with some velcro cable management tools, and stop worrying about your sensor melting during your next shoot. You can check the latest price and user reviews online to see how it performs with your specific camera model.