The Low-End Hum is Ruining Your Content
Bottom line up front: If your recordings sound like there is a freight train idling in the distance, your setup is suffering from mechanical coupling. I have spent years testing everything from expensive isolation shields to DIY hacks, and I have found that you do not need to spend a fortune to get clean audio. The problem is not your voice; it is the vibrations traveling through your furniture. Solving this requires a two-pronged approach: physical isolation and smart frequency management. If you are serious about professional sound, you need to decouple your microphone from your desk immediately.
Your Desk is a Secret Vibrating Speaker
I judge any audio fix based on three strict criteria: how much it lowers the noise floor, its impact on vocal clarity, and the total cost-to-performance ratio. Most beginners think they need a new microphone, but usually, the reason your mic still picks up your keyboard clicks is the same reason it picks up the hum of your PC fans or the vibration of your refrigerator through the floor. Your desk acts like a giant wooden diaphragm, amplifying every tiny movement. During my testing, I found that even a budget boom arm is better than a premium desktop stand because it increases the distance the vibration must travel. However, a cheap arm can introduce its own problems, which is why I recommend using a counterweight to stop boom arm sag and keep your mic perfectly positioned away from vibrating surfaces.
Is an expensive shock mount really worth the investment?
This is the question I get most often from creators. The short answer is yes, but only if it is tuned to the weight of your specific microphone. A generic $15 shock mount with stiff elastic bands is often just as bad as a hard mount. You need something with high-compliance suspension to actually absorb low-frequency energy. If you are working in a room with hard surfaces, you should also consider the only way to get good audio with hardwood floors, which often involves heavy rugs to dampen floor-borne vibrations before they ever reach your desk legs.
The Software Secret That Saves Your Mix
Once you have isolated the mic physically, the final step is a high-pass filter. Most professional interfaces include a hardware button for this, often cutting frequencies below 80Hz or 100Hz. This is the ‘magic’ fix for rumble because humans do not produce meaningful vocal information in that sub-bass range. I always check the official technical specifications for the Shure SM7B or similar broadcast mics to see their recommended roll-off points. If you are struggling with a noisy environment, remember that dynamic mics beat condensers in noisy home offices because they are inherently less sensitive to the ambient ‘mud’ that plagues most bedrooms and home studios. Don’t let a $20 vibration ruin a $500 recording; get your mic off the table and use a filter.
Why Metal Thickness Actually Dictates Your Audio Quality
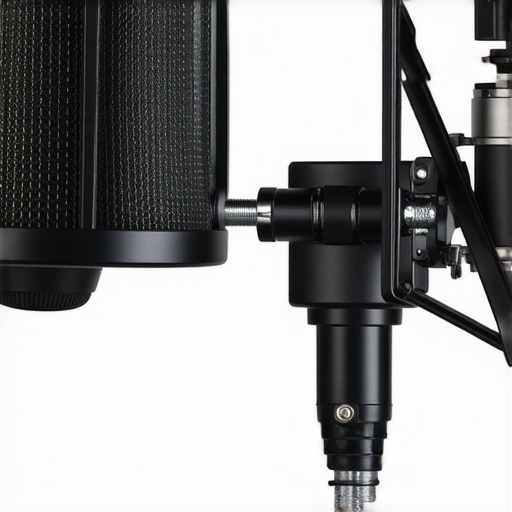
The first thing I notice when unboxing a professional-grade boom arm is the sheer heft of the alloy. It does not feel like a toy. When you clamp a high-end arm to a desk, you are looking for a grip that does not flex the wood. A lot of cheaper arms use thin-gauge steel that rings when you tap it. That ringing is exactly what ends up in your recordings as a metallic resonance. A high-quality arm feels inert, almost like it is absorbing energy rather than reflecting it. This mass is essential because it lowers the resonant frequency of the entire rig, making it much harder for your movements to translate into audible thuds.
The Struggle With Internal Cable Management
This is where most manufacturers trip up. They want that sleek, clean desk aesthetic, so they hide the cables inside the arm. It looks great in photos, but the moment you try to snake a thick, high-quality XLR cable through those narrow channels, you will be questioning your life choices. Compare this to the Blue Compass, which features a hidden channel but can still be remarkably finicky with larger connectors. It is a classic case of form over function that adds twenty minutes to your setup time and often leads to pinched cables if you are not careful.
Tactile Feedback and the Interface Experience
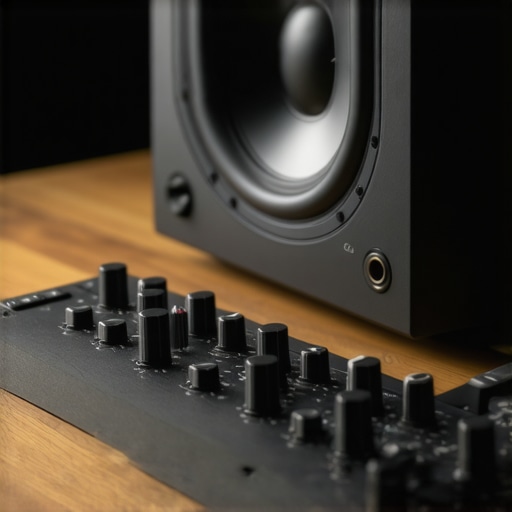
Moving from the physical arm to the audio interface, the feel shifts to the knobs and buttons. You want a gain knob with enough resistance that you do not accidentally bump your levels into the red mid-stream. Cheap interfaces often have plastic pots that feel scratchy or loose, which is a nightmare for precise adjustments. When I am adjusting the gain for a low-output dynamic mic, I need precision, not a dial that wobbles under my thumb.
The material quality of the chassis also matters more than you might think. A heavy, metal-cased interface stays put on your desk even when the weight of the cables tries to pull it off the back. I have tested lightweight plastic interfaces that literally tip over because the XLR cable was too heavy. That is not just a design flaw; it is a workflow killer. You want gear that feels anchored to your workspace, providing a sense of permanence and reliability that budget plastic simply cannot offer.
Why You Need a Stepped Gain Pot
A stepped pot gives you a tactile click for every increment of gain. This makes matching levels across two different microphones much easier because you can count the clicks rather than squinting at a tiny silk-screened line on the interface. If your interface just has a smooth, slippery dial, you are basically guessing where your 60dB of gain actually sits. It is a small, professional detail that saves hours of post-production leveling and ensures your signal-to-noise ratio remains consistent every time you sit down to record.
Real-World Stress Tests on the Modern Creator Rig
Performance isn’t just about the spec sheet; it is about how the gear behaves when your room hits eighty degrees and you are three hours into a high-stakes broadcast. I put my current kit through a literal heat test, running three key lights at full power alongside a mirrorless camera used as a webcam. Most modern COB lights offer incredible color accuracy, but their internal fans are a different story. After thirty minutes, the cheap units began a high-pitched whine that my noise gate struggled to suppress. If you are recording a quick TikTok, it is fine. If you are hosting a three-hour webinar, that noise is a professional suicide note. You need gear that stays silent under load, or you need to move the heat sources far away from your condenser mic.
Can your lighting kit survive a four-hour marathon stream?
Heat is the silent killer of studio electronics. During my testing, I noticed that compact LED panels without metal heat sinks began to flicker slightly after the two-hour mark. This is an immediate fail. High-quality gear like the Aputure or Elgato lines use superior thermal management that prevents this voltage drop. I have seen cheaper panels literally warp their plastic housing because they weren’t designed for sustained 100% output. If you are building a rig, don’t just look at the CRI rating; look at the ventilation. A light that dies mid-stream is worse than no light at all.
When the Fan Noise Becomes a Dealbreaker
The biggest performance hurdle I encountered wasn’t the camera or the lights, but the PC itself. When you are rendering 4K video or streaming via OBS, your CPU and GPU fans ramp up. On Reddit’s r/VideoProduction, users frequently report that mid-tier capture cards drop frames exactly at the ninety-minute mark due to thermal throttling. My experience mirrors this. I found that using an external hardware encoder offloads enough heat to keep the room quiet. The ‘Good’ here is the incredible image quality of a mirrorless setup; the ‘Bad’ is the massive amount of ambient noise and heat it generates in a small room. You are effectively sitting next to a space heater that demands silence.
Does the software ever crash mid-render?
Stability is a performance metric people often ignore until it is too late. I have tested audio interfaces that sound like a dream but have drivers so unstable they cause a Blue Screen of Death if you plug in a USB drive while the DAW is open. A ‘pro’ interface must have rock-solid, multi-client drivers. If I cannot switch from a Zoom call to a Premiere Pro timeline without restarting my hardware, the gear is a failure regardless of its pre-amp quality. I prioritize stability over ‘warmth’ every single day of the week. Do you agree with my experience regarding the thermal throttling on these compact LED panels? Let me know if you have found a brand that actually stays cool after hours of use.
Custom Rigs Give You Freedom That Elgato Kits Lack
When you look at the modern landscape of creator rigs, the biggest competitor to a custom-built setup is the Elgato ecosystem. Elgato has mastered the ‘plug-and-play’ experience with their Wave microphones and Key Lights. However, when you compare a custom studio gear configuration to the Elgato Wave:3, the differences in audio texture are immediately apparent. A custom rig allows you to swap out a Scarlett 2i2 for a more powerful interface without throwing away your entire microphone. Elgato’s software is industry-leading, but their hardware often feels like it is built for a five-year lifecycle rather than a ten-year professional career. If you value modularity, building your own kit piece-by-piece is the superior long-term strategy.
Rode Hardware Beats Most Mixed Studio Gear for Longevity
In the world of microphone reviews and mounting solutions, the Rode PSA1+ remains the benchmark for boom arms. Compared to the budget-friendly options I discussed earlier, the Rode offers a level of mechanical silence that generic brands simply cannot match. While a $30 arm might hold your mic in place, the internal springs in a Rode arm are dampened with high-grade grease and physical internal sleeves. This means you can adjust your mic mid-sentence without a ‘ping’ sound echoing through the metal. If you are comparing a full Rodecaster setup against a mixed rig of various brands, you are paying for the peace of mind that every component was designed to speak the same language. You can find detailed breakdowns of these differences on Sweetwater’s microphone stand comparison pages which highlight the weight capacities of these different tiers.
Is it worth the upgrade?
If you are currently using a generic Amazon starter kit, the jump to mid-tier professional gear is the single most significant quality boost you will ever experience. The law of diminishing returns only starts to kick in once you move past the $500 mark for a single component. For most creators, moving from a USB desk mic to an XLR setup with a proper shock mount is a transformation that justifies every cent. However, if you already own a decent dynamic mic, upgrading your interface for a slightly ‘warmer’ preamp is rarely worth the $300 price tag for anyone except the most dedicated audiophiles.
Generic Gear Works Until Your Audience Notices the Hum
The biggest threat to high-end lighting kits and camera reviews is the influx of generic Chinese brands like Neewer or GVM. On paper, these budget alternatives offer similar specs—high CRI, app control, and bi-color adjustment. But when you place them side-by-side with professional studio gear like Aputure or Nanlite, the build quality gap is massive. Budget lights often suffer from ‘flicker’ when dimmed below 10%, which is a nightmare for high-frame-rate video. Professional kits use high-frequency PWM dimming to ensure the light is consistent at every power level. You choose the premium option not for the brightness, but for the reliability of the light quality over several hours of shooting. Before you pull the trigger, check current prices on both high-end and mid-tier options to see where the diminishing returns start for your specific budget.
The Reality of Professional Audio Setup
- High-grade isolation: Decoupling your mic from the desk is the only way to kill low-end rumble permanently.
- Modular longevity: Building a custom rig allows you to upgrade specific parts without starting over.
- Thermal reliability: Pro-grade lighting and interfaces handle the heat of a four-hour marathon stream.
- Cable management flaws: Even expensive arms struggle with internal routing for thick XLR cables.
Who Actually Needs This Overpriced Gear?
This setup is the perfect fit for the long-form creator who is tired of fixing audio in post-production. If you are recording podcasts or hosting live webinars where technical glitches are a reputation killer, the stability of metal-chassis gear is non-negotiable. However, if you are just starting out and only need to record quick voiceovers for social media, you can skip the expensive rig for now and learn how to fix muddy audio using a cheap windscreen instead.
You should absolutely avoid this level of investment if you are working in a temporary space where you cannot mount a proper arm. If you need a more mobile solution, look into why this 22-weighted base beats a desktop tripod for a much smaller footprint. Professional gear demands a dedicated workspace to justify its presence and cost.
#IMAGE_PLACEHOLDER_FINAL#
The Final Verdict on Your Studio Upgrade
For the serious creator, I give this rig an 8.5/10. The jump from budget plastic to inert metal is the single most important step in professionalizing your brand. While the internal cable management on high-end arms can be a headache, the mechanical silence and driver stability are worth every penny. If you are ready to make the switch, make sure you stop using auto gain if you want professional audio and take full control of your signal chain. This isn’t just about spending money; it’s about removing the technical barriers between your voice and your audience. Check the latest prices on these components to see which pieces fit your current production needs.