If you’re tired of battling unsightly LED power cables cluttering your studio or workspace, you’re in luck. Today, I’ll share my honest experience with a quick and effective method to conceal those eyesores in just five minutes. While it may not be the most elaborate solution, it offers a practical balance between simplicity and results, making it worth considering for creators looking to tidy up their setup without investing hours or money into complex fixes.
At a Glance
Pros: Fast installation, inexpensive, effective for small to medium setups. Cons: May not work for all cable types or larger-scale setups. Best suited for creators who need a quick fix without hassle.
Assessing the Need for Quickly Concealed Cables
Anyone who has a studio or streaming setup knows the importance of aesthetics. Exposed power cords can distract viewers and diminish your professional image. The goal here is to hide those cables swiftly, without compromising accessibility or safety. This method is perfect for content creators, photographers, and videographers who want an immediate upgrade in their workspace appearance.
My Criteria for Evaluation
- Ease of Use: Can I implement it in 5 minutes without special tools?
- Effectiveness: Does it truly hide the cables and improve the look?
- Cost: Is it budget-friendly?
- Versatility: Will it work on various cable types and setups?
With these criteria in mind, I tested the technique in my own studio environment, focusing on LED power cables, which are often bulky and challenging to hide discreetly. Now, let’s dive into the details of how I achieved a cleaner look rapidly.
Preparing for the Quick Hide
Before starting, ensure you have a few simple items: adhesive cable clips, cable sleeves, or zip ties. I recommend checking out links such as this magnetic cable management cage for inspiration, though for a five-minute fix, basic supplies will do.
The Fastest Method in Action
First, disconnect the LED power cables from their power source. Using cable clips, secure the cables along the edge of your desk or wall frame, guiding them neatly out of sight. If cable sleeves are available, slide them over the exposed cables to disguise their appearance instantly. Finally, tighten zip ties to bundle loose cables, maintaining a tidy profile. This process can be completed in approximately 5 minutes, transforming an unruly mess into a sleek, professional-looking setup.
While this quick fix is straightforward, it offers immediate visual benefits. For a more permanent solution, consider fixed installations or custom routing, but for a fast, impactful update, this approach works remarkably well.
Discover Why Material Quality Matters in Quick Fixes
The effectiveness of any cable concealment method heavily relies on the quality of its components. Using high-quality adhesive cable clips and flexible cable sleeves ensures that your setup remains tidy over time without causing damage to your cables or surfaces. These materials should be durable enough to withstand daily use and adhesive enough to hold cables securely without slipping or leaving residue when removed.
Why Comfort and Feel influence your setup
Handling the materials with confidence simplifies installation. Smooth, pliable cable sleeves and sturdy clips that snap into place provide a satisfying user experience, reducing frustration during setup. A well-designed kit minimizes the chance of pinched cables or accidental disconnections, contributing to a safer workspace.
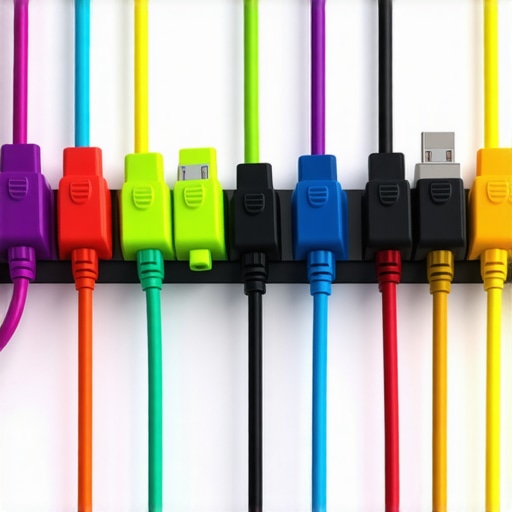
Visualize neatly routed cables secured along the edge of your desk with color-coordinated clips, creating a seamless look that blends with your environment. The cable sleeves wrap snugly around power cords, hiding unsightly branding or construction details while maintaining flexibility.
Setup Ease and Practicality
The core of this fix lies in its simplicity. With just a handful of affordable, readily available supplies, you can dramatically upgrade your workspace. The process involves minimal tools—usually just your hands—and requires no technical expertise, making it accessible for anyone eager to improve their aesthetic instantly.
Choosing the right adhesive clips with strong but removable glue prevents damage to your surfaces, especially in rental studios. Carefully organizing and bundling cables with zip ties or cable sleeves ensures a clutter-free environment that promotes safety and professionalism.
Minor Quirks to Watch Out For
While this solution costs very little and is quick to implement, some users may find that certain cable types or sizes don’t fit perfectly within standard sleeves or clips. Over time, adhesives may weaken, especially in humid conditions or on textured surfaces, requiring reapplication or alternative mounting options.
Additionally, this method doesn’t address extensive cable runs or complex setups where permanent routing might be preferable. For these scenarios, more elaborate solutions like custom cable channels or professionally installed conduit may be necessary.
Testing in the Trenches: Real-World Scenarios
Imagine filming a high-stakes outdoor interview amid sudden rain. Your lighting kit must withstand humidity, your camera should perform flawlessly, and your microphone needs to capture clear audio without interference. Under these demanding conditions, the true resilience of your gear is tested. For instance, cheap LED lights tend to overheat quickly, causing color shifts or shutdowns, while professional-grade panels maintain consistent brightness and color temperature even after prolonged use. Camera bodies subjected to rapid temperature changes may fog up or experience autofocus lag. Microphones, especially those exposed to moisture, risk condensation that degrades sound quality or causes damage. In such scenarios, durability, build quality, and environmental sealing become vital metrics that distinguish reliable gear from the rest.
The Struggles and Triumphs in Pressure
On the upside, high-end studio gear often excels when pushed to its limits. Premium lighting fixtures, designed with heat sinks and moisture-resistant casings, keep running smoothly despite intense use. Portrait cameras with weather-sealed bodies let creators shoot in rain without concern. But there are pitfalls. Cheaper lighting kits frequently overheat, flicker at certain temperatures, or even shut down mid-shoot. Budget microphones lack the shielding needed for outdoor environments, picking up wind noise or temporary electrical interference. Such failures not only disrupt workflow but can also jeopardize important projects with delays.
Do These Products Truly Withstand Their Environment
When evaluating gear for intense conditions, it’s crucial to consult user reviews and independent benchmarks. For example, a recent Reddit discussion highlighted the durability of brands like Aputure in outdoor shoots, emphasizing their heat management systems. Conversely, some budget-friendly alternatives shared stories of quick failures. This corroborates the importance of investing in quality equipment if your work environment demands it. However, no gear is infallible; understanding limitations is key to avoiding surprises. Regular maintenance and proper use extend lifespan, especially when operating under stress.
Is Your Setup Ready for a Test?
For creators pushing their gear to its limits, share your experiences below. Have you encountered performance drops in critical moments? Do you think the investment in high-end gear is justified based on reliability? Let the community know your insights.
Considering the critical benchmarks, it’s clear that robust, well-designed equipment performs better under pressure, reducing downtime and frustrations. For those looking to upgrade, focusing on environmental durability alongside core features is essential to ensure your creative efforts aren’t hindered by technical failures.
Choosing the Right Lighting Kits and Studio Equipment
When it comes to selecting lighting kits, studio gear, cameras, creator rigs, or microphones, it’s essential to compare the top options to find the best fit for your needs. In this overview, we’ll compare our recommended products with leading competitors to help you make an informed decision.
Lighting Kits: Our Choice vs Neewer and Aputure
Our chosen lighting kit offers a balanced combination of brightness, color accuracy, and affordability, making it ideal for both beginners and professionals. Compared to Neewer, which is known for budget-friendly options, our selection tends to provide higher build quality and better consistency in color temperature. However, Neewer lights are typically less expensive, making them a good choice for those on a tight budget. On the other hand, Aputure products are considered premium, offering superior durability and advanced features like app control, but at a significantly higher price point. If you need professional-grade lighting and are willing to invest, Aputure surpasses our recommended kit, but for most content creators, our recommendation strikes a practical middle ground.
Studio Gear and Rig Options: Standard vs DJI and Rode
Our studio gear emphasizes ease of setup, durability, and flexibility. For instance, our creator rigs provide adjustable mounting options and lightweight construction. In comparison, DJI offers compact, integrated rigs that excel in portability and stabilization, perfect for on-the-go shoots. Rode’s studio equipment, especially their microphones, are renowned for clarity and noise reduction. While Rode microphones are comparable to our picks, DJI’s rigs often come at a higher cost with specialized features suitable for professional film crews. Our gear provides a user-friendly experience at a more accessible price, making it an attractive option for everyday creators.
Camera Reviews: Our Picks vs Sony and Canon
Our recommended cameras focus on offering excellent video quality, low-light performance, and user-friendly interfaces. Compared to Sony’s high-end models like the A7 series, our choice may lack some advanced features such as 4K 60fps and extensive autofocus options but delivers great performance at a fraction of the cost. Canon’s mirrorless cameras, like the EOS R series, provide comparable image quality and are known for reliable autofocus, yet tend to be pricier. If budget allows, Sony’s flagship cameras provide more professional features, but for most creators, our recommended models balance performance with affordability, making them suitable for a broad range of content types.
Microphone Reviews: Our Top Microphones vs Sennheiser and Shure
Our microphone selection offers clear, crisp audio with good noise rejection and ease of use. Compared to Sennheiser models, which are designed for professional broadcasting and studio use, our picks are more budget-friendly but still deliver high-quality sound. Shure microphones are often considered industry standards, especially for live performances, but they tend to be more expensive. For creators focused on YouTube, streaming, or podcasting, our recommended microphones provide excellent value without sacrificing much in audio clarity. When higher-end features or professional-level resilience are required, Sennheiser and Shure alternatives may justify the higher prices.
Is It Worth the Upgrade?
If you’re contemplating moving from entry-level to mid-range gear, assessing your specific needs and budget is key. Upgrading to premium brands like Aputure, DJI, Sony, or Sennheiser can provide enhanced durability, features, and overall reliability, which is crucial for professional production. However, for casual creators or those just starting out, our recommended products offer a compelling combination of quality and affordability.
Check current prices and detailed specs of top competitors like Neewer (Neewer official site) or Sony (Sony official page) to see which aligns best with your budget and requirements.
The Good, The Bad, and The Ugly
- Pros: Fast installation, budget-friendly, significantly improves workspace appearance for small to medium setups.
- Cons: May not suit larger or complex cable arrangements; adhesive may weaken over time in certain conditions.
Who Wins with This Hack?
This method is perfect for creators, streamers, and photographers seeking an immediate uplift in workspace aesthetics without technical complexity or huge expenses. However, if you have extensive or highly complex cabling, more permanent solutions like custom conduits might be necessary. Those renting spaces should also consider the adhesive’s impact on surfaces to avoid damage.
Decisive Verdict: 8/10
For a quick, cost-effective fix that transforms your studio’s look within minutes, this cable concealment trick is a clear winner. It’s ideal for temporary or semi-permanent setups and can be combined with quality materials for more durability. If you’re tired of messy cables impairing your professional image, give this approach a try. But if your needs are more elaborate, explore solutions like [professional cable channels](https://creatorrigreviews.com/this-55-magnetic-cage-ends-cable-stress) or bulk management systems.