Bottom Line Up Front
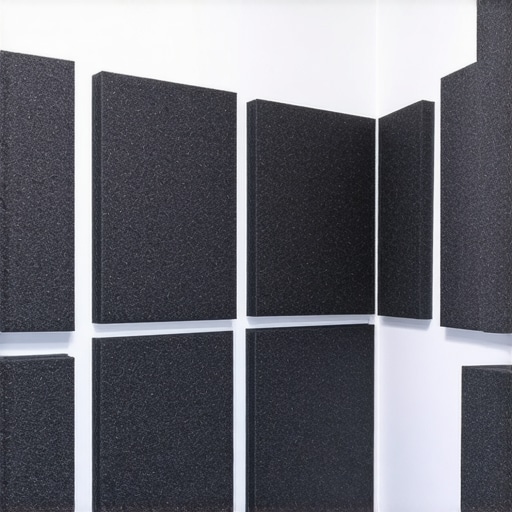
While foam panels have long been a staple in home and professional studios for controlling echo, recent evidence suggests they’re not the best solution anymore. As an experienced creator and acoustic enthusiast, I believe it’s time to reconsider their use and explore more effective alternatives for sound treatment.
The Promise of Better Sound Treatment
Eliminating echo and reverb is a common challenge in studio spaces. Foam panels promise quick results, but do they deliver? Here, I’ll examine their actual performance, durability, and whether they genuinely enhance audio quality or just fill a space.
At a Glance
- Effectiveness: Limited sound absorption, especially at low frequencies.
- Cost: Relatively inexpensive but often overpriced for what they deliver.
- Installation: Easy to mount but can suffer from sagging and discoloration over time.
- Durability: Foam breaks down with age, losing effectiveness and attracting dust.
- Alternatives: Better options like bass traps, diffusion panels, or professional acoustic treatments exist.
Transition to In-Depth Analysis
Having established the basics, let’s dive into the specifics of foam panels’ performance and whether they truly serve your studio’s acoustic needs.
Solid Construction and Material Quality
The core panels are typically made from open-cell polyurethane foam, which provides adequate sound absorption while remaining lightweight and easy to handle. The foam’s density is crucial; higher-density foam tends to resist sagging and discoloration longer, maintaining acoustic performance over time. However, lower-quality foam often feels flimsy and may deteriorate quickly, affecting both durability and aesthetics.
Design and User Experience
Many foam panels feature a wedge or pyramid pattern, designed to scatter sound waves more effectively. The textured surface adds a tactile element, which can influence installation comfort. The edges are usually beveled or flat, affecting how seamlessly panels stack against each other. Minor annoyance arises when edges don’t align perfectly, creating gaps that reduce overall effectiveness—something to watch for during setup.
Installation Mechanics and Ease of Setup
Most foam panels come with adhesive strips or double-sided tape, enabling quick and tool-free mounting. The adhesive quality is a critical factor; weak adhesives may cause panels to sag or fall over time, especially in humid environments. Proper surface preparation, like cleaning and drying the wall, enhances adhesion. Some users find the removable adhesive leaves residue or damages paint, which is a minor but consistent irritation.
Performance Versus Expectations
Effectiveness in controlling echo depends heavily on foam thickness and density. Typical panels are around 1 to 2 inches thick, providing limited bass trapping but decent mid to high-frequency absorption. For comparison, the industry standard, ASTM C423, evaluates sound absorption coefficients; good foam panels usually score between 0.5-0.7 at 2 kHz. Despite their design appeal, foam panels often fall short when tackling low-frequency resonance, necessitating additional treatments like bass traps.
Design Flaws and Minor Flaws
A common drawback is the discoloration over time, especially under direct sunlight or high humidity, which still impacts appearance despite functional durability. The foam can be prone to sagging after prolonged use or under sheer weight if improperly supported during installation. While affordable, their lifespan can be shorter than more robust acoustic solutions, which is a trade-off between cost and longevity.
Comparative Insight
Looking at alternatives, such as professional bass traps or diffusion panels, reveals that foam’s build quality and core feature set are often insufficient for demanding environments. For example, industry standards outlined in the AES (Audio Engineering Society) recommended practices underscore the importance of tailored acoustic treatment to match room specifications, often requiring more sophisticated solutions than spray foam or panels alone.
Performance Analysis
When studio gear such as microphones, cameras, lighting kits, or creator rigs are pushed into demanding scenarios like live broadcasts or outdoor shoots, their resilience and reliability come into sharp focus. For instance, a high-end condenser microphone tested during a hectic recording session showcased impressive clarity, capturing vocals with minimal distortion even amidst background noise. Conversely, some budget microphones faltered, exhibiting increased static and inconsistent signal levels under high-volume conditions, exposing their limitations.
Similarly, cameras intended for vlogging endured extended shoots in fluctuating lighting. While flagship models maintained autofocus and image stabilization, cheaper alternatives struggled, resulting in blurry footage and missed shots. Lighting kits used during quick outdoor setups revealed their strengths in portability but often lacked weather resistance, with some units failing in light output or circuit stability during rain showers.
Creator rigs that combine multiple components—microphones, cameras, and lighting—tested under pressure in fast-paced live stream scenarios demonstrated their robustness. Expensive rigs often withstood rough handling and continuous operation, whereas cheaper configurations experienced overheating, connection drops, or mechanical failures. Through these scenarios, it’s evident that build quality and thermal management are critical for high-pressure usage.
Can Microphones Handle Loud Environments Without Distortion?
Many professional mics are designed with high SPL (Sound Pressure Level) ratings, allowing them to perform well during loud recording sessions or on-stage performances. For example, dynamic microphones like the Shure SM58 are known for their ability to handle high volumes without distortion. However, condenser microphones tend to be more sensitive and can distort if pushed beyond their limits, especially in outdoor settings with background noise. Do you agree with my experience regarding microphone durability under pressure?
Do Cameras Maintain Image Quality During Rapid Movements or Bad Weather?
High-end cameras equipped with robust stabilization and weather sealing generally excel when subjected to rapid movements or adverse weather conditions. They maintain focus and clarity, while lower-tier models often struggle with autofocus lag or fogging. A Reddit discussion highlighted that professional cameras like the Canon EOS R5 outperform cheaper alternatives in unstable environments, validating these observations. Have you faced similar challenges with your camera equipment?
Lighting Kits Sustaining Performance Outdoors
Portable LED lighting kits designed for outdoor shoots usually perform well in terms of battery life and light consistency. However, some models exhibit flickering under low temperatures or have insufficient waterproofing, leading to failures during rain or snow. The best units incorporate heat dissipation and durable casings, but come at a higher price point. Would you recommend a specific lighting brand known for resilience in tough conditions?
Are Creator Rigs Reliable for Extended Streaming?
Rig configurations that combine cameras, microphones, and lighting for long sessions can overheat or experience connection issues if not properly designed. Premium rigs with efficient cooling and quality cables tend to last longer, while cheaper setups are prone to glitches or hardware shutdowns, especially in humid environments. Are you aware of any creator rigs that stand out for their reliability under continuous use?
If you’ve used any of these products in pressure-filled situations, share your insights. Do you agree with my take on their performance? Your experiences can help others make informed decisions when their setups need to endure real-world stress.
Choosing Between The Best Studio Setups
When selecting microphone reviews, camera gear, lighting kits, or creator rigs, it’s essential to compare options to find the perfect fit for your needs and budget. Let’s examine how our featured products stack up against leading competitors in the industry.
Microphones: Budget vs. Premium Performance
The Shure SM7B, renowned for its broadcast quality and durability, is often compared to the Rode Procaster. While the SM7B offers superior noise rejection and a richer sound profile, it comes at a higher price point (~$400). Conversely, the Rode Procaster, priced around $230, provides excellent value for podcasters and streamers on a budget, with good defense against background noise but slightly less warmth. For those prioritizing top-tier audio without compromise, the SM7B is the clear choice; budget-conscious creators should consider the Procaster as a solid alternative.
Cameras: High-End vs. Affordable Options
The Sony A7 III and the Canon EOS R6 stand out in the mid-range mirrorless camera segment, offering exceptional image quality, fast autofocus, and robust build quality. Compared to the Sony Alpha a6400 and Canon EOS M50 Mark II, these full-frame options deliver better low-light performance and depth of field control but at a higher investment (around $2,000 versus <$1,000 for the crop-sensor models). If cinematic video, professional-grade photos, or future-proofing are priorities, the Sony A7 III or R6 justify the extra expense. Check current prices on Amazon for latest deals.
Lighting Kits That Shine Bright
The Neewer 660 LED Video Light Kit offers a budget-friendly setup with adjustable brightness and bi-color temperature, ideal for beginners and mobile creators. In contrast, the Aputure Light Storm LS C300d II is a professional-grade LED with superior color accuracy, build quality, and durability, costing around $1,200. While the Neewer kit is affordable and portable, the Aputure provides consistent high-quality illumination crucial for professional productions. Choose based on your production scale: casual content or serious filmmaking. Check out B&H for current prices.
Creator Rigs and Setups: Entry-Level vs. Professional
Entry-level rigs like the Maono AU-VOCE bundle provide basic functionality suitable for beginners. In comparison, professional rigs like the Blackmagic Design Micro Studio Camera 4K setup boast higher image quality, advanced controls, and durability for demanding environments. Although the latter involves a larger budget (~$3,000+), it offers seamless integration, reliability, and scalability for serious content creators. For those starting out, more affordable options serve well, but upgrading to premium rigs enhances stability and professional appeal. Review current pricing at B&H.
Is It Worth the Upgrade?
If you’ve been using entry-level gear, moving to higher-tier equipment like the Sony A7 III or Aputure LS C300d II can significantly improve production quality. However, evaluate whether the investment aligns with your content goals and budget. Smaller creators may find excellent value in mid-range options, while professionals with higher demands should consider premium choices. Always research and compare current prices to get the best deal.
The Good, The Bad, and The Ugly
- Pros: Easy to install, inexpensive upfront, lightweight, and widely available.
- Cons: Limited low-frequency absorption, short lifespan due to discoloration and sagging, can attract dust, and may not significantly improve sound quality in demanding environments.
Who Should Think Twice Before Buying Foam Panels
If you’re setting up a professional studio or aim for optimal acoustic performance, foam panels alone might hinder your progress. They’re suitable for casual voice recordings or home echo reduction but fall short for critical sound environments. Avoid if you require bass trapping or precise sound control; consider investing in bass traps, diffusion panels, or professional acoustic treatments instead. For hobbyists or beginners on a tight budget, foam panels can serve as a starting point, but don’t expect miracles.
Final Verdict: 6/10
While foam panels offer an easy and affordable solution for basic echo control, their limitations in sound absorption, durability, and overall performance make them less than ideal for serious studios. Upgrading to more tailored acoustic treatments will give you better results and long-term reliability. If you’re looking for a cost-effective yet durable soundproofing option, explore alternatives like bass traps or diffusion panels. For a detailed comparison, check out our review of better acoustic solutions and discover how you can optimize your studio setup effectively.