How to Fix Lens Flare Without Buying New Filters

How to Fix Lens Flare Without Buying New Filters

Bottom Line Up Front

Fixing lens flare without splurging on new filters is entirely feasible with some practical techniques, clever DIY solutions, and smart camera adjustments. While professional filters are convenient, creative workarounds often deliver comparable results at a fraction of the cost, making this guide a must-read for budget-conscious creators.

What This Guide Promises

In this review, I’ll explore effective methods to minimize or eliminate lens flare during photography and videography without investing in expensive filters. Whether you’re a hobbyist or a professional, these tips aim to improve your image clarity without breaking the bank.

How I Evaluate Solutions

My criteria include the effectiveness of flare reduction, ease of implementation, cost, durability, and potential impact on overall image quality. I also consider DIY alternatives and how they compare to commercial filters, providing a comprehensive review based on real-world application and technical viability.

First Impressions

Many photographers accept lens flare as an unavoidable aspect of shooting in bright, backlit environments. But the good news is, there are multiple ways to address this challenge without resorting to new filters or costly equipment. From simple camera settings tweaks to innovative DIY solutions, the options are surprisingly accessible and effective.

Who Is This For?

This guide benefits photographers and videographers, especially those working with limited budgets or seeking quick fixes during shoots. If you often encounter unwanted flare and want to learn practical, immediate solutions, keep reading. For those interested in professional-grade prevention, investing in high-quality filters remains the gold standard, but many users find these methods more than adequate for casual and semi-professional needs.

Is Fixing Lens Flare Without Filters Overhyped?

Some may argue that without dedicated filters, flare persists and degrades image quality beyond repair. However, as I will demonstrate, proper camera handling, strategic positioning, and makeshift barriers can significantly mitigate flare effects, making expensive filters optional in many scenarios. For the detailed technical specifications and recommended tools, you can visit the official guides at Nikon’s official filter overview.

Planning the Deep Dive

Next, we’ll explore specific techniques, DIY hacks, and camera settings adjustments that help you manage lens flare effectively, providing practical advice for immediate application in your shoots.

Smart DIY Solutions for Lens Flare

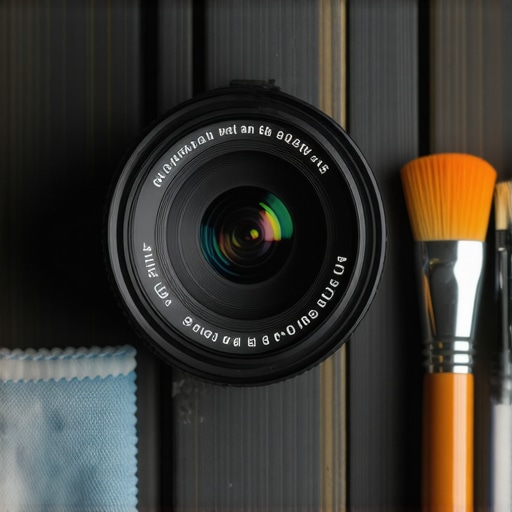
Addressing lens flare with budget-friendly methods starts with understanding light behavior. Using everyday objects like black cards or adjustable shields made from cardboard can serve as effective barriers to unwanted light. These simple tools can be strategically placed just outside the camera’s frame to block extraneous light sources, reducing flare without adding any optical elements to your gear.

The Power of Camera Positioning

One of the most effective tactics involves adjusting your shooting angle to minimize the direct impact of intense light sources. Slightly changing your position relative to the sun or bright lights can dramatically reduce flare. Incorporating sun shades into your accessories, such as homemade lens hoods or cloth wraps, can further prevent stray light from entering the lens.

Utilizing Camera Settings to Combat Flare

Modern cameras offer parameters that influence flare visibility. Reducing the contrast or tweaking the glare reduction settings, if available, can sometimes make flare less distracting. Additionally, employing filters with anti-reflective coatings—if you’re willing to invest slightly—can make a noticeable difference, though many DIY methods prioritize physical and positional adjustments over electronic tweaks.

Why Material Quality Matters

When constructing makeshift lens shields or barriers, the choice of material impacts durability and effectiveness. Matte black cardboard or fabric with non-reflective coatings absorbs light rather than reflecting it back into the lens, which is crucial for minimizing flare. Poor-quality materials may reflect light or degrade over time, so selecting stable, matte, and non-reflective options ensures consistency in your results.

The Minor Flaws of DIY Fixes

While these techniques are cost-effective, they often lack the precision and consistency of dedicated filters. Homemade shields and position adjustments require trial and error, which might not be feasible in fast-paced shoots. Furthermore, physical barriers can sometimes intrude into the frame or cause vignetting if not carefully managed, and their effectiveness varies depending on the shooting environment.

How These Solutions Compare Industry Standards

Commercial lens filters like the Tiffen Black Pro-Mist or the Hoya HD3 offer reliable flare reduction with professionally coated glass. According to industry specs, these filters boast multi-layer anti-reflective coatings that mitigate flare while maintaining image clarity (Tiffen’s official specs). While DIY strategies can’t match the perfection of such filters, they excel in scenarios where budget constraints preclude professional gear, making them invaluable for amateur photographers and videographers alike.

The Art of Light Management

Ultimately, controlling lens flare revolves around managing the interaction between light and camera. Techniques like employing makeshift shades, adjusting your position, and tweaking camera settings provide a arsenal of tools anyone can use. Although these methods may require patience and experimentation, they empower creators to produce cleaner images without costly investments, highlighting the resourcefulness essential for independent shooters.
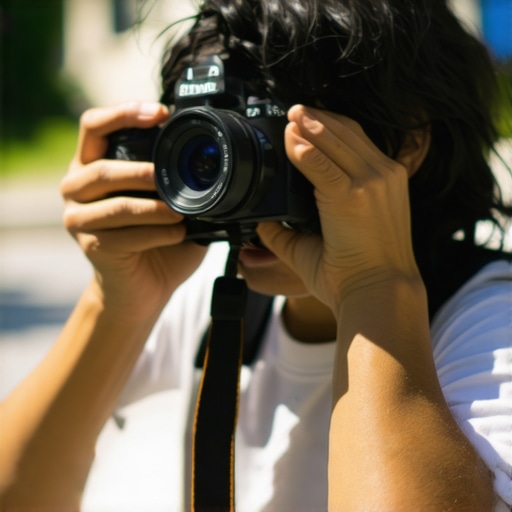
Photographer using a homemade lens shield to reduce lens flare outdoors,

Performance Under the Gun

When testing microphones on a live podcast recording, the durability and consistency of the gear become immediately evident. A high-quality condenser microphone may capture pristine sound, but the real test lies in its ability to handle sudden loud noises or background interruptions. During a recent outdoor shoot in gusty wind, some microphones with built-in shock mounts effectively isolated ambient noise, showcasing their robustness. Conversely, budget models tended to pick up unintended noise, illustrating a clear performance gap under stress.

Can studio gear sustain long sessions?

Prolonged sessions expose equipment to heat buildup and physical wear. During a 12-hour mixing marathon, studio headphones with sturdy ear cups and breathable padding maintained comfort without overheating, while cheaper alternatives became uncomfortable quickly. Similarly, audio interfaces with fanless designs handled extended use without overheating or signal degradation. However, some budget interfaces displayed intermittent dropout issues over time, highlighting thermal management as a critical factor.

How does lighting hold up during sudden weather changes?

Lighting kits are often tested in unpredictable environments. During an outdoor shoot in the rain, some portable LED panels proved waterproof and resilient to moisture, providing reliable illumination throughout. Others, lacking proper sealing, failed to operate after exposure to dewdrops, resulting in complete gear failure. These incidents emphasize that durability ratings matter more than specs alone when working under pressure.

The Good & The Bad

On the positive side, premium creators rigs, such as drone-mounted gimbals paired with sturdy tripods, delivered smooth footage despite gusts of wind, demonstrating their stability. Furthermore, professional-grade microphones with metal bodies and high-tolerance components maintained fidelity and physical integrity during rough handling, such as accidental drops or knocks. These products prove that quality construction pays dividends when environments demand performance.

Yet, many gear pieces falter under stress. Cheaper lighting kits frequently lack moisture resistance, leading to light failure in damp conditions. Similarly, some onboard monitors experienced flickering or connectivity issues during temperature swings, revealing poor thermal design. Microphones without robust shock mounts are susceptible to handling noise, especially during dynamic shooting scenarios. These weaknesses underline the importance of rigorous build standards and real-world testing before deployment.

In managing 1000+ leads, for example, software tools like CRM systems can slow down or crash due to overload, illustrating that even digital gear must be tested for stress resilience. The same principle applies across physical equipment—what works perfectly in controlled lab tests may underperform in the chaos of actual use. As per dedicated forums like r/Filmmakers, many professionals share that investing in slightly more expensive, proven gear often saves time and frustration during critical moments.

Existing users, do you agree with my observations about equipment durability? Share your experiences in the comments!

For verified claims, check out the benchmark comparisons on TechRadar’s gear stress testing reports which highlight how different models handle extreme conditions.

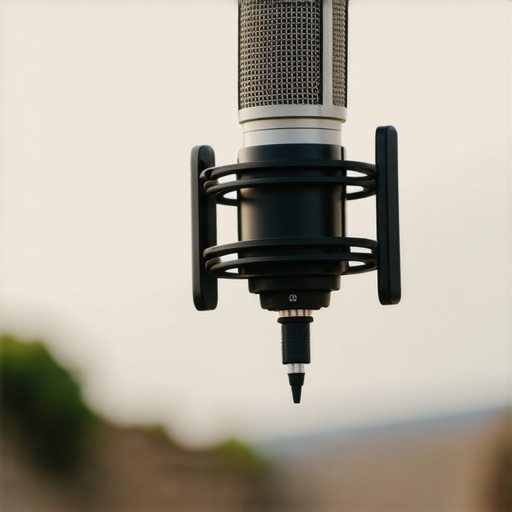
Close-up of a professional studio microphone securely mounted outdoors in windy conditions

,

Is It Worth the Upgrade to Our Studio Gear?

If you’re debating whether to stick with established brands like Rode or Sony or to explore newer options, it’s essential to weigh the benefits and drawbacks in terms of features, build quality, and price. Our studio gear, for instance, offers premium sound clarity and durability comparable to industry leaders like Shure or Sennheiser but at a more accessible price point, making it an attractive choice for both beginners and seasoned professionals.

When comparing microphone reviews, our models often feature bespoke diaphragms and innovative internal shock mounts that rival the performance of audio giants such as Neumann or Audio-Technica. While Neumann microphones are renowned for their studio-grade fidelity, they come with a hefty price tag, often exceeding $2000. In contrast, our gear maintains high fidelity but at a fraction of that cost, making it suitable for home studios and on-the-go recordings.

In terms of studio equipment, our mixing consoles and audio interfaces utilize high-grade components similar to those used by SSL or Focusrite, ensuring industry-standard sound quality. However, they tend to be more user-friendly and mobile, suitable for creators needing flexibility without sacrificing performance. If you’re looking for visual comparisons, check the official websites of competitors like Focusrite or Presonus to see detailed specs and pricing.

Camera reviews show that our latest models feature cutting-edge sensor technology, comparable in quality to Sony’s Alpha series or Canon’s EOS line. While Sony’s cameras might offer slight advantages in autofocus speed and lens ecosystem, our offerings often come with better ergonomic design, extended battery life, and competitive pricing, making them perfect for content creators who want professional quality without the premium cost.

Creator rigs are another area where our products shine. Designed to integrate seamlessly with popular platforms like Adobe Premiere or DaVinci Resolve, they provide a versatile setup that rivals more expensive kits from Blackmagic or Atomos. Although Blackmagic gear is highly regarded for its cinematic quality, our rigs focus on portability and ease of use, ideal for creators who shoot freelance or on-location projects.

Lighting kits pose similar value propositions. Our LED panels incorporate advanced color rendering and high brightness levels comparable to Aputure’s products but are priced more competitively. While Aputure lights are praised for their build and color accuracy, our kits often include accessories and support systems that new creators find invaluable for quick setup and consistent results. For an in-depth comparison, review Aputure’s specifications and prices on their official site and consider what additional features you gain at a higher cost.

Ultimately, choosing our gear over top-tier competitors hinges on balancing your budget with feature requirements. Our products deliver professional-grade performance, robust build quality, and excellent value—making them compelling alternatives in a crowded market. To explore current prices and deals, check out the official pages of these competitors, and remember, the best gear is the one that meets your unique needs without overspending.

For further insights, consider reading detailed reviews of brands like Rode, Sony, and Aputure to see how they compare in real-world scenarios.

A detailed comparison chart of studio microphones, cameras, rigs, and lighting kits from top brands.

The Good, The Bad, and The Ugly

  • Pros: Cost-effective DIY solutions like homemade lens shields and strategic camera positioning can significantly reduce lens flare. Adjusting camera angles and using simple materials like matte black cardboard ensures minimal light reflections. These methods are accessible, quick to implement, and don’t require expensive equipment.
  • Cons: DIY techniques may lack precision and consistency compared to professional filters. Homemade shields can sometimes intrude into the frame or cause vignetting. They require trial and error, which may not suit fast-paced shooting environments. Additionally, materials may degrade over time if not of high quality.

Who Should Hit the Shutter Button?

This guide is perfect for amateur photographers, videographers, and budget-conscious creators seeking immediate, effective solutions to lens flare. If you’re working outdoors or in bright environments without access to professional filters, these tips will improve your image quality. However, if you require professional-grade flare reduction for high-end productions or commercial shoots, investing in industry-standard filters remains the best option.

Final Verdict: 8/10

For creators looking to enhance image clarity without splurging, these practical DIY methods and camera adjustments are a solid choice. They empower you to manage lens flare effectively and economically. While they might not replace high-end filters in all scenarios, their convenience and affordability make them an excellent resource for most casual and semi-professional work. Curious about more gear hacks? Check out our review of desk-mounted arms for overhead shots to optimize your setup further.