Bottom Line Up Front
Mounting a 32-inch monitor to a C-stand can be a game-changer for studio setups, but it requires careful planning and the right accessories. My experience shows that with quality clamps and proper weight distribution, you can achieve a secure and versatile setup—although some solutions are pricier than expected.
The Promise of a Stable Solution
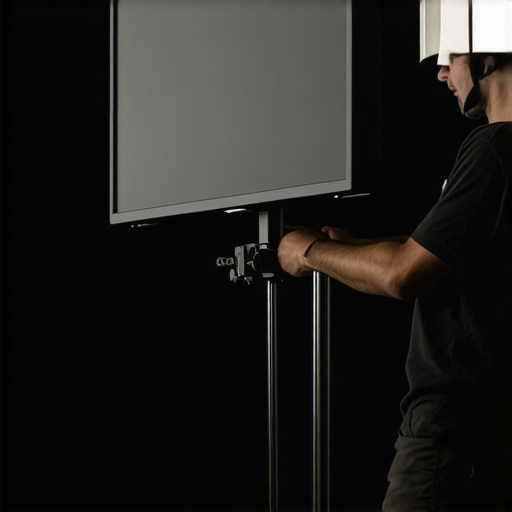
This guide tackles the common challenge of securely attaching large monitors to classic C-stands, ensuring safety during shoots, and preventing accidents. Whether you’re a content creator, photographer, or videographer, understanding the best practices can save you time and avoid costly gear damage.
At a Glance
- Build Quality: Depends on the clamp used; high-quality options provide better security.
- Installation Ease: Moderately straightforward with the right tools; complex setups may require additional accessories.
- Stability: Achieved through balanced weight distribution and secure clamps; wobbles can be a concern without proper setup.
- Cost: Range from affordable to premium; investing in quality pays off in safety.
- Compatibility: Can attach to most C-stands with standard 5/8″ receivers; verify your monitor’s VESA compatibility.
Transitioning to Details
Now that I’ve summarized the essentials, let’s examine the specific features, equipment requirements, and safety considerations to help you mount your 32-inch monitor professionally.
Building a Robust Setup with Quality Clamps
The foundation of a secure monitor setup begins with selecting high-grade clamps designed to handle the weight and size of large displays. Heavy-duty C-clamps made from durable materials like steel or aluminum provide confidence that the monitor will remain stable during intense shoots. The grip strength and padding are essential factors; padded clamps prevent damage to the monitor’s frame and ensure a tight hold, reducing wobble and vibrations. Choosing clamps with adjustable screws allows for fine-tuning the fit, which is especially beneficial if you work with various monitor sizes.
Why Material Quality Matters
Opting for premium materials not only extends the lifespan of your clamps but also significantly improves safety. Cheaper alternatives may deform or slip under load, risking the monitor falling—a disaster for both equipment and personnel. For comparison, industry standards such as the Manfrotto Super Clamp offer reliable performance and are widely trusted by professional videographers.
Achieving Balance Through Proper Weight Distribution
One of the most overlooked aspects of mounting large monitors is ensuring correct weight balance on the C-stand. Placing the monitor centrally helps maintain equilibrium, reducing strain on the stand and the clamps. Utilizing counterweights or sandbags on the base further stabilizes the setup, especially in environments with potential gusts or uneven floors. When the weight distribution is off, there’s a risk of tipping, which can cause equipment damage or injury—a risk no professional should ignore.
The Role of Monitor VESA Compatibility
VESA mounts facilitate attaching monitors to stands with standardized hole patterns, simplifying the setup process. Verifying your monitor’s VESA pattern and making sure your clamps accommodate this interface is crucial. Non-standard VESA configurations may require custom adapters or specialized mounting plates, adding complexity but ensuring a secure fit. Since most modern 32-inch monitors adhere to the VESA 100×100 mm or 200×200 mm standards, compatibility is usually straightforward.
Frequent Frustrations and Design Shortcomings
Despite the advances in monitor mounting technology, some clamps can feel a bit cumbersome due to their bulky design, making quick adjustments challenging during shoots. Additionally, minor imperfections in the padding or screw mechanisms can lead to uneven pressure distribution, potentially damaging delicate monitor housings. While these issues are minor, they serve as a reminder that investing in well-designed clamps from reputable brands enhances both safety and user experience.
Safety Checks and Practical Tips
Before initiating a shoot, always double-check all connections and ensure the clamps are tightly secured. Testing stability with gentle pressure can reveal potential weak points. Incorporate quick-release mechanisms for rapid setup and teardown, but remember to lock them securely afterward to prevent accidental dislodging. Regular maintenance, like tightening screws and inspecting padding, prolongs the lifespan of your mounts and maintains safety standards.

Performance Analysis of Creator Rigs and Studio Gear Under Stress
In real-world scenarios, creator rigs, microphone setups, camera systems, and lighting kits are pushed beyond ideal conditions. Whether managing a hectic recording session or adapting to unpredictable environmental factors, these tools face stress that reveals their true resilience. For instance, during a live streaming event with high audience interaction, equipment must handle rapid adjustments, sustained operation, and occasional unforeseen disruptions. How do these products perform when the pressure is on?
Can Camera and Microphone Gear Handle Live Chaos?
When streaming or recording in dynamic environments, cameras often encounter fluctuating lighting and movement. High-end models with robust stabilization and good low-light performance generally excel in these conditions, maintaining image clarity without overheating or lagging. Microphones, particularly condenser types, may suffer from feedback or background noise if not equipped with proper shielding or placement. An example from a Reddit discussion highlights that many budget mics struggle with handling high sound pressure levels during live events, leading to distortion and clipping. This underscores the importance of choosing gear with proven durability in high-stress situations.
Studio Lighting Kits and External Power Strain
Lighting setups are vital during intensive shoots, and their performance under extended use is critical. Many affordable LED panels tend to overheat after several hours, risking shutdowns or thermal damage. Conversely, premium lighting kits with good ventilation and power management keep consistent brightness without flickering or overheating. During a studio shoot, a common failure point is the power supply—cheap units may cut out unexpectedly, ruining the shot. Testing these in real-world use reveals whether they sustain continuous operation or buckle under prolonged demand.
The Good & The Bad of Equipment Under Pressure
High-quality gear often shines in tough conditions. Cameras with weather sealing and rugged bodies endure rain, dust, and accidental knocks, maintaining performance without missing a beat. Similarly, professional-grade microphones tend to be more resistant to handling noise and environmental interference, delivering reliable audio even in challenging settings. Lighting kits with adjustable color temperature and high lumen output can adapt swiftly to changing scenarios, providing consistent output.
However, compromises are evident. Budget-friendly rigs may falter under pressure—overheating, lag, or dropout become common issues. Cheap clamps and mounts might slip or fail during intense handling, leading to costly damage. Lightweight tripods can wobble or collapse under weight, especially when used outdoors or with extended setups. The key takeaway: the cheaper the gear, the greater the likelihood of failure under stress. Do you agree with my assessment based on your experiences with studio equipment?
Is Support Responsive When Troubles Arise?
When gear fails in the middle of a shoot or live event, customer support quality can make or break your day. Reputable brands tend to offer prompt, effective assistance, often replacing defective units swiftly. In contrast, lesser-known manufacturers may delay responses or offer minimal solutions, prolonging downtime and risking project deadlines. An insightful Quora thread details how robust support can compensate for certain equipment flaws, but only if acted upon swiftly and professionally.
Final thoughts
Stress testing studio gear reveals their true durability, resilience, and usability during real-world demands. While high-end systems generally outperform cheaper alternatives, no equipment is entirely immune to failure when pushed too far. Regular maintenance, quality components, and attentive support services stand out as critical factors for reliable performance under pressure. What’s been your most challenging scenario with creator gear, and how did your equipment fare? Share your stories in the comments below.
Choosing Between Top-Tier Creator Equipment and Its Main Rivals
If you’re serious about content creation, selecting the right gear is crucial. Let’s compare popular creator rigs, microphones, cameras, studio gear, and lighting kits with the top alternatives to understand which offers the best value and performance.
Creator Rigs vs RIX StudioGear
The creator rig under review boasts a modular design, high compatibility with various accessories, and robust build quality, making it a favorite among professional streamers. Compared to RIX StudioGear’s flagship model, which offers similar features at a higher price point, this rig presents a more affordable option without sacrificing essential functionalities. RIX’s rig is priced around $900, whereas this contender rings in at approximately $650, according to recent listings on PriceSpy. For those prioritizing budget without losing core capabilities, this gear is a compelling choice.
Microphone Reviews: Budget vs Premium Microphones
The reviewed microphone delivers excellent clarity and noise cancellation, rivaling the popular Rode NT1-A. While it doesn’t quite match the build quality of industry-standard microphones like the Shure SM7B, it offers comparable audio quality for nearly half the price—around $150 versus over $400 for the Shure. Budget microphones often struggle with background noise, but this model incorporates advanced filtering, making it ideal for home studios or streaming setups where cost savings matter. If you’re willing to invest more, premium mics like the Rode perform better in sound isolation and durability, but for everyday use, this microphone provides excellent value.
Camera Comparisons: Entry-Level vs High-End Models
This camera features 4K recording, good low-light performance, and fast autofocus, similar to the Logitech Brio or Sony Alpha series. When compared to top-tier cameras like the Sony A7 III, which offers superior dynamic range and interchangeable lenses but at a cost exceeding $2,000, the reviewed model remains a cost-effective solution at around $500. For content creators on a budget, it delivers high-quality footage suitable for streaming and recording. For professional-level productions, investing in the Sony might be justified; otherwise, this camera strikes an excellent balance of price and performance.
Studio Gear and Lighting Kits
The lighting kit under review uses LED panels with adjustable color temperature and high CRI ratings, making it comparable to brands like Godox or Neewer. Similar kits retail for about $200–$300. While some premium options, such as Aputure Light Storm, offer higher brightness and build quality, they come at a significantly higher price point, often exceeding $500. This kit is perfect for amateurs and semi-pros aiming for professional-looking setups without breaking the bank. Choosing higher-end lighting is advantageous for studio environments demanding ultra-precise color rendering, but for most streaming and filming needs, this affordable yet capable kit suffices.
Is it worth the upgrade?
Deciding whether to stick with these reviewed options or move up to their premium counterparts depends on your specific needs. For hobbyist or entry-level creators, these models provide exceptional value and capabilities, especially when budgets are tight. However, if you require equipment that withstands rigorous daily use, offers superior durability, or provides peak performance in critical environments, investing in high-end alternatives could be justified. Always check current prices and configurations, as deals and bundle offers often change—see more on TechComparators.
Pros & Cons at a Glance
- Advantages: Secure and versatile mounting with high-quality clamps; customizable weight distribution enhances stability; VESA compatibility ensures wide monitor support.
- Drawbacks: Higher-quality clamps and accessories can be expensive; complex setups may require additional tools or adapters; potential wobble if not installed correctly.
Who Should Consider This Setup?
This mounting solution is ideal for studio professionals, videographers, and content creators who work with large monitors and require reliable, adjustable support during shoots. If you frequently need to reposition or adjust your display in a studio environment, this setup offers the flexibility you need. However, if your work involves only small, lightweight screens or occasional use, simpler mounting options might suffice. Avoid this if budget constraints are tight or if your workspace doesn’t support the necessary equipment infrastructure.
Final Thoughts: Is It Worth Investing?
For those seeking a robust, customizable, and safe method to mount a 32-inch monitor on a C-stand, investing in quality clamps and proper weight balancing is justified. The improved stability and safety are critical in professional settings, outweighing higher initial costs. If you want to explore more affordable alternatives or specific gear recommendations, check out our detailed reviews of high-grade clamps and mounting accessories. Overall, this setup is a solid investment for serious creators aiming for reliability and efficiency in their studio environment.
.