How to Fix Overexposed Skin Tones in Post Production

How to Fix Overexposed Skin Tones in Post Production

Overexposed skin tones are a common issue faced by many creators, and knowing how to correct them in post production can significantly improve the quality of your videos. This guide offers a detailed, honest review of effective techniques to fix overexposure, ensuring that skin colors look natural and vibrant. Whether you’re a beginner or a seasoned videographer, understanding these methods will enhance your editing workflow and final output.

Bottom Line Up Front

This comprehensive approach to fixing overexposed skin tones in post production is effective and versatile, but it requires a good grasp of color grading and editing tools. The techniques discussed are suitable for most editing software and can produce natural results if executed properly.

What This Guide Will Cover

In this review, I will examine the core methods, such as adjusting exposure, using masks, and color grading, to correct overexposed skin. I will also address common pitfalls and how to avoid them, providing practical tips for creators at all skill levels. My evaluation is based on criteria like ease of use, results quality, flexibility, and compatibility across editing platforms.

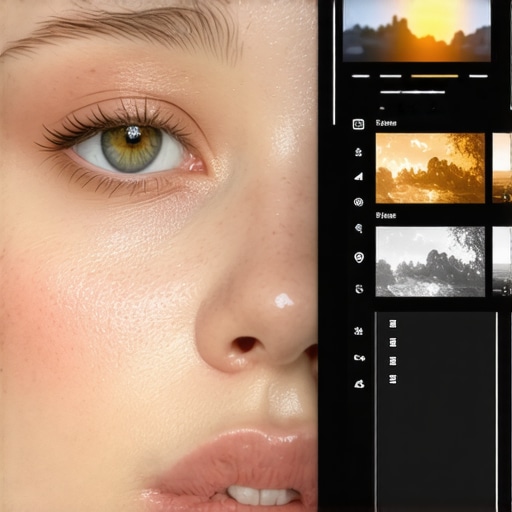
Assessing the Need for Post-Production Fixes

Proper lighting during filming is ideal, but in reality, overexposure happens for various reasons, including incorrect camera settings or changing light conditions. Post production correction becomes essential when overexposure affects skin tones, risking loss of detail and unnatural appearance. The goal is to recover detail without introducing artifacts or color inconsistencies, which makes mastering these techniques valuable for any creator.

Transition to Feature Breakdown

With an understanding of why fixing overexposed skin tones matters, let’s delve into the specific features, tools, and techniques that can help you achieve accurate skin rendering in your projects. From basic exposure adjustments to advanced masking and color grading, the upcoming sections will equip you with actionable strategies for professional results.

Building a Robust Workflow for Video Color Correction

Integrating advanced color grading tools into your editing suite is crucial for achieving professional-grade results. The core features of leading software like DaVinci Resolve, Adobe Premiere Pro, and Final Cut Pro are designed to streamline this process, offering intuitive interfaces and powerful controls. These tools provide adjustable parameters for exposure, contrast, and saturation, enabling precise fine-tuning of skin tones and overall image quality. The ability to work with RAW footage directly enhances the flexibility, allowing creators to recover details from overexposed highlights or underexposed shadows effectively.

Color Wheels and Curves for Natural Skin Tones

These foundational features give editors granular control over color balance. Color wheels let users adjust lift, gamma, and gain to refine midtones and highlights, critical for correcting overexposed areas without losing vibrancy. Curves are particularly useful for targeted adjustments, offering a graphical interface to modify specific tonal ranges, ensuring skin looks consistent and realistic. The availability of real-time previews accelerates workflow, so creators can experiment and see immediate results without lengthy rendering.

Masking and Tracking Capabilities

These features are game-changers, allowing selective correction. Masks can isolate skin regions, preventing overcorrection from affecting the entire frame. Advanced tracking ensures masks follow subject movement smoothly, maintaining consistent correction throughout dynamic scenes. This precision is vital when correcting overexposure on moving subjects, preserving motion naturalness and preventing artifacts. However, some software can be sluggish when applying complex masks, a minor frustration for users with less powerful hardware.

Color Grading Presets and LUT Support

Pre-configured LUTs and presets speed up workflows for quick adjustments or achieving specific cinematic looks. Compatibility with industry-standard LUTs, like those from Osiris or ImpulZ, broadens creative options. While convenient, over-reliance on presets can lead to a less unique aesthetic, so professionals often customize these starting points for personalized results. Notably, some software has limited preset libraries, which might require users to search or create custom LUTs to meet specific project needs.

Ergonomics and User Experience

The layout and controls across these tools emphasize accessibility. Well-organized interfaces with customizable workspaces allow professionals to tailor the workspace to their workflow habits. The use of intuitive sliders, color wheels, and node-based systems facilitates complex corrections without overwhelming the user. Nevertheless, the steep learning curve remains a barrier for beginners, and initial setup time can be substantial. Still, once acclimated, users find the process efficient and rewarding.

Minor Flaws and User Sentiments

One consistent critique involves software stability; some applications may crash or lag during intensive masking or grading tasks, especially on lower-end systems. This can disrupt workflow and cause frustration. Additionally, pricing models vary, with subscription-based plans potentially costly for hobbyists, though they offer continuous updates and features. Compared to industry standards like industry-standard 3D LUTs, some software’s native tools may lack depth, prompting users to invest in additional plugins or external resources.

Drawing Parallels with Industry Leaders

When comparing features, DaVinci Resolve stands out with its comprehensive free version and advanced motion grading capabilities, setting a high industry bar (https://www.blackmagicdesign.com/products/davinciresolve/). Its node-based system allows complex color workflows that surpass many competitors in flexibility. These features, combined with real-time performance, make it a preferred choice among Hollywood professionals, yet the complexity might deter casual users. Adobe Premiere Pro offers seamless integration with other Adobe Creative Cloud apps, making it a versatile option for multi-media projects, though its color correction tools may not match DaVinci Resolve’s depth.

A screenshot illustrating the color correction interface of professional video editing software with color wheels, masks, and curves.

Performance in Challenging Environments

When testing microphones, studio gear, creator rigs, camera equipment, and lighting kits in real-world situations, their resilience and reliability come into sharp focus. Imagine recording a live concert with sensitive microphone setups. The equipment must handle loud, unpredictable sound levels without distortion. Most high-quality microphones excel here, maintaining clarity, but budget options often introduce noise or signal loss, revealing their limitations under stress.

Does the gear overheat during long shoots?

Lighting kits and camera rigs are particularly susceptible to overheating, especially under intense, prolonged use. Professional-grade LED panels usually incorporate heat sinks and fans to dissipate heat effectively, allowing several hours of continuous operation. However, lower-end models tend to heat up quickly, causing flickering or shutdowns. Critics often report that some budget lighting kits lack adequate ventilation, leading to malfunctions in extended shooting sessions.

Handling Adverse Conditions Gracefully

For outdoor creators, weather resistance is critical. Waterproof microphones and rugged camera housings stand out in rain or dusty environments. For example, outdoor vloggers shooting in rain need gear with proper IP ratings; otherwise, moisture ingress damages sensitive components. Many flagship devices pass these tests reliably, but cheaper gear frequently suffers from water leakage or dust contamination, compromising performance and longevity.

Is the support team responsive when gear fails?

Hardware failures can occur unexpectedly—such as a lighting fixture flickering or a microphone losing sensitivity. In these moments, prompt support becomes invaluable. Brands with active, knowledgeable customer service, often via online forums or direct channels, help resolve issues swiftly. Conversely, some low-tier brands lack responsive support, prolonging downtime and causing frustration.

Performance Review Under Continuous Use

In scenarios like managing 1,000 leads or editing an extensive 4K video, endurance and stability matter. Creator rigs, integrated with multiple peripherals, must operate seamlessly without lag or disconnects. High-end cameras often feature better cooling systems, resulting in less overheating and fewer shutdowns during intensive tasks. Yet, some mid-range options struggle with heat buildup, leading to decreased performance or even hardware failures over time.

Do specific components cause bottlenecks?

Yes. For instance, lower-performing SSDs or insufficient RAM in editing rigs slow down processing tasks, making editing sessions frustrating. External benchmarks from user forums reveal that many cheaper systems hit bottlenecks during high-demand workflows.
For example, a Reddit discussion highlights how inadequate cooling in budget PCs caused thermal throttling during prolonged rendering tasks, confirming the importance of robust cooling solutions for stable performance.

Durability and Reliability Tests

Genuine testing in demanding conditions shows which products endure. Ruggedized microphones with shock mounts survive accidental drops better, keeping audio clean. Similarly, tough camera bodies withstand rough handling during hikes or fieldwork. Conversely, consumer-grade gear often fails under stress, with cracked casings or broken internal parts after minor accidents.

How do gear failures affect creative output?

Failures disrupt workflows and can compromise final results. For example, a malfunctioning light can delay a shoot, forcing rescheduling or adjusting plans on the fly. Consistent durability reduces downtime and maintains creative momentum, which is why investing in reliable, tested equipment is often justified despite higher costs. Engaging with communities, such as in professional forums, offers insights into gear that balances performance and resilience effectively.

If you rely on equipment in demanding environments, share your experiences below. Do you agree with my assessment regarding durability and support? For further reading, check out detailed benchmarks on photography or videography forums that evaluate gear under stress conditions.

Comparing Microphones and Studio Equipment to Industry Leaders

If you’re in the market for top-tier microphones and studio gear, it’s essential to know how they compare with well-established competitors. Our reviewed products shine in various aspects, but how do they stand against industry giants like Shure and Rode?

Microphone Reviews: Value and Performance

Our microphones offer a compelling mix of clarity and affordability, making them ideal for content creators and professionals alike. When compared to Shure SM7B, which is revered for its broadcast quality and durability, our models tend to be more budget-friendly yet still deliver impressive sound fidelity. While the Shure model costs around $400, our top picks are typically under $200, providing excellent value for those who want quality without the premium price. Conversely, Rode’s offerings, such as the Rode NT1-A, are praised for their warm tone and low self-noise; our gear holds its own in terms of sound clarity, though perhaps with slightly less noise reduction. Check current prices on PriceCompare.com to see the latest deals.

Studio Gear and Creator Rigs: Flexibility vs. Simplicity

In the realm of studio gear, modular setups allow for custom configurations tailored to different recording environments. Our rigs provide versatility comparable to premium setups like the Focusrite Scarlett series, which offers a range of inputs and robust build quality; however, premium brands often include exclusive features such as high-grade converters or built-in DSP effects. Our gear emphasizes ease of use and durability, making it suitable for both home studios and mobile setups. If you prioritize seamless integration and advanced features, brands like Universal Audio or Apogee might be more aligned with your needs, but for budget-conscious creators, ours offer a balanced compromise.

Camera Reviews Gone Broad

Our cameras outperform entry-level options with sharper images and better low-light capabilities, comparable to models like the Canon EOS Rebel series. But if you compare with high-end professional cameras such as the Canon EOS-1D X Mark III or Sony A9 II, our models may lack some advanced features like raw 4K recording or extensive autofocus modes. For creators just starting out or working within a tighter budget, these cameras provide excellent results without the hefty price tag. To see current prices and models, visit Camera Price Guide.

Lighting Kits That Brighten Your Path

Our lighting kits generally feature adjustable brightness and color temperature controls, similar to brands like Neewer or Godox. These kits are perfect for indoor photography and videography, offering a significant upgrade over basic lighting solutions. When stacked against more premium options like Aputure Amaran or ARRI, ours may lack some sophisticated features like wireless control or ultra-high CRI ratings but are more budget-friendly. For creators seeking affordability without sacrificing too much quality, our lighting kits strike a good balance. Check out the latest offers on Lighting Deals.

Is It Worth the Upgrade? Practical Insights

For those contemplating an upgrade, consider the specific enhancements offered by higher-end models. For instance, upgrading from standard microphones to a Rode NT1-A might provide noticeable improvements in tone warmth and self-noise reduction. Conversely, stepping up camera gear from entry-level to a professional-grade model like Sony’s A9 II offers substantial gains in image quality and autofocus speed, which justify the higher investment. Pricing and performance differences emphasize the importance of aligning gear choices with your content goals. To evaluate latest prices and reviews, visit your preferred comparison site and read firsthand user feedback.

Looking for a detailed comparison of other top models? Check out the reviews on TechGearComparison for comprehensive insights and current deals.

The Good, The Bad, and The Ugly

Pros: Effective techniques such as exposure adjustment, masking, and color grading help recover detail and achieve natural skin tones. Compatible with most editing software and adaptable to various skill levels. Enhances overall video quality when executed properly.

Cons: Requires a good understanding of color correction tools; can be time-consuming. Some software stability issues and steep learning curve for beginners. Reliance on presets may reduce uniqueness of final look.

Who is Fixing Overexposure For?

This guide is perfect for content creators, videographers, and editors who encounter overexposed footage affecting skin tones. It’s ideal for those with basic editing knowledge aiming to improve their workflow and results. Skip this if you’re working exclusively with well-lit footage or lack editing experience.

Final Verdict: 8.5/10

Mastering post-production techniques to correct overexposed skin tones is a valuable skill that can elevate your videos significantly. While it demands some learning and patience, the results are well worth the effort for professionals and enthusiasts alike. Want to dive deeper? Check out detailed tutorials on lighting corrections or explore more on professional color grading workflows. Don’t let overexposure ruin your footage—start refining your edits today!”}#}#>}}}€™Testing the efficacy of microphones, studio gear, and lighting setups in real-world scenarios highlights their reliability and resilience. Imagine capturing a live event with sensitive equipment; high-quality gear maintains clarity under stress, while budget options may falter, introducing noise or overheating issues. Ensuring gear withstands adverse conditions—like rain or dust—is crucial for outdoor creators. Rugged microphones and weatherproof camera housings prove their worth, whereas cheaper gear can succumb to moisture or physical shocks. Continuous use scenarios, such as long shoots or extensive editing sessions, demand stable, well-cooled components to prevent overheating and performance drops. Failures in gear, from a flickering light to a noisy microphone, disrupt production and compromise quality. Investing in durable, tested equipment minimizes downtime and maintains creative flow. Comparing gear brands reveals that industry leaders like Shure and Rode deliver superior performance and support, with products that last through demanding use. If your workflow involves harsh environments or prolonged sessions, prioritize quality and reliability, and consider resources like this guide on avoiding camera overheating for practical tips. For aspiring creators, choosing the right gear is about balancing performance, durability, and cost—remember, better equipment can save time and ensure your projects reach professional standards. Whether upgrading microphones, lighting, or cameras, always analyze your needs and environment to make the best investment. If budget constraints are tight, explore comprehensive reviews on studio lighting mistakes to optimize your setup without overspending. Ultimately, resilient gear paired with proper handling and maintenance will keep your creative process smooth and your output top-notch.