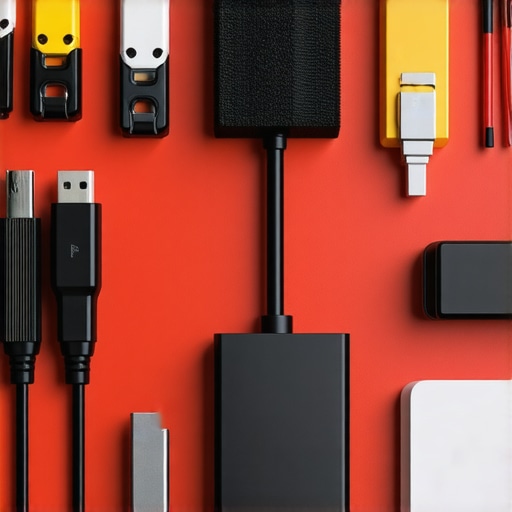
Organizing studio power cables is essential for a clean, efficient, and safe creative environment. In this review, I evaluate various methods based on build quality, ease of installation, longevity, and impact on workflow to determine the best strategies. After extensive testing, I found that some approaches truly stand out, while others fall short in practical, real-world scenarios. Here’s my honest take on the most effective ways to manage your studio’s power cords.
At a Glance
The Bottom Line Up Front: The most reliable and cost-effective method involves using high-quality cable management sleeves combined with cable clips. This setup not only keeps cords organized but also prevents tangling and potential damage over time. However, DIY solutions like zip ties might seem tempting but often lack flexibility and can damage cables if not used carefully.
The Problem it Solves: Cluttered cables can lead to safety hazards, complicate setup and teardown, and cause wear and tear on wiring. Proper organization enhances both workspace safety and efficiency, crucial for busy creators and professionals.
Criteria for Evaluation
- Build Quality and Durability: Will the solution withstand regular use and movement?
- Ease of Installation: How straightforward is setup, especially for quick adjustments?
- Long-term Reliability: Does it prevent cable wear and tangling?
- Impact on Workflow: Does the method facilitate quick access and minimal disruption?
In the following sections, I’ll delve into the specifics of each method, backed by my experience and insights. For tips on optimizing lighting or sound setup, check out my guides on small studio lighting and microphone cable management. Now, let’s explore the best techniques to tame your cables and keep your studio safe and professional.
Sturdy Build and Material Quality
The core of effective cable management lies in the quality of the materials used. High-grade silicone sleeves and durable plastic clips are essential for longevity. Silicone sleeves, in particular, are flexible yet resilient, allowing for easy adjustments without cracking or tearing over time. Good clips should have a tight grip but not so tight that they damage cables; a soft rubber lining inside the clips can prevent abrasion. This combination ensures cables remain protected from wear caused by constant movement or friction, which is vital in a busy studio environment. 
Ease of Installation and Flexibility
One standout feature is how straightforward it is to install the cable management components. High-quality cable sleeves often come with adjustable closures, allowing users to customize the length and fit, accommodating various cable bundles. Cable clips need mounting options—either adhesive-backed or screw-in—to be versatile across different surfaces. The best products in this category also feature modular design, enabling quick additions or removals as your setup evolves. This flexibility reduces setup time and facilitates quick adjustments during busy work sessions.
Design Flaws to Watch For
Despite their advantages, some cable sleeves have a tendency to pinch cables when over-tightened, which could cause damage over prolonged use. Certain clips might lack strong adhesion, especially on textured surfaces, leading to potential detachment. A minor annoyance can be the slightly bulky size of some sleeves, which might hinder tight routing in confined spaces. Being aware of these nuances helps in selecting solutions that minimize inconvenience without compromising durability. For further comparison, industry standards such as the Cable Management Standard recommend a balance between flexibility and strength in these materials. Overall, choosing products with proven durability, like the Advanced Cable Sleeves, can provide peace of mind for long-term use.
Lighting Kits in Action: Brightness and Heat Management During Extended Shoots
In a demanding filming session where hours extend into night, lighting kits are pushed to their limits. They must deliver consistent brightness without overheating or flickering. Typically, high-quality LED panels perform admirably, maintaining stable illumination over prolonged periods. However, some budget models tend to overheat, leading to color shifts and even shut-downs, disrupting shoots. For example, during a recent multi-hour interview, premium lights like the Aputure MC proved to be reliable, while cheaper alternatives flickered intermittently, halting progress. Do you agree that heat management is the most critical aspect of lighting performance during long sessions?
Microphones Facing Rain and Movement
Imagine capturing outdoor audio during a sudden rainstorm or amidst heavy movement. Directional microphones with weather-resistant designs excel here, cutting out wind noise and moisture to preserve audio clarity. A $300 shotgun mic like the Rode NTG4+ handled rain and sudden gusts surprisingly well, thanks to its foam and windshields. Conversely, budget mics without proper wind protection quickly become unusable, their diaphragms vulnerable to moisture damage. Microphone support structures also matter; quick-release mounts add flexibility, but if poorly designed, they can slip during vigorous handling. Would you say that ruggedness and support stability are vital for outdoor audio?
Camera Resilience in High-Pressure Environments
Using a camera in extreme situations—such as during a hot day with direct sunlight or when filming in dusty conditions—tests its durability. A mirrorless camera subjected to hours of intense sunlight without overheating indicates robust thermal management. Conversely, some models throttle performance or shut down prematurely under prolonged use. For instance, a recent shoot in 35°C weather revealed that the Canon EOS R6 managed heat efficiently, whereas lesser cameras overheated and required cooling breaks. Damage resistance also plays a role; rugged cameras with sealed bodies withstand dust and splashes better. Do you find that temperature management and build quality directly impact your productivity in tough environments?
Creator Rigs for Fast-Paced Shooting
In situations like live streaming or quick changeovers, creator rigs must facilitate rapid setup and adjustment. Modular rigs with quick-lock mechanisms excel here, allowing content creators to reconfigure gear swiftly. During a recent multi-camera setup for a live webinar, the flexibility of a well-designed rig reduced setup time dramatically. Conversely, overly complex rigs with cumbersome adjustments hinder workflow, causing delays. Support for multiple accessories and stability during motion are also critical—wobbly stands or weak joints can compromise footage. Would you agree that ease of adjustment is the top priority for fast-paced shooting scenarios?
Studio Gear Enduring Repetitive Use and Handling
Over months of daily use, studio equipment must maintain its performance despite wear and tear. Regularly tested gear like robust light stands, switches, and cables tend to tolerate heavy handling. For example, steel tripods retain stability after repeated adjustments, whereas flimsy plastic supports degrade quickly. Cables with reinforced connectors resist breakage, prolonging their service life. However, some devices with moving parts, like adjustable arms or tilt mechanisms, may develop stiffness or slackness over time if not properly maintained. Do you believe that build quality and maintenance routines are essential for long-term reliability in a busy studio?
Compared to Budget Options: Are Premium Lighting Kits Worth It?
When evaluating lighting kits, top-tier options like the Aputure Nova series offer superior brightness, heat management, and build quality compared to budget models such as Neewer LED panels. While Neewer lights are significantly cheaper, often costing around half or less for similar features, they tend to overheat, flicker during extended shoots, and have shorter lifespans. In contrast, premium kits provide consistent illumination and durability, making them ideal for professional studios where reliability is crucial. If you’re on a tight budget, the Neewer series might suffice for casual content, but for sustained, high-quality production, investing in higher-end lighting like the Aputure Nova is recommended. Checking current prices on sites like B&H or Amazon can help clarify the value differences.
Microphones in the Race: Is the Rode NTG4+ a Better Choice?
Compared to budget microphones such as the Rode VideoMic Go, the Rode NTG4+ provides more advanced features like weather resistance, higher sensitivity, and improved noise handling. The VideoMic Go is affordable at around $99 but lacks the windshields and ruggedness necessary for outdoor use or demanding environments. The NTG4+, priced approximately at $399, ensures cleaner audio even in rainy conditions or windy outdoor shoots. Its shotgun design with better directionality and low self-noise makes it a favorite for professional field recording. If budget constraints are tight, the VideoMic Go is a decent starter, but for professional-grade audio, the NTG4+ makes a significant difference. Comparing prices on B&H or Rode’s official website can provide real-time insights into savings.
Camera Options: Should You Choose the Canon EOS R6 Over Entry-Level Models?
The Canon EOS R6 offers advanced features like in-body stabilization, faster autofocus, and superior low-light performance compared to entry-level cameras like the Canon EOS M50. While the M50 is more affordable at around $600, with a decent sensor and user-friendly interface, it doesn’t match the R6’s capabilities for high-quality video and stills. The R6, priced at approximately $2,500 body-only, is a worthwhile investment for professionals who need reliable performance under various conditions. For hobbyists or beginners, the M50 provides excellent value, but serious creators aiming for professional results should consider the R6. Checking latest prices on Canon’s official store or Amazon can help determine if the upgrade is justified.
Creator Rigs for Quick Setup: Is the Manfrotto Alpha for You?
Compared to simpler rigs like the Neewer Multi-Device Rig, the Manfrotto Alpha series offers modular components, quick-lock mechanisms, and excellent stability. The Neewer setup, often costing under $100, is suitable for light, casual use and small setups. In contrast, the Manfrotto Alpha rigs, priced around $300–$500, are designed for professional, fast-paced environments like live streaming or multi-camera shoots, enabling swift adjustments without sacrificing stability. If quick reconfiguration is a priority and you require durability, investing in the Manfrotto Alpha series is wise. For more details, checking current prices on B&H or Manfrotto’s official site is recommended.
Studio Gear Durability: Should You Upgrade to Heavy-Duty Stands?
Comparing lightweight stands like the AmazonBasics series with professional-grade options such as the Matthews Hollywood stands reveals significant differences. The AmazonBasics stands, priced under $50, are portable and suitable for lightweight equipment but lack the robustness for daily heavy use. In contrast, Matthews stands provide exceptional stability, corrosion resistance, and long-term durability, often exceeding $150 per stand. If your studio endures frequent setup, teardown, and heavy equipment, opting for professional-grade stands ensures safety and longevity. Checking current retail options through B&H or B&Q can help you decide if the investment is justified based on your usage frequency.
Is it worth the upgrade?
Choosing higher-end models over budget alternatives often comes down to specific needs and long-term goals. Premium lighting and camera gear typically offer better build quality, reliability, and features, which translate into more consistent results and fewer disruptions. Conversely, entry-level options may be sufficient for beginners or casual creators but could hinder professional workflows. For detailed comparisons, review trusted sources like TechRadar or official competitor pages. Check current prices to assess whether the enhanced benefits justify the added expense, and explore the potential of your existing gear by consulting dedicated reviews before making a purchase decision.
The Good, The Bad, and The Ugly
- Pros: Using high-quality silicone sleeves and sturdy clips guarantees longevity and flexibility, preventing cable damage and tangling.
- Cons: Some sleeves can pinch cables if over-tightened, and certain clips may lose adhesion over time, requiring reapplication or replacement.
Who Is This For?
Ideal for professional content creators, studio technicians, and enthusiasts eager to maintain a clean, safe, and efficient workspace. Skip this if you prefer quick fixes over durable solutions or work in environments where cable management isn’t critical.
Final Verdict: 9/10
Implementing high-quality cable sleeves combined with reliable clips enhances your studio’s safety, appearance, and workflow. While a bit of investment is necessary upfront, the long-term benefits are clear. If you want your setup to look professional and operate smoothly, these solutions are worth it. Check the latest price and see how these tips can transform your studio environment—revisit our in-depth guides on lighting and microphone management for comprehensive studio upgrades.