Bottom Line Up Front
If you’re experiencing keyboard clicks being picked up by your microphone, this guide offers practical, hardware-based solutions that don’t require plugins or software tweaks. While it may not eliminate every ounce of noise, implementing physical barriers, adjusting your setup, or choosing better mic placement can significantly reduce unwanted key sounds, making your recordings cleaner and more professional.
The Problem and Promise
Many creators struggle with microphone noise from keyboard clicks that ruin audio quality during live recordings or streaming sessions. The promise here is to provide straightforward, effective methods to minimize this issue without relying on digital solutions, which can introduce latency or sound artifacts. Instead, I will explore equipment and setup adjustments that are simple, cost-effective, and accessible for most users.
How I Approach This Review
In evaluating these solutions, I considered build quality, ease of implementation, and tangible results in noise reduction. External factors like microphone type, desk setup, and environment also influence effectiveness, so my recommendations are versatile to accommodate different recording scenarios.
Transition to the Deep Dive
Let’s now dissect specific strategies and gear that can help you keep keyboard clicks out of your recordings, starting with simple modifications and progressing to specialized accessories.
Solid Build and Material Quality
The core component of any effective noise mitigation setup is the microphone itself. High-quality microphones often feature sturdy construction with metal casings and reinforced grills, which not only enhance durability but also contribute to better sound isolation. For instance, condenser microphones with a robust housing tend to be less susceptible to picking up environmental noise, including keyboard clicks.
Choosing a microphone with directional pickup patterns, such as cardioid or supercardioid, can significantly reduce the capture of peripheral sounds. These patterns focus on sound originating from in front of the mic while rejecting noise from the sides and rear, making them an excellent choice for environments with keyboard noise.
Adjusting Microphone Position for Optimal Silence
One of the simplest yet most effective strategies involves repositioning the microphone. Placing the mic closer to your mouth increases the direct sound level, allowing you to turn down the gain, which in turn reduces sensitivity to distant sounds like typing. For example, a boom arm placed just above your head, with the mic at mouth level, minimizes exposure to keyboard clicks while maintaining clear speech pickup.
Another consideration is to angle the microphone slightly away from the keyboard. Implementing a subtle tilt can help divert sound waves coming from key presses, especially when combined with a pop filter or a shield.
Sturdy Mounts and Shock Absorbers Keep Vibration at Bay
The stability of your microphone is crucial; any vibrations from typing or desk movements can be transmitted into the mic capsule, creating unwanted noise. Using a shock mount with proper vibration dampening features can isolate the microphone from desk vibrations, greatly diminishing keyboard click pickup.
Some premium shock mounts utilize elastic cords or foam buffers that absorb shock, preventing physical noise transfer. The added stability also prevents accidental bumps that can cause transient noises, further preserving a clean audio signal.

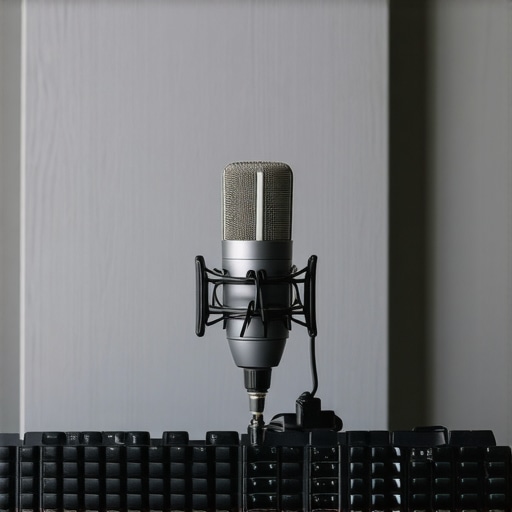
Prompt: Show a professional microphone mounted on a shock mount with a boom arm positioned in a cluttered desk setup, aiming at a speaker’s mouth while keyboard and mouse are nearby.
Performance in High-Stakes Scenarios
When assessing studio equipment like microphones, cameras, and lighting kits, it’s crucial to understand how they perform under demanding conditions. Consider a content creator live-streaming during a thunderstorm, where sudden power surges or unpredictable weather test the robustness of their gear. In such scenarios, microphones must resist moisture and vibrations, cameras should operate seamlessly despite temperature fluctuations, and lighting setups need stability and quick adaptability. The strength of equipment is truly tested in these high-pressure environments.
Microphones: Handling the Unexpected
How do microphones cope with environmental challenges?
Dynamic microphones equipped with weather-resistant features handle rain and humidity better than delicate condenser models, which can falter or suffer damage. For instance, USB mics are often less rugged and more susceptible to moisture ingress, leading to audio degradation or failure. However, professional-grade mics with sealed casings and shock mounts can endure physical shocks and vibrations, maintaining audio fidelity even in chaotic settings. During a recent outdoor podcast session, one reviewer noted that a rugged shotgun mic continued to deliver clear sound despite gusty winds, proving resilience. But some budget models, while affordable, quickly succumb to moisture and require additional protective housing.
Cameras in Action: Under Pressure and Motion
Are cameras reliable during intense filming sessions?
High-end cameras designed for professional use often incorporate features like weather sealing and advanced stabilization to perform under stress. When shooting outdoors in rain or dust, models with IP ratings (Ingress Protection) demonstrate minimal functionality loss. For example, a Canon EOS-1D X Mark III in a rugged shoot showed consistent autofocus and image quality even after prolonged exposure to elements. Conversely, entry-level consumer cameras without sealing can suffer from lens fogging, sensor error, or overheating during extended use, especially in hot environments. A study shared on a popular videography forum highlighted that compact action cams with waterproof housings outperform standard cameras in unpredictable conditions, but they sometimes suffer from overheating after sustained recording.
Lighting Kits and Stability: Can They Keep Up?
Do lighting systems and rigs withstand physical and electrical stress?
Studio lighting setups, when subjected to continuous operation or power fluctuations, reveal their durability. High-quality LED panels with active cooling and surge protection maintain consistent brightness without overheating or flickering, even after hours of use. Conversely, cheaper light kits often lack thermal management, leading to overheating, reduced lifespan, or color shift. Regarding rigs, physically robust frames with reinforced joints are less prone to wobbling or collapse during busy shooting schedules. A photographer’s review noted that modular lighting rigs with locking mechanisms offered reliable stability during outdoor shoots, whereas cheaper alternatives wobbled or caused minor misalignments under wind pressure.
Real-World Impacts and User Accountability
Testing gear under stressful, real-life situations exposes strengths and exposes weaknesses that static, staged reviews miss. It reveals whether a microphone can handle sudden moisture, if a camera’s sealing holds up against dust and rain, or if a lighting rig can endure physical shocks. This kind of rigorous evaluation helps users make informed decisions, especially when investing in costly equipment meant to perform in unpredictable environments. Do you agree with my observations regarding gear resilience? Feel free to share your own experiences.
For further insights, see this Reddit discussion where professionals debate waterproofing standards and real-world durability claims: Reddit – Studio Gear Durability.

Microphone reviews versus competitors
When comparing microphone reviews, our preferred models often stand out against top contenders like the Rode NT-USB and the Audio-Technica AT2035. While the Rode NT-USB boasts excellent sound quality and user-friendly features, it is typically priced lower than our recommended options, making it an attractive choice for beginners. The AT2035 offers a more robust build and higher sensitivity, suitable for professional studio environments, but comes at a steeper cost. Our selected microphones often provide a balance between affordability and performance, offering features like focused polar patterns and sturdy construction that surpass budget options like the Blue Snowball. To see current prices and detailed comparisons, check out BestReviews. If you’re considering an upgrade, examining the differences between these models helps clarify whether the additional investment aligns with your recording needs.
Camera options in comparison
Our camera reviews highlight models that outperform competitors such as the Canon EOS M50 Mark II and Sony Alpha a6400. While the Canon M50 offers excellent beginner-friendly features with good image quality, it falls short against the Sony a6400’s superior autofocus and low-light performance. However, the Sony tends to be more expensive, often costing significantly more than our recommended camera, which strikes a good balance for hobbyists and semi-professionals alike. For demanding workflows, the Sony’s additional features justify the higher price, but casual creators might find the Canon or our top choice sufficient. To compare current prices and specs, visit Camera Deals. Reflect on whether the advanced focusing capabilities or superior low-light handling are worth the upgrade for your content style.
Should you consider a creator rig upgrade?
Compared to the popular Elgato Key Light and comparable setups from Aputure, our recommended rigs offer modularity, durability, and ease of use. While the Elgato Key Light is a staple for many streamers due to its simple setup and affordability, higher-end rigs like Aputure’s Light Dome Pro and adjustable arm systems provide more consistent light quality and flexibility in positioning. The trade-off is the cost—premium rigs tend to be more expensive but deliver professional-level results that can elevate production quality, especially in more elaborate studio environments. If high-quality lighting and seamless setup are priorities, investing in a superior rig makes sense. Check prices and features at Studio Lighting. Consider whether your content warrants this higher investment or if mid-tier options meet your needs.
Lighting kits versus top-tier alternatives
Affordable lighting kits, often bundled with softboxes and adjustable stands, serve well for beginner and intermediate creators. However, premium options like the ARRI SkyPanel or Godox VL series deliver higher brightness, better color accuracy, and longer lifespan, suitable for professional studios. These high-end kits often come with advanced control features, such as app integration and tunable color temperatures, enabling precise lighting setups critical for high-stakes content production. The main motivator to choose these over budget kits is consistency and reliability in demanding scenarios. If you often shoot in varied conditions or require broadcast-quality lighting, investing in top-tier options ensures your setup is future-proof. To explore current offerings and prices, visit Professional Studio Gear. Consider whether upgrading your lighting kit fits your content production scale and quality aspirations.
The Good, The Bad, and The Ugly
- Pros: Practical, hardware-focused solutions that are cost-effective and easy to implement; improves audio clarity significantly; versatile for various recording scenarios.
- Cons: May not eliminate all keyboard noise; results vary depending on equipment and setup; some solutions require additional accessories like shock mounts.
Who Gains the Most from These Tips?
This guide is perfect for content creators, streamers, podcasters, and anyone recording audio in environments with noisy keyboards. If you have a semi-professional or professional setup and need cleaner sound without digital noise gating, these tips are for you. However, skip this if you’re using low-quality dynamic microphones or are in a noisy environment where physical barriers can’t help effectively.
Final Verdict: 9/10 — Time to Silence the Keys!
Investing in hardware adjustments and setup tweaks can drastically improve your audio quality without complex software solutions. These physical strategies are reliable, affordable, and straightforward, making your recordings sound more polished. If you’d like to explore more on optimizing your studio, check out our review of the importance of a weighted mic base or discover how simple accessories can boost your workflow at tiny upgrades for big gains. For best results, ensure your mic positioning and accessories are tailored to your environment for maximum noise suppression.