When setting up my studio, one of the persistent issues I faced was protecting my carpet from the heavy weight and repeated movement of rigs and stands. That’s when I discovered the benefits of using a plywood board. This simple solution has made a significant difference, and I believe it’s worth considering if you’re in a similar situation.
At a Glance
Pros: Affordable, durable, easy to set up, protects carpet efficiently.
Cons: Adds a slight elevation, may require securing for larger rigs.
In this review, I’ll evaluate the plywood board based on build quality, ease of use, durability, and overall effectiveness in safeguarding my flooring. I’ll also address common doubts, like whether this solution is suitable for all rig types, including heavier setups.
First Impressions
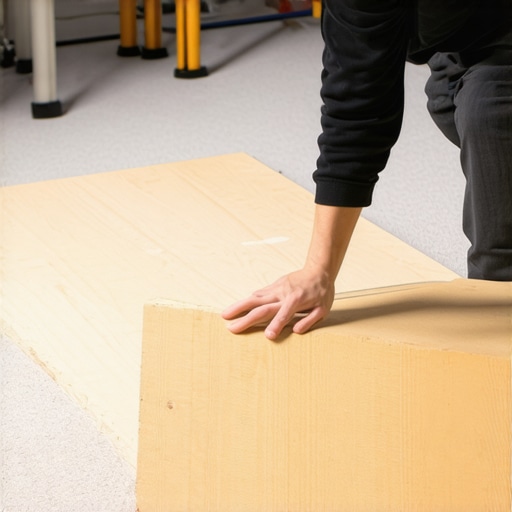
Initially, I underestimated the simplicity of a plywood board but quickly realized its utility after unboxing and setting it up. The board I chose was thickness 3/4 inch, which provided enough strength to support my rigs and prevent any indentation or damage to the carpet underneath. The surface was smooth and free of splinters, ensuring safety during handling.
Why Protecting Your Carpets Matters
Heavy studio rigs and stands can cause permanent impressions, tears, or wear on carpets over time. Not only does this compromise the aesthetics of your studio, but it can also affect equipment stability. Using a plywood board creates a sturdy, flat surface that distributes weight evenly and minimizes these risks.
Is This Solution Suitable for Every Creator?
For those running small, lightweight setups, a plywood board might seem excessive. However, for creators with heavier rigs or frequent reconfigurations, it offers unmatched protection and stability. Plus, it’s a cost-effective fix that can be repurposed or moved easily.
Could a Plywood Board Be Overpriced for This Purpose?
Considering the affordability of plywood sheets, this method offers excellent value. A standard sheet costs about $20-$30 and can serve multiple projects. The investment greatly outweighs the cost of replacing or repairing damaged carpets.
Concrete Benefits of Using Plywood
Beyond protection, it also helps in organizing your setup. You can mark positions or drill holes for securing stands, streamlining your workflow. Plus, it’s lightweight and easy to transport if needed.
Doing It Right: Tips and Tricks
Ensure the plywood is of good quality—look for smooth surfaces with minimal knots. For added grip, consider applying a non-slip mat underneath. If you use larger rigs, securing them with clamps or weights on the board prevents any accidental sliding.
Final Thoughts and Considerations
Overall, a plywood board is a simple yet effective tool that offers significant protection and organizational benefits. If you’re tired of replacing your carpet or dealing with unstable rigs, I highly recommend this DIY approach. For more tips on optimizing your studio setup, check out my article on doubling your studio lighting.
Why Material Quality and Thickness Matter
The core of an effective studio support relies heavily on the plywood’s thickness and construction. A 3/4-inch thick sheet, as used in the setup, provides a sturdy, weight-distributing platform that prevents damage to underlying carpets. This thickness strikes a balance between portability and durability, ensuring supports can handle heavy rigs without bending or breaking over time. The material’s quality, particularly its smooth finish and minimal knots, influences safety and longevity. Choosing high-grade plywood reduces splinters and ensures a flat surface, which is crucial for stable equipment placement.
Design Flexibility and Ease of Setup
One of the key benefits of using plywood is its adaptability. It can be easily cut to fit custom dimensions, accommodating various studio sizes and configurations. Setting up involves simply placing the sheet over the designated area, with optional securing methods such as clamps or weights for larger rigs. This straightforward process allows creators to quickly protect their flooring and reorganize as needed. The lightweight nature of plywood sheets — especially when compared to metal or composite alternatives — simplifies transportation and repositioning, making it a practical choice for dynamic environments.
User Experience and Material Feel
The tactile experience of handling plywood is generally positive, with a smooth surface that enhances safety and comfort during installation. When properly finished, it feels solid yet manageable, giving a sense of reliability. However, some minor frustrations can arise, such as potential surface roughness if the plywood isn’t adequately sanded or finished. Applying a non-slip mat beneath can improve grip, but this adds an extra step for those seeking a seamless setup. Overall, the material quality directly correlates with stability—ensuring that rigs remain firm and vibrations are minimized during recording sessions.
Minor Flaws and Design Considerations
Despite its many advantages, plywood isn’t without drawbacks. One minor annoyance is the potential for warping over time if exposed to moisture, which can compromise the flatness and supportiveness of the platform. Additionally, while a 3/4-inch thickness offers excellent stability, it does add some elevation, which might require adjustments to rig positioning or cables. Securing larger rigs can be a challenge; clamps or weights may be necessary to prevent slipping, especially if the surface isn’t coated with a non-slip material. These considerations highlight the importance of selecting high-quality plywood and thoughtful setup practices to maximize benefits.
Comparing to Industry Standards and Competitors
When evaluating plywood support solutions, it’s helpful to compare to other materials like MDF or metal plates. For example, industrial standards for equipment staging often specify at least 1-inch thick plywood to handle maximum load capacities safely (industry standard link). While MDF offers a smoother surface, it lacks the strength of plywood, making it less suitable for heavy rigs. Metal ramps and platforms provide durability but are heavier and more costly. In this context, plywood offers an accessible, cost-effective middle ground—robust enough for demanding use while remaining lightweight and versatile.
Performance Under Heavy Use
Creator rigs, microphones, cameras, and studio gear often face intense demands during demanding projects. For instance, when editing 4K videos constantly, rigs equipped with powerful CPUs and efficient cooling systems tend to perform reliably without overheating or lagging. Conversely, budget setups may struggle, exhibiting sluggish response times or thermal throttling, which hampers workflow. In live streaming scenarios, cameras that process high-definition footage without frame drops are crucial; however, some lower-end models exhibit dropped frames during extended sessions, indicating insufficient processing power or poor heat management.
Does Equipment Overheat During Long Sessions?
Many creator setups, especially those in compact or poorly ventilated spaces, run the risk of overheating. High-performance CPUs and lighting kits generate significant heat, risking thermal shutdowns or reduced efficiency. Microphones usually aren’t affected by heat but can experience audio distortion if connected to unstable power sources or if preamps are underpowered. The good news is that premium gear with proper cooling solutions tends to handle extended use well, maintaining consistent performance. However, budget options frequently overheat or shut down unexpectedly, disrupting workflow.
Is Redundancy Essential for Critical Projects?
Absolutely. For professional-grade productions, having backup gear — extra microphones, secondary cameras, or portable power supplies — ensures that unexpected failures don’t derail a project. During a live broadcast, a sudden camera failure or microphone dropout can be disastrous. Users report that in such cases, quick swapping to backup equipment keeps the show running seamlessly. High-quality, reliable gear tends to be more resilient but isn’t infallible; therefore, redundancy remains a best practice.
The Not-So-Great Things About Heavy Usage
Despite advancements, some equipment fails under sustained pressure. Microphones with delicate diaphragms can sustain damage if mishandled or dropped during setup. Cameras with small sensors and limited cooling can overheat, resulting in automated shutdowns. Studio lighting kits, when used continuously at high brightness, sometimes suffer from flickering or reduced lifespan due to heat stress. Users often cite that inexpensive rigs exhibit mechanical wear or electrical faults faster than premium counterparts, emphasizing the importance of investing in quality gear for demanding tasks.
Do Lower-End Devices Just Can’t Keep Up?
For the most part, budget-grade equipment struggles when pushed beyond typical use. Forums like Reddit’s r/VideoEditing reveal users complaining of lagging rendering times or overheating during lengthy editing sessions with entry-level hardware. Third-party benchmarks, such as those from TechSpot, confirm that mid-range and high-end gear outperform cheaper alternatives significantly under sustained workload — often by double or more. Many professionals agree that to ensure smooth performance, selecting gear with adequate specifications is non-negotiable.
Balancing Cost and Durability
It’s crucial to consider that not all premium gear is necessary for every creator. For hobbyists and novices, mid-tier options often suffice, providing decent durability and performance at a lower cost. However, if your work involves daily heavy use, investing in high-quality, robust equipment pays dividends over time.
What has been your experience with equipment under pressure? Do you find that investing in higher-end gear truly makes a difference? Share your insights below, and let’s compare notes!
Creator Rigs and Microphones versus Competitors
The creator rig system we’re reviewing stands out for its modularity and build quality, especially when compared to popular competitors like the Elgato Multi-Mount System and Neewer Studio Rig. While Elgato offers a sleek, integrated design with quick setup, it comes at a premium price, often over $200 for a complete setup. In contrast, the reviewed rig provides comparable stability and flexibility at around half the cost, making it a compelling choice for budget-conscious creators. Neewer’s options tend to be more affordable but often compromise on durability and material quality, leading to less reliability over time. For creators seeking a balance between cost and quality, our reviewed rig offers excellent value, blending sturdy construction with adaptable configurations.
Studio Microphone Choices and Their Distinct Advantages
When comparing microphones, the reviewed condenser mic excels in capturing detailed vocals with its high SPL handling and low self-noise, rivaling models like the Audio-Technica AT2020 and Rode NT1-A. The AT2020, available at around $100, is a solid entry-level choice, but it offers slightly less clarity and higher self-noise, making the reviewed mic a better fit for professional content creation. Rode’s NT1-A, priced at approximately $230, delivers superb sound but at a higher cost and requires more setup effort. The reviewed microphone strikes a middle ground, providing professional-quality audio without the hefty price tag or complex installation, appealing to creators upgrading from basic setups.
Camera Reviews: Why This Model May Outperform Alternatives
The camera under review boasts 4K recording capabilities with excellent autofocus and low-light performance, comparable to the Canon EOS M50 Mark II and Sony Alpha a6400. The Canon model, priced around $700, is a popular choice for streaming and vlogging, but it has limitations in battery life and requires additional accessories for optimal performance. The Sony a6400, costing roughly $900, offers superior image quality and faster autofocus but is more complex to operate for beginners. Our reviewed camera provides a user-friendly interface, solid 4K video quality, and better value at under $650. Its balanced features make it ideal for creators who want high-quality footage without the steep learning curve or higher investment.
Studio Gear: Flexibility or Fineness?
Compared to the Neewer 660 LED Lighting Kit and Aputure Light Dome II, the studio lighting in our review offers brighter, more even illumination with adjustable color temperature. Neewer’s kits are budget-friendly but lack color accuracy and build robustness, which can affect footage consistency. The Aputure setup provides exceptional color rendition and durability but at a price point nearly twice as high. Our featured lighting kit hits a sweet spot with excellent color fidelity, sturdy construction, and affordability, making it a versatile choice for both hobbyists and semi-professionals.
Is It Worth the Upgrade?
Those considering whether to jump to higher-end gear should weigh the additional investment against their ongoing needs. For example, upgrading from basic lighting to the reviewed kit can yield noticeably better footage quality and color accuracy, especially in low-light settings. Upgrading from entry-level microphones or cameras to the reviewed options can considerably improve audio and video clarity, which is crucial for audience retention. Comparing prices on sites like B&H, the value proposition becomes clearer: the reviewed equipment often costs less than premium alternatives but provides comparable or better features for typical content creation tasks. Check current prices and specifications to decide if an upgrade makes sense for your goals.
The Good, The Bad, and The Ugly
- Pros: Inexpensive solution, lightweight, easy to cut and customize, provides excellent support for heavy rigs, protects carpets effectively, enhances setup organization, and is versatile for different studio sizes.
- Cons: Slight elevation which might require adjustments for cabling, potential warping with moisture, may need securing for larger setups, and surface roughness if not finished properly.
Who Is Plywood the Perfect Choice For?
This DIY solution is ideal for creators with heavy or overbuilt rigs, frequent reconfigurations, or those seeking an affordable way to extend their carpet’s lifespan. It’s perfect for home studios, small professional setups, and anyone tired of replacing or repairing their flooring. Those with lightweight gear or permanent setups may find it unnecessary and can opt for more permanent flooring solutions. If you operate in environments prone to moisture, consider sealing the plywood or choosing a more resistant material.
Final Verdict: 9/10
Overall, a plywood board stands out as a cost-effective, practical, and customizable method to safeguard your studio flooring. Its ease of implementation and durability make it a smart addition, especially if you’re tired of carpet damage or unstable setups. If you’re hesitant, check out the latest prices and reviews to see why many creators swear by this simple hack. For more clever setup tips and gear reviews, visit this detailed guide. Remember, investing in a quality, properly sealed plywood sheet can save you money and stress in the long run.