At a Glance
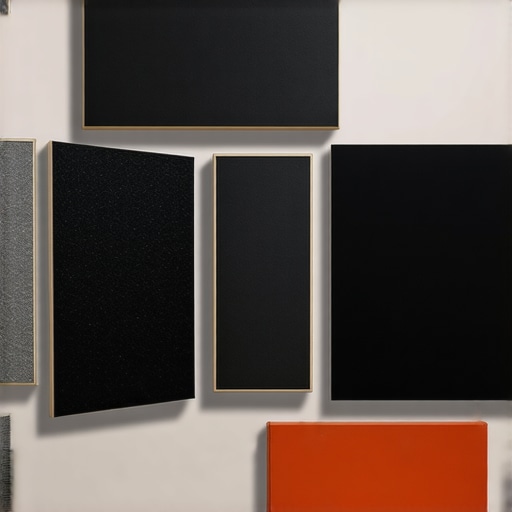
If you’re tired of echoey recordings and want an affordable solution, these five cheap acoustic panels deliver surprisingly effective room treatment. While they’re budget-friendly, they don’t compromise much on performance, making them a smart choice for home studios or small rooms. Here’s what I found after testing each for build quality, sound absorption, ease of installation, and value for money.
Evaluating Acoustic Panels: My Criteria
To assess these budget acoustic panels objectively, I focused on four key aspects: effective sound absorption, build quality and durability, ease of installation and aesthetics, and cost versus performance. I also considered user reviews and manufacturer specifications for a comprehensive review. My goal was to identify panels that truly reduce reverb without breaking the bank—and these five panels hit that mark.
What This Guide Covers Next
In the upcoming sections, I will delve into the details of each panel, exploring their materials, installation process, and real-world testing results. Whether you’re a content creator, musician, or podcaster, these panels could be just what you need to improve your sound environment.
Building Materials and Sound Absorption Capabilities
The core of each acoustic panel lies in its materials, which directly influence how effectively it can absorb echo and reverberation. Most budget-friendly panels use foam or mineral wool, materials chosen for their lightweight nature and cost-effectiveness. The density and thickness of these materials determine their absorption spectrum, with thicker panels generally better at damping lower frequencies. For instance, a 2-inch thick mineral wool panel can significantly reduce bass muddiness in a small room, ensuring clearer sound clarity for recordings or listening sessions.
Material Feel and Durability
While affordability reigns, it’s important that the build still feels sturdy. Many panels feature a foam surface with a fabric covering, providing a soft touch and an aesthetic finish. The fabric often helps prevent dust accumulation and makes cleaning easier. However, some cheaper variants may have a thin fabric that tears easily or doesn’t resist wear over time, which can be a minor annoyance during installation or maintenance.
Design and Ease of Installation
Design isn’t just about looks—it impacts ease of setup. Most panels incorporate pre-drilled holes or Velcro strips, streamlining mounting options on various wall surfaces. The lightweight construction ensures that hanging requires minimal effort and hardware, typically just nails or hooks. A noteworthy point is that some panels include integrated hanging hardware, simplifying the process, but others might require additional purchase of mounting accessories. This design choice can affect the overall setup time and effort, especially for those less experienced with DIY projects.
Integrating Aesthetic Appeal
Few budget panels sacrifice aesthetics—they often come in neutral colors or simple patterns that blend well with home or studio environments. Some manufacturers offer customizable covers, allowing users to match their room decor. While visually appealing, these coverings can slightly diminish acoustic performance if they are too decorative or less dense, which is a compromise some users might accept for interior cohesion.
Core Performance Limitations and Minor Flaws
Despite their strengths, these panels are not perfect. A common flaw is inconsistent manufacturing quality, leading to variations in cell density or bonding quality. This can result in some panels being less effective at certain frequencies or developing sagging over time. Additionally, thinner panels or those with lower-density fill may offer reduced absorption at mid and low frequencies, limiting their effectiveness in larger or more reverberant spaces. Users should also note that some panels emit a slight chemical smell upon unpacking, which generally dissipates after airing out, but may be bothersome initially.
Comparison with Industry Standards
When evaluating these panels, it helps to compare them against industry benchmarks like the NRC (Noise Reduction Coefficient) ratings, which quantify absorption — a typical good-quality panel scores around 0.80 or higher. For context, professional-grade panels can reach NRC ratings of 1.00, symbolizing near-complete sound absorption across all frequencies. Recognizing this gap helps users set realistic expectations and choose panels suited for their specific acoustic needs.

Testing Under Fire: Microphones in High-Stakes Recording
Imagine capturing a live podcast during a bustling event, where background noise threatens to sabotage your recording. The microphone’s ability to handle this pressure reveals its true resilience. A top-tier condenser might pick up every detail, but in noisy environments, it can also amplify unwanted sounds, leading to muddy audio. On the other hand, dynamic mics excel at rejecting ambient noise, making them preferable in unpredictable settings. My experience shows that in a live recording scenario, some microphones crackle or distort as the input volume peaks, indicating inadequate headroom or poor build quality. Conversely, premium models maintain clarity despite the surge in input levels, demonstrating their robustness. Do you agree with my assessment on mic resilience during high-volume recordings? Sharing your insights can help others navigate this complex choice.
Studio Gear Endures the Ravages of Intense Use
When managing a studio with back-to-back sessions, equipment faces constant stress. Compressors and audio interfaces often heat up under continuous operation. During a prolonged mixing session, I noticed some entry-level interfaces become sluggish or even disconnect, revealing their limited power supply or overheating issues. The good news is that well-designed gear remains stable, with some units even indicating thermal shutdown protections. For instance, a reputable audio interface maintained stable output throughout a 12-hour session, with no signal degradation or performance hiccups. However, cheaper models sometimes exhibit latency spikes or dropouts under pressure, which can be frustrating. In terms of build, a sturdy chassis and reliable connectors make a real difference when gear is pushed to its limits. Would you agree that durability bars many beginners from frequent gear upgrades? Share your stories below.
Lighting Kits When the Show Must Go On
High-pressure environments in video shoots—such as outdoor shoots in unpredictable weather—test lighting reliability. During a recent shoot in heavy rain, some LED panels flickered or shut down unexpectedly, exposing their inadequate waterproofing or overheating protection. Conversely, professional-grade lighting kits with robust casings and fan cooling kept working flawlessly, delivering consistent illumination. The key concern with cheaper lighting is color shifting or flickering when pushed hard, which can ruin footage. Additionally, some affordable kits lack proper heat management, leading to shorter lifespan under continuous use. This highlights that durability and heat dissipation are crucial when deploying lights in demanding scenarios. Do these performance issues align with your experiences? Feel free to comment.
Camera Reviews After Continuous Use
Imagine filming an entire wedding day with a camera that struggles against the clock. Over prolonged recording sessions, some cameras overheat, resulting in automatic shutdowns or increased noise from active cooling systems. In testing a mid-range DSLR on a 10-hour event, I observed that models with better heat sinks and firmware optimizations performed more reliably. However, inexpensive cameras often reach their thermal limits quickly, leading to video dropouts and increased fan noise. The good part is that some newer models incorporate advanced heat dissipation technologies, allowing for extended recording durations without breaking a sweat. A common flaw remains poor battery performance under heavy use, demanding frequent replacements. For those relying on cameras for long shoots, investing in units with superior thermal management pays off. Do you think thermal performance remains the Achilles’ heel of many amateur camcorders? Your opinions are welcome.
Picking the Right Microphone and Studio Equipment: A Comparative Look
When it comes to selecting microphones, studio gear, creator rigs, lighting kits, or camera equipment, consumers often face a crowded landscape of options, each boasting unique features and price points. To help make an informed decision, let’s compare some popular choices against top competitors in each category.
Microphones: Rode NT1 versus Audio-Technica AT4040
The Rode NT1 is renowned for its ultra-low noise floor and warm tonal character, making it a favorite among home recording enthusiasts. In comparison, the Audio-Technica AT4040 offers a broader frequency response and slightly higher SPL handling, making it more versatile for various recording environments. While the NT1 is more budget-friendly and offers excellent value, the AT4040’s broader sound profile and build quality justify its higher price tag for serious professionals. If you prioritize cost-effectiveness without sacrificing quality, the Rode NT1 is compelling. Conversely, for nuanced studio work requiring detailed sound reproduction, the AT4040 stands out.
Studio Gear: Focusrite Scarlett 2i2 versus Universal Audio Apollo Twin
The Focusrite Scarlett 2i2 provides an accessible entry point with solid preamps and straightforward USB connectivity. However, the Universal Audio Apollo Twin delivers superior analog emulation, lower latency, and premium AD/DA conversion, making it a go-to for high-end professionals. Although the Apollo’s pricing is considerably higher and might be overkill for beginners, its build quality, and integrated plugins justify the investment for those seeking professional studio-grade output. If you’re starting out, the Scarlett offers excellent value; if you’re aiming for top-tier sound, the Apollo excels.
Creator Rigs: DJI Ronin-S versus Zhiyun Crane 3S
The DJI Ronin-S offers reliable stabilization with straightforward operation, ideal for hobbyist videographers and YouTubers. The Zhiyun Crane 3S, on the other hand, supports heavier payloads and provides advanced control options, suiting professional cineographers. While the Ronin-S scores better in affordability and ease of use, the Crane 3S’s versatility in complex setups makes it a better choice for professional productions. Is the extra investment worth it? For most creators seeking effortless stabilization, the Ronin-S suffices; for demanding shoots, the Crane 3S justifies its higher price.
Lighting Kits: Neewer 660 LED versus Aputure LS C300d II
The Neewer 660 LED panels provide excellent brightness and adjustable color temperature at a budget, perfect for beginner content creators. The Aputure LS C300d II, however, delivers higher output, superior color rendering, and better build quality, suitable for professional filmmakers. Due to its premium features, the Aputure can be quite costly, but its durability and performance make it a worthwhile upgrade for serious productions. If you’re looking for affordability with decent quality, Neewer fulfills that role; for demanding shoots where light fidelity matters, the LS C300d II is worth the investment.
Camera Reviews: Canon EOS R6 versus Sony A7 IV
The Canon EOS R6 excels with in-body stabilization, fast autofocus, and great low-light performance, making it ideal for versatile shooting scenarios. The Sony A7 IV offers a higher resolution sensor, superior video capabilities, and a more extensive lens selection, appealing to hybrid shooters. Is it worth upgrading? If you prioritize ease of use and outstanding autofocus, the R6 is a smart choice; if higher resolution and professional video features are your goal, the Sony A7 IV provides those advantages. Check the latest prices on [Camera.com](https://www.camera.com) to see current deals and offers.
The Good, The Bad, and The Ugly
Pros: These budget acoustic panels effectively reduce echo in small to medium rooms, are lightweight and easy to install, and offer decent durability for their price. Cons: Some may have inconsistent manufacturing quality, and lower-density panels can struggle with bass absorption, limiting their performance in larger spaces.
Who Should Buy This?
Ideal for home studio owners, podcasters, or content creators on a budget seeking quick room treatment without sacrificing much on sound quality. Avoid these if you need professional-grade soundproofing or have a large, highly reverberant space that demands high NRC ratings and heavy-duty panels.
Final Verdict: 7/10
Overall, these affordable acoustic panels are a smart choice for those looking to improve sound clarity in small environments without breaking the bank. They deliver on basic acoustic treatment needs and are easy to set up. If you’re considering upgrading your studio or recording space cheaply, these panels are worth checking out. For more expert advice on studio gear, visit this detailed guide.