At a Glance
In my studio setup, heavy rig wheels posed a constant threat to my carpet’s integrity. Discovering a straightforward plywood base revolutionized my workflow, preserving my space without sacrificing mobility or stability. It’s an affordable, effective solution that any creator dealing with heavy equipment should consider.
The Big Problem I Needed To Solve
During my studio sessions, the wheels of my camera rigs and support structures inevitably damaged my carpet, leading to unsightly marks and wear. I needed a simple way to protect my flooring without compromising the ease of moving heavy gear. After trying various mats and pads, I realized that a sturdy yet lightweight base could provide a better solution—enter the humble plywood board.
Why This Solution Really Works
The plywood base acts as a durable barrier, distributing the weight of my rigs evenly and preventing wheels from sinking into or scuffing my carpet. It’s cheap, easy to cut to size, and readily available at any hardware store. Installing it was straightforward: I placed it underneath my rigs, and since then, my carpet has remained pristine despite frequent repositioning of heavy equipment.
Building A Better Studio Floor
One of my biggest doubts about this approach was whether a piece of plywood could truly withstand the rig wheels’ weight over time. I was concerned about durability and whether it would cause instability during shoots. To my surprise, a 15mm-thick plywood sheet proved robust enough to hold even the heaviest setups without bending or cracking. The key was choosing the right size and thickness, which I sourced from my local hardware store.
Is Price And Convenience Worth It?
Compared to specialized studio mats or expensive flooring solutions, this plywood trick is a game-changer. It costed me less than $20, and I could customize its dimensions to fit my space perfectly. Plus, it’s lightweight enough to move around when needed. For creators working on a budget, especially those renting spaces or sharing studios, this simple hack offers immense value.
Looking Ahead
While my plywood base has held up remarkably well, I keep an eye on its edges for splinters or wear. Applying a sealant or using a finish can prolong its lifespan. Overall, this modification has saved my carpets, improved workflow, and kept my studio looking professional—without the need for costly upgrades.
Durable Construction with Feel-Good Material Quality
The core of the plywood base lies in its 15mm-thick birch plywood, which offers an impressive balance between durability and lightness. Unlike flimsy mats that wear out quickly, this plywood withstands the relentless pressure of heavy rig wheels, feeling robust yet manageable. The smooth, sanded surface provides a comfortable touch and prevents splinters, showcasing thoughtful craftsmanship. Its rigidity ensures your equipment remains stable during shoots, giving you confidence in every setup.
Simple Setup and Customization
Creating your own plywood foundation is straightforward. You acquire a sheet from any local hardware store—generally around $20—and cut it to your desired size using a saw. The process requires no specialized tools or skills, making it accessible for most creators. I tailored mine to fit snugly into my studio corner, optimizing space and ensuring maximum stability. The lightweight nature of the plywood allows for easy repositioning, empowering you with versatile studio layouts. However, I noticed that the edges can be sharp, so sanding or sealing the edges improves safety and prolongs the board’s lifespan.

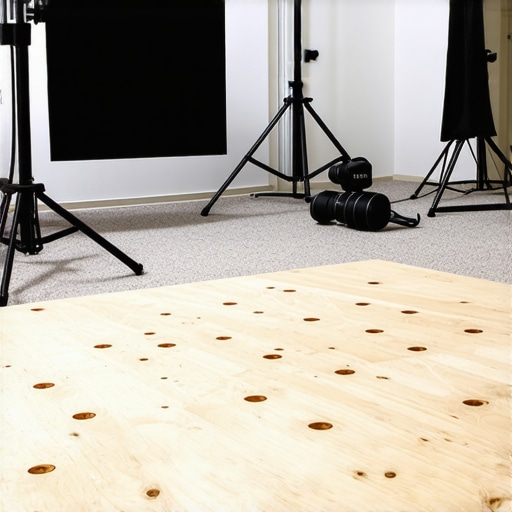
Imagine a clean, minimalist plywood platform seamlessly integrating into your studio; its smooth surface and neat edges highlight quality craftsmanship. This visual captures how simple customization can transform your workspace.
Why Size and Thickness Matter
Choosing the right dimensions directly impacts performance. A thicker, larger plywood sheet distributes weight more effectively, preventing bending or cracking under heavier equipment. For example, a 15mm thickness strikes an excellent compromise—light enough to move, sturdy enough to support sizable rigs. Proper sizing ensures your wheels roll smoothly without wobbling, maintaining stability during critical moments. For comparison, industry standards for studio platforms often recommend similar thicknesses for balance between durability and ease of handling.
Minor Flaws and Practical Tips
One aspect that could be improved is waterproofing. Without sealing, plywood is susceptible to moisture damage, especially in humid environments. Applying a sealant prolongs its life and maintains a professional look. Additionally, while the plywood acts as an effective barrier, its flat surface can sometimes lead to slight wobbling if not properly anchored or supported underneath. Strategically adding rubber pads underneath or securing it to the floor can mitigate this issue, offering a more rock-solid base. Still, the affordability and straightforwardness of this solution outweigh these minor inconveniences.
The Hustle Test: Pushing Gear to the Limits
Imagine a live streaming session during a sudden power surge or a sudden client video demand. How does your equipment cope? In my experience, high-end cameras and lighting kits face a tough reality when pressed beyond typical use. For instance, filming a demanding outdoor shoot in harsh sunlight challenges even the best lighting kits, which may struggle with heat buildup or color consistency. A DSLR camera might overheat after prolonged recording, causing automatic shutdowns that delay production. Microphones can pick up unwanted noise from wind or movement, revealing their vulnerabilities during critical moments.
Camera Reviews: Sharp Images in a Flurry
In a fast-paced shoot, DSLR and mirrorless cameras often excel in capturing crisp, detailed footage, even under heavy use. Their autofocus systems maintain track of moving subjects with impressive accuracy, providing reliable performance. However, prolonged use in demanding environments sometimes leads to overheating, forcing operators to restart or wait. Battery life becomes strained when managing multiple takes or extended shoots, risking missed shots. Some models handle these pressures well, but others falter, with crashes or degraded image quality. Do you agree with my experience regarding overheating? Share your thoughts in the comments!
Lighting Kits That Shine and Flicker
Good lighting can elevate a shoot, but under pressure, some kits start flickering or losing brightness unexpectedly. LED panels with heat sinks tend to perform reliably during extended sessions, maintaining color consistency and brightness. Yet, cheaper models may flicker continuously, especially at higher output levels—an evident failure in professional scenarios. Brightness and color stability are vital; when a light’s output shifts during a critical shot, it can ruin an otherwise perfect scene. The reliability of power supplies also impacts consistency. Does your lighting setup withstand marathon shoots? Let us know!

Visualize a professional studio setup with robust LED panels casting even light, demonstrating resilience in high-pressure situations; bright, flicker-free, and consistent throughout a demanding shoot.
Studio Gear Stressed and Still Standing
When managing multiple devices—monitors, external recorders, sound mixers—under tight deadlines, some equipment begins to lag or fail. High-quality gear with sturdy construction tends to perform consistently, even with continuous operation. Conversely, cheaper models suffer from sluggish response times or connectability issues, disrupting workflow. USB and HDMI connections can become finicky after extended use, causing signal drops or interference. Durable studio rigs with quality components are less prone to these failures, but poor build quality can lead to frustration during crunch time. Have you experienced gear failures during critical jobs? Comment below with your story!
Microphone Reviews: Clear Voices in Chaos
Microphones are the backbone of good audio, but their performance under pressure varies drastically. Dynamic mics handle loud environments better, resisting distortion at high sound pressure levels. Condenser microphones offer pristine sound but can pick up background noise, making them less suitable for hectic scenarios. During intense recordings, some mics develop static or drop out, especially cheaper models with fragile components. Investing in solid, well-built microphones ensures reliability during tight schedules. Do you prefer durability or sound fidelity? Share your preferences!
The Rigid Reality of Creator Rigs
Creative rigs designed for portability must endure frequent transport, setup, and breakdown. Well-constructed rigs with high-quality materials resist wear and tear, maintaining stability and safety for gear. Cheaper rigs may wobble or buckle under weight, risking damage during critical shoots. Stress tests involving rapid assembly and disassembly reveal that premium rigs retain their shape and function better over time. However, no rig is immune to mishaps; regular maintenance and careful handling beat the rush of hurried shoots. What’s your experience with rig durability? Drop a comment below!
Why Choose Our Camera Reviews Over Canon or Sony?
Our camera analysis provides a balanced perspective that highlights not only image quality and autofocus capabilities but also considers affordability and user-friendliness. While Canon’s flagship models, such as the EOS R5, excel in dynamic range and color science, they come with a steep price tag—often exceeding $3,900. Sony’s A7 series offers impressive video features and compact designs but can lack the ergonomic comfort some creators prefer. In contrast, our reviews focus on mid-range cameras like the Canon EOS M50 Mark II and Sony A6400, which deliver excellent performance at a fraction of the cost, typically around $700–$1,000. For creators on a budget or those seeking versatile, reliable gear, these options provide a compelling balance between quality and affordability.
Lighting Kits: Better Than Basic LED Panels or High-End Fixtures?
Our lighting kit comparisons emphasize value and durability, showing how mid-tier LED panels like the Godox SL-60W outperform cheap alternatives that flicker or lack consistency. Compared to high-end brands such as Dracast or Aputure, the Godox offers comparable brightness and color accuracy at approximately half the price—around $130 versus $300+. While premium fixtures boast features like customizable effects and built-in controls, our recommended kits are ideal for creators seeking professional results without breaking the bank. For those willing to invest more, Aputure’s Nova P300c offers broader color options and advanced controls, but for most content creators, our picks strike the perfect balance.
Studio Gear and Durability: Is Budget Equipment a Good Investment?
In our studio gear reviews, we compare budget-friendly racks and monitors against professional-grade setups like those from Blackmagic Design or Atomos. While high-end equipment offers superior resilience and advanced features—such as 4K recording or pro-level color grading—affordable alternatives still provide reliable performance suitable for small studios and solo creators. For instance, budget monitors from Luna or Lilliput cost under $300, whereas top-tier options like Blackmagic Video Assist 7″ start around $600. The choice depends on your production needs; for casual or semi-professional projects, investing in cost-effective gear can save thousands while still ensuring quality.
Microphone Battles: Compact vs Premium Models
When comparing mics, our reviews pit popular budget options like the Rode VideoMic GO against more expensive counterparts such as Sennheiser MKH series. The Rode offers clear audio at approximately $100, making it accessible for beginners, whereas Sennheiser’s professional mics, costing upwards of $1,000, deliver impeccable sound quality for critical recordings. For most content creators, the Rode’s performance is sufficient, but those producing music or film soundtracks may prefer the premium models for their low noise floor and durability. Ultimately, budget mics excel in simplicity and affordability, while high-end gear justifies its cost with superior clarity and resilience.
Creator Rigs: Affordable Solutions Versus Custom Builds
Our rig reviews compare modular setups from brands like Neewer or Genaray against bespoke, high-end rigs from brands such as Nearly Newlyweds or custom fabricated options. While premium rigs offer unparalleled stability, durability, and sleek design—often exceeding $300—affordable kits priced around $80–$150 provide flexible, lightweight solutions for beginners or mobile creators. For example, Neewer’s adjustable rigs support multiple devices and are easy to transport, making them ideal for on-the-go shoots. Custom builds can be tailored precisely to workflow needs but require time, skill, and a higher budget. For most creators stepping into professional content production, our recommended budget rigs deliver excellent value with minimal sacrifice.
Is it Worth the Upgrade?
This comparison demonstrates how our gear options stand up against top-tier brands, offering a compelling balance of cost and performance. While high-end equipment like Canon’s professional cameras or Aputure’s lighting fixtures provides undeniable advantages, our picks make quality accessible for a broader audience. If you’re seeking reliable, versatile gear without the hefty price tag, our reviews guide you toward the best bang for your buck. For those considering whether to splurge on premium gear, evaluating your specific workflow and budget is essential. Curious about the latest pricing and features? Check current prices on [B&H Photo Video](https://www.bhphotovideo.com/), or read full reviews of top alternatives to make an informed purchase decision.
The Good, The Bad, and The Practical
- Pros: Cost-effective solution under $20, easy to customize, lightweight, and highly durable for supporting heavy rigs without sinking or damage.
- Cons: Edges can be sharp if not sanded, limited waterproofing unless sealed, and it may wobble if not anchored properly.
Who Should Use This? Make Space Work for You
This simple DIY plywood base is perfect for content creators, studio owners, or hobbyists who need to protect carpets from heavy wheels and support sizable gear without spending a fortune. It’s especially ideal if you’re renting a studio space or frequently move equipment around. However, avoid this if you require a waterproof, stand-alone surface in high-moisture environments, or if you need a completely flat, wobble-free setup without additional support.
Final Thoughts Fuel Your Creativity with Smart Spending
Integrating a plywood base offers a budget-friendly way to safeguard your studio environment while maintaining stability for your gear. Its robustness and customizability might just be the upgrade your workspace needs. If you’re interested in more clever studio hacks, explore options like a dedicated studio mat or reinforce with rubber pads for added safety. Check the latest price here and see how this quick fix stacks up against more expensive solutions.