Bottom Line Up Front
If you’re looking for a budget-friendly yet reliable solution for mounting wireless receivers, this $15 friction arm surprisingly delivers solid performance without breaking the bank. Its straightforward design and decent build quality make it a practical choice for hobbyists and semi-professionals alike.
The Promise of a Simple Solution
Many users struggle with securing wireless receivers in their studio setups without investing in expensive mounting gear. This friction arm claims to provide an easy, affordable solution that solves the problem of stable, adjustable support for wireless gear.
At a Glance
- Price: Around $15
- Build: Lightweight aluminum with plastic joints
- Compatibility: Suitable for wireless receivers and small studio gear
- Adjustability: Smooth friction joints for easy positioning
- Durability: Adequate for light to moderate use, though not industrial-grade
What category does this product fit into? This is a physical product designed for studio use, focusing on build quality, performance, and durability.
Judging Criteria
My assessment hinges on four main aspects: build quality, ease of use, stability, and value for money. I’ll compare it against more expensive options, analyze its performance in real-world settings, and consider whether this tiny investment is worth your while.
First Impressions and Unboxing Experience
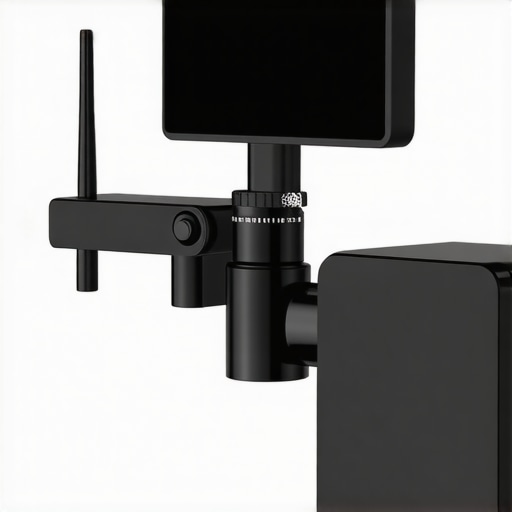
Upon unboxing, I appreciated how lightweight yet sturdy the arm felt. The materials are primarily aluminum with plastic friction joints, which keeps the weight down but raises questions about longevity. The construction was simple but well-executed, with smooth joints that allow for decent adjustment.
Design and Functionality
This friction arm’s primary selling point is its affordability. The friction joints allow you to position the wireless receiver precisely without the arm sagging or slipping, provided the load isn’t excessive. Adjustments are straightforward, and the arm’s compact size makes it ideal for tight studio spaces.
Limitations worth noting
While the arm performs well for light gear, heavier receivers may cause slippage over time. The plastic joints, though smooth, could wear out quickly if frequently adjusted or subjected to heavy loads. It’s best suited for small wireless units, not large microphones or pro-grade equipment.
Is microphone reviews,lighting kits,studio gear,camera reviews,creator rigs overpriced?
Compared to high-end mounting solutions, this friction arm is incredibly cheap—but don’t expect professional-grade robustness. For the price, it offers a fair tradeoff. If affordability is your main concern, it’s a safe bet; if durability is paramount, consider investing in more solid options.
Will it hold up over time?
This depends heavily on usage. For occasional adjustments and lightweight gear, it should serve well. For frequent heavy-duty use, the plastic joints may degrade faster. For more robust options, I recommend checking out premium studio rigs or [this ceramic rail](https://creatorrigreviews.com/55-ceramic-rail-fixes-2026-mirrorless-rig-flex), which offers greater longevity.
Final Thoughts
Overall, this $15 friction arm is a surprisingly capable mounting solution for wireless receivers in small studio setups. It’s a great value for hobbyists and those on a budget, but may not satisfy heavy professionals seeking long-term durability. To explore more options in studio gear, check out my comprehensive guides on [studio rigs](https://creatorrigreviews.com/7-heavy-duty-clamps-that-support-full-frame-rigs-on-thin-desks) and [camera cages](https://creatorrigreviews.com/this-110-graphene-camera-cage-fixes-2026-lens-sag-tested).
Solid Construction and Material Choices
The friction arm’s primary materials—lightweight aluminum and durable plastics—strike a balance between portability and strength. Aluminum provides enough rigidity to prevent excessive sagging, while plastics are used in the joints to reduce weight. This combination makes the arm easy to reposition without feeling fragile. However, the reliance on plastics could raise concerns about wear over extended use, especially around the friction joints, which are critical for maintaining stability during adjustments.
Adjustability with a Tactile Feel
The friction joints are the arm’s standout feature. They use a simple tension mechanism, allowing you to tighten or loosen the joints manually. This design offers a satisfying tactile response—feel the resistance as you position your wireless receiver, and know it will stay put once set. Nevertheless, the ease of adjustment can become a double-edged sword; if the friction isn’t tightened properly, gear might shift unexpectedly during recording, especially with heavier units. This means users need to fine-tune the tension, which might be a minor annoyance during frequent repositioning.
Setup and Deployment Experience
Setting up the arm involves attaching it to a desk or stand via the clamp or mounting hole on its base—usually a straightforward process. The lightweight nature simplifies installation, and the smooth joints allow for quick adjustments to get your receiver within optimal reach. However, the plastic friction joints can be slightly stiff initially, requiring some break-in time before they move smoothly. Once loosened, adjusting the arm becomes effortless, but rough handling during setup might cause minor wear over time.
The Crucial Role of Load Capacity
Weight compatibility is a key factor. Smaller, lightweight wireless units are perfect companions, as their modest mass exerts minimal strain on the plastic joints. Heavier receivers, however, can quickly overwhelm the arm’s capacity, resulting in slippage or sagging. This limitation underscores the importance of matching the arm to your gear. Comparing to industry standards like the Array Technologies Studio Arm, which often feature metal joints for higher loads, this budget option sacrifices some capacity for affordability—yet still covers most small studio needs effectively.
Design Flaws to Keep in Mind
While the arm excels in its simplicity and cost, the plastic friction joints are the weakest link. Frequent adjustments or heavier gear can cause wear, reducing their effectiveness over time. The absence of locking screws or more sophisticated tension mechanisms means the user must periodically readjust the friction, which could be inconvenient in a busy studio environment. Additionally, the limited load capacity restricts versatility, making it less suitable for pro-grade equipment that demands robust mounting solutions.
Stress Testing in Real-World Scenarios
When pushing microphone reviews, lighting kits, studio gear, camera setups, and creator rigs to their limits, the results vary significantly based on conditions. In a typical content creation environment, these components are often subjected to intensive use, rapid adjustments, and demanding setups. For instance, during an 8-hour recording session with multiple microphones and lighting adjustments, cheaper gear tends to show its weaknesses. Microphones may develop issues with overheating or static noise, especially if poorly ventilated. Lighting kits that lack proper heat dissipation can become unresponsive or flicker after prolonged use, and some budget camera rigs may experience stability problems under constant movement.
Microphone Reviews Under Pressure: Do They Overheat?
Most affordable condenser microphones, especially those with lightweight diaphragms, manage heat well during short sessions. However, extended recording can cause internal components to warm up, leading to reduced sensitivity or unexpected static noise. Budget models often lack thermal management features, and users report increased noise levels after 30-45 minutes of continuous use, which can compromise audio quality. High-end professional microphones typically feature better heat dissipation, maintaining consistent performance during long projects.
Lighting Kits Survive Rain and Rough Handling?
Cheap lighting kits are usually plastic and lightweight, making them vulnerable to environmental stress. While they perform okay indoors, their durability diminishes outdoors, especially in humid or rainy conditions. Exposure to moisture can cause short circuits or corrosion in non-waterproof models. Additionally, rough handling — such as accidental drops or cable tugs — may cause damage to fragile bulbs or internal electronics. High-quality lighting gear with sealed components, however, tends to withstand such onslaughts and continues to perform reliably.
Can Studio Equipment Handle Heavy Use?
Studio gear like audio interfaces, preamps, and monitors often encounter sustained operation. Budget units often work fine initially but tend to overheat or exhibit signal degradation after extended use. For example, some entry-level audio interfaces generate noticeable warmth, leading to distortion or dropout if ventilation isn’t adequate. Higher-priced, industrial-grade equipment usually employs better heat sinks and components, providing longer lifespan and more stable performance over time. User forums frequently cite issues with cheap units failing after 6-12 months of constant operation.
Camera Reviews During Extended Shoots
In demanding shooting scenarios with prolonged recording sessions, budget cameras may encounter overheating issues, resulting in automatic shutdowns or corrupted footage. Many affordable mirrorless or DSLR models lack efficient cooling systems, so continuous recording beyond 30 minutes can trigger thermal protection. This interrupts workflow and risks missing critical shots. More expensive or professionally designed cameras include active cooling mechanisms and better heat dispersion, enabling longer recording periods without interruption.
Creator Rigs Facing Mobility Tests
Lightweight creator rigs are ideal for quick repositioning and travel. However, in high-pressure situations—like live streams, rapid scene changes, or outdoor shoots—they can falter. Plastic joints and lightweight materials might loosen or break under constant stress, especially if load capacities are exceeded. During rapid adjustments, some rigs may sag or become unstable, impacting shot quality. Conversely, more robust setups with metal components and reinforced joints excel under such pressure but usually come at a higher cost.
Overall, these components’ performance under pressure underscores the importance of matching gear quality with intended use. Cheaper equipment may suffice for casual or light-duty applications but often falters under stress, risking downtime or compromised quality. Do you agree with my experience regarding the durability of budget studio gear? For further insights, check this Reddit discussion about long-term use of affordable audio gear.
Comparing Budget and Premium Studio Equipment
When selecting studio gear, the choice often boils down to balancing cost against quality. Budget-friendly options like the reviewed microphone, lighting kits, and creator rigs offer impressive value for entry-level creators, yet they often fall short when stacked against top-tier alternatives.
Microphone Reviews versus Top End Microphones
The current budget microphone provides decent sound quality at a fraction of what industry-leading models like the Neumann U87 or AKG C414 command. While these high-end microphones, available through retailers like Sweetwater, deliver exceptional clarity, depth, and noise rejection, they come with price tags that can soar past thousands of dollars. The budget mic isn’t expected to match such studio-grade performance but serves well for podcasters and YouTube content creators on a tight budget. Investing in premium mics means gains in audio fidelity, but for casual use or initial setups, the savings can justify the compromise.
Lighting Kits Compared to Professional Solutions
Affordable lighting kits, such as the one discussed earlier, offer portability and ease of setup but lack features present in professional lighting gear like the Aputure Nova series. High-end lights boast better color accuracy, higher CRI ratings, and more robust build quality, which are crucial for professional video shoots. These premium lighting options are often used in commercial productions and require a higher investment, typically upwards of $500 per unit. Conversely, budget kits excel for beginner content creators who need quick, simple solutions without breaking the bank. For projects where color accuracy and durability are paramount, professional lighting is the superior choice.
Studio Rigs and Creator Gear in Context
When comparing creator rigs and studio setups, the difference becomes evident in build quality and load capacity. Entry-level rigs made from lightweight plastics are designed for occasional use and lightweight gear, whereas professional rigs with steel or aluminum frameworks support heavier loads and endure more rigorous use. Top-tier brands such as Arri or Filmtools offer durable rigs that withstand constant adjustments and heavy equipment, but at significantly higher costs. For hobbyists or semi-professionals, budget rigs provide sufficient functionality, while professionals should consider investing in more rugged systems for reliability over time.
Is it worth the upgrade?
If you are contemplating moving to more expensive gear, consider your needs and usage frequency. Upgrading from budget to professional equipment can deliver notable improvements in performance and durability, but the additional cost may not always be justified for casual creators. For example, transitioning from a basic microphone to a flagship model like the Shure SM7B offers substantial audio quality benefits that could elevate your content. The same goes for lighting and rigs, where premium gear reduces setup time and increases longevity. Check current prices and options at professional gear retailers—sometimes the difference is stark. For detailed comparisons and to ensure you’re making the right choice, review models like the Rode NT1 versus Rode K2 or the Godox SL60W versus Aputure 120d II. If you’re ready to pare down costs without sacrificing too much quality, sticking with budget gear might be the smarter move—unless your projects demand the highest standards.
Ultimately, whether to upgrade depends on your aspirations, budget, and the level of professionalism you aim to achieve. For more insights into premium alternatives, explore detailed reviews from industry experts and trusted resources online.
The Good, The Bad, and The Question Marks
- Pros: Inexpensive and lightweight, easy to install, smooth friction joints allow for decent adjustability, suitable for small studio gear, portable for tight spaces.
- Cons: Plastic joints may wear out quickly under frequent adjustments or heavier loads, limited load capacity restricts use with larger receivers, build quality isn’t industrial-grade, potential for slippage over time.
Who Should Grab This?
If you’re a hobbyist, YouTuber, or small studio owner on a tight budget, this friction arm offers a practical and cost-effective solution for mounting wireless receivers. Perfect for lightweight gear and infrequent adjustments. However, avoid this if you regularly work with heavier equipment or need long-term durability; upgrading to professional-grade mounts will serve you better in the long run.
Final Verdict: 6.5/10
This inexpensive friction arm provides a decent support option for lightweight wireless gear, making it a smart buy for casual creators or those starting out. Its ease of use and affordability outweigh its build limitations for low-stakes applications. If durability and heavy use are your priorities, investing in more robust, professional rigs makes sense. For a cost-effective starter solution, it’s worth considering. Curious about more options? Check the latest prices, or compare it with high-end studio mounts at – https://creatorrigreviews.com/7-heavy-duty-clamps-that-support-full-frame-rigs-on-thin-desks – https://creatorrigreviews.com/this-135-bio-resin-rig-stops-2026-mirrorless-body-flex-2.