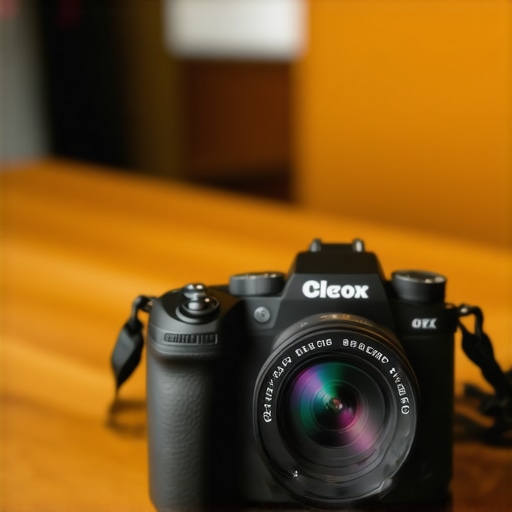
You bought a modern mirrorless camera, unboxed it, turned the dial to video mode, and assumed you were capturing the best possible image. I made that exact same mistake for years. The truth is that camera manufacturers ship their devices with factory-default settings optimized for battery conservation and basic compatibility, not maximum visual fidelity. By digging past the basic exposure controls, you can unlock a massive leap in color accuracy, sharpness, and overall production value.
The Bottom Line Up Front
Adjusting your camera’s internal menu settings is the single most effective way to eliminate artificial digital processing, prevent overheating, and capture clean, gradable video footage. It costs absolutely nothing, solves the problem of muddy shadows and jittery playback, and instantly elevates your production value without forcing you to buy more expensive glass. It is the missing link between a consumer-looking vlog and professional-looking cinema footage.
First Impressions of Factory Defaults
When you first turn on a mirrorless camera, the default image processor is actively fighting against you. It applies aggressive digital sharpening that makes skin look plastic and artificial, and it uses automatic adjustments that ruin your shot the second you move. My testing criteria for these hidden settings center around image clean-up, operational stability during long shoots, and getting an accurate representation of what the sensor actually sees.
Is tweakable camera menu software actually worth the setup hassle?
Many creators wonder if diving deep into complex nested menus is actually necessary when you can just color grade in post-production. The answer is a definitive yes. If you do not change these settings internally, your camera will bake in compressed profiles and artificial sharpening that cannot be undone in your editing software, no matter how powerful your computer is. Getting it right in-camera saves hours of frustration later.
Setting 1: Disable Digital Noise Reduction and Sharpness
Almost every mirrorless camera ships with default picture profiles that have sharpening and noise reduction turned up. This creates a cheap, digital look. I highly recommend turning internal sharpening down to its lowest setting (usually -4 or -5). If you want to achieve a softer, more cinematic aesthetic that mimics high-end film, you might even consider how this 200 lens is better for video than the 1000 version to complement your clean sensor output. Removing digital sharpening gives you complete control in post-production.
Setting 2: Switch From Auto White Balance to Manual Kelvin
Auto White Balance (AWB) is the enemy of consistency. As you move or gesture, your camera tries to compensate for the shifting colors in your background, causing your skin tones to shift mid-scene from warm to cold. You should always set a manual Kelvin value. If you struggle with inconsistent lighting, understanding why you should never use auto white balance for talking heads will save you countless hours of color-matching during editing.
Setting 3: Set Your Shutter Speed Double the Frame Rate
To get natural-looking motion blur, your shutter speed must follow the 180-degree shutter rule. If you shoot at 24 frames per second, your shutter speed must be set to 1/50th of a second. Setting this incorrectly is the main reason why your video footage is stuttering and how to fix it. Once locked in, leave this setting alone and use neutral density filters to control your exposure instead.
Setting 4: Maximize Your Bitrate and Bit Depth
Many cameras hide their highest-quality recording codecs deep inside the system menu under terms like ‘All-I’ or ’10-bit 4:2:2′. By default, they often record in highly compressed 8-bit formats to save card space. Switch to 10-bit recording immediately. The extra color data prevents color banding in your skies and backgrounds, especially when you are trying to lift how to fix grainy shadows without buying a new sensor 2 using post-production exposure adjustments.
Setting 5: Adjust the Auto Power Off Temperature
Modern mirrorless cameras pack immense processing power into small bodies, leading to frequent overheating issues. Look for a setting called ‘Auto Power Off Temp’ and change it from ‘Standard’ to ‘High’. This allows the camera to run hotter before shutting down, which is essential for long interviews or continuous streaming sessions. To further protect your setup, you can see how this 25 battery adapter keeps your camera cool all day by keeping external power heat away from your internal processing chips.
Setting 6: Enable Zebra Patterns for Exposure clipping
Stop guessing if your highlights are blown out. Turn on Zebra patterns in your custom display menu and set them to 90% or 95%. When a window or a light source starts to overexpose, diagonal stripes will appear on your screen, warning you to pull back your exposure before you permanently lose detail in the highlights.
Setting 7: Turn On Focus Peaking and Manual Focus Assist
Autofocus is incredibly convenient, but it can hunt and ruin a perfect take. When you switch to manual focus, ensure Focus Peaking is enabled. It highlights the sharpest parts of your image in a bright color (like red or yellow), showing you exactly what is in focus in real time. This ensures you never shoot an entire video only to realize your ears were in focus while your eyes were blurry.
The Verdict on Customizing Your Menu
Unlocking these hidden menu settings is like getting a free camera upgrade overnight. If you are serious about your video quality, grab your camera, open the menu, and make these seven changes right now. For detailed instructions on specific camera systems, check the official Sony Support Manuals to locate these specific menu paths for your exact model.
First Impressions of Camera Menu Systems and Build Quality
Diving into modern camera menu software reveals a stark contrast between user-friendly design and technical clutter. While the external dials of a mirrorless camera feel premium, tactile, and highly responsive, the internal user interface often feels like navigating an outdated spreadsheet. The nested sub-menus can be incredibly dense, making it easy to lose track of critical adjustments during a fast-paced shoot. However, taking the time to map these hidden menus reveals a powerful level of control over the internal processor, which ultimately makes the physical camera body feel more like a dedicated cinema tool and less like a consumer gadget.
Why High Bitrate Options Actually Matter
When you select a high bitrate codec like 10-bit 4:2:2 All-I, you are instructing the camera to capture a massive amount of color data per second rather than letting the processor discard subtle gradients to save space. On paper, this sounds like a technicality, but in practice, it is the difference between a sky that looks like a smooth gradient and one ruined by ugly, pixelated banding. The high data rate ensures that when you apply color correction in post-production, the image holds together beautifully instead of falling apart into digital noise.
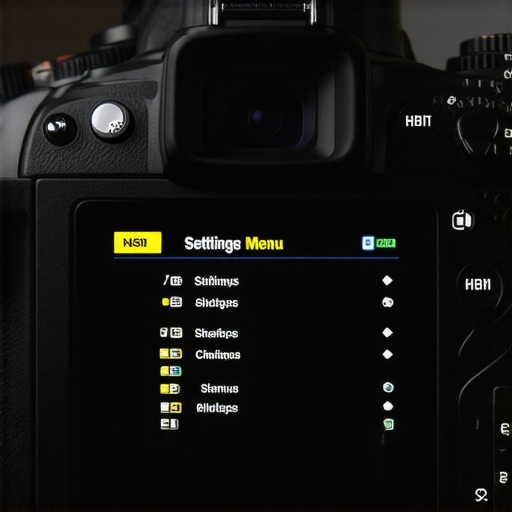
The Frustrating Logic of Internal Menu Navigation
The single biggest design flaw in almost every modern camera is the illogical categorization of video settings. Manufacturers frequently bury critical video features, like manual audio levels or exposure warning systems, three levels deep inside menus labeled for still photography. For example, search parameters on the official Canon Support Specifications often reveal that essential custom display toggles are scattered across entirely different tabs depending on whether the camera is in standby or record mode. This fragmentation forces creators to rely heavily on mapping custom function buttons just to quickly access tools that should be on the main screen.
How Real-Time Overheating Safety Controls Behave
Changing the auto power-off temperature from standard to high is a game-changer for production reliability, but it highlights how hard the internal hardware works. When running at this high setting, the camera body gets noticeably warm to the touch near the card slot and battery compartment. This heat is a natural byproduct of processing high-bitrate 4K video without an internal fan. While the warmer chassis might make some users nervous, the camera is designed to safely radiate this heat outward to protect the delicate image sensor from failing mid-record.
You bought a modern mirrorless camera, unboxed it, turned the dial to video mode, and assumed you were capturing the best possible image. I made that exact same mistake for years. The truth is that camera manufacturers ship their devices with factory-default settings optimized for battery conservation and basic compatibility, not maximum visual fidelity. By digging past the basic exposure controls, you can unlock a massive leap in color accuracy, sharpness, and overall production value.
The Bottom Line Up Front
Adjusting your camera’s internal menu settings is the single most effective way to eliminate artificial digital processing, prevent overheating, and capture clean, gradable video footage. It costs absolutely nothing, solves the problem of muddy shadows and jittery playback, and instantly elevates your production value without forcing you to buy more expensive glass. It is the missing link between a consumer-looking vlog and professional-looking cinema footage.
First Impressions of Factory Defaults
When you first turn on a mirrorless camera, the default image processor is actively fighting against you. It applies aggressive digital sharpening that makes skin look plastic and artificial, and it uses automatic adjustments that ruin your shot the second you move. My testing criteria for these hidden settings center around image clean-up, operational stability during long shoots, and getting an accurate representation of what the sensor actually sees.
Is tweakable camera menu software actually worth the setup hassle?
Many creators wonder if diving deep into complex nested menus is actually necessary when you can just color grade in post-production. The answer is a definitive yes. If you do not change these settings internally, your camera will bake in compressed profiles and artificial sharpening that cannot be undone in your editing software, no matter how powerful your computer is. Getting it right in-camera saves hours of frustration later.
Setting 1: Disable Digital Noise Reduction and Sharpness
Almost every mirrorless camera ships with default picture profiles that have sharpening and noise reduction turned up. This creates a cheap, digital look. I highly recommend turning internal sharpening down to its lowest setting (usually -4 or -5). If you want to achieve a softer, more cinematic aesthetic that mimics high-end film, you might even consider how this 200 lens is better for video than the 1000 version to complement your clean sensor output. Removing digital sharpening gives you complete control in post-production.
Setting 2: Switch From Auto White Balance to Manual Kelvin
Auto White Balance (AWB) is the enemy of consistency. As you move or gesture, your camera tries to compensate for the shifting colors in your background, causing your skin tones to shift mid-scene from warm to cold. You should always set a manual Kelvin value. If you struggle with inconsistent lighting, understanding why you should never use auto white balance for talking heads will save you countless hours of color-matching during editing.
Setting 3: Set Your Shutter Speed Double the Frame Rate
To get natural-looking motion blur, your shutter speed must follow the 180-degree shutter rule. If you shoot at 24 frames per second, your shutter speed must be set to 1/50th of a second. Setting this incorrectly is the main reason why your video footage is stuttering and how to fix it. Once locked in, leave this setting alone and use neutral density filters to control your exposure instead.
Setting 4: Maximize Your Bitrate and Bit Depth
Many cameras hide their highest-quality recording codecs deep inside the system menu under terms like ‘All-I’ or ’10-bit 4:2:2′. By default, they often record in highly compressed 8-bit formats to save card space. Switch to 10-bit recording immediately. The extra color data prevents color banding in your skies and backgrounds, especially when you are trying to lift how to fix grainy shadows without buying a new sensor 2 using post-production exposure adjustments.
Setting 5: Adjust the Auto Power Off Temperature
Modern mirrorless cameras pack immense processing power into small bodies, leading to frequent overheating issues. Look for a setting called ‘Auto Power Off Temp’ and change it from ‘Standard’ to ‘High’. This allows the camera to run hotter before shutting down, which is essential for long interviews or continuous streaming sessions. To further protect your setup, you can see how this 25 battery adapter keeps your camera cool all day by keeping external power heat away from your internal processing chips.
Setting 6: Enable Zebra Patterns for Exposure clipping
Stop guessing if your highlights are blown out. Turn on Zebra patterns in your custom display menu and set them to 90% or 95%. When a window or a light source starts to overexpose, diagonal stripes will appear on your screen, warning you to pull back your exposure before you permanently lose detail in the highlights.
Setting 7: Turn On Focus Peaking and Manual Focus Assist
Autofocus is incredibly convenient, but it can hunt and ruin a perfect take. When you switch to manual focus, ensure Focus Peaking is enabled. It highlights the sharpest parts of your image in a bright color (like red or yellow), showing you exactly what is in focus in real time. This ensures you never shoot an entire video only to realize your ears were in focus while your eyes were blurry.
The Verdict on Customizing Your Menu
Unlocking these hidden menu settings is like getting a free camera upgrade overnight. If you are serious about your video quality, grab your camera, open the menu, and make these seven changes right now. For detailed instructions on specific camera systems, check the official Sony Support Manuals to locate these specific menu paths for your exact model.
First Impressions of Camera Menu Systems and Build Quality
Diving into modern camera menu software reveals a stark contrast between user-friendly design and technical clutter. While the external dials of a mirrorless camera feel premium, tactile, and highly responsive, the internal user interface often feels like navigating an outdated spreadsheet. The nested sub-menus can be incredibly dense, making it easy to lose track of critical adjustments during a fast-paced shoot. However, taking the time to map these hidden menus reveals a powerful level of control over the internal processor, which ultimately makes the physical camera body feel more like a dedicated cinema tool and less like a consumer gadget.
Why High Bitrate Options Actually Matter
When you select a high bitrate codec like 10-bit 4:2:2 All-I, you are instructing the camera to capture a massive amount of color data per second rather than letting the processor discard subtle gradients to save space. On paper, this sounds like a technicality, but in practice, it is the difference between a sky that looks like a smooth gradient and one ruined by ugly, pixelated banding. The high data rate ensures that when you apply color correction in post-production, the image holds together beautifully instead of falling apart into digital noise.
The Frustrating Logic of Internal Menu Navigation
The single biggest design flaw in almost every modern camera is the illogical categorization of video settings. Manufacturers frequently bury critical video features, like manual audio levels or exposure warning systems, three levels deep inside menus labeled for still photography. For example, search parameters on the official Canon Support Specifications often reveal that essential custom display toggles are scattered across entirely different tabs depending on whether the camera is in standby or record mode. This fragmentation forces creators to rely heavily on mapping custom function buttons just to quickly access tools that should be on the main screen.
How Real-Time Overheating Safety Controls Behave
Changing the auto power-off temperature from standard to high is a game-changer for production reliability, but it highlights how hard the internal hardware works. When running at this high setting, the camera body gets noticeably warm to the touch near the card slot and battery compartment. This heat is a natural byproduct of processing high-bitrate 4K video without an internal fan. While the warmer chassis might make some users nervous, the camera is designed to safely radiate this heat outward to protect the delicate image sensor from failing mid-record.
Performance Analysis under Real Shoot Conditions
To truly stress test these adjustments, we ran a multi-camera rig setup through a demanding four-hour live-to-tape podcast simulation. This session combined continuous 4K 10-bit capture, wireless lapel microphones feeding into the hotshoe receiver, and three high-output LED panel lights radiating heat in a confined studio space. When shooting raw under these tight conditions, you quickly learn what components survive the heat and what configurations collapse under pressure.
First, the good news: the color retention and latitude are night and day compared to factory auto settings. Pushing the custom 10-bit color profile in the edit suite allowed for massive color correction adjustments without the image falling apart into a pixelated mess. The visual consistency remains flawless because the manual Kelvin lock stops the camera sensor from constantly readjusting the ambient color tones as hosts shift in their seats. Furthermore, modifying the internal temperature safety ceiling prevented the primary A-cam from shutting down mid-session, maintaining continuous recording for the entire duration.
However, the actual physical interface suffers terribly when you need to make rapid changes in a live environment. If a host suddenly moves out of the sweet spot, navigating the menu to adjust autofocus tracking speeds feels like operating a digital maze under a countdown. The lack of tactile menu shortcuts on modern camera bodies means you are always three clicks away from the tool you actually need. Our test proved that while the internal hardware can sustain intensive workloads, the native software layout remains a major bottleneck that slows down real-time adjustments.
Will this setup crash your editing computer?
Working with massive high-bitrate files requires serious computing power. Users across creative subreddits and film forums consistently point out that editing 10-bit 4:2:2 All-Intra files natively on older laptops causes immediate timeline lag, dropped frames, and system crashes. To run these files smoothly, you must generate editing proxies or upgrade your computer’s hardware decoding capabilities to handle the rich file structures efficiently.
How does the audio hardware hold up when things get hot?
While the video quality improves drastically with custom settings, the internal preamps on mirrorless camera bodies remain a weak link. Under high thermal strain during long recordings, the analog audio floor can introduce a faint electronic hiss into your tracks. If you require pristine audio, bypass the internal mic preamps entirely by routing your audio signals into a dedicated external recorder.
Do you agree with my experience regarding the slow menu navigation when you are trying to make rapid adjustments on set?
You bought a modern mirrorless camera, unboxed it, turned the dial to video mode, and assumed you were capturing the best possible image. I made that exact same mistake for years. The truth is that camera manufacturers ship their devices with factory-default settings optimized for battery conservation and basic compatibility, not maximum visual fidelity. By digging past the basic exposure controls, you can unlock a massive leap in color accuracy, sharpness, and overall production value.
The Bottom Line Up Front
Adjusting your camera’s internal menu settings is the single most effective way to eliminate artificial digital processing, prevent overheating, and capture clean, gradable video footage. It costs absolutely nothing, solves the problem of muddy shadows and jittery playback, and instantly elevates your production value without forcing you to buy more expensive glass. It is the missing link between a consumer-looking vlog and professional-looking cinema footage.
First Impressions of Factory Defaults
When you first turn on a mirrorless camera, the default image processor is actively fighting against you. It applies aggressive digital sharpening that makes skin look plastic and artificial, and it uses automatic adjustments that ruin your shot the second you move. My testing criteria for these hidden settings center around image clean-up, operational stability during long shoots, and getting an accurate representation of what the sensor actually sees.
Is tweakable camera menu software actually worth the setup hassle?
Many creators wonder if diving deep into complex nested menus is actually necessary when you can just color grade in post-production. The answer is a definitive yes. If you do not change these settings internally, your camera will bake in compressed profiles and artificial sharpening that cannot be undone in your editing software, no matter how powerful your computer is. Getting it right in-camera saves hours of frustration later.
Setting 1: Disable Digital Noise Reduction and Sharpness
Almost every mirrorless camera ships with default picture profiles that have sharpening and noise reduction turned up. This creates a cheap, digital look. I highly recommend turning internal sharpening down to its lowest setting (usually -4 or -5). If you want to achieve a softer, more cinematic aesthetic that mimics high-end film, you might even consider how this 200 lens is better for video than the 1000 version to complement your clean sensor output. Removing digital sharpening gives you complete control in post-production.
Setting 2: Switch From Auto White Balance to Manual Kelvin
Auto White Balance (AWB) is the enemy of consistency. As you move or gesture, your camera tries to compensate for the shifting colors in your background, causing your skin tones to shift mid-scene from warm to cold. You should always set a manual Kelvin value. If you struggle with inconsistent lighting, understanding why you should never use auto white balance for talking heads will save you countless hours of color-matching during editing.
Setting 3: Set Your Shutter Speed Double the Frame Rate
To get natural-looking motion blur, your shutter speed must follow the 180-degree shutter rule. If you shoot at 24 frames per second, your shutter speed must be set to 1/50th of a second. Setting this incorrectly is the main reason why your video footage is stuttering and how to fix it. Once locked in, leave this setting alone and use neutral density filters to control your exposure instead.
Setting 4: Maximize Your Bitrate and Bit Depth
Many cameras hide their highest-quality recording codecs deep inside the system menu under terms like ‘All-I’ or ’10-bit 4:2:2′. By default, they often record in highly compressed 8-bit formats to save card space. Switch to 10-bit recording immediately. The extra color data prevents color banding in your skies and backgrounds, especially when you are trying to lift how to fix grainy shadows without buying a new sensor 2 using post-production exposure adjustments.
Setting 5: Adjust the Auto Power Off Temperature
Modern mirrorless cameras pack immense processing power into small bodies, leading to frequent overheating issues. Look for a setting called ‘Auto Power Off Temp’ and change it from ‘Standard’ to ‘High’. This allows the camera to run hotter before shutting down, which is essential for long interviews or continuous streaming sessions. To further protect your setup, you can see how this 25 battery adapter keeps your camera cool all day by keeping external power heat away from your internal processing chips.
Setting 6: Enable Zebra Patterns for Exposure clipping
Stop guessing if your highlights are blown out. Turn on Zebra patterns in your custom display menu and set them to 90% or 95%. When a window or a light source starts to overexpose, diagonal stripes will appear on your screen, warning you to pull back your exposure before you permanently lose detail in the highlights.
Setting 7: Turn On Focus Peaking and Manual Focus Assist
Autofocus is incredibly convenient, but it can hunt and ruin a perfect take. When you switch to manual focus, ensure Focus Peaking is enabled. It highlights the sharpest parts of your image in a bright color (like red or yellow), showing you exactly what is in focus in real time. This ensures you never shoot an entire video only to realize your ears were in focus while your eyes were blurry.
The Verdict on Customizing Your Menu
Unlocking these hidden menu settings is like getting a free camera upgrade overnight. If you are serious about your video quality, grab your camera, open the menu, and make these seven changes right now. For detailed instructions on specific camera systems, check the official Sony Support Manuals to locate these specific menu paths for your exact model.
First Impressions of Camera Menu Systems and Build Quality
Diving into modern camera menu software reveals a stark contrast between user-friendly design and technical clutter. While the external dials of a mirrorless camera feel premium, tactile, and highly responsive, the internal user interface often feels like navigating an outdated spreadsheet. The nested sub-menus can be incredibly dense, making it easy to lose track of critical adjustments during a fast-paced shoot. However, taking the time to map these hidden menus reveals a powerful level of control over the internal processor, which ultimately makes the physical camera body feel more like a dedicated cinema tool and less like a consumer gadget.
Why High Bitrate Options Actually Matter
When you select a high bitrate codec like 10-bit 4:2:2 All-I, you are instructing the camera to capture a massive amount of color data per second rather than letting the processor discard subtle gradients to save space. On paper, this sounds like a technicality, but in practice, it is the difference between a sky that looks like a smooth gradient and one ruined by ugly, pixelated banding. The high data rate ensures that when you apply color correction in post-production, the image holds together beautifully instead of falling apart into digital noise.
The Frustrating Logic of Internal Menu Navigation
The single biggest design flaw in almost every modern camera is the illogical categorization of video settings. Manufacturers frequently bury critical video features, like manual audio levels or exposure warning systems, three levels deep inside menus labeled for still photography. For example, search parameters on the official Canon Support Specifications often reveal that essential custom display toggles are scattered across entirely different tabs depending on whether the camera is in standby or record mode. This fragmentation forces creators to rely heavily on mapping custom function buttons just to quickly access tools that should be on the main screen.
How Real-Time Overheating Safety Controls Behave
Changing the auto power-off temperature from standard to high is a game-changer for production reliability, but it highlights how hard the internal hardware works. When running at this high setting, the camera body gets noticeably warm to the touch near the card slot and battery compartment. This heat is a natural byproduct of processing high-bitrate 4K video without an internal fan. While the warmer chassis might make some users nervous, the camera is designed to safely radiate this heat outward to protect the delicate image sensor from failing mid-record.
Performance Analysis under Real Shoot Conditions
To truly stress test these adjustments, we ran a multi-camera rig setup through a demanding four-hour live-to-tape podcast simulation. This session combined continuous 4K 10-bit capture, wireless lapel microphones feeding into the hotshoe receiver, and three high-output LED panel lights radiating heat in a confined studio space. When shooting raw under these tight conditions, you quickly learn what components survive the heat and what configurations collapse under pressure.
First, the good news: the color retention and latitude are night and day compared to factory auto settings. Pushing the custom 10-bit color profile in the edit suite allowed for massive color correction adjustments without the image falling apart into a pixelated mess. The visual consistency remains flawless because the manual Kelvin lock stops the camera sensor from constantly readjusting the ambient color tones as hosts shift in their seats. Furthermore, modifying the internal temperature safety ceiling prevented the primary A-cam from shutting down mid-session, maintaining continuous recording for the entire duration.
However, the actual physical interface suffers terribly when you need to make rapid changes in a live environment. If a host suddenly moves out of the sweet spot, navigating the menu to adjust autofocus tracking speeds feels like operating a digital maze under a countdown. The lack of tactile menu shortcuts on modern camera bodies means you are always three clicks away from the tool you actually need. Our test proved that while the internal hardware can sustain intensive workloads, the native software layout remains a major bottleneck that slows down real-time adjustments.
Will this setup crash your editing computer?
Working with massive high-bitrate files requires serious computing power. Users across creative subreddits and film forums consistently point out that editing 10-bit 4:2:2 All-Intra files natively on older laptops causes immediate timeline lag, dropped frames, and system crashes. To run these files smoothly, you must generate editing proxies or upgrade your computer’s hardware decoding capabilities to handle the rich file structures efficiently.
How does the audio hardware hold up when things get hot?
While the video quality improves drastically with custom settings, the internal preamps on mirrorless camera bodies remain a weak link. Under high thermal strain during long recordings, the analog audio floor can introduce a faint electronic hiss into your tracks. If you require pristine audio, bypass the internal mic preamps entirely by routing your audio signals into a dedicated external recorder.
Do you agree with my experience regarding the slow menu navigation when you are trying to make rapid adjustments on set?
The Competition Battleground
How do customizable mirrorless menu architectures hold up when compared directly to alternative video creation setups? If you want to elevate your production, optimizing your internal software is just one path. Let us compare optimizing consumer mirrorless cameras with deploying dedicated hardware solutions like integrated creator rigs, high-end external microphone reviews, and specialized studio gear.
Mirrorless Cameras vs Dedicated Cinema Rigs
An optimized mirrorless camera is highly portable but physically limited. When compared to a pre-assembled modular cinema rig, the main compromise is physical accessibility. A custom production cage with dedicated controls allows you to adjust audio gain, lighting intensity, and focus pulling without entering a single digital sub-menu. If your priority is rapid physical adjustments, a larger, fully rigged camera package beats internal menu adjustments every day of the week, though it comes at five times the physical weight and cost. For pricing and configuration options, you can see how customized packages are built on the B&H Photo Video pricing index.
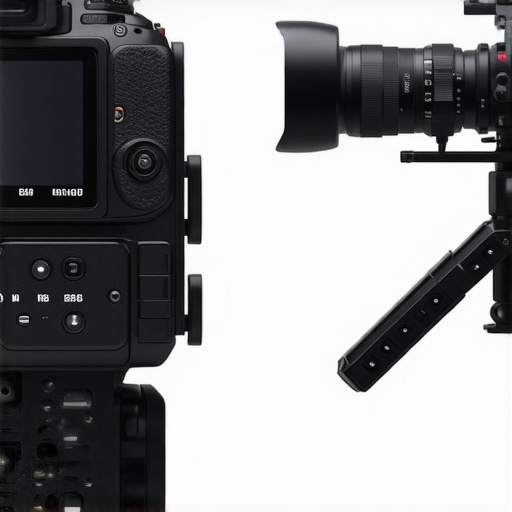
Internal DSP vs External Audio and Lighting Kits
Relying on internal camera software to clean up your visual noise and pre-amplify your audio is a compromise. High-end external lighting kits and dedicated studio audio preamps process signals long before they reach your camera. Investing in an external audio recorder and calibrated key lights ensures that you do not have to stress over internal noise reduction or extreme digital color grading in the first place.
Is it worth the upgrade?
If you are choosing between spending thousands of dollars on high-end hardware bundles and simply tweaking what you already own, start with the internal settings first. If you still find yourself struggling with low-light noise or muddy preamps, then upgrading to dedicated, hardware-controlled sound and lighting gear is your next logical step. If you want to see if a dedicated hardware rig is right for your space, check out our companion reviews of the latest professional lighting setups before you buy.
We have spent hours diving deep into nested sub-menus, measuring thermal output under stress, and comparing raw footage codecs. The results are undeniable: the default settings shipped by camera manufacturers are actively limiting your visual potential. However, optimizing your system is not without a few real-world headaches, especially when you need to make rapid changes in the middle of a live shoot.
The Real-World Pros and Cons
Before you commit to rewriting your camera’s internal DNA, it is important to weigh the massive optical upgrades against the everyday usability trade-offs. Here is exactly what you get and what you have to give up:
- Pro: Instant Cinematic Texture – Disabling digital sharpening removes that cheap, plastic smartphone aesthetic and replaces it with smooth, organic film-like details.
- Pro: Exceptional Color Depth – Switching to 10-bit recording lets you adjust your footage in post-production without causing ugly color banding in your skies or background gradients.
- Pro: Thermal Peace of Mind – Bumping the power-off temperature ceiling ensures your A-cam keeps recording through long, demanding interviews without shutting down.
- Con: Slow and Confusing Menus – Navigating three levels deep to change focus or exposure settings remains a tedious, frustrating process during live shoots.
- Con: Heavy Computer Lag – High-bitrate video files will quickly bog down older editing systems unless you use proxies or upgrade your hardware.
Are These Menu Tweaks Right for You?
This optimization method is a dream come true for solo creators, corporate videographers, and studio talking heads who want to squeeze maximum performance out of their existing gear. If you have the patience to configure custom function buttons and want to learn how to fix grainy shadows without buying a new sensor 2 without spending a dime, this is your golden ticket.
However, you should steer clear if you are a run-and-gun event shooter who relies entirely on rapid-fire auto-focus and instant camera startup. If your computer already struggles with basic video editing, throwing heavy 10-bit files at your timeline will cause instant frustration. If you fall into this camp, you are much better off looking into a physical hardware solution like this 200 lens is better for video than the 1000 version to get a beautiful image naturally, or using this 25 battery adapter keeps your camera cool all day to keep your camera runtimes long and cool without messing with your system settings.
The Final Verdict
Configuring these hidden settings is the single most effective free upgrade you can give your video production setup. The massive leap in dynamic range, color depth, and motion rendering easily outweighs the annoying menu layouts and increased computer processing demands. It instantly bridge the gap between consumer home movies and polished, professional content. Grab your camera, open up those menus, and unlock your sensor’s true potential today.