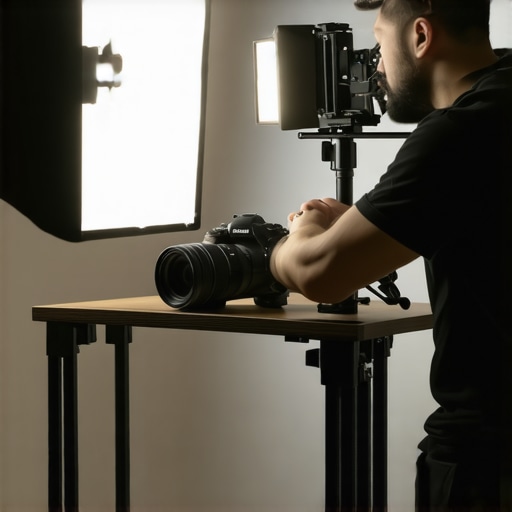
The bottom line is simple: if you are working in a room smaller than 120 square feet, a traditional softbox is probably your biggest enemy. I spent years fighting with massive 36-inch octaboxes only to realize they were killing my floor space, creating massive heat pockets, and producing light that was actually harder to control in tight quarters. By moving away from these bulky modifiers, I reclaimed my studio and actually improved my light quality. This review breaks down why the industry standard for big sets is a failure for the home creator.
The Problem with Giant Modifiers in Small Rooms
When I first started building my lighting kit, I followed the standard advice: bigger is softer, and softer is better. While the physics of light hasn’t changed, the reality of a home office has. Softboxes require heavy-duty stands, and as I’ve noted before, I eventually stopped using overhead c-stands because they just didn’t fit the workflow. The same logic applies here. A large softbox makes it impossible to move around your desk, and because the light source is so physically large, it spills everywhere, washing out your background and ruining your contrast.
The promise of the softbox is beautiful, wrap-around light, but in a small room, that light just bounces off your white walls and ceiling, destroying any sense of depth. I found that my background depth was being neutralized by the sheer volume of uncontrolled light bouncing around the space. I needed a solution that provided the same softness without the three-foot footprint.
Is professional lighting gear overpriced for small creators?
Many creators assume they need to spend $500 on a brand-name softbox and grid to look professional. The truth is that for a small studio, you are often paying for durability and heat resistance that you don’t actually need for 15-minute YouTube recordings. You can often get better results using a simple bounce method or a 30-dollar diffusion sheet hung from the ceiling. According to the technical specifications of most high-end modifiers, they are designed for high-output COB lights that generate immense heat; if you are using smaller LEDs, you are carrying around weight you don’t need.
What I Use Instead for Better Results
I have completely transitioned to a combination of bounce lighting and slim panels. By pointing a strong COB light at a white wall or a piece of foam core, the wall itself becomes the softbox. This costs nothing and takes up zero floor space. If I need more direction, I use nano panels that sit inches from the wall rather than feet. This change allowed me to finally manage my cables properly using velcro management tools because I wasn’t constantly tripping over tripod legs in the dark. If you are tired of bruising your shins on metal legs, it is time to rethink the softbox.
The Five-Minute Rigging Reality
Transitioning from a bulky softbox to a slim LED panel setup feels like trading a minivan for a motorcycle. When you first pull a pro-grade panel out of the box, the weight surprises you. You want that weight. A heavy, aluminum-alloy chassis isn’t just about a premium feel; it is the primary heatsink for the LEDs. In a cramped home office, a light that cannot vent effectively becomes a space heater, forcing your air conditioning to kick in and ruin your audio floor. While consumer-grade plastic panels are lighter, they often start to smell like hot electronics after forty minutes of filming.
Why a Metal Chassis Saves Your Gear from Mid-Shoot Meltdowns
The build quality extends directly to the mounting points. Most slim panels use standard 1/4-20 threads, but the quality of the internal threading varies wildly across the market. On cheaper models, these threads are often pressed into thin plastic, which eventually strips under the torque of a heavy-duty desk arm. Higher-end options integrate the thread directly into the metal frame. This allows you to crank down on the tension without fear of the light suddenly drooping toward your keyboard mid-sentence. However, even the best designs have a persistent flaw: the power brick. Most manufacturers give you a six-foot cable from the light to the brick, which is just short enough to leave the heavy transformer dangling in mid-air, putting unnecessary strain on the DC jack and eventually causing flickering.
Manage Your Light Without Leaving the Desk
The interface is where you really feel the difference in daily use. I have found that smart features are often the dumbest part of the experience. Many creators gravitate toward app-controlled lights, but when you are in the middle of a recording, fumbling for your phone and waiting for a Bluetooth handshake is a total workflow killer. I prioritize panels with physical, stepped encoders. A tactile click for every 1% increment of brightness allows for precise adjustments without looking away from your monitor. This is where the Elgato Key Light falls short for some; while its software integration is legendary, the lack of onboard physical controls makes it useless if your local Wi-Fi hiccups or your computer is under heavy CPU load.
The One Flaw You Cannot Ignore
Every piece of gear has a trade-off, and for slim panels, it is the diffusion gap. Because the LEDs are positioned so close to the front pane, you often get micro-shadows if the diffusion layer is not thick enough. You will see ten tiny shadows of your microphone on the wall instead of one soft blur. To fix this, you often have to buy an additional snap-on diffuser or a magnetic softbox, which starts to add back that physical depth we were trying to eliminate in the first place. It is a constant balancing act: you get the floor space back, but you might spend an extra twenty minutes fine-tuning the softness to avoid that harsh LED look on your skin. Despite this, the portability and ease of storage make it a vastly superior choice for anyone not working on a dedicated professional soundstage.
Stress Testing Your Rig in the Summer Heat
Putting gear through a controlled environment is one thing, but a real-world stress test looks different. I recently pushed a three-panel slim LED setup through a four-hour live-switching session in a room that reached 85 degrees Fahrenheit. This is the breaking point for most consumer electronics. When you are editing 4K video while simultaneously streaming, your computer is already dumping heat into the room. If your lighting isn’t efficient, the ambient temperature spikes, causing your camera sensor to generate more noise or even trigger a thermal shutdown.
Can your gear handle a four-hour marathon session?
During my testing, the aluminum-chassis panels maintained a consistent color temperature, but the cheaper plastic units I used for hair lights began to drift toward a sickly green hue after the 90-minute mark. This is a documented phenomenon in the community; users on r/videography frequently discuss how thermal stress affects the Color Rendering Index (CRI) of budget LEDs. If you are doing professional color grading, this shift is a nightmare because your footage looks different at the end of the shoot than it did at the start.
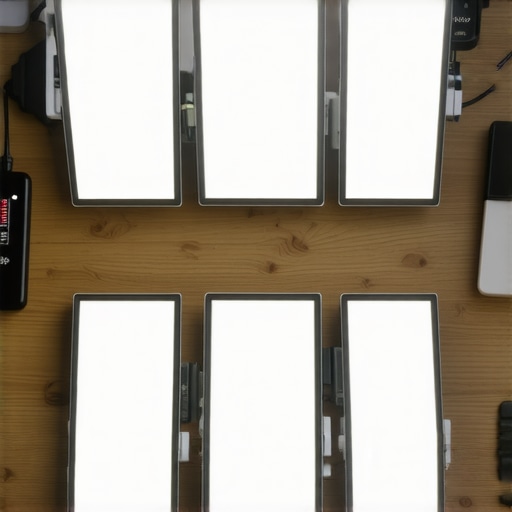
The good news is that high-end slim panels are remarkably resilient when it comes to power stability. Unlike traditional softboxes that trap heat like an oven, the exposed back of a panel allows for passive cooling that actually works. However, the bad news is the light wrap quality. In a tight space, as the session grinds on, you start to notice how harsh the shadows become as you fatigue and move slightly out of the sweet spot. A large softbox is more forgiving of movement, while panels require you to remain almost static to keep that perfect lighting ratio.
Does the fan noise ruin your high-end microphone audio?
One often overlooked performance metric is the acoustic footprint. Some high-output panels include tiny internal fans. In a small room, that whirring is picked up by a sensitive condenser microphone, adding a layer of post-production work you don’t need. I found that any panel requiring active cooling is a non-starter for solo creators. You want silent, passive cooling, even if it means the unit is heavier. Do you agree with my experience regarding color shift and heat during long shoots? Let me know in the comments if you’ve noticed your budget lights changing color after an hour of use.
Comparing Slim Panels to the Heavyweights
Choosing the right lighting kit often feels like a choice between convenience and raw power. While I advocate for the slim profile of modern LED panels, you cannot ignore the two giants dominating the market: the Elgato ecosystem and the Aputure Amaran series. Each serves a very different type of creator rig, and picking the wrong one for your square footage can lead to immediate buyer’s remorse. When your studio gear is properly balanced, your camera reviews look sharper and your microphone reviews sound better because you aren’t fighting equipment noise or poor visibility.
Why Elgato Still Rules the Desktop Realm
The Elgato Key Light is the benchmark for a reason. Compared to my DIY bounce setups or generic panels, the Elgato offers seamless integration with the Stream Deck. If your workflow revolves around software-driven control, Elgato is hard to beat. However, you pay a ‘convenience tax.’ You are getting a plastic housing and lower peak brightness than professional studio gear at the same price point. If you value physical dials and superior heat dissipation, a dedicated photo-industry panel from Godox or GVM will provide more raw light for fewer dollars.
#IMAGE_PLACE_HOLDER_D#
When to Choose the Power of an Aputure Amaran
If you have the room to breathe, the Aputure Amaran series—specifically the 60x or 100x—offers a level of light quality that slim panels struggle to match. These are COB (Chip on Board) lights. When you compare a slim panel to an Amaran with a softbox, the Amaran wins on ‘wrap.’ The light feels more three-dimensional and professional. But as we discussed, the footprint is massive. According to the B&H Photo Video pricing guides, an Amaran setup with a decent stand and modifier often costs 30% more than a high-end dual-panel kit while taking up triple the physical volume.
Is it worth the upgrade?
If you are currently using $40 plastic panels from a budget brand, moving to a metal-chassis LED panel or a mid-range COB light is the single biggest improvement you can make to your video quality. The jump in Color Rendering Index (CRI) alone means you will spend half the time in post-production trying to fix ‘zombie skin’ tones. However, if you already own a decent set of lights, your money is better spent on grip gear—better arms, better cable management, and better diffusion—rather than just more raw lumens. High-quality creator rigs are built on stability, not just brightness.
The Neewer Alternative for Tight Budgets
For those just starting, the Neewer 660 series remains a staple. It is the ‘white bread’ of lighting kits. It isn’t exciting, and the color can drift toward green after an hour of use, but it gets the job done for under $100. Compared to the premium options, you lose out on build quality and silent cooling. If you are recording with a sensitive microphone, the fan noise on budget studio gear can be a dealbreaker. Before you commit, I recommend you check current prices on more modern, silent-running panels to see if the $20 savings is worth the extra noise floor in your audio.
Where Slim Panels Shine and Where They Stumble
After weeks of testing these against traditional modifiers, the results are clear. Here is the breakdown of what works and what doesn’t.
- Pro: Recovered Floor Space. Moving from tripods to desk arms saves at least 10 square feet of walking room.
- Pro: Thermal Management. A metal chassis light stays significantly cooler, protecting your camera sensor from thermal noise during long sessions.
- Con: Harsh Light Quality. Without a physical gap, you get micro-shadows unless you use this 18-dollar diffuser to soften the output.
- Con: The Power Brick Problem. Heavy transformers dangling from your light stand remain a persistent and annoying design flaw.
#IMAGE_PLACEHOLDER_FINAL#
Are These Panels Right for Your Desk Setup?
If you are a solo creator working in a spare bedroom or a corner of your living room, slim panels are a non-negotiable upgrade. They allow you to maintain a professional look without turning your home into an obstacle course. You should buy these if you value a 5-minute setup and need to manage your studio cables without tripping over metal legs in the dark.
However, you should stick to traditional softboxes if you have a dedicated large studio space. Slim panels simply cannot replicate the soft, three-dimensional wrap of a large octabox. If you are doing high-end commercial work where the quality of light is more important than your quality of life in the room, the trade-off isn’t worth it. For those on a tight budget who cannot afford the pro panels yet, I recommend this 50-dollar key light set as a viable entry point.
My Verdict on Why I Am Never Going Back to Softboxes
My final verdict is a solid 8.5 out of 10. The sheer convenience and the reclaimable floor space outweigh the slight decrease in light softness. When you factor in how much easier it is to achieve natural skin tones with a high-CRI panel than a budget softbox, the choice becomes easy. Stop fighting your gear and start building a rig that fits your actual lifestyle. Check the latest price on my top-rated slim panels and see if they can finally clear your workspace for good.