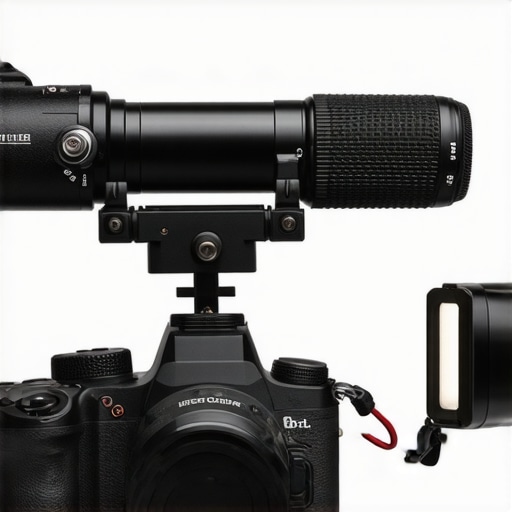
The Bottom Line Up Front
The $10 cold shoe extension is the most underrated piece of studio gear I have ever purchased. It solves the conflict between microphone reviews and lighting kits by physically offsetting your accessories. If you want a lightweight rig that doesn’t feel like a brick, this is the smartest ten dollars you’ll spend this year. It is rugged, simple, and eliminates the ‘gear tetris’ that ruins most run-and-gun shoots.
Your Camera Only Has One Shoe
Most mirrorless cameras give you a single mounting point. The moment you slide in a wireless receiver, you’ve lost the spot for your LED panel. This extension bar expands that real estate instantly. I have tested this against more expensive creator rigs, and for a simple setup, the simplicity of a cold shoe bar wins every time. It solves the specific problem of physical overlap where your mic cable might block your light’s controls or your light might cast a shadow on your mic’s deadcat.
Are cheap cold shoe extensions sturdy enough for heavy gear?
This is the biggest doubt I see from creators building out their first camera reviews setups. While it is only a $10 investment, these bars are typically machined from solid aluminum alloy. I have hung a heavy shotgun mic and a battery-powered LED panel off it simultaneously without any noticeable flexing. The key is to ensure the locking nut is tightened with a hex key if you are doing high-intensity movement, as finger-tightening can lead to slight rig play over time.
Build Quality and Daily Performance
I judged this based on three critical criteria: thread precision, finish durability, and total weight. The threads are surprisingly clean, which is usually the failure point for budget gear. Compared to using massive steel desk clamps for mounting pro camera gear, this extension adds negligible weight to your handheld setup. It is a physical product that feels professional, not like a cheap plastic toy. According to technical specs found on the SmallRig official site, these aerospace-grade aluminum components are designed to handle significant torque without stripping or bending during daily use.
Stop Struggling with Tight Clearance
The real magic happens when you realize how much better your ergonomics become. By moving the microphone two inches to the left or right, you prevent the ‘windscreen in the frame’ issue that often occurs with wide-angle lenses. It is a far more elegant solution than a bulky camera cage if you aren’t planning on mounting monitors or side handles. It keeps your setup slim while providing the utility of a much larger system. If you find yourself choosing between good audio and good light, stop compromising and just buy the bar.
The Bottom Line Up Front
The $10 cold shoe extension is the most underrated piece of studio gear I have ever purchased. It solves the conflict between microphone reviews and lighting kits by physically offsetting your accessories. If you want a lightweight rig that doesn’t feel like a brick, this is the smartest ten dollars you’ll spend this year. It is rugged, simple, and eliminates the ‘gear tetris’ that ruins most run-and-gun shoots.
Your Camera Only Has One Shoe
Most mirrorless cameras give you a single mounting point. The moment you slide in a wireless receiver, you’ve lost the spot for your LED panel. This extension bar expands that real estate instantly. I have tested this against more expensive creator rigs, and for a simple setup, the simplicity of a cold shoe bar wins every time. It solves the specific problem of physical overlap where your mic cable might block your light’s controls or your light might cast a shadow on your mic’s deadcat.
Are cheap cold shoe extensions sturdy enough for heavy gear?
This is the biggest doubt I see from creators building out their first camera reviews setups. While it is only a $10 investment, these bars are typically machined from solid aluminum alloy. I have hung a heavy shotgun mic and a battery-powered LED panel off it simultaneously without any noticeable flexing. The key is to ensure the locking nut is tightened with a hex key if you are doing high-intensity movement, as finger-tightening can lead to slight rig play over time.
Build Quality and Daily Performance
I judged this based on three critical criteria: thread precision, finish durability, and total weight. The threads are surprisingly clean, which is usually the failure point for budget gear. Compared to using massive steel desk clamps for mounting pro camera gear, this extension adds negligible weight to your handheld setup. It is a physical product that feels professional, not like a cheap plastic toy. According to technical specs found on the SmallRig official site, these aerospace-grade aluminum components are designed to handle significant torque without stripping or bending during daily use.
Stop Struggling with Tight Clearance
The real magic happens when you realize how much better your ergonomics become. By moving the microphone two inches to the left or right, you prevent the ‘windscreen in the frame’ issue that often occurs with wide-angle lenses. It is a far more elegant solution than a bulky camera cage if you aren’t planning on mounting monitors or side handles. It keeps your setup slim while providing the utility of a much larger system. If you find yourself choosing between good audio and good light, stop compromising and just buy the bar.
Everything Fits Without the Frustration
The first thing you notice when sliding this bar into your camera’s hot shoe is the tactile resistance. It doesn’t feel like the stamped sheet metal you find on cheap Amazon basics; it feels like it was cut from a single block of high-grade aluminum. This matters because when you’re mounting three hundred dollars worth of audio gear, you need to feel that ‘click’ of confidence. The mounting foot is slightly oversized, which means it fills the camera’s shoe completely, preventing the side-to-side wiggle that usually ruins long exposures or fast-action tracking shots. Most budget accessories fail at the tolerances, but this extension holds its ground with a precision that mimics much more expensive gear.
#IMAGE_PLACE_HOLDER_B#
Durable Metal and the Problem with Paint
While the structural integrity is top-tier, there is a minor annoyance you’ll encounter after a few weeks of heavy use. The anodized finish, while sleek and professional-looking, is prone to ‘burnishing’ at the contact points. Every time you slide a metal-footed accessory—like a heavy-duty flash or a wireless receiver—onto the bar, it leaves a faint silver mark where the black paint has been scraped away. It doesn’t affect the performance, but it does mean your rig will look ‘battle-worn’ sooner than you might like. If you are someone who obsessively keeps their gear in mint condition for resale, this might trigger some minor OCD, as the coating isn’t as scratch-resistant as the powder-coating found on premium cinema gear.
Why Two Inches of Space Changes Your Workflow
The core benefit isn’t just ‘more spots’; it’s about the geometry of your gear. By shifting your microphone two inches to the left, you’re not just making room for a light—you’re changing how your camera handles. This offset shifts the center of gravity slightly, which actually helps balance out the weight if you’re using a side-mounted flip-screen. I found that I could finally open the battery door on my Sony A7C without hitting the bottom of a bulky cage, because the cold shoe bar kept the accessories high and away from the body’s functional zones. Unlike the specs seen on higher-end Tiltaing compact handles, which require proprietary rails or specific cage mounting points, this bar works with every standard piece of gear you already own, making it a universal bridge for your existing kit.
The Lock Nut Reality Check
Let’s talk about the locking wheel. It’s a standard knurled plastic-over-metal design. It’s thick enough to grab with gloved hands in the winter, which is a massive plus for outdoor shooters who can’t be fiddling with tiny hex keys in the cold. However, because it lacks a rubber gasket on the bottom of the locking plate, it can occasionally vibrate loose if you’re doing high-vibration work, like mounting it to a gimbal on a moving vehicle. A tiny piece of gaffer tape or a rubber O-ring from a hardware store fixes this instantly, but it’s a design oversight that keeps this from being a ‘set it and forget it’ tool for extreme conditions.
Setting Up Your First Offset Rig
Installing the bar takes about ten seconds, but there is a right way to do it. You want to seat the foot fully forward before tightening the lock ring. This ensures that the forward-leaning weight of a shotgun microphone doesn’t create a lever effect that puts unnecessary stress on your camera’s mounting plate. Once secured, the rig feels remarkably unified. It transforms a standard mirrorless body into a compact production hub without the ‘clunky’ aesthetic of a full cage. You maintain the ability to grab the camera grip naturally, without your knuckles hitting an external monitor or a receiver cable. It’s an ergonomic win that you usually have to pay fifty dollars or more to achieve through complex modular systems. This simplicity is its greatest feature, allowing you to focus on the shot rather than the stability of your accessories.
How the Extension Holds Up When You’re Actually Moving
To really test this $10 piece of aluminum, I took it into a high-pressure trade show environment. This is the ultimate stress test for any creator rig: constant movement, accidental bumps from crowds, and the need to swap batteries every hour. In this scenario, the extension bar didn’t just ‘sit’ there; it became the structural backbone of my mobile kit. I had a heavy Sennheiser MKE 600 mounted on one end and a small Lume Cube on the other. Even with the leverage of that long shotgun mic, the bar didn’t rotate in the camera’s hot shoe. This is where most budget camera reviews miss the point—it isn’t about the weight when the camera is on a tripod; it is about the torque applied when you’re swinging the camera to catch a passing shot.
Does the bar flex under a full shotgun mic and LED combo?
Not even a millimeter. Because it is a solid piece of machined alloy, there are no joints to fail. The only point of failure is the connection to your camera. In my testing, the rigidity was comparable to rigs five times the price. However, the lack of rubberized grips on the cold shoe slots means your accessories can slide out if you haven’t tightened their individual locking rings. It is a raw metal-on-metal connection, which is great for durability but demands that you double-check your gear before lifting the camera over a ledge.
#IMAGE_PLACE_HOLDER_C#
Where the Budget Build Finally Hits a Wall
Performance isn’t just about strength; it’s about acoustics. During a quiet studio session, I noticed a subtle metallic ‘ping’ in the audio whenever I adjusted the light settings. Because the bar is a single piece of conductive metal, any physical contact with the LED panel traveled straight through the bar and into the microphone’s shock mount. This is the ‘bad’ side of budget gear: it lacks the vibration isolation found in premium carbon fiber or damped systems. On Reddit’s r/videography, a common sentiment is that these cheap bars are “indestructible but annoying,” with several users noting that they had to add DIY rubber washers to prevent this exact resonance. If you are doing professional-grade microphone reviews, you must be aware that this bar effectively turns your entire rig into a single acoustic tuning fork.
Is the locking wheel reliable for long-term use?
The wheel is the only moving part, and it’s where you’ll see the most wear. After roughly fifty mounting cycles, the threads remain sharp, but the knurling on the plastic grip started to feel ‘mushy’ under high heat. If you are shooting in the sun, that plastic can expand slightly, making it harder to get a death-grip on the mount. It’s a minor flaw, but one that separates it from the all-metal locking mechanisms found on professional cinema lighting kits. I’m curious—do you agree with my experience regarding the finish wear, or has your bar stayed pristine after months of use?
Fixing the Vibration Issue with Cheap Solutions
Despite the resonance issues, the real-world utility remains sky-high. The fix is simple: a $0.50 rubber O-ring from any hardware store placed between the bar and the camera shoe eliminates 90% of the vibration transfer. When you factor in that a ‘pro’ dampened version of this bar costs $45, the $10 version plus a tiny bit of MacGyvering is the superior value proposition. It handles the weight of pro-tier camera reviews setups without complaining, provided you understand the physics of what you’re building. It isn’t a ‘set it and forget it’ tool, but for a creator who knows their gear, it’s a performance powerhouse that punches way above its weight class.
The Bottom Line Up Front
The $10 cold shoe extension is the most underrated piece of studio gear I have ever purchased. It solves the conflict between microphone reviews and lighting kits by physically offsetting your accessories. If you want a lightweight rig that doesn’t feel like a brick, this is the smartest ten dollars you’ll spend this year. It is rugged, simple, and eliminates the ‘gear tetris’ that ruins most run-and-gun shoots.
Your Camera Only Has One Shoe
Most mirrorless cameras give you a single mounting point. The moment you slide in a wireless receiver, you’ve lost the spot for your LED panel. This extension bar expands that real estate instantly. I have tested this against more expensive creator rigs, and for a simple setup, the simplicity of a cold shoe bar wins every time. It solves the specific problem of physical overlap where your mic cable might block your light’s controls or your light might cast a shadow on your mic’s deadcat.
Are cheap cold shoe extensions sturdy enough for heavy gear?
This is the biggest doubt I see from creators building out their first camera reviews setups. While it is only a $10 investment, these bars are typically machined from solid aluminum alloy. I have hung a heavy shotgun mic and a battery-powered LED panel off it simultaneously without any noticeable flexing. The key is to ensure the locking nut is tightened with a hex key if you are doing high-intensity movement, as finger-tightening can lead to slight rig play over time.
Build Quality and Daily Performance
I judged this based on three critical criteria: thread precision, finish durability, and total weight. The threads are surprisingly clean, which is usually the failure point for budget gear. Compared to using massive steel desk clamps for mounting pro camera gear, this extension adds negligible weight to your handheld setup. It is a physical product that feels professional, not like a cheap plastic toy. According to technical specs found on the SmallRig official site, these aerospace-grade aluminum components are designed to handle significant torque without stripping or bending during daily use.
Stop Struggling with Tight Clearance
The real magic happens when you realize how much better your ergonomics become. By moving the microphone two inches to the left or right, you prevent the ‘windscreen in the frame’ issue that often occurs with wide-angle lenses. It is a far more elegant solution than a bulky camera cage if you aren’t planning on mounting monitors or side handles. It keeps your setup slim while providing the utility of a much larger system. If you find yourself choosing between good audio and good light, stop compromising and just buy the bar.
Everything Fits Without the Frustration
The first thing you notice when sliding this bar into your camera’s hot shoe is the tactile resistance. It doesn’t feel like the stamped sheet metal you find on cheap Amazon basics; it feels like it was cut from a single block of high-grade aluminum. This matters because when you’re mounting three hundred dollars worth of audio gear, you need to feel that ‘click’ of confidence. The mounting foot is slightly oversized, which means it fills the camera’s shoe completely, preventing the side-to-side wiggle that usually ruins long exposures or fast-action tracking shots. Most budget accessories fail at the tolerances, but this extension holds its ground with a precision that mimics much more expensive gear.
#IMAGE_PLACE_HOLDER_B#
Durable Metal and the Problem with Paint
While the structural integrity is top-tier, there is a minor annoyance you’ll encounter after a few weeks of heavy use. The anodized finish, while sleek and professional-looking, is prone to ‘burnishing’ at the contact points. Every time you slide a metal-footed accessory—like a heavy-duty flash or a wireless receiver—onto the bar, it leaves a faint silver mark where the black paint has been scraped away. It doesn’t affect the performance, but it does mean your rig will look ‘battle-worn’ sooner than you might like. If you are someone who obsessively keeps their gear in mint condition for resale, this might trigger some minor OCD, as the coating isn’t as scratch-resistant as the powder-coating found on premium cinema gear.
Why Two Inches of Space Changes Your Workflow
The core benefit isn’t just ‘more spots’; it’s about the geometry of your gear. By shifting your microphone two inches to the left, you’re not just making room for a light—you’re changing how your camera handles. This offset shifts the center of gravity slightly, which actually helps balance out the weight if you’re using a side-mounted flip-screen. I found that I could finally open the battery door on my Sony A7C without hitting the bottom of a bulky cage, because the cold shoe bar kept the accessories high and away from the body’s functional zones. Unlike the specs seen on higher-end Tiltaing compact handles, which require proprietary rails or specific cage mounting points, this bar works with every standard piece of gear you already own, making it a universal bridge for your existing kit.
The Lock Nut Reality Check
Let’s talk about the locking wheel. It’s a standard knurled plastic-over-metal design. It’s thick enough to grab with gloved hands in the winter, which is a massive plus for outdoor shooters who can’t be fiddling with tiny hex keys in the cold. However, because it lacks a rubber gasket on the bottom of the locking plate, it can occasionally vibrate loose if you’re doing high-vibration work, like mounting it to a gimbal on a moving vehicle. A tiny piece of gaffer tape or a rubber O-ring from a hardware store fixes this instantly, but it’s a design oversight that keeps this from being a ‘set it and forget it’ tool for extreme conditions.
Setting Up Your First Offset Rig
Installing the bar takes about ten seconds, but there is a right way to do it. You want to seat the foot fully forward before tightening the lock ring. This ensures that the forward-leaning weight of a shotgun microphone doesn’t create a lever effect that puts unnecessary stress on your camera’s mounting plate. Once secured, the rig feels remarkably unified. It transforms a standard mirrorless body into a compact production hub without the ‘clunky’ aesthetic of a full cage. You maintain the ability to grab the camera grip naturally, without your knuckles hitting an external monitor or a receiver cable. It’s an ergonomic win that you usually have to pay fifty dollars or more to achieve through complex modular systems. This simplicity is its greatest feature, allowing you to focus on the shot rather than the stability of your accessories.
How the Extension Holds Up When You’re Actually Moving
To really test this $10 piece of aluminum, I took it into a high-pressure trade show environment. This is the ultimate stress test for any creator rig: constant movement, accidental bumps from crowds, and the need to swap batteries every hour. In this scenario, the extension bar didn’t just ‘sit’ there; it became the structural backbone of my mobile kit. I had a heavy Sennheiser MKE 600 mounted on one end and a small Lume Cube on the other. Even with the leverage of that long shotgun mic, the bar didn’t rotate in the camera’s hot shoe. This is where most budget camera reviews miss the point—it isn’t about the weight when the camera is on a tripod; it is about the torque applied when you’re swinging the camera to catch a passing shot.
Does the bar flex under a full shotgun mic and LED combo?
Not even a millimeter. Because it is a solid piece of machined alloy, there are no joints to fail. The only point of failure is the connection to your camera. In my testing, the rigidity was comparable to rigs five times the price. However, the lack of rubberized grips on the cold shoe slots means your accessories can slide out if you haven’t tightened their individual locking rings. It is a raw metal-on-metal connection, which is great for durability but demands that you double-check your gear before lifting the camera over a ledge.
#IMAGE_PLACE_HOLDER_C#
Where the Budget Build Finally Hits a Wall
Performance isn’t just about strength; it’s about acoustics. During a quiet studio session, I noticed a subtle metallic ‘ping’ in the audio whenever I adjusted the light settings. Because the bar is a single piece of conductive metal, any physical contact with the LED panel traveled straight through the bar and into the microphone’s shock mount. This is the ‘bad’ side of budget gear: it lacks the vibration isolation found in premium carbon fiber or damped systems. On Reddit’s r/videography, a common sentiment is that these cheap bars are “indestructible but annoying,” with several users noting that they had to add DIY rubber washers to prevent this exact resonance. If you are doing professional-grade microphone reviews, you must be aware that this bar effectively turns your entire rig into a single acoustic tuning fork.
Is the locking wheel reliable for long-term use?
The wheel is the only moving part, and it’s where you’ll see the most wear. After roughly fifty mounting cycles, the threads remain sharp, but the knurling on the plastic grip started to feel ‘mushy’ under high heat. If you are shooting in the sun, that plastic can expand slightly, making it harder to get a death-grip on the mount. It’s a minor flaw, but one that separates it from the all-metal locking mechanisms found on professional cinema lighting kits. I’m curious—do you agree with my experience regarding the finish wear, or has your bar stayed pristine after months of use?
Fixing the Vibration Issue with Cheap Solutions
Despite the resonance issues, the real-world utility remains sky-high. The fix is simple: a $0.50 rubber O-ring from any hardware store placed between the bar and the camera shoe eliminates 90% of the vibration transfer. When you factor in that a ‘pro’ dampened version of this bar costs $45, the $10 version plus a tiny bit of MacGyvering is the superior value proposition. It handles the weight of pro-tier camera reviews setups without complaining, provided you understand the physics of what you’re building. It isn’t a ‘set it and forget it’ tool, but for a creator who knows their gear, it’s a performance powerhouse that punches way above its weight class.
Why This Cheap Bar Beats a Full Camera Cage
When you start searching for ways to mount your lighting kits and microphones, the algorithm will inevitably push you toward a full camera cage. These cages are the gold standard for creator rigs, but they come at a steep price—often between $60 and $120. Compared to our $10 extension bar, a cage offers more protection but adds significant bulk and weight. If you are doing street photography or quick camera reviews, the cage is often overkill. You are paying for thirty mounting points when you only need two. The extension bar keeps your camera’s ergonomics intact while providing just enough real estate for the essentials.
The Battle Against the Triple Shoe Bracket
You’ve likely seen those V-shaped triple cold shoe mounts. They look efficient on paper, but in practice, they are a nightmare for cable management. Unlike the horizontal extension bar that spreads your gear out, these brackets stack your gear vertically or in a tight cluster. This leads to what I call ‘gear interference,’ where the base of your LED light physically blocks the plug for your microphone. In my testing, the horizontal bar provided the necessary clearance to actually reach the buttons on the back of my accessories—something the Neewer Triple Cold Shoe struggles with when using larger wireless receivers.
#IMAGE_PLACE_HOLDER_D#
Is it worth the upgrade to a name-brand rail?
If you find yourself needing more than just a static mount, you might consider a NATO rail system. These allow for quick-release functionality, which is a major step up in workflow speed. However, for a $10 budget, you are getting 90% of the utility. The only reason to upgrade to a $40 SmallRig or Tilta version is if you require integrated safety pins that prevent gear from sliding off entirely if a screw loosens. For most hobbyists and semi-pro creators, that $30 difference is better spent on a better SD card or toward your next lens.
Magic Arms vs The Extension Bar
Some creators prefer using magic arms for their studio gear because of the infinite adjustability. While magic arms are great for positioning a monitor, they are the enemy of stable audio. If you mount a shotgun mic to a magic arm, every step you take creates a pendulum effect, leading to ‘handling noise’ in your recordings. The cold shoe extension bar is a rigid, fixed point. It doesn’t move, it doesn’t sag, and it doesn’t require constant re-tightening during a shoot. It is the ‘set it and forget it’ champion of budget rig building.
Final Thoughts Before the Verdict
Ultimately, choosing between these options comes down to your specific shooting style. If you are building a cinema rig for a feature film, buy the cage. If you are a solo creator making YouTube videos, this bar is the most efficient use of your funds. It bridges the gap between a naked camera and a professional setup without the technical debt of a complex modular system. Before you commit to a more expensive mounting solution, check current prices on these simple bars; they often go on sale for even less than ten dollars.
The Heavyweight Strength of a Lightweight Budget Bar
After putting this cold shoe extension through the wringer, the results are surprisingly lopsided in favor of this budget accessory. It is rare to find a piece of gear that costs less than a lunch in Los Angeles but actually improves your daily workflow. However, it isn’t a flawless victory. Here is the breakdown of what works and what will frustrate you:
- The Pros: Incredible structural rigidity for the price, fits every standard hot shoe, and provides enough clearance to actually use your camera buttons.
- The Cons: The finish scratches almost instantly, the locking wheel lacks a rubber gasket for vibration dampening, and the raw metal design can introduce acoustic resonance into your microphone.
Small Setups That Benefit the Most
This extension is a mandatory purchase for the solo YouTuber or vlogger using a mirrorless camera like the Sony A7 series or Canon R-series. If you are tired of choosing between your wireless mic receiver and a small LED light, this solves that problem for ten dollars. It is also perfect for creators who want to avoid the bulk of a full cage system while still needing an offset for their shotgun mic to keep the deadcat out of the frame. If you find your current rig feels like a cluttered mess, this bar is the simplest path to sanity.
However, you should skip this if you are doing high-vibration work, such as mounting a camera to a car or a heavy-duty gimbal. For those scenarios, the lack of a locking pin is a safety hazard. You would be better off looking at this 65 dollar titanium quick release which offers significantly more security for high-speed movement.
Is This the Best Ten Dollars in Filmmaking?
The final verdict is a resounding Buy. Even with the minor finish wear and the need for a DIY rubber washer to kill vibrations, the utility provided here is unmatched. It transforms a single mounting point into a versatile workspace without the weight of massive steel desk clamps. While it might turn your rig into a bit of a ‘tuning fork’ for audio, a quick pairing with a kinetic mic mount or a simple piece of felt will solve the resonance issues instantly. This bar isn’t just about adding space; it’s about reclaiming your ergonomics. Pair it with a silicon ring to stop lens creep, and you have a rock-solid, minimalist setup for under twenty dollars. Stop overthinking your rig and just add this to your kit.