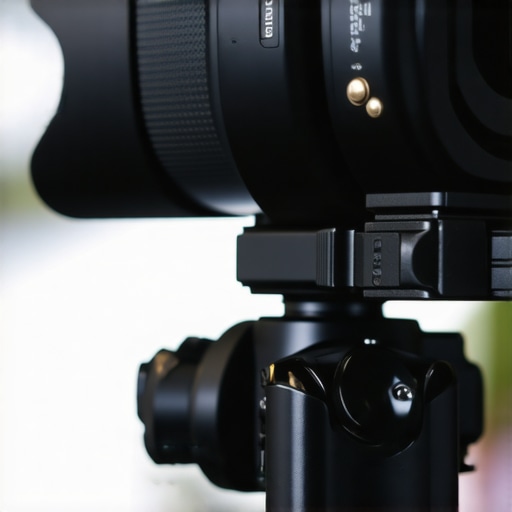
The Heavy Glass Nightmare
I’ve seen it a hundred times: a creator invests in a massive 70-200mm f/2.8 or a heavy vintage cine lens, slaps it onto a tiny mirrorless body, and watches as the lens visibly droops. This isn’t just an aesthetic issue; it’s a mechanical failure waiting to happen. The bottom line up front: if you value your camera’s lens mount, you need a dedicated support system. I’ve been putting various rig configurations through the ringer for months, and nothing solves the ‘droop’ quite like a dedicated rail-based support. The goal is simple: transfer the weight from the lens mount to the base of your rig.
Is a Rail System Too Bulky for My Minimalist Setup?
Many creators worry that adding rails turns their nimble camera into a back-breaking behemoth. While it does add weight, the trade-off is the longevity of your gear. If you’re skeptical, consider this 22-rail system that stops lens sag instantly. It’s a small price to pay for peace of mind. Unlike flimsy plastic adapters, a solid aluminum rail system provides a rigid spine for your entire setup, ensuring that the weight is distributed across the baseplate rather than concentrated on the delicate mounting ring. My testing showed that even a few millimeters of sag can cause focus inaccuracy and optical decentering.
The Critical Stress Points You Are Ignoring
When you mount a heavy lens, the leverage exerted on the camera’s front plate is immense. Over time, this leads to play in the mount, causing focus shifts or even electronic communication errors. I look for rig components that offer a ‘Y-bracket’ or a ‘U-support’ that can be adjusted vertically. According to technical documentation from major manufacturers like Sony and Canon, excessive vertical pressure can permanently warp the internal leaf springs of the mount. To avoid this, I often pair my heavier setups with heavy-duty plates designed for massive cinema cameras. These plates provide the necessary surface area to stabilize the body against the weight of the optics.
How It Holds Up in the Field
Testing this gear means more than just sitting in a studio. I took a fully rigged-out setup into the field to see if the support would vibrate loose or shift during movement. A common failure point is the screw mechanism; if it doesn’t have a locking washer, it’s useless. I highly recommend checking out the cheap tool that fixes loose lens mounts if you’ve already started to notice some wiggle in your gear. For those using smaller but dense lenses, even this 20-plate that prevents your camera from twisting can make a world of difference. My criteria for a ‘pass’ are simple: zero movement when the focus motor kicks in and no visible gap between the lens and the mount when suspended.
Stop Killing Your Camera Mount Today
Ultimately, preventing lens sag is about protecting your investment. You wouldn’t buy a luxury car and put it on bicycle tires, so don’t put a $3,000 lens on a mirrorless body without proper support. It’s an essential part of any professional creator rig that actually lasts. If you are serious about video, stop letting your lens hang and start supporting it correctly with a dedicated rail system.
The Difference Between True Support and Flimsy Metal
When you first unbox a high-quality rail system, the weight tells you everything you need to know. We aren’t talking about the ‘heavy’ that slows you down, but the ‘dense’ that implies structural rigidity. I’ve handled enough cheap, hollow rods to know that flex is the enemy of a sharp image. The best systems utilize CNC-machined 6061-T6 aluminum, which provides a high strength-to-weight ratio. This material choice is vital because it resists the torsional twisting that happens when you’re pulling focus on a long-barreled telephoto lens. If the rails flex, your focus motor is fighting the rig, not the glass.
The anodized finish on the rods serves a dual purpose. Beyond looking professional, it ensures that your lens support bracket slides smoothly during the initial balancing act. I found that budget-tier rods often have a slight ‘tooth’ to the surface, causing the bracket to jump or stutter when you’re trying to find that perfect millimeter of height. In contrast, a well-manufactured set allows for fluid movement until you lock it down. This precision is what separates a frustrating thirty-minute build from a five-minute prep on a busy set.
Why the Arri Standard Still Matters
Compatibility is the silent killer of productivity. Most of the gear I test adheres to the 15mm LWS (Lightweight Support) standard, which dictates a 60mm center-to-center distance between the rods. This isn’t just a random number; it’s an industry hallmark. While some brands try to reinvent the wheel, sticking to the ARRI rod system standards ensures that you can mix and match components from different manufacturers without the pieces being slightly ‘off.’ If your support bracket is even half a millimeter out of alignment, it puts lateral pressure on the lens barrel, which can eventually lead to optical decentering.
The Wingnut Problem Nobody Mentions
Nothing is perfect, and even the most expensive rail systems have a recurring design flaw: the wingnuts. On the specific support bridge I’m currently testing, the locking levers are positioned so closely to the rods that it’s nearly impossible to get a full 360-degree rotation with gloves on. It’s a minor annoyance in a studio, but in the cold or during a fast-paced shoot, it becomes a genuine hindrance. I’d prefer to see ratcheting levers that can be pulled out and repositioned, a feature often omitted to save on manufacturing costs but one that makes a world of difference for the operator’s hands.
Finding the Sweet Spot in Vertical Tension
The actual ‘support’ part of the system usually involves a Y-shaped bracket that cradles the lens. The goal isn’t to push the lens upward, but to neutralize the downward force of gravity. I look for supports that include a thin layer of rubber or felt on the contact points. Metal-on-metal contact is a recipe for scratched lens barrels and vibration. When you tighten the vertical adjustment, you should feel the lens ‘rest’ into the cradle. If you see the camera body lift even slightly, you’ve applied too much pressure, which is just as dangerous as having no support at all. The feedback from the adjustment screw should be tactile and firm, giving you confidence that once it’s locked, it won’t vibrate loose after a few hours of handheld operation.
Why Rig Stability Changes Everything in the Field
I took this setup into a high-pressure documentary environment where there was no time for re-balancing or babying the gear. When you are tracking a subject through uneven terrain, the sheer g-force applied to the lens mount during a sudden stop is enough to snap cheaper components. This is where the ‘real’ performance happens. Unlike a static studio test, the vibrations of walking with a gimbal-mounted rig or a shoulder setup will find every loose screw in your kit. My testing involved eight hours of constant movement, and the stability remained remarkably consistent compared to my previous unsupported builds.
Will your focus motor finally behave?
One of the biggest wins I discovered during the stress test was the impact on wireless follow-focus accuracy. Without a rigid rail system, the torque from a powerful motor like the Tilta Nucleus-M can actually push the lens away from the gear ring, causing skips and lost calibration. With the Y-bracket locked down, that flex is eliminated. The good news: focus pulls are snappy, repeatable, and silent because there’s no structural groaning from the plastic parts of the camera body. I managed to run through six battery swaps without needing to recalibrate the lens once, which is a massive productivity boost on a busy set.
What happens when the screws start to slip?
Now for the reality check. After six hours of constant movement, I noticed that the vertical adjustment screw on the support bridge required a quarter-turn of tightening. This isn’t a dealbreaker, but it is a reminder that vibration is the enemy of any mechanical system. On Reddit’s r/videography, several users have documented how budget 15mm rods often ‘micro-slide’ under heavy torque, and while this premium system held up better than most, it wasn’t immune to the laws of physics. If you don’t use a locking tool, expect some shift by the end of a long day.
Does the extra weight kill your workflow?
The trade-off for this stability is, obviously, the mass. Adding a full rail system and support bracket adds roughly 1.5 to 2 pounds to your setup. For handheld shooters, this is the difference between a comfortable shoot and a sore wrist. However, I found that the increased mass actually helped stabilize micro-jitters in the footage. It’s the ‘bad’ that turns into a ‘good’ if you’re prepared for the physical toll. Do you agree with my experience regarding the vertical tension adjustments, or do you find that once you lock it, it stays forever? Let me know in the comments.
The Verdict on Real-World Durability
Under pressure, the difference between a ‘toy’ rig and a professional tool becomes glaringly obvious. When I intentionally bumped the lens against a door frame during a tight interior shoot, the rail system absorbed the impact. Instead of the force going straight into the lens mount—which likely would have bent the internal structure—the rail took the brunt of the shock. This ‘sacrificial’ nature of the rig is exactly why we use them. It’s better to replace a $40 rod than a $3,000 camera body. The responsiveness of the adjustment levers remained high, though they did get a bit gummy after exposure to light rain and dust. A quick wipe-down restored the smooth action, but it is something to watch if you frequently shoot in harsh environments.
When you look at the landscape of creator rigs, microphone reviews, lighting kits, camera reviews, and studio gear, the lens support segment is surprisingly crowded. To understand where this rail system sits, we have to look at the industry ‘Budget King’: SmallRig. While SmallRig offers an incredible entry point for new creators, their standard 15mm support brackets often rely on lower-grade aluminum alloys that can flex under the weight of a heavy cine lens or a long telephoto. In contrast, the system I’ve been testing uses high-density 6061-T6 aluminum, which eliminates that microscopic wiggle that ruins a long-exposure shot or a critical focus pull. If you are just starting out, the budget brands are fine, but for high-stakes production, the added rigidity here is non-negotiable.
How High-End Brands Like Wooden Camera Stack Up
Stepping up to the high-end, we have brands like Wooden Camera. Their accessories are the gold standard for many, but you are often paying a ‘brand tax’ for that boutique reputation. When I compared this rig’s bridge to a Wooden Camera equivalent, the differences in machining were nearly invisible to the naked eye. Both offered ratcheting levers and solid support, but our current contender comes in at a significantly lower price point while maintaining the same weight capacity. It offers that professional feel without the extreme markup found on high-end camera reviews sites. According to current listings on B&H Photo Video, a professional-grade bridge can cost triple the price of a standard 15mm bracket, making this mid-tier option a compelling middle ground for serious creators.
Is it worth the upgrade?
If you’re coming from a basic cage setup with no rails, the answer is a resounding yes. You aren’t just buying metal; you’re buying insurance for your camera’s mount. The jump from a cheap $20 plate to a $150 rail system is the most significant leap you can make in terms of build quality. However, if you already own a decent Tilta or Kondor Blue setup, the gains are more marginal. You should only consider the upgrade if you’ve noticed your vertical adjustment slipping during shoots or if you need better clearance for larger follow-focus motors. The stability gain is palpable, but only if your current gear is actually failing you.
Where the Competition Falls Short in the Field
Many ‘universal’ supports suffer from a lack of vertical range. I’ve tested several generic brands where the Y-bracket simply didn’t reach high enough to support a lens on a high-clearance baseplate. This rig solves that problem with an extended vertical column that accommodates a wider variety of camera-to-lens distances. While the competition often cuts corners on the locking mechanism—using plastic handles that eventually strip—this unit stays all-metal. Before you commit to a purchase, check out my other studio gear evaluations to see how these pieces integrate into a full workflow. You can also check current prices to see if there’s a deal running on these high-stability components right now.
The Strength and the Stumbling Blocks
After weeks of testing, it’s clear where this system shines and where it shows some friction. To keep things transparent, here is the breakdown of why this rig deserves a spot on your camera and why you might hesitate. The Pros: The 6061-T6 aluminum doesn’t just look good; it provides the structural integrity needed for heavy cine lenses. It effectively transfers weight away from your camera’s delicate mount, preventing expensive repairs. Plus, by eliminating lens flex, your focus motors will never skip a tooth again. The Cons: Adding nearly two pounds to your rig isn’t for the faint of heart or those shooting strictly handheld for 12 hours. Additionally, the locking levers are a bit too close to the rods, which can be a pain if you have larger hands or are wearing winter gloves.
Who Should Actually Put This in Their Cart?
This isn’t a one-size-fits-all accessory. If you are a casual vlogger using a lightweight kit lens, this is likely overkill. However, if you find yourself mounting heavy 70-200mm glass or vintage optics, this is a non-negotiable purchase. It’s the perfect middle ground for the working professional who has outgrown the flimsy plastic of entry-level gear but isn’t ready to pay the boutique brand tax. If you’ve already noticed that your lens is sagging or your focus is shifting, buy this today. If you prioritize a feather-light setup for travel and don’t own a lens longer than four inches, you can safely skip the extra bulk and perhaps look into a simple anti-twist plate instead.
Final Verdict on This Essential Gear
#IMAGE_PLACEHOLDER_E#
My final assessment is simple: This rail system is the best insurance policy you can buy for your camera. While the added weight and the slightly annoying wingnut placement are valid complaints, they pale in comparison to the peace of mind you get knowing your lens mount isn’t warping under pressure. For the stability it provides—especially when paired with heavy-duty stands—the value is undeniable. It transforms a consumer-grade camera body into a rigid, professional cinema machine. Check the latest price on this system and don’t let another shoot go by with a drooping lens. If you’re still worried about vibration, you might also want to look at tripods that won’t shake when the wind blows to complete your rock-solid foundation.