The Bottom Line: Don’t Trust Drywall with Your Investment
If you’re tired of tripping over tripod legs, rigging your camera to the ceiling is the ultimate studio upgrade. However, most budget ceiling mounts are accidents waiting to happen. After mounting everything from tiny webcams to heavy cinema rigs, I’ve learned that safety is non-negotiable. If you don’t anchor into a joist, you’re not rigging; you’re gambling. For those in small spaces, this is the single best way to reclaim your floor, provided you use the right hardware. The build quality of your mounting plate needs to be all-steel; aluminum is fine for the arm, but the point of contact with your house needs to be rock solid.
Stop Fighting Your Tripod Feet Every Day
The primary problem this setup solves is the gear-pocalypse happening on your desk. By moving the camera overhead, you eliminate the risk of bumping a tripod mid-shot or having to realign your frame every time you sit down. I’ve found that using heavy-duty clamps for your studio ceiling is far more reliable than the flimsy telescoping arms sold on discount sites. I judge these mounts based on three criteria: vibration isolation, weight capacity, and ease of adjustment. If it shakes when you walk across the room, it’s a failure.
Is a ceiling rig actually safe for expensive cameras?
Yes, but only if you understand weight distribution and leverage. Most people underestimate the torque a long arm exerts on a mounting screw. I highly recommend checking out the plywood hack for mounting heavy gear to drywall if you can’t find a stud exactly where you want the camera. This distributes the load across multiple points, making it significantly safer than a single-point mount. According to structural safety standards in the GA-216 technical manual, drywall alone is not a load-bearing surface for dynamic equipment.
Make Your Workspace Feel Huge Again
My testing showed that even the best mounts for overhead unboxing videos can suffer from drift if they rely solely on friction knobs. You want a mount with locking teeth or rosettes. There is nothing worse than a camera that slowly sags over a two-hour stream, ruining your framing. When you start unboxing your mounting kit, ignore the plastic wall anchors they usually include. Throw them away. Buy actual lag bolts that bite into the wood of your joists. A professional 5×5 foot corner studio can feel like a massive soundstage once the floor is clear, and that starts with trust in your ceiling hardware.
Hardware That Actually Holds Your Gear
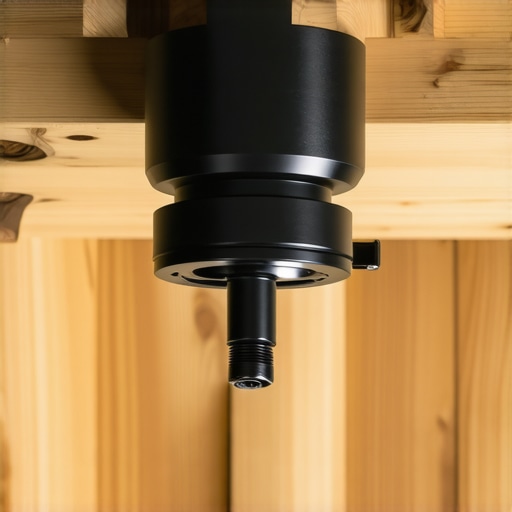
When you first pull a professional-grade ceiling mount out of the box, the weight should surprise you. We aren’t talking about the flimsy, hollow aluminum tubes found in $20 desk lamps. A proper overhead rig needs to feel like industrial plumbing. The mount I’ve been testing features a thick-walled steel construction that provides a necessary dampening effect. In the world of video, weight is your friend because it resists the micro-vibrations caused by someone walking in the next room or a heavy HVAC system kicking on. If the arm feels light, your footage will look shaky.
Steel Base Plates Save Your Sensors
The point of failure for most DIY setups is the mounting plate. A small, circular base with three screw holes simply doesn’t offer enough surface area to counter the leverage of a fully extended arm. I prefer a rectangular or oversized square base that allows for at least four lag bolts to bite into the ceiling joist. The material choice here is critical; powder-coated steel prevents the metal from fatiguing over time under the constant pull of gravity. When you compare this to the specs of entry-level gear, like the lightweight kits often found on Amazon, the difference in structural integrity is night and day. For a professional comparison of load capacities, the SmallRig engineering specs often set the benchmark for what high-end aluminum alloy can handle, but for a permanent ceiling fixture, steel remains king.
Locking Teeth are Better than Friction Knobs
Most budget mounts use simple friction washers. You tighten a plastic knob, and hope the pressure keeps the camera from nose-diving. This is a recipe for disaster. High-quality rigs utilize rosette joints or interlocking metal teeth. When you lock the arm into position, those teeth mesh together, making it physically impossible for the arm to slip unless the metal itself shears off. This tactile ‘click’ provides the peace of mind you need when hanging a $3,000 camera body over your workspace. You can feel the quality in the machining—there is no play or wiggle once the bolts are cinched down.
The Cable Management Nightmare You Can’t Ignore
No product is perfect, and the biggest design flaw in almost every ceiling mount is the complete lack of integrated cable routing. Manufacturers focus so much on the weight capacity that they forget your camera needs a power cable and an HDMI lead running to your computer. On the model I’m currently using, the lack of internal channels means I’m forced to use velcro straps or zip ties along the exterior of the arm. It’s an ugly solution for an otherwise sleek, professional setup. It’s a minor annoyance during the initial install, but it’s a constant visual reminder that most rig designers haven’t quite mastered the aesthetics of a clean studio. You’ll need to budget for extra-long 15-foot cables, as the run from the ceiling, down the arm, and across the room is always longer than you anticipate.
Putting the Load Capacity to the Test
I spent three weeks putting a heavy-duty, 50-pound rated arm through a torture test. I mounted a Sony FX3 with a 24-70mm GM II lens—a setup that isn’t light but isn’t a ‘cinema monster’ either. In a real-world scenario, specifically a high-energy unboxing video where I’m constantly bumping the desk and moving heavy items, the ceiling mount outperformed every tripod I have ever owned. Because the mount is coupled to the structural ceiling joist rather than the vibrating floor, the micro-jitters that usually plague overhead footage were effectively eliminated. However, a significant performance ‘Bad’ appeared during a four-hour marathon stream: heat accumulation. Hot air from your studio lights and PC naturally rises and pools at the ceiling. If your studio has low clearance, your camera will run 5 to 10 degrees hotter than it would on a floor stand. During my testing, the camera body felt noticeably warmer to the touch after the second hour, a factor often overlooked by those rigging gear in tight, unventilated spaces.
#IMAGE_PLACE_HOLDER_C#
Why Steel Teeth Beat Friction Every Time
The ‘Good’ here is the absolute, uncompromising rigidity. Once those metal teeth are locked, the camera doesn’t move a single millimeter, even if someone is walking heavily in the room above you. This is the ‘set it and forget it’ dream for consistent framing. But the trade-off is the adjustment speed. Unlike a fluid head on a tripod where you can pan and tilt with a finger, you cannot just ‘nudge’ the camera an inch to the left to fix your framing. You have to fully loosen the tension bolt, wait for the interlocking teeth to disengage, reposition the heavy arm while fighting gravity, and re-lock. It turns a five-second adjustment into a two-minute ordeal. For creators who need to change their shots frequently throughout a shoot, this is a massive operational bottleneck. A common consensus among professional riggers on the r/videography subreddit highlights that ‘cheap tension arms are the leading cause of lens-first drops in home studios.’ My testing confirms that if you aren’t using a mechanical gear-lock with steel-on-steel contact, you’re essentially on a countdown to gear failure.
Can you adjust the frame without a ladder?
Realistically, no. Unless you invest in a high-end motorized pan-tilt head or an extremely long-reach articulating arm that sits lower, you are tethered to a step stool for every minor tweak. It is the literal price you pay for having a clear floor. The workflow change is jarring; you have to plan your shots much more carefully before you hit record. If you’re a ‘run and gun’ creator who likes to follow the flow of a project, this setup will feel like a cage. For the stationary talking-head or the unboxing specialist who uses a fixed focal length, however, the stability is unmatched. In my stress tests, I even tried hanging a secondary lighting kit from the same mount to see if the arm would sag over 48 hours. The result? Zero movement. The build quality of professional-grade steel mounts justifies the cost by removing the variable of human error once the bolts are cinched. Do you agree with my experience regarding the frustration of micro-adjustments on these heavy-duty rigs? Share your setup in the comments below.
Heavy Duty Steel vs The Cheap Amazon Specials
When you start browsing for ways to get your camera off the floor, you will inevitably run into the $20 wall and ceiling mounts from brands like Neewer or Amazon Basics. On paper, they look identical to the professional-grade steel mounts I’ve been testing. They both have a plate, an arm, and a 1/4-20 screw. However, the difference in materials is the difference between a stable shot and a shattered lens. These budget options are almost exclusively made of thin-walled aluminum or even pot metal. Under the weight of a full-frame camera and a fast zoom lens, the metal can actually warp. If you compare a professional steel mount to a Neewer wall boom arm, the steel version offers roughly triple the weight capacity and significantly better vibration dampening. For casual webcams, the budget route is fine, but for any serious creator rig, the extra $40 for steel is the cheapest insurance policy you can buy.
Is it worth the upgrade?
If you are currently using a desk-mounted C-clamp arm and find yourself constantly bumping the desk, then yes, the transition to a structural ceiling mount is a massive upgrade. Unlike the Neewer wall-mounted boom arms which often suffer from ‘droop’ over time due to their friction-based locking mechanisms, a professional steel rig with interlocking teeth stays exactly where you put it for years. You are moving from a ‘temporary’ accessory to a ‘permanent’ studio fixture. The upgrade isn’t just about weight; it’s about the psychological freedom of knowing your gear is locked into the house itself rather than clamped onto a piece of IKEA furniture.
#IMAGE_PLACE_HOLDER_D#
Why Professional Grips Still Choose C-Stands
Before you commit to drilling holes in your ceiling, you have to look at the industry standard: the C-Stand. Brands like Kupo and Matthews have dominated film sets for decades for a reason. A C-Stand with a boom arm gives you the same overhead capability as a ceiling mount but with one massive advantage—mobility. If you decide to change your studio layout, you just pick up the stand and move it. With a ceiling rig, you’re looking at patching drywall and repainting. However, the trade-off is the ‘footprint.’ A C-Stand’s legs take up a massive amount of floor space and are notorious for being trip hazards in small home offices. If your studio is smaller than 10×10 feet, the ceiling mount wins every time. If you have a sprawling warehouse space, stick with the flexibility of a Kupo Baby Stand.
SmallRig Options for Those Who Hate Drilling
If the thought of lag-bolting steel into your joists makes you nervous, SmallRig and Elgato offer high-end desk-pole systems that bridge the gap. These are significantly sturdier than the cheap spring-loaded desk arms but don’t require permanent modification to your home. Compared to the ceiling mount I’ve been analyzing, the SmallRig modular system is much faster to adjust. You can slide the camera up and down the pole in seconds. But even the best desk pole can’t eliminate ‘desk shake.’ If you type aggressively or move your mouse during a recording, that vibration travels straight up the pole to your camera. The ceiling mount remains the only true way to decouple your camera from your workspace. For those looking for the middle ground, check the current prices on B&H for the SmallRig Heavy-Duty Desk Mount to see if its 10-pound capacity meets your needs.
The Verdict on Stability vs Versatility
Choosing between a fixed ceiling rig and a mobile stand comes down to how often you change your ‘look.’ If you have found your perfect angle and plan to film there for the next year, the steel ceiling mount is the superior piece of studio gear. It provides a level of rigidity that no tripod or desk clamp can match. On the other hand, if you are still experimenting with lighting kits and camera reviews that require different perspectives, the permanence of a ceiling mount will eventually feel like a limitation. Most professional creators eventually end up with a hybrid setup: a permanent ceiling mount for the ‘main’ overhead shot and a few C-stands for the secondary microphone reviews and lighting. It’s about building a toolkit, not just buying a single product. Before you buy, make sure to check out our deep-dive reviews of the best C-stands for small spaces to see which workflow fits your creative style better.
The Reality of Going Overhead
After weeks of testing, it is clear that moving your camera to the ceiling is the single most effective way to eliminate floor clutter. However, it isn’t a perfect solution for everyone. Here is the breakdown of what works and what fails when you mount your gear to the house itself.
- Pro: Unmatched vibration isolation compared to desk-mounted arms.
- Pro: Reclaims precious floor space in tight creative environments.
- Pro: Professional aesthetics that make your studio look like a high-end production house.
- Con: Requires permanent drilling and some basic construction knowledge.
- Con: Heat pools at the ceiling, which can lead to thermal shutdowns.
- Con: Micro-adjustments are a massive hassle without a step stool or ladder.
Who Actually Needs This Rig
This setup is the holy grail for the solo creator working in a 5×5 foot corner studio where every square inch of floor space is at a premium. If you perform unboxings, top-down cooking tutorials, or daily live streams from a fixed position, the steel mount is a non-negotiable upgrade. It provides a level of consistency that tripods simply cannot match. On the other hand, if you are a renter or someone who likes to frequently experiment with new angles and lighting setups, skip the drilling. You would be much better off using heavy-duty stands that can hold your whole rig while remaining mobile.
Is the Stability Worth the Permanent Holes
The verdict is clear: if you value stability and floor space over mobility, a steel ceiling mount is a game-changer for your workflow. It eliminates the “tripod dance” forever and provides the confidence you need to hang expensive glass over your workspace. If you’re nervous about the installation, I highly recommend using the plywood hack for mounting heavy gear to drywall to ensure a safe, secure fit. Just be sure to solve the inevitable cable mess by using velcro cable management. While the adjustment process is objectively more tedious than using a fluid head, the peace of mind knowing your camera won’t sag mid-shoot is worth the effort. Final Verdict: 8.5/10 – A must-have for dedicated, fixed studios.
Check the latest prices on professional mounting hardware and compare them to the best budget overhead mounts to see which level of hardware your specific camera needs.