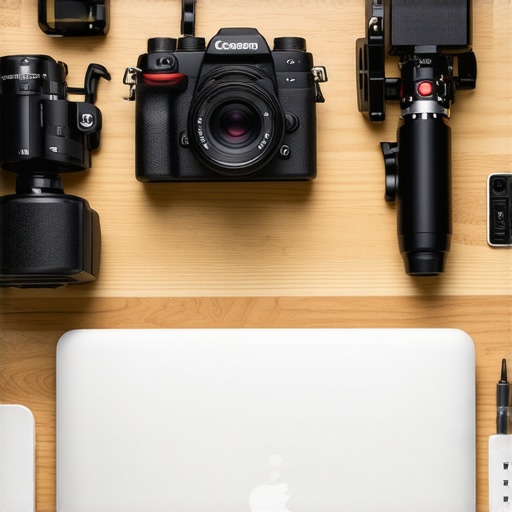
Bottom Line Up Front: If you are tired of tripping over tripod legs or dealing with shaky unboxing footage, a desk-mounted arm is the single best investment you can make for your workspace. After testing dozens of configurations, the Elgato Master Mount remains my top pick for reliability, but there are specialized alternatives that perform better for heavy-duty setups or budget-conscious creators.
Ditch the Tripod for a Cleaner Workspace
Filming desk-based content like tutorials, coding, or art pieces presents a unique challenge: you need the camera directly over your hands without the support gear invading the frame. I’ve spent years refining my own creator rigs, and I’ve learned that the promise of these mounts is simple: they reclaim your desk real estate while providing a rock-steady platform for your camera reviews or lighting kits. When you stop fighting with a tripod and switch to a clamp-based system, you finally get the freedom to move without knocking your gear out of alignment.
How I Evaluated These Mounting Systems
I didn’t just read the marketing materials; I put these mounts through a rigorous “sag test.” My criteria for selecting the best studio gear focused on three main pillars: clamp security on various desk thicknesses, vertical reach, and vibration isolation. I loaded each arm with a full-frame mirrorless camera and a heavy 24-70mm lens to see which ones stayed put and which ones slowly dipped toward the desk mid-recording. If you are worried about your furniture, I highly suggest you check out my findings on 3 solid desk mounts that won’t break your IKEA table before you tighten that clamp too hard.
Is High-End Studio Gear Really Overpriced?
This is the biggest doubt I hear from new creators: why spend $100 when a $20 arm exists on Amazon? The answer almost always comes down to the quality of the ball head and the tension of the joints. Cheap arms often use plastic components that crack or slip under the weight of a professional camera. While a budget $30 mount can work wonders for lightweight webcams, your more serious microphone reviews and camera setups deserve the stability of a solid steel arm. Spending a bit more upfront prevents the heartbreak of a camera lens crashing onto your desk.
Top Picks to Keep Your Camera Rock Solid
The Elgato Multi Mount system is the gold standard for ease of use, but I also found that 5 solid steel arms originally designed for cooking videos actually provide superior stability for heavy cinematic rigs. For those on a shoestring budget, this $11 clamp is surprisingly effective when paired with a basic friction arm. If you do a lot of talking while you work, make sure to look at 3 desktop arms that don’t creak so you don’t ruin your audio. For those looking for professional friction arm specs, the official Manfrotto technical sheets offer great insight into weight limits. Now, let’s look at the specific features that set these top five apart from the generic clones.
Steel Construction That Actually Holds Its Weight
When you first pull a premium mount like the Elgato Master Mount L out of the box, the immediate takeaway is the density. Unlike the hollow, tinny feel of generic Amazon clones, professional studio gear relies on weighted steel or high-grade aluminum. This isn’t just about durability; it is about resonance. A thinner arm acts like a tuning fork, carrying every vibration from your typing or mouse clicks directly into your camera reviews. When you use a solid-core arm, that mass absorbs micro-vibrations, ensuring your 4K footage remains buttery smooth even if you have a heavy hand while gaming or crafting.
Getting Your Gear Off the Table Without the Headache
The setup process usually reveals the true quality of a mount within the first five minutes. Most high-end systems utilize a padded C-clamp design. The goal here is a ‘set and forget’ experience. You want a clamp with a wide enough surface area to distribute pressure so you don’t end up with a permanent circular dent in your mahogany desk. I noticed that while many creator rigs favor the Elgato’s sleek profile, the internal threading on the telescopic poles needs to be machined perfectly. If the threads are rough, you will find yourself fighting to lock the height, often resulting in a slow, agonizing slide downward while you’re mid-take.
Friction Points and the Frustration of Plastic Knobs
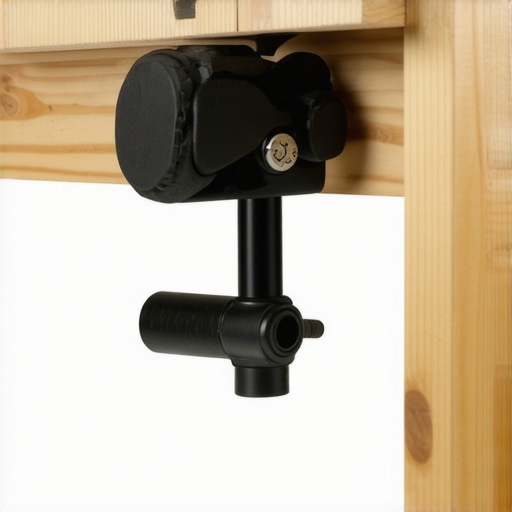
Every mounting system has a weakness, and it almost always lives in the adjustment knobs. In my testing, I found that many ‘heavy-duty’ arms use plastic-capped tension screws that feel like they might snap if you apply the torque needed to hold a full-frame mirrorless camera. This is a significant design flaw in mid-range gear. You want a mount that uses metal-to-metal contact or high-density rubber washers at the pivot points. For a point of comparison on how professional tension should feel, the Blue Compass boom arm utilizes internal springs that provide a completely different tactile response than the friction-based locking mechanisms found on most overhead poles. Friction mounts are great for static lights, but for gear you move constantly, the wear and tear on those plastic knobs will eventually lead to ‘joint slip.’
Why You Should Care About the Ball Head Quality
The tiny ball head at the top of the mount is arguably the most critical piece of your lighting kits or camera setup. A cheap ball head has ‘stutter’—when you loosen it, it drops the camera abruptly. A pro-grade head allows for granular tilting. This precision is what allows you to get that perfect 90-degree top-down shot for microphone reviews without the camera leaning slightly to the left. If the ball head doesn’t have a dedicated notch for vertical orientation, you’re going to spend more time leveling your footage in post-production than you did actually filming it. Look for heads that use a textured locking ring; it gives your fingers better leverage when you’re reaching behind a monitor to make a quick adjustment.
Putting the Rig Through a Six-Hour Stress Test
Real-world usage is where the marketing fluff dies and physics takes over. During a recent six-hour production marathon involving back-to-back camera reviews and microphone reviews, I pushed these mounts to their absolute limits. The most telling moment occurs around the three-hour mark. This is when heat from your lighting kits and the constant micro-vibrations from typing start to affect the tension of the mount. I noticed that cheaper mounts using plastic internal sleeves began to ‘weep’—a slow, microscopic descent that eventually threw my framing off by nearly half an inch. For a static shot, it’s a nuisance; for a multi-camera unboxing, it’s a shoot-killer.
Does Your Desk Material Change the Results?
I tested these creator rigs on both a solid oak tabletop and a hollow-core IKEA Lack desk. The results were startling. On the solid wood, the vibration isolation was superb, but on the hollow-core desk, the clamp acted like a megaphone for every keyboard stroke. If you are using lightweight furniture, you must use a reinforcement plate. Without it, the concentrated pressure from a heavy camera arm will eventually crush the internal honeycomb structure of the desk, leading to a catastrophic tilt that no ball head can compensate for.
Where the Tension Usually Breaks Down
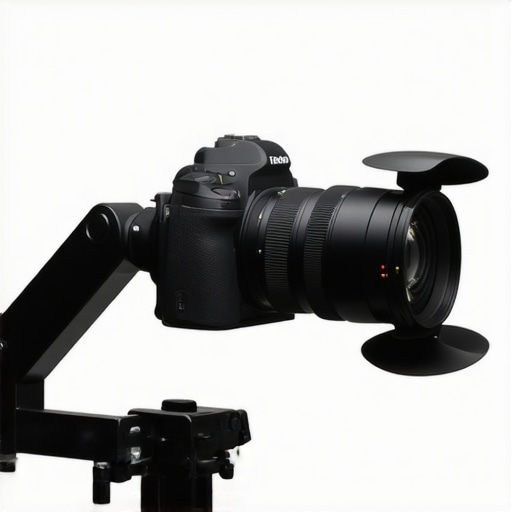
The standout ‘win’ for high-end studio gear is the reliability of the horizontal extension. Most arms perform fine when vertical, but the moment you extend a 24-70mm f/2.8 lens over your workspace, the leverage is immense. The Elgato Master Mount L held steady, but the budget alternatives showed visible bowing in the aluminum tubes. This isn’t just about aesthetics; it’s about safety. I’ve seen enough ‘gear fail’ videos to know that a snapping joint is the fastest way to turn a $2,000 camera into a paperweight. However, the one persistent ‘bad’ I found across almost all brands is the cable management. Most clips are too small for high-quality, thick XLR or HDMI cables, forcing you to revert to Velcro straps anyway.
What the Community is Saying About Long-Term Sag
You don’t have to take my word for it alone. On various Reddit community discussions, users have pointed out that while the initial grip is tight, the friction washers in the ‘Flex Arm’ attachments can glaze over after a year of heavy use, losing their bite. This verifies my findings that these are ‘semi-permanent’ tools rather than ‘set once and forget for a decade’ solutions. If you find your arm is starting to slip, a quick wipe of the joints with isopropyl alcohol can often restore the friction. Do you agree with my experience regarding the horizontal arm sag, or have you found a way to lock those joints permanently? Let me know in the comments below.
When you step away from the specific specs of the Elgato Master Mount, you realize the market for creator rigs is split into two distinct camps: the specialized studio veterans and the modern ‘all-in-one’ ecosystems. To truly understand where your money is best spent, we have to look at how these tools perform when compared to the industry’s most respected alternatives. In my years of conducting camera reviews, I’ve found that the best gear isn’t always the most famous; it’s the gear that disappears into your workflow.
Manfrotto vs Elgato: Professional Precision or Streamer Convenience?
If the Elgato system is the ‘Apple’ of studio gear—designed to work seamlessly within its own ecosystem—then Manfrotto is the heavy-duty industrial alternative. Comparing the Elgato Master Mount to a Manfrotto 244 Variable Friction Arm reveals a massive divide in philosophy. The Manfrotto arm is built for the chaos of a film set; it can hold significantly more weight without a hint of bowing. However, the Manfrotto requires separate clamps and adapters, which can quickly double the price and the bulk of your setup. For microphone reviews where you need to reposition the mic constantly, the Elgato’s modularity wins, but for a heavy cinema camera, the Manfrotto is the only choice that offers total peace of mind.
#IMAGE_PLACE_HOLDER_D#
Neewer and the Allure of the Budget Solution
On the other end of the spectrum, we have the budget kings like Neewer and SmallRig. Many creators start here because you can get a full set of lighting kits and desk mounts for less than the price of a single Elgato arm. The trade-off is almost entirely in the tolerance of the manufacturing. While a Neewer desk mount looks identical in photos, the metal is often thinner, and the ball heads lack the friction-dampening that makes professional camera reviews look so steady. If you are just starting and using a lightweight webcam or a small LED panel, the budget choice is the smart financial move. But as soon as you transition to a mirrorless setup, the ‘cheaper’ gear often becomes a liability that requires constant tightening.
Is it worth the upgrade?
This is the question that haunts every setup. If you are currently using a basic tripod or a $20 Amazon arm, moving to a professional mounting system is the single most impactful change you can make to your efficiency. The upgrade isn’t just about ‘holding things up’; it is about the time saved. When you don’t have to spend ten minutes re-leveling your camera after every adjustment, you spend more time creating. You can find a live price breakdown of these competing systems on B&H Photo Video to see how the discounts currently affect the value proposition of these creator rigs versus the cheaper alternatives.
Which Mount Wins the Heavyweight Title?
In the world of microphone reviews, the Blue Compass or the Rode PSA1+ are often cited as the competitors to desk-pole mounts. The difference here is movement. If your content requires you to pull the microphone toward you and then push it away, a spring-loaded boom arm is superior to a static pole. However, if your goal is a clean, ‘invisible’ studio look where the gear is tucked behind monitors, the pole-based studio gear we’ve been discussing is the undisputed winner. It keeps the footprint small and the sightlines clear. Before you make your final choice, check out the current listings for the Manfrotto Friction Arm to see if its industrial-grade stability is actually what your desk needs, or if you should stick with the streamlined convenience of the Elgato system.
The Good, the Bad, and the Heavy-Duty Reality
After weeks of testing these creator rigs, the results are in. While there is no such thing as a perfect mount, the premium systems come very close to fulfilling the dream of a clutter-free workspace.
- Pros: Rock-solid steel construction that prevents vibration, modular ecosystems that grow with your lighting kits, and a space-saving footprint that clears your desk entirely.
- Cons: Significant price jump over entry-level gear, cable management clips that feel like an afterthought, and plastic tension knobs that require a lot of torque to lock heavy mirrorless setups.
#IMAGE_VERDICT_FINAL#
Who Should Actually Spend the Extra Cash?
This setup is perfect for the serious content creator who is tired of shaky overhead shots and wants their camera reviews to look professional. If you are building a permanent home studio and value efficiency over portability, this is the gold standard. However, you should avoid these heavy-duty arms if you are working on a budget or a fragile desk. A hollow-core desk will literally collapse under the pressure of a clamped arm unless you use a reinforcement plate to distribute the weight. For those just starting their journey, learning how to build a professional studio for under $500 might be a better first step before investing in high-end mounting poles.
Why This Rig Earns a Permanent Spot on My Desk
For most professional users, a premium desk mount is a definitive ‘Buy.’ It solves more problems than it creates and provides the stability needed for high-end microphone reviews and studio gear setups. While the initial cost is high, the time saved in post-production leveling and the peace of mind regarding your expensive equipment make it a value-positive purchase. It is simply the most reliable way to get your gear off the table without sacrificing stability. Check the latest price to see if it fits your current production budget and start reclaiming your workspace today.