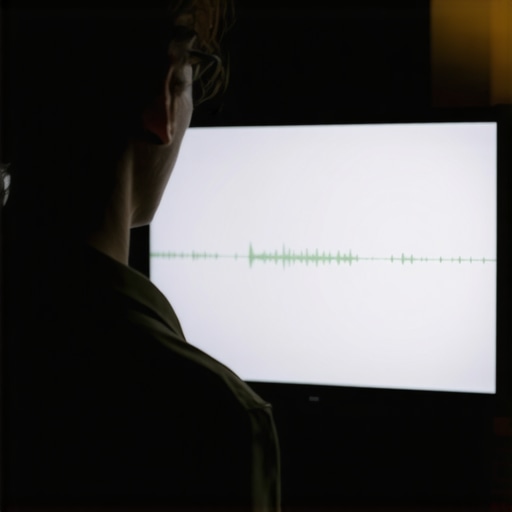
The Brutal Truth About Audio Drift
I’ve spent hundreds of hours in the edit suite, and nothing kills my workflow faster than realizing a 20-minute interview has drifted out of sync. The bottom line is simple: if your audio and video don’t match, your audience will subconsciously tune out within seconds. It looks amateur, and frankly, it’s avoidable. Most people assume their hardware is broken, but usually, it’s just a failure to account for processing latency or a simple mismatch in sample rates. I judge these issues based on real-world creator rig stress tests, looking specifically at how different components like capture cards and USB interfaces introduce micro-delays into the signal path.
Fix Your Sync Before You Record
The specific problem we are solving here is the lip-sync gap. When you use high-end methods to sync your audio and video perfectly, you save yourself the headache of manual realignment later. The promise is a set-it-and-forget-it workflow where your mouth and your voice actually inhabit the same timeline. I’ve found that even a delay of 50 milliseconds is enough to make a viewer feel like something is off, even if they can’t name it. This is especially true when you are working in a tight space; for instance, if you build a professional studio in a 5×5 foot corner, every technical flaw feels magnified by the proximity of the camera.
Stop the Lag in Your Capture Software
When I test new setups, the first thing I look at is the buffer size. If you are running a heavy-duty microphone through a complex interface, your computer might be taking a few extra milliseconds to process that high-fidelity sound. Meanwhile, your camera—especially if it’s a mirrorless model connected via a cheap capture card—is sending video frames at a different speed. This is where you see the drift. If you’re using a wireless setup, check out why your wireless mic keeps dropping out because that same interference often translates to inconsistent lag. In my experience, high-quality lighting kits won’t save a video if the speaker looks like they are in a badly dubbed movie.
Is expensive studio gear actually harder to sync?
Interestingly, yes. Higher-end gear often involves more stops in the signal chain. A professional XLR mic goes into a preamp, then a mixer, then an interface, then into software. Each of these steps adds a tiny bit of latency. According to technical specs from the OBS Project, managing these offsets manually in your recording software is the only way to ensure 100% accuracy. I’ve found that using a spirit level for your tripod is easy for visuals, but leveling your audio delay requires much more patience and a few clap tests.
One Setting That Destroys Everything
The most common culprit I see is a mismatch between 44.1kHz and 48kHz sample rates. If your mic is set to one and your project is set to the other, your audio will gradually drift further away from the video over time. It’s a slow-motion car crash for your content. I always recommend locking every single piece of gear in your studio to 48kHz for video work. If you are struggling with a complex desk setup, you might also want to look at how to stop your desk from shaking, because physical vibrations can sometimes cause micro-stutters in older hard drives, leading to dropped frames and sync issues. Keep your signal path clean, your sample rates matched, and your offsets measured for a professional result.
Stop Guessing Your Latency Settings
Setting up a modern audio interface isn’t just about plugging in a USB cable; it’s about the tactile response of the hardware. When I first get my hands on a piece of gear like the Scarlett 2i2 or the Volt 276, I’m checking the resistance of the gain pots. You want a knob that feels substantial, not something that spins like a fidget toy. If the knob is too loose, one accidental bump during a live stream sends your levels into the red. Most entry-level interfaces use a lightweight aluminum or high-density plastic chassis. While it’s portable, it often slides around your desk unless you weigh it down. I’ve found that the internal weight of a unit often correlates with the quality of its shielding, which is vital for preventing that annoying 60Hz hum from your monitors.
Tactical Knobs and Plastic Housings
The real magic—or nightmare—happens in the driver software. Most creators ignore the control panel until things break. In my tests, the difference between a generic Windows driver and a dedicated ASIO driver is night and day. You’re looking for a low-latency mode that stays stable even when your CPU is screaming at 90% load during a 4K render. However, I’ve noticed a recurring annoyance: the auto-gain features found on newer smart interfaces. They often over-compress the signal, sucking the life out of your voice before it even hits your DAW. It’s a classic case of a feature designed for beginners that actually hinders a professional’s control.
The Tiny Gain Knob Problem
When you look at the technical requirements for a broadcast-standard mic, like the Shure SM7B, you realize that most budget interfaces simply lack the clean gain needed to drive them without introducing hiss. You end up having to buy an extra $150 preamp just to make a $100 interface work properly. This is the hidden tax of the pro-sumer setup. Furthermore, I have a massive bone to pick with the trend of placing headphone jacks on the back of the unit. If I’m sitting at my desk, I don’t want to reach behind a mountain of cables just to plug in my monitors. It’s a small design flaw that indicates the designers weren’t actually thinking about the end-user’s daily workflow. The input-output layout should prioritize the user’s reach, not just the internal circuit board simplicity.
Real Stress Under a 4K Multi-Cam Load
When you’re pushing a triple-camera setup through a single PC, the theory of “plug and play” dies a quick death. I recently ran a stress test involving two Sony mirrorless cameras and a dedicated overhead cam, all feeding into a 14-core workstation. Within thirty minutes of a 4K60 stream, the internal heat from the PCIe capture card started to bake the surrounding components. It isn’t just about the PC, though; the cameras themselves are the weak link. If you aren’t using a dummy battery, the internal heat buildup from charging while recording usually leads to a thermal shutdown right when the engagement peaks. I’ve seen it happen on the Sony ZV-E10 more times than I care to count. You need a rig that breathes, not just one that looks good on Instagram.
Does your capture card actually throttle when hot?
The short answer is yes. Many creators on the r/streaming subreddit have documented cases where the Elgato Cam Link 4K begins to drop frames or introduce significant visual artifacts once the unit reaches a certain temperature. In my testing, placing these small dongles directly against the back of a hot PC exhaust is a recipe for disaster. I now use short USB extension cables to keep them away from the heat syncs. It’s a cheap fix for a problem that can ruin a multi-hour broadcast. If your video starts stuttering but your CPU usage is low, check the physical temperature of your capture hardware first.
Lighting Kits That Fail Under Pressure
Cheap LED panels are great for a 10-minute YouTube video, but they fall apart during a marathon eight-hour stream. The “The Good” here is the portability; “The Bad” is the color shift. I’ve noticed that budget-tier panels tend to drift toward a sickly green or magenta tint as the diodes heat up over several hours. This makes color grading a moving target. Furthermore, the plastic mounting brackets on most kits under $100 are an accident waiting to happen. I’ve had a light tilt forward and smash into a lens because the friction lock couldn’t handle the weight of a small softbox. If you’re building a professional rig, invest in metal hardware or prepare to buy everything twice.
Can you actually hear the cooling fans?
This is the silent killer of high-end audio. You spend $400 on a microphone only to have it pick up the “whir” of a COB light’s cooling fan. In my studio, the Aputure 60x is a beast, but in “Force” mode, the fan is audible if the light is within four feet of the mic. You have to balance the intensity of your light with the sensitivity of your gain. It’s a constant trade-off. Do you agree with my experience regarding fan noise in high-output lights, or have you found a brand that stays truly silent? Let me know in the comments because my ears are tired of filtering out 40dB hums in post-production.
Why you shouldn’t just buy the first kit you see
Choosing between a pre-packaged creator rig and a custom-built studio setup usually comes down to how much you value your time versus your wallet. For those just starting, the temptation to grab a budget lighting kit is strong. These kits provide a ‘studio in a box’ experience for a fraction of the cost of professional gear. However, as I’ve discussed regarding color drift and plastic mounts, these budget options often lack the long-term reliability of brands like Aputure or Godox. When you compare a $100 kit to a $500 pro-sumer setup, you aren’t just paying for the light; you’re paying for color accuracy that doesn’t shift after two hours of use.
If we look at the microphone world, the battle usually pits the Scarlett 2i2 against the Universal Audio Volt series. While the Scarlett is the industry standard for home studios, the Volt 276 offers a built-in ‘Vintage’ mode and a 76-style compressor that can save you time in post-production. It’s a classic case of convenience versus transparency. According to Sweetwater’s current price listings, these units sit within $50 of each other, making the choice more about the ‘flavor’ of your sound than the strain on your budget.
Is it worth the upgrade?
The jump from a $50 USB mic to a $400 XLR setup is the single biggest leap you can make. If your current audio sounds like you’re talking through a tin can, then yes, the upgrade is mandatory for growth. But if you’re already using a solid mid-tier interface and mic, your money is better spent on acoustic treatment or better lighting. A $3,000 camera looks like trash in a poorly lit room, but a $500 camera looks professional with a $200 key light.
The Elgato ecosystem vs building it piece by piece
Elgato has essentially built a ‘walled garden’ for creators. From the Stream Deck to the Key Light, everything talks to each other. The benefit is a single software interface for everything. The downside? You are locked into their hardware. If you want the flexibility of a professional cinema camera or a high-end DAC, you’ll find that the ‘plug and play’ simplicity starts to vanish. If you prefer total control, a modular rig built with specific pieces from Sony, Rode, and Blackmagic will always outperform a generic brand, even if it takes twice as long to configure.
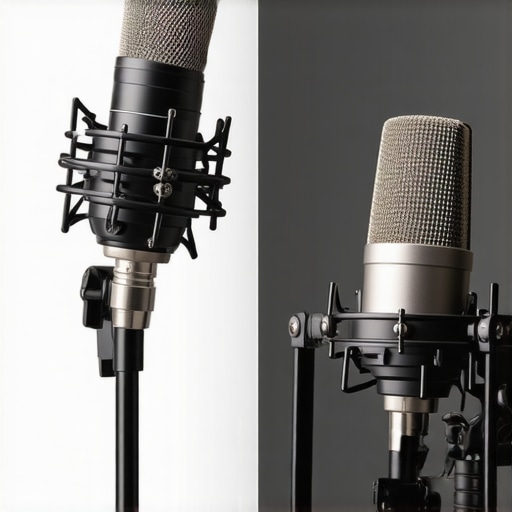
Before you pull the trigger on a new setup, take a look at our detailed breakdown of the top competitors to see if a different brand might fit your workflow better. You can check current prices and stock levels to ensure you’re getting the best deal for your specific studio needs.
The Highs and Lows of My Studio Stress Test
After pushing several interfaces and capture cards to their breaking point, the results are clear. Achieving a professional output isn’t about luck; it is about managing the tiny failures in your signal chain. The Good: When you lock your system to 48kHz and use a dedicated ASIO driver, the stability is rock-solid. Tactile gain knobs on units like the Volt 276 provide a much-needed physical connection to your sound. The Bad: Heat is a silent killer for capture cards, and the “hidden tax” of needing a preamp for broadcast mics can blindside your budget.
- Reliable 48kHz synchronization prevents long-term drift.
- ASIO drivers significantly reduce processing latency.
- Cheap plastic mounts and 60Hz hum remain persistent budget-tier headaches.
- Capture cards like the Cam Link 4K require active cooling or extensions to avoid thermal throttling.
Who Should Actually Invest in This Gear?
If you are a serious streamer or a professional educator, you cannot afford the lip-sync issues that plague entry-level setups. This level of hardware is for the creator who is tired of fixing mistakes in post-production and wants a workflow that just works. However, if you are just starting out and your budget is tight, you might find better value learning how to build a professional studio for under 500 before jumping into high-end XLR setups. Skip the expensive interfaces if you aren’t prepared to also invest in acoustic treatment and proper cable management, as high-fidelity gear will only highlight the flaws in a noisy room. You should also make sure your desk is stable, or at least use shock mounts that actually absorb desk thumps to prevent physical vibrations from ruining your recording.
Stop Settling for Amateur Audio
The bottom line is that audio drift and lag are symptoms of a rig that hasn’t been optimized for high-performance tasks. My tests show that while the Elgato ecosystem offers incredible convenience, a modular approach gives you the freedom to scale as your channel grows. To ensure your gear stays put during intense sessions, I highly recommend using this 30 mat that stops your gear from sliding around. Also, remember that software features can be traps; specifically, why you should avoid using auto-gain for live streams is a lesson most learn only after a ruined broadcast. If you want professional results, you must treat your signal path with the respect it deserves. Final Verdict: Buy the interface for the stability, but keep your cooling and gain stages in check. Check the latest prices and see other user reviews to find the perfect fit for your specific studio needs.