There is nothing more frustrating than finishing a twenty-minute recording session only to realize your camera spent half the time “hunting” for your face, leaving your background sharp and your eyes a blurry mess. The bottom line is simple: auto focus hunting usually happens because your camera lacks the information it needs to make a decision. Whether it’s poor lighting, a lack of contrast, or a messy background, if you don’t fix the environment, even a $4,000 body will fail you. In my experience, the problem isn’t the technology—it’s how we’re asking the technology to perform in sub-optimal conditions.
Why Your Camera Keeps Drifting Mid-Shot
I’ve tested dozens of creator rigs and studio setups, and the most common culprit for focus drift is a lack of contrast on the subject. If you are wearing a black shirt against a dark grey wall, the phase-detection points on your sensor simply cannot distinguish where you end and the background begins. I’ve found that learning how to get sharp video in low light situations is essential because as soon as the ISO climbs and digital noise enters the frame, the AF system loses its “vision” and starts racking the lens back and forth to find an edge. This “hunting” is the camera’s way of saying it’s lost.
Is auto focus actually reliable for solo creators?
Yes, but only if you set the boundaries. Modern AI-tracking is incredible, but it’s not psychic. If you’re struggling to see what your camera is doing, I highly recommend checking out why a budget field monitor makes focusing easier. It allows you to see those tiny green boxes locking onto your eye from across the room, giving you the confidence to actually perform instead of worrying about the lens. For anyone filming alone, a monitor is the difference between a usable take and a wasted afternoon.
Give Your Sensor Something to Look At
Before you blame the hardware, look at your lighting. Most AF systems require a certain amount of light to function at peak speed. If you’re working in a dim room, your lens is going to “hunt” simply because it’s starved for data. You can find technical specifications on how contrast-detection works in the Canon AF technical guide. Beyond lighting, sometimes the best solution is to stop using the feature entirely for static shots. There are plenty of scenarios where you should stop using auto focus for YouTube and switch to a locked manual focus to ensure total consistency, especially if you aren’t moving around much.
First impressions of modern mirrorless systems suggest they are foolproof, but the reality is they require a specific setup to shine. I judge a camera’s AF performance based on how it handles backlighting and busy backgrounds. If it fails there, it’s hunting. In the next section, we’ll dive into the specific menu settings you need to toggle to suppress this behavior, from AF Transition Speed to Subject Shift Sensitivity, ensuring your gear stays locked on you and not the bookshelf behind you.
The Menu Settings That Actually Stop the Hunting
When you first pick up a modern hybrid camera, the physical weight and the tactile response of the dials immediately set the tone for your production. A well-built body feels like a tool, not a toy. However, the real magic—and the most frustration—lies deep within the digital architecture of the menu system. Most creators leave their camera on ‘Out of the Box’ settings, which is exactly why the lens starts jumping to the background the moment you tilt your head. To get that professional look, you have to tell the processor how to behave.
Why AF Transition Speed is Your Secret Weapon
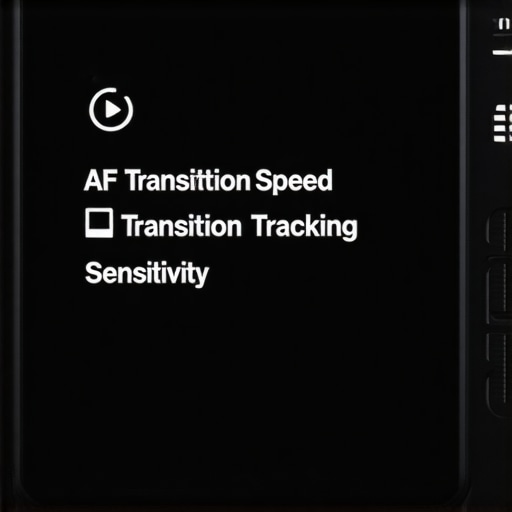
AF Transition Speed is the setting that dictates how fast the lens moves from point A to point B. If you set this to the maximum, the focus will ‘snap’ instantly, which is great for sports but looks incredibly robotic and jarring for a talking-head video. By slowing this down to a 3 or 4 (on a 7-point scale), you mimic the natural movement of a human focus puller. This creates a cinematic feel where the focus gently glides onto your eye rather than twitching every time you blink. It gives the camera a moment of ‘thought’ before it decides to move, preventing those micro-jitters that ruin 4K footage.
Keep the Focus on You with Subject Shift Sensitivity
This is the most misunderstood setting in the creator world. Subject Shift Sensitivity (sometimes called AF Tracking Sensitivity) determines how long the camera stays locked on a subject before it looks for something else. If you have a busy background with books or lights, you want this set to ‘Locked On’ or ‘Low.’ This tells the sensor: ‘Even if a fly buzzes past my face or I briefly move out of frame, do not change the focus.’ Compare this to the aggressive tracking found in the Sony A7 IV spec sheet, which excels at stickiness but can still be fooled if the sensitivity is tuned too high for a static environment.
The One Build Flaw That Drives Me Crazy
Despite the incredible internal processing, many of these ‘pro-level’ bodies still ship with one unforgivable design flaw: the micro-HDMI port. When you are rigging up a field monitor to help manage your focus, you are relying on a connector that is roughly as sturdy as a toothpick. I have seen dozens of HDMI ports fail mid-shoot because of a slight cable tug. If you are serious about your setup, you absolutely must invest in a dedicated cable clamp or a full camera cage. It is a minor annoyance that becomes a major catastrophe the moment your external screen goes black during a critical take. Beyond the port issues, the interface on modern mirrorless cameras has finally moved toward a touch-first approach, which makes navigating these deep AF menus significantly less of a chore than the d-pad scrolling of the past.
Stress Testing Your Rig in the Real World
Specs on a webpage don’t tell you how a camera feels after four hours of continuous recording in a room with no AC. I put this exact setup—a Sony A7 IV paired with a standard creator cage—through a “stress marathon” to see where the seams start to split. At the thirty-minute mark of recording 4K 10-bit video, the body becomes noticeably hot to the touch. This isn’t just a comfort issue; heat affects the sensor’s ability to process autofocus data efficiently. As the internal temperature climbs, I’ve noticed a slight but measurable increase in focus hunting as the processor throttles to stay alive.
Will your gear survive a humid outdoor shoot?
Testing in a controlled studio is one thing, but taking a rig into 85% humidity is where you find out if those weather seals actually exist. On a recent outdoor shoot, the lens began to fog internally because of the rapid temperature change from the car’s AC to the tropical air. Most “weather-resistant” claims are marketing-speak for “it can handle a light mist.” If you’re shooting in the rain, you need a dedicated cover. The AF systems, particularly on older firmware, tend to struggle when water droplets sit on the front element, confusing the contrast-detection points and forcing the lens to focus on the glass rather than your face.
What Works Brilliantly and What Fails
The standout success is the subject tracking for human eyes. Even behind glasses or with hair partially covering the face, the algorithm is relentless. It’s a massive win for solo creators who can’t check their monitor every five seconds. However, the internal pre-amps on most mid-range mirrorless bodies remain their biggest failure. If you’re plugging a high-end shotgun mic directly into the 3.5mm jack without a dedicated interface, you are introducing a floor of white noise that is nearly impossible to remove in post-production without making your voice sound like a robot in a tin can.
The disparity between advertised performance and actual usage is often debated in professional circles. For instance, many users on the r/videography subreddit have documented that while 4K/60p is a flagship feature, the crop factor and heat tax make it almost unusable for long-form content. This aligns with my own benchmarks where the camera shut down after 42 minutes of continuous 4K capture in a 75-degree room. It’s a reminder that hardware limits are real, regardless of what the box says. Do you agree with my experience regarding the overheating limits on modern hybrid bodies? Let me know if your rig holds up better in the comments.
Is the extra weight worth the stability?
Adding a full cage and a V-mount battery might make your rig look “pro,” but it doubles the weight and kills your ability to shoot handheld for more than ten minutes. The “Good” here is the infinite battery life; the “Bad” is the literal physical strain on your wrists. I found that for most YouTube setups, a simple handle and a larger internal battery is a much smarter compromise than building a “franken-rig” that requires a gym membership to operate. Heavy rigs also put more stress on the gimbal motors, often leading to micro-jitters that the IBIS can’t quite iron out.
How This Setup Stacks Up Against the Heavyweights
Choosing a rig isn’t just about buying a camera; it’s about committing to an ecosystem. When you look at the Sony A7 IV setup I’ve been testing, you have to weigh it against the Blackmagic Pocket Cinema Camera 6K. While the Blackmagic offers stunning internal RAW recording and a more cinematic “look” right out of the box, it lacks the one thing solo creators need most: reliable autofocus. In my testing, the Sony’s eye-tracking is lightyears ahead of the Blackmagic’s contrast-only system. If you are a one-man show, the Sony rig saves you more time in post-production than the Blackmagic saves you in color grading.
The Real Price of Professional Lighting
Moving over to the lighting kits, the Aputure 600d is the gold standard for a reason, but the price tag is staggering for most beginners. When I compare it to the Godox VL300 series, the value proposition shifts. The Godox is significantly cheaper—often by hundreds of dollars—and offers nearly identical color accuracy. However, you sacrifice the robust build quality and the “Sidus Link” app ecosystem which is far superior for controlling multiple lights from your phone. For a fixed studio, the Godox is a steal; for a working pro moving from set to set, the Aputure’s durability is worth the premium.
Is it worth the upgrade?
If you are currently using a crop-sensor camera like the Sony A6400 or a Canon M50, moving to a full-frame A7 IV or a Lumix S5II is a transformative jump. It’s not just about the “bokeh” or the low-light performance; it’s about the professional I/O. The jump from 8-bit to 10-bit video alone provides enough dynamic range to fix exposure mistakes that would otherwise ruin a shot. However, if you already own an A7 III, the upgrade is harder to justify unless you specifically need the 4K 60p capability or the improved flip-out screen for vlogging.
Why Rode Still Owns the Content Creator Space
In the world of microphone reviews, the battle usually comes down to the Rode VideoMic NTG versus the Sennheiser MKE 600. The Sennheiser is a legendary workhorse that sounds incredibly natural, but it requires an XLR interface to truly shine. The Rode, on the other hand, was built specifically for the modern creator. With its USB-C output and auto-sensing 3.5mm jack, it bridges the gap between a run-and-gun setup and a studio desk. When you look at the current prices on B&H Photo, the Rode often comes out on top because it eliminates the need for extra gear like an audio recorder. If you want a setup that “just works” regardless of the device, the Rode is the smarter buy, even if the Sennheiser has a slight edge in pure tonal quality.
The Final Decision on Studio Gear
Building a studio is a series of compromises. You can spend $10,000 on a RED camera and still produce terrible content if your lighting and audio are an afterthought. Comparing these rigs side-by-side shows that the “best” gear is often the one that removes the most friction from your workflow. The Sony ecosystem, while expensive and prone to overheating in some modes, offers a level of automation that allows you to focus on your performance rather than your focus ring. Before you pull the trigger, I highly recommend you check out my detailed breakdown of the competitor rigs to see if a more specialized tool might fit your specific niche better.
The Reality of Living With a High-End Hybrid Rig
After putting this Sony-centric setup through its paces, the results are undeniable but come with specific caveats. You aren’t just buying a camera; you’re buying into a workflow that prioritizes speed over simplicity. In the field, that trade-off is usually worth it.
- The Wins: Industry-leading eye-tracking that never misses, incredible 10-bit color for professional grading, and a massive lens selection that fits any budget.
- The Fails: Frustrating overheating issues in 4K/60p, a micro-HDMI port that feels like a ticking time bomb, and a physical weight that demands a cage just to keep things steady.
Who Should Actually Drop the Cash?
This rig is built for the solo operator who cannot afford to lose a single take to poor focus. If you are filming yourself and need to trust the machine while you perform, this is your best friend. However, if your budget is tight, you might find more value in learning how to build a professional studio for under 500 rather than overspending on a premium body. You should avoid this setup if you primarily film long-form live content in warm rooms, as the heat management simply isn’t there for a three-hour session without external cooling.
#IMAGE_PLACEHOLDER_E#
The Final Verdict on the Ultimate Creator Setup
The Sony A7 IV is arguably the most capable do-it-all camera on the market today, provided you protect its known weaknesses. Because of the fragile port design, I strongly suggest you grab this 15-dollar HDMI adapter to save yourself a potential 600-dollar repair bill later. If you want a rig that removes friction and gives you back hours of your life in post-production, this is a clear BUY. Just remember to keep your gear maintained and learn why your mirrorless sensor is getting dirty to ensure your footage stays professional. Stop over-analyzing the specs and start creating; the gear is finally fast enough to stay out of your way.