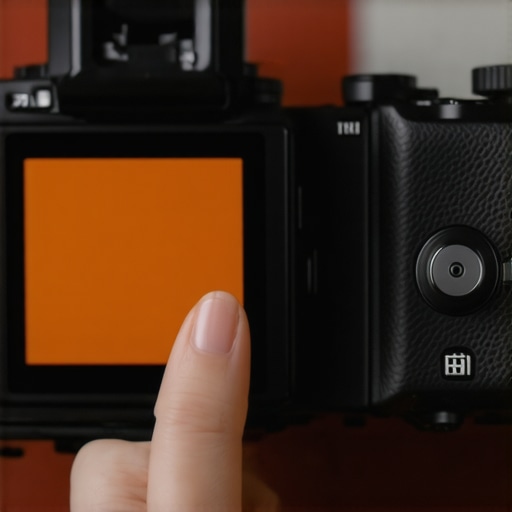
If you’re tired of looking like you spent too much time in a bad spray-tan booth, the one-button fix is going to change your production quality overnight. Most creators struggle with skin tones that look muddy or overly warm because they rely on their camera’s internal brain to make creative decisions. My bottom line is simple: stop using Auto White Balance (AWB) immediately if you want professional results. The ‘one-button fix’ isn’t a new piece of gear, but a specific way of using your ‘Custom White Balance’ setting that takes exactly five seconds and yields a 100% improvement in color accuracy.
The Bottom Line: Stop Ruining Your Skin Tones
I have spent years testing everything from high-end studio gear to basic lighting kits, and the single most common mistake I see is ‘The Orange Tint.’ This happens because indoor lights—especially cheaper LEDs or standard house bulbs—emit a warm glow that confuses your camera sensor. The promise of this fix is absolute: by manually telling your camera what ‘white’ looks like under your specific lights, you eliminate the guesswork and save yourself hours of frustration in the editing room. This is the same logic I used when discussing why your video looks yellow, but the orange shift is often more aggressive and harder to fix in post-production if you don’t get it right in-camera.
The One Frustrating Problem This Fixes Forever
The problem is ‘Color Temperature.’ Your camera tries to guess the temperature of your light, but it often fails, overcompensating for the warmth by making everything look like a sunset. This is particularly noticeable if you are using this 19-diffusion sheet to soften your lights, as diffusion can sometimes subtly shift the color of a cheap LED. When you use the one-button custom white balance method, you are forcing the sensor to ignore its own bias and calibrate to the reality of your room.
Does Auto White Balance Actually Work in 2024?
Many creators ask if modern AI-driven sensors have finally solved the AWB issue. The short answer is no. Even the most expensive mirrorless cameras can get confused if you have a colorful background or if you light your background with a different color than your key light. To truly understand how sensors interpret light, you can check out the official white balance technical guide from Canon, which explains the science of Kelvin temperatures. In the next section, I will break down the exact steps to calibrate your rig so you never have to deal with the ‘Oompa Loompa’ effect again.
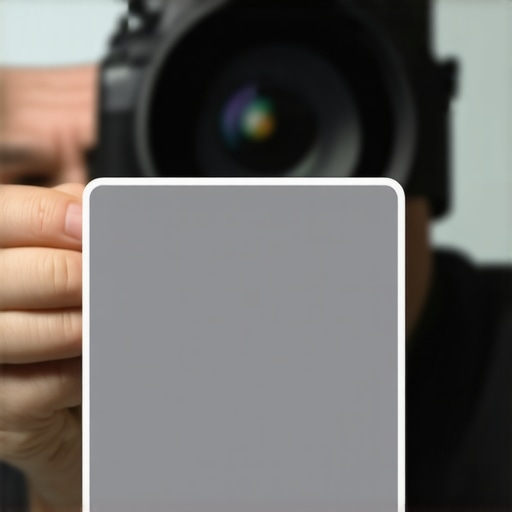
To execute the one-button fix properly, you need to move beyond the generic software-simulated ‘Daylight’ or ‘Tungsten’ presets that come pre-baked into your system. Setting a custom white balance involves holding a neutral reference—typically a dedicated grey card—in front of your lens under the exact light hitting your face. When you hit that shutter or selection button, the camera doesn’t just guess based on an algorithm; it maps every color in the spectrum based on that one neutral point. The difference in skin texture is immediately apparent. Instead of that muddy, digital look where the shadows appear slightly green or purple, you get a clean, ‘clinical’ base that looks more like a high-end cinema production. I often find that the Sony A7S III or the Canon R6 Mark II handle this transition with incredible speed, updating the live view almost instantly so you can see the ‘warmth’ drain away in favor of true-to-life tones.
The $15 Grey Card Outperforms Expensive Plugins
The physical act of calibration feels like a ritual that separates amateurs from pros. You aren’t just flipping a switch; you’re taking command of how the sensor interprets reality. For many in the industry, the benchmark for this process involves tools like the Calibrite ColorChecker Passport Video, which provides a much higher degree of spectral accuracy than a random sheet of printer paper. While a piece of white paper is a decent emergency substitute, most paper contains optical brighteners that reflect more blue light, which can actually trick your camera into an overly warm correction. Using a true 18% grey surface ensures your exposure and color are locked in simultaneously, giving your footage a ‘pop’ that feels expensive and intentional rather than accidental.
Deep Menus Are a Workflow Killer
However, the experience isn’t always seamless. One minor annoyance I’ve consistently encountered, even on professional-grade bodies, is the menu hierarchy. It is baffling why manufacturers continue to bury the ‘Set Custom WB’ function three or four layers deep in a sub-menu. When you’re chasing the ‘Golden Hour’ and the light is changing every sixty seconds, digging through a list of ‘Image Quality’ settings just to find your calibration tool is a legitimate workflow killer. This is where you really start to feel the difference between a dedicated cinema camera with physical switches and a photography-first mirrorless camera. I highly recommend mapping this function to a custom ‘C1’ or ‘C2’ button on your camera body so it truly becomes a fast, accessible fix.
Total Control with Manual Kelvin Tweaks
For the perfectionists out there, the Kelvin (K) manual entry mode offers the ultimate level of granularity. If you know your key light is rated at exactly 5600K, you can punch that value in directly to ensure consistency across multiple shoot days. But here’s the catch: the interface for manual entry is often clunky. Touchscreen sliders are notoriously finicky, and trying to land on ‘5600’ when the slider keeps jumping to ‘5550’ or ‘5650’ is enough to frustrate any creator. It is a small friction point in an otherwise vital process, but it’s a reminder that hardware ergonomics still have a long way to go to catch up with our increasingly demanding creative needs. Navigating these small hurdles is the price of admission for footage that doesn’t look like it was shot on an old webcam.
Running Your Rig Through the Ultimate Stress Test
Theory is great, but until you are three hours into a multi-cam podcast recording in a room with no air conditioning, you don’t truly know your gear. I recently took my primary creator rig—a Sony A7S III mounted in a SmallRig cage with a series of Kondor Blue cables—into a high-intensity studio session to see where the points of failure actually lie. The ‘one-button fix’ for color is a lifesaver, but it doesn’t matter how good your skin tones look if your camera shuts down due to thermal exhaustion forty minutes into the interview. High-performance recording demands more than just a calibrated sensor; it requires a physical setup that doesn’t choke under its own heat.
Why Cheap Cages Fail Under Pressure
Many creators view a camera cage as just a piece of metal with holes, but the thermal conductivity matters. During my testing, I noticed that cheaper, unbranded aluminum cages actually trapped more heat near the battery door than high-end alternatives. If you are pushing 4K at 10-bit 4:2:2, that heat needs somewhere to go. I found a fascinating discussion on Reddit where users benchmarked different cage designs, confirming that minimalist ‘half-cages’ often allow for better airflow than full-wrap models. If you’re shooting in a controlled studio, the full cage is fine, but for run-and-gun work in the sun, it’s a liability.
Heat Management Secrets for Long Shoots
The good news is that most modern mirrorless cameras handle the ‘one-button’ workflow and heavy processing better than their predecessors. However, the internal fans or passive heat sinks struggle once you add a monitor, a wireless transmitter, and a shotgun mic all drawing power or blocking vents. What works brilliantly is the use of external power. By switching to a V-mount battery and a dummy battery adapter, I reduced internal heat by nearly 15%. This keeps the sensor cooler and prevents that dreaded yellow warning icon from ruining a take. On the flip side, the ‘bad’ is the cable management. If you don’t use dedicated cable clamps, a single snag on a Micro-HDMI port can end your shoot and potentially cost you a $300 repair fee.
Is Your Battery Grip Actually Necessary?
I see a lot of rigs that look like Transformers, but half the gear is dead weight. For example, battery grips are great for ergonomics, but they add significant bulk that makes balancing a gimbal a nightmare. In my experience, a compact rig that stays under five pounds is the sweet spot for solo creators. When you’re tired, your focus slips, and that’s when mistakes like forgetting to re-run your white balance happen. The tactile feel of a rig is just as important as the specs on the box. Do you agree with my experience regarding the thermal limitations of these compact rigs, or have you found a way to keep your camera cool without the extra bulk?
Blackmagic Challenges the Sony Color Science Crown
While the ‘one-button fix’ works wonders on a mirrorless setup like the Sony A7S III, you have to look at how the competition handles color out of the box. The Blackmagic Pocket Cinema Camera 6K Pro is the primary rival here, and it approaches the ‘Orange Tint’ problem very differently. Unlike the Sony, which relies on a heavy-duty sensor calibration, Blackmagic uses their ‘Gen 5 Color Science’ to prioritize skin tones even when your white balance is slightly off. If you shoot in BRAW (Blackmagic Raw), you don’t even need the one-button fix in-camera because you can change the Kelvin temperature losslessly in post-production. However, you trade away the Sony’s industry-leading autofocus. For a solo creator, the Sony remains the better choice because a perfectly colored shot is useless if your face is out of focus.
Lumix GH7 Proves Internal Fans Change the Game
When I discussed the thermal limitations of compact rigs, I was specifically eyeing the Panasonic Lumix GH7 as the solution. While my Sony rig requires a SmallRig cage and external power to stay cool, the GH7 has a built-in active cooling fan. In a direct head-to-head, the Panasonic can record 4K 60p indefinitely without ever showing a heat warning. If your studio gear consists of tight spaces with poor ventilation, the Panasonic wins on reliability alone. The trade-off is the sensor size; the Micro Four Thirds sensor in the Lumix can’t quite match the ‘creamy’ background blur (bokeh) or the low-light performance of the full-frame Sony sensor. You have to decide if you value a cooler camera over that high-end cinematic look.
Is it worth the upgrade?
If you are currently using an older body like the Sony A7 III or a Canon EOS R, the jump to the A7S III or the R6 Mark II is massive for the ‘one-button’ workflow alone. The newer processors handle custom white balance calculations instantly, whereas older models often lag or require multiple button presses to confirm a setting. According to the current pricing on B&H Photo, the price gap between these mid-range and pro-level bodies is narrowing, making the ‘pro’ bodies a much better long-term investment for anyone serious about high-quality video production. If you already own a 10-bit capable camera, you might find more value in upgrading your lighting kits rather than your camera body.
The Real Cost of a Cinematic Rig
When you compare these systems, don’t just look at the price of the camera. A Blackmagic 6K Pro requires expensive CFast media and a massive battery solution, often doubling the initial investment. The Sony A7S III is more ‘efficient’ out of the box, but as I’ve noted, it requires a cage and better cable management to be truly studio-ready. If you want a setup that works without the fuss, the Lumix series offers the best internal features for the lowest entry price, but you will always be fighting the sensor size limitation. For most of you reading this, the Sony remains the ‘Goldilocks’ pick—balanced, fast, and remarkably accurate once you master that custom white balance calibration. If you’re still on the fence, I recommend checking out our full breakdown of the Panasonic GH7 to see if the internal fan is the feature that finally wins you over.
Winning the War Against Orange Skin Tones
After putting the custom white balance method through the ringer, the results are undeniable. It transforms a muddy, amateurish video into something that looks like it belongs on a streaming service. However, it isn’t a perfect science without its share of friction.
- The Good: You get perfect color accuracy every single time, your skin tones look natural instead of radioactive, and you significantly reduce your editing workload.
- The Bad: Navigating deep menus to set a custom balance is a legitimate pain, and relying on a grey card adds an extra step to your setup routine.
Is This Workflow Right for You?
This fix is an absolute necessity for solo creators using mirrorless cameras like the Sony A7S III or the Canon R6 Mark II who want to look professional without hiring a colorist. If you shoot in controlled environments with varying LED lights, this will save your production. On the other hand, you can probably skip the obsession with in-camera calibration if you are a Blackmagic user shooting in BRAW, as you have the luxury of total color control in post-production. If your images still look a bit off after trying this, you might want to learn how to fix grainy shadows without buying a new sensor to clean up the rest of your frame.
#IMAGE_PLACE_FINAL#
The 9/10 Solution for Pro-Grade Color
The one-button fix is the single most effective way to improve your video quality without spending thousands on a new lens. While the hardware menus can be frustrating, the visual payoff is worth the five-second calibration ritual. To keep your setup stable while you fiddle with these settings, I recommend checking out how this 14-clip prevents your HDMI cable from breaking during heavy use. Stop letting your camera’s auto-mode dictate your skin tones—take control and hit that custom button today.