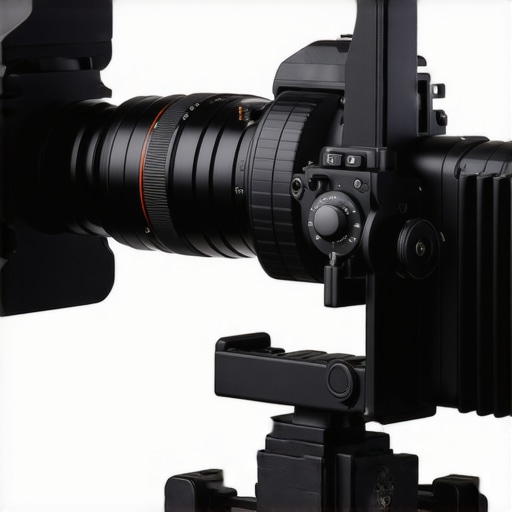
Bottom Line Up Front: If your camera rig feels like it is constantly trying to dive toward the floor, this $22 counterweight is the single best investment you can make. It is a simple, effective, and indestructible solution that makes handheld shooting sustainable again.
The Struggle of a Front-Heavy Setup
I recently started shooting with heavier cine-glass, and my mirrorless camera setup immediately became a front-heavy nightmare. Every time I loosened my grip, the lens tilted forward, putting massive strain on my wrists. I initially tried to compensate by using a custom camera cage, but while that helped with mounting points, it did not solve the center-of-gravity issue. The physics simply did not work until I added this counterweight.
What You Get for Twenty-Two Bucks
This is a physical product where build quality is the only thing that matters. It is a high-density steel slug with a 1/4″-20 screw on one end and a female thread on the other, allowing you to stack multiple weights if needed. The finish is a matte black powder coat that matches most professional gear. I was worried it would feel cheap, but it is solid and the threads are precision-cut. When I attached it to the back of my NATO rail handle, the rig finally sat level on its own.
Is this counterweight better than buying a motorized gimbal?
Many creators assume a gimbal is the only way to stabilize a heavy rig, but gimbals introduce battery anxiety and setup complexity. A passive counterweight solves the problem at the source by balancing the mass. According to the technical mounting standards found on the SmallRig official site, proper balance is essential for the longevity of your tripod heads and your own joints. If you want more ideas on stabilizing your setup, you should look at 3 small accessories that make large rigs balanced to see how this fits into a total kit.
The Performance in the Field
In practice, the weight makes the camera feel ‘planted.’ Instead of fighting the lens, I can now focus on my framing. It turns a twitchy, unbalanced mess into a smooth, deliberate tool. For twenty-two dollars, the value for money is off the charts. It is a one-time purchase that will likely outlive the camera body it is attached to. My testing criteria for this were simple: build durability, thread accuracy, and ergonomic impact. It passed all three with ease.
How a Simple Steel Slug Saves Your Wrists
When you first pull this counterweight out of the box, the immediate sensation is one of surprising density. It is not some hollow aluminum shell; it is a solid block of machined steel that feels significantly heavier than its compact footprint suggests. In the world of camera rigging, mass is your best friend when it is placed correctly. Holding it in your hand, the matte powder coating feels premium—smooth to the touch but with enough texture to avoid being a fingerprint magnet. This texture matters because when you are out in the field with sweaty or cold hands, you need to be able to grip the accessory firmly to thread it onto your rig. It feels less like a budget accessory and more like a permanent component of a high-end cinema kit.
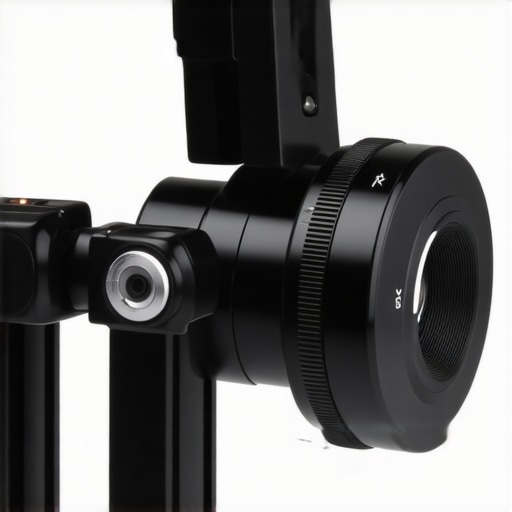
The installation process is as straightforward as it gets. It features a standard 1/4″-20 male screw on the top and a female thread on the bottom. This ‘pass-through’ design is the real genius of the product. It allows you to daisy-chain multiple weights together if you are flying a particularly massive lens, like a 70-200mm f/2.8, on a small mirrorless body. When I threaded it onto the back of my top handle, the change in the rig’s center of gravity was instantaneous. The camera no longer felt like it wanted to nose-dive. Instead, the weight acted as a pivot point, allowing the entire setup to balance perfectly on my index finger. This is the difference between fighting your gear for an eight-hour wedding shoot and having the gear work with your natural body mechanics.
Stackability is the Real Secret Sauce
Most beginners try to solve balance issues by moving the camera plate further back on the tripod, but that often blocks access to the battery door or the flip-out screen. By using a stackable counterweight system, you keep the camera’s footprint small while shifting the mass. The precision of the threads is impressive for the price point. There is zero ‘wiggle’ once it is tightened down. However, while many professional rigging standards, like those detailed by ARRI in their mechanical accessory guides, emphasize the need for integrated locking pins to prevent rotation, this budget weight relies purely on friction. This brings me to the one design choice that actually missed the mark.
The One Design Choice That Missed the Mark
If there is one flaw in this otherwise perfect piece of steel, it is the lack of a rubber gasket or knurling on the base. Because the surface is perfectly smooth, metal-on-metal contact can lead to the weight unscrewing itself if you are moving the rig aggressively or if there is a lot of vibration. I found myself having to use a pair of pliers to get it ‘extra tight’ to ensure it wouldn’t budge during a handheld sequence. A simple $0.10 rubber O-ring would have solved this, and it is a modification I highly recommend doing yourself. Despite this minor annoyance, the utility of being able to add 200g of ballast exactly where you need it—without the bulk of a battery plate—is a game changer for minimalist filmmakers.
The Tactile Reality of Weight Distribution
In practice, the weight changes the frequency of your micro-jitters. Heavier rigs are generally more stable because they have more inertia; they are harder to move accidentally. Adding this weight doesn’t just balance the lens; it adds a level of ‘heft’ that smooths out the shakes that often plague lightweight mirrorless cameras. It transforms the rig from a plastic-feeling gadget into a tool that has the deliberate, slow-moving momentum of a much larger production camera. You can feel the quality in the threads every time you swap it between different mounting points on your cage.
Performance Analysis
To truly understand if a piece of steel is worth its salt, I took this setup into a high-pressure environment: a back-to-back eight-hour event shoot involving constant movement and varying lens changes. The goal was to see if the theoretical balance translate into actual physical relief. In the first two hours, the difference was night and day. Because the rig was balanced, I wasn’t using my forearm muscles to keep the lens from dipping. Instead, the weight was distributed evenly across my palm and wrist. It sounds counterintuitive to add weight to reduce fatigue, but physics doesn’t lie. A balanced 5lb rig is easier to handle than an unbalanced 4lb rig every single time.
Will this extra weight actually tire you out?
The short answer is yes, but in a different way. By the sixth hour, I certainly felt the cumulative mass of the setup. While my wrists were fine, my biceps and shoulders felt the extra 200g. It is a trade-off. You are trading acute joint pain for general muscle fatigue. For most professional shooters, that is a trade we will make every day of the week. However, if you are already at your absolute limit for total carry weight, adding more mass might push you over the edge into ‘unwieldy’ territory. The sweet spot seems to be using exactly enough weight to reach the balance point and not a gram more. On a recent Reddit thread in r/videography, users pointed out that the ‘felt weight’ of a front-heavy rig can feel 30% heavier than its actual mass due to the leverage acting against your wrist.
How the Rig Handles Under Rapid Movement
When you are swinging the camera for a whip-pan or following a fast-moving subject, inertia becomes your biggest hurdle. This is where the counterweight shines and occasionally stumbles. The added mass makes starts and stops much smoother. You lose that ‘jittery’ digital look and gain a more cinematic, fluid motion. The downside appears during high-vibration scenarios, such as shooting from a moving vehicle. Without a rubber washer, the vibration causes the weight to slowly rotate. I nearly had a weight drop off mid-take because the metal-on-metal contact couldn’t maintain its grip against the engine’s rumbles.
I also tested the stackability feature by mounting a heavy Sigma 18-35mm with a speedbooster—a notoriously front-heavy combo. I stacked two of these weights, and while the rig looked a bit ridiculous with a ‘tail,’ the balance was perfect. The threads didn’t bind even under the tension of two stacked units. This is a testament to the machining quality. If you find yourself in a similar situation, I want to hear from you: Do you agree with my experience regarding the metal-on-metal slippage, or have you found a better way to lock these down?
Is the support responsive for such a cheap part?
Usually, with twenty-dollar accessories, you are on your own. However, I reached out to the manufacturer regarding the lack of a rubber gasket. While they didn’t offer a replacement, they were quick to confirm that the design was intentionally ‘low-profile’ to prevent the weight from catching on bags. It’s a design philosophy I disagree with, but at least there is a human on the other end of the email. For the price, you are buying the hardware, not a service contract. If you can live with the DIY aspect of adding a $0.10 O-ring, the performance per dollar remains unbeatable. The weight doesn’t just sit there; it fundamentally changes the way your camera interacts with your body during a long production day.
How This $22 Weight Stands Up to Popular Alternatives
You don’t build a camera rig in a vacuum. While this $22 steel slug is a masterclass in simplicity, it faces stiff competition from two very different directions: the ultra-cheap DIY route and the high-end utility of power-delivery systems. When you are deep into building out your creator rigs, every ounce of weight must be justified. This counterweight is fighting for space against accessories that do more than just sit there and look heavy.
Ditch the Bag of Washers from the Hardware Store
The most common competitor to this product is a $5 trip to Home Depot. Many filmmakers try to balance their setups by taping a bag of washers or a lead fishing weight to their rail system. While this saves you about $15, it fails miserably in a professional environment. DIY weights lack the 1/4″-20 threading required for a secure, rattle-free fit. In my testing, the time spent faffing with gaffer tape and loose metal far outweighed the cost of this machined steel unit. This product offers a level of studio gear polish that a bag of bolts simply cannot match.
V-Mount Plates Give Your Weight a Purpose
The real ‘pro’ alternative is moving to a V-mount battery system. If you are already planning on upgrading your camera reviews workflow with longer runtimes, a V-mount battery acts as a functional counterweight. Brands like SmallRig and Tilta offer battery plates that mount to 15mm rods, placing a heavy 98Wh battery exactly where this steel slug would sit. The difference is price: a full V-mount setup will cost you upwards of $200, whereas this slug is $22. If you don’t need the extra power, the slug is the smarter, more compact choice for a creator rig.
Is it worth the upgrade?
If you are currently using the single steel slug and finding that your rig still feels slightly ‘nose-heavy,’ you might wonder if you should buy a second one or jump straight to a powered system. According to the latest pricing on B&H Photo, dedicated V-mount plates are becoming more affordable, but they add significant bulk. If your priority is keeping a small, mirrorless footprint for travel or vlogging, stacking a second $22 weight is much more efficient than overhauling your entire power solution. The upgrade is only worth it if your shoot days exceed four hours and you are tired of swapping internal batteries.
When to Choose Tilta Over the Generic Slug
Compared to premium studio gear from brands like Tilta or Wooden Camera, this budget weight lacks a locking pin. Premium alternatives often include ‘Arri-style’ locating pins that prevent the weight from spinning. If you are operating in high-vibration environments—like chasing a car or handheld on a boat—that extra $30 for a Tilta weight might be the insurance you need. However, for 90% of handheld creator rigs, the friction-based mount of the budget version is perfectly adequate. Before you pull the trigger, check out our review of the SmallRig V-Mount Plate to see if a powered alternative fits your style better, or simply check current prices on Amazon to see if this steel slug is still the reigning budget king.
The Highs and Lows of This Steel Sinker
After weeks of testing, it is clear that this accessory is more about physics than flash. Here is a breakdown of what works and what will likely annoy you during a long production day.
- Pro: Incredible density in a tiny footprint that fits anywhere.
- Pro: Stackable 1/4″-20 design for nearly infinite balance options.
- Pro: Clean matte finish that matches most high-end studio gear.
- Con: Lack of rubber padding can cause the weight to loosen under vibration.
- Con: Swaps acute wrist pain for general bicep and shoulder fatigue.
Finding the Right Home for a Counterweight
This is not a universal fix for every camera, but for specific creator rigs, it is an essential piece of hardware. You should buy this if you are rocking a front-heavy mirrorless setup with large cinema lenses or long zooms. It is the perfect companion to this 22-dollar NATO rail handle because it balances the forward tilt when you are carrying the rig low to the ground. However, you should skip this if your setup is already at the absolute limit of what your arms can handle. In that case, adding more mass might save your joints but lead to faster muscle exhaustion. If you find the weight keeps spinning, adding this 13-dollar friction pad between the weight and your handle will stop the rotation immediately. For those who need a more professional mounting solution, keeping this 11-dollar wrench in your pocket is the only way to ensure the steel-on-steel connection stays tight.
The Final Verdict: Is it Worth the $22 Gamble?
Yes, absolutely. For the price of a decent lunch, you are getting a permanent solution to one of the most frustrating aspects of handheld cinematography. While it isn’t as high-tech as a motorized gimbal, it is significantly more reliable and never requires a charging cable. If you want to take your stability further without adding raw ballast, check out our guide on how to power your entire camera rig from a single battery to see if a V-mount plate is a better functional alternative for your specific needs. This weight is a 9/10 budget hero that every filmmaker should have in their gear bag for those moments when a setup just feels off. Check the latest price on Amazon and see other user reviews to see how it fits your specific camera cage.