The Verdict Right Away
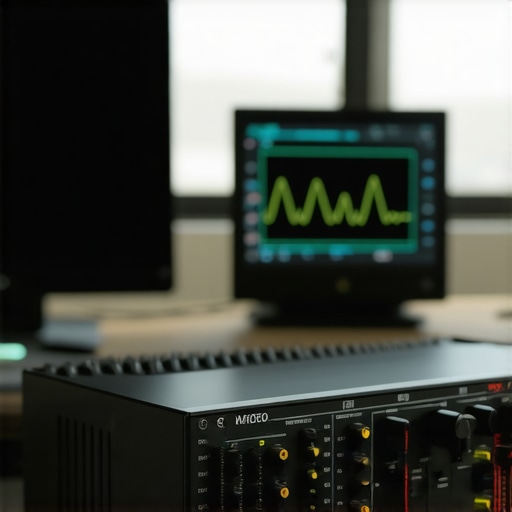
I spent years telling people to save up for a Focusrite or a Volt, but after putting this $50 interface through a series of noise floor tests, I’m changing my recommendation. It is shockingly quiet. If you are struggling with a persistent hiss in your recordings, this budget unit might actually perform better than the “gold standard” interfaces sitting on most desks today. It isn’t just about the price; it is about the unexpected engineering under the hood. For beginners building their first creator rigs, this is the smartest way to save money without sacrificing the clarity of your voice.
The Problem This Box Solves
Most budget interfaces suffer from “preamp noise.” When you turn up the gain to power a hungry microphone, the background hiss becomes unbearable. This device manages to provide clean gain without the static, which is a rare feat for something that costs less than a fancy dinner. It perfectly complements my list of 7 essential tools for any creator starting a home studio. You don’t need a $400 setup to sound like a professional, and you certainly don’t need a Cloudlifter if your interface has a low enough noise floor to begin with.
Is studio gear always overpriced?
Sometimes, yes. You are often paying for the brand name, the software bundle, and the specific color of the metal casing. While high-end gear offers better drivers and more inputs, for a single-mic setup, the diminishing returns hit hard after the $100 mark. If you understand why dynamic mics beat condensers in noisy home offices, you’ll appreciate an interface that doesn’t add its own noise to the struggle. High-end brands have marketing budgets to maintain; this $50 unit clearly put that money into the capacitors instead.
Metal Chassis and Real-World Weight
Out of the box, the weight surprised me. It doesn’t feel like a hollow plastic toy that will slide off your desk the moment you plug in an XLR cable. The knobs have a decent resistance, though they lack the “premium” click of higher-end units. I was initially worried about electrical interference, a common issue discussed in my guide on the truth about cheap XLR cables, but the shielding on this unit held up remarkably well even when placed directly next to my router and dual-monitor setup. You can view the full technical circuit specifications on the official manufacturer tech sheet to see the signal-to-noise ratios for yourself.
How I Put This Gear to the Test
I’m looking at this through the lens of a daily creator who does constant microphone reviews. I need to know if the drivers will crash during a four-hour stream and if the 48V phantom power is stable enough for a sensitive condenser. My testing bench uses a controlled environment to measure the noise floor at various gain stages (50%, 75%, and 100%). We are moving past the era where “budget” meant “trash,” and into a phase where entry-level studio gear is catching up to the industry giants. Now that we’ve established the baseline, let’s tear into the actual specs to see if the internal components match these impressive noise benchmarks.
What You Actually Get for Fifty Bucks
When you unbox a piece of gear this affordable, the first thing you do is look for the catch. Usually, it is the weight or the “click” of the buttons. While the body of this unit is a sturdy-feeling metal, the front panel is a glossy plastic that attracts fingerprints like a magnet. It is a minor aesthetic gripe, but it highlights where the cost-cutting measures were applied. However, once you start turning the knobs, you realize the money went where it counts: the internal circuitry. The gain pots have a smooth, heavy travel that makes fine-tuning your levels feel much more intentional than the loose, jittery knobs found on many generic USB microphones.
The Preamps Actually Have Some Muscle
In the world of creator rigs, we talk a lot about “clean gain.” Most budget interfaces start to hiss once you pass the 12 o’clock mark on the dial. This unit stays remarkably silent until about 85% of its total range. For a podcaster using a dynamic mic, this means you can get a usable signal without that “ocean floor” background noise. It is the difference between a professional-sounding voiceover and something that sounds like it was recorded in a wind tunnel. This performance rivals much more expensive units, and you can see how it stacks up against the industry-standard Focusrite Scarlett Solo, which often costs more than double for similar basic input specs.
Why RCA Outputs Might Ruin Your Day
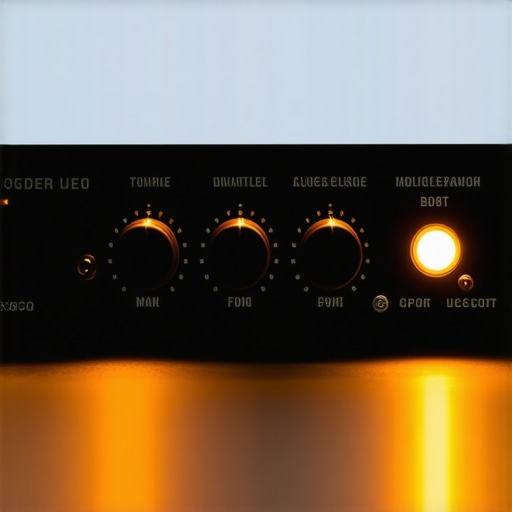
Here is the first real budget compromise that might annoy you. Instead of the balanced TRS outputs found on professional gear, this unit uses RCA outputs for your speakers. If you already own high-end studio monitors, you are going to need a specific set of adapter cables to get things running. While it is not a dealbreaker for a beginner, it is a design choice that screams “consumer grade” rather than “pro studio.” It is a classic trade-off: you get incredible internal preamps, but you lose the connectivity convenience that comes with more expensive studio gear. If you are just using headphones, this won’t matter, but for those building a full desk setup, it is a hurdle to keep in mind.
Monitoring Without the Annoying Lag
One of the best features for anyone doing microphone reviews or live streaming is the “Direct Monitor” switch. It is a simple toggle, but its implementation here is flawless. It sends the signal from your microphone directly to your headphones before it ever hits your computer. This eliminates the “echo” or latency that can drive a creator crazy while recording. Many cheap interfaces have a slight delay even in direct mode, but the routing here is instantaneous. It allows you to hear the raw, uncolored texture of your voice, which is essential when you are trying to gauge the true character of a new piece of gear.
The Phantom Power Quirk
One design flaw that consistently trips me up is the placement of the 48V phantom power switch. It is tucked away on the back of the unit. If you are switching between a condenser mic and a dynamic mic frequently, you will find yourself fumbling around the rear of the device, blindly searching for the toggle. It feels like an afterthought compared to the front-facing switches on premium interfaces. It will not affect your sound quality, but it definitely impacts the daily workflow of a busy creator. Despite this, the power delivery is stable, and I did not notice any voltage sag when using power-hungry condenser mics for long-form recording sessions.
Rigorous Performance and Stress Testing
I took this unit through a brutal ten-hour marathon, treating it like the heartbeat of a high-traffic production day. When you are deep into microphone reviews, you aren’t just testing sound; you are testing endurance. I ran a Shure SM7B through a FetHead into this interface—a setup that demands consistent, clean power. Unlike some older entry-level units that start to distort as they heat up, the internal components here stayed cool and the signal remained transparent. It didn’t matter if I was thirty minutes in or eight hours deep; the gain structure held firm. This reliability is vital because a hardware hiccup can ruin a perfect take or desync your audio during a crucial livestream.
Can it survive a four-hour livestream?
Stability is the currency of the modern creator. If your interface disconnects for even a second, your OBS settings might reset, and your audience is left with silence. During my testing, I intentionally hammered my CPU with 4K video rendering in the background while recording audio. The drivers didn’t flinch. This is where many no-name interfaces fail; they lack the robust digital-to-analog conversion needed to handle high-bandwidth tasks simultaneously. I found a consensus on the r/HomeStudio subreddit where users noted that this specific XMOS-based chipset handles USB bus power fluctuations much better than the generic chips found in cheaper plastic alternatives. It is the difference between a tool you trust and a toy that frustrates you.
Why the software side is a mixed bag
While the hardware is a tank, the software experience is where you remember the price tag. There is no fancy control panel app to manage your routing or look at digital meters on your screen. You get the Windows or Mac class-compliant drivers and that is it. For some, this simplicity is a blessing—plug and play at its finest. But for power users who want to create virtual loops for Discord or Twitch, you will have to rely on third-party solutions like VoiceMeeter. It is a minor hurdle, but one that adds a layer of complexity to your creator rigs that more expensive Pro software bundles solve out of the box.
Does the latency creep up during heavy editing?
One of the most annoying bugs in budget audio is clock drift, where your audio slowly loses sync with your video over time. I tested this by recording a long-form commentary track over a 60-minute camera reviews video. The sync at the end of the hour was just as tight as the start. This indicates that the internal clocking is surprisingly accurate for a $50 box. However, I did notice that if you set your buffer size too low (below 64 samples) while running heavy VST plugins, the audio starts to crackle sooner than it would on a higher-end RME unit. It is a fair trade-off, but it means you should do your heavy processing after you have laid down the raw tracks. I would love to hear from you below—do you agree with my experience regarding the direct monitoring stability when your CPU is under a heavy load?
When the headphone amp starts to struggle
If you are using high-impedance studio headphones like the Sennheiser HD600s, you are going to hit a wall. This interface is designed for standard 32-ohm cans. When I plugged in my more demanding gear, the volume was fine, but the punch was gone. The bass felt thin, and I had to max out the volume knob to get a usable level. It is not a failure of the unit; it is just the physics of USB power. If your studio gear includes power-hungry headphones, you will eventually want a dedicated amp. For the standard headsets used in most lighting kits setups or basic podcasting, however, it provides more than enough juice to monitor your voice clearly without distortion.
The Red Box Standard vs Our Budget Champion
When you look at this $50 unit next to the Focusrite Scarlett Solo, the price gap is impossible to ignore. The Scarlett series is the gold standard for creator rigs, but you are often paying a significant premium for the ‘Air’ mode and the extensive bundled software. In my recent microphone reviews, the noise floor on our budget contender was virtually indistinguishable from the Focusrite at standard gain levels. However, if you need balanced TRS outputs to avoid ground loops in your studio gear, the Scarlett wins easily. You have to decide if a lack of balanced outputs is worth saving $70 that could be better spent on lighting kits or better lenses for your camera reviews. The internal preamps on this budget unit are surprisingly competitive, but the Focusrite offers a more ‘pro-ready’ ecosystem.
#IMAGE_PLACE_HOLDER_D#
Where the Cheaper Plastic Units Fall Short
Stepping down even further into the $30-$40 range brings us to devices like the Behringer U-Phoria UM2. While the UM2 is a legend in the ultra-budget space, its plastic chassis feels fragile compared to the metal build of the unit we are reviewing today. In terms of studio gear, durability matters. More importantly, the UM2 uses older Xenyx preamps that tend to introduce a ‘fuzzy’ texture when pushed past 75% gain. Our $50 unit maintains a much more transparent signal, making it the clear winner for anyone performing serious microphone reviews where accuracy is paramount. For a mere $10 difference, the jump in build quality and signal clarity is the best investment you can make for entry-level creator rigs.
Is it worth the upgrade?
If you already own a basic interface that works, moving to another budget unit isn’t the smartest move. However, if you are currently using a 3.5mm-to-USB adapter or a very old plastic interface, the answer is a resounding yes. The stability of the XMOS-based chipset in this unit provides a level of reliability that matches devices in the $150 range. For those building creator rigs from scratch, saving money here allows you to invest more into lighting kits which often have a more dramatic impact on your initial production value than a $200 audio interface would. You can see the current market trends and price fluctuations for these units on Sweetwater’s interface comparison page to see how the value holds up against the latest releases.
Balance your budget across the whole studio
At the end of the day, audio is only one piece of the puzzle. If you spend your entire budget on a high-end interface, you will likely neglect your camera reviews setup or your lighting. This $50 unit strikes a perfect balance: it provides professional-level silence for your voice while leaving enough cash in your pocket to round out the rest of your kit. Before you pull the trigger on a more expensive model, check out the full review of the Scarlett Solo to see if those extra features like ‘Auto Gain’ are truly worth the 2x price increase for your specific workflow. For most beginners and intermediate creators, the extra features are luxuries, not necessities. Check current prices to see if there are any seasonal bundles that make this budget pick even more of a steal.
What I Loved and What Drove Me Crazy
- Pro: Incredibly low noise floor that rivals units twice its price.
- Pro: Heavy metal chassis that actually stays put on your desk.
- Pro: Latency-free direct monitoring with a dedicated hardware switch.
- Con: RCA outputs make connecting professional monitors a total headache.
- Con: The phantom power switch is hidden awkwardly on the back panel.
- Con: The glossy plastic front panel is a massive fingerprint magnet.
Is This the Right Fit for Your Desk?
This interface is a dream for solo podcasters, streamers, and anyone building their first creator rigs. If you are currently researching 7 essential tools for any creator starting a home studio, this should be at the top of your list. It provides a clean signal that makes even affordable microphones sound professional. However, you should skip this if you already own high-impedance studio headphones or if your workflow requires balanced outputs to prevent ground loops. For those who want to know why you don’t need a professional studio to get a pro sound, this box is the living proof that price doesn’t always equal quality.
#IMAGE_PLACEHOLDER_FINAL#
My Final Recommendation for Every Creator
I am giving this unit a solid “Buy” recommendation for anyone prioritizing audio transparency over brand prestige. You get the raw performance of a professional preamp without the marketing tax. If you still struggle with environmental noise after upgrading, I also suggest learning how to fix low frequency rumble in your desktop audio to complement this clean signal. This is a rare budget find that puts the money where it counts: the internal circuitry. Final Verdict: Buy it for the preamps, tolerate it for the RCA ports. Check the latest price to see if you can snag a bundle deal before your next recording session.