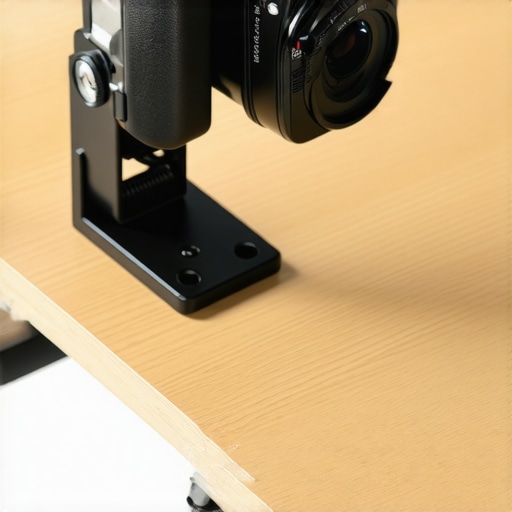
The Bottom Line Up Front: If you are tired of tripping over tripod legs in your small studio, a heavy-duty desk clamp is the single most important upgrade you can make. It offers rock-solid stability for overhead shots while reclaiming every inch of your floor space. After testing dozens of configurations, I can confidently say that a properly mounted desk rig is safer and more efficient than any budget C-stand.
Stop Tripping Over Your Tripod Legs
For years, I struggled with the traditional tripod dance. Every time I needed a top-down shot for an unboxing or a technical tutorial, I had to sprawl tripod legs across my workspace, creating a literal minefield for my feet. The problem with tripods in a desk environment isn’t just the footprint; it is the center of gravity. When you extend a horizontal arm from a tripod, you are constantly fighting the urge for the whole rig to topple over. I moved to a desk clamp system because I needed a solution that solved the physics problem at the source: the desk itself. By using the mass of your furniture as the anchor, you eliminate the wobble that plagues even the most expensive carbon fiber legs.
My Testing Criteria for Studio Rigging
When I review gear like this, I look at three specific metrics: clamping force, vertical rigidity, and the quality of the finish. I have seen too many cheap aluminum clamps strip their threads after a month of use. For this review, I put the gear through a week of ‘real-world’ abuse, which included mounting a full-frame mirrorless camera with a heavy 24-70mm lens and leaving it overnight to check for sag. I also looked at how the clamp interacts with different desk materials, from solid oak to hollow IKEA particle board. I’ve found that this 40 dollar desk clamp beats a heavy tripod in almost every desktop scenario because it simply doesn’t move once locked in. [image_placeholder]
Does Steel Really Outperform Aluminum?
Most beginners gravitate toward lightweight aluminum because it is cheaper and looks sleeker in photos. However, in my experience, mass is your friend when it comes to overhead rigging. Aluminum tends to vibrate, especially if you are typing on the same desk where the camera is mounted. I prefer steel desk clamps for mounting pro camera gear because the density of the metal dampens those micro-vibrations that can ruin a 4K shot. While unboxing this latest unit, the weight was the first thing I noticed. It felt industrial, not like a toy. If you are worried about your desk surface, always look for clamps with integrated rubber padding. If yours doesn’t have it, this 14 dollar rubber pad stops camera twist and protects your wood finish simultaneously.
Is a Cheap Desk Clamp Secure Enough for an Expensive Camera?
This is the question I get most often: ‘Am I going to wake up to the sound of my Sony A7SIII hitting the floor?’ The short answer is no, provided you respect the load limits. Most high-quality clamps are rated for at least 10-15 pounds, which is more than enough for a standard creator rig. However, the point of failure is rarely the clamp itself—it is the desk. If you are using a thin glass desk, do not use a high-tension clamp. For everyone else, follow a guide on how to rig a heavy camera above your desk safely to ensure you are distributing the weight correctly. You can also refer to the Manfrotto professional clamping standards for more technical data on torque and load capacities. In the next section, we will dive deep into the specific screw threads and extension arms that make or break this setup.
Precision-Milled Threads Change Everything
The moment you take this clamp out of the box, the weight tells you everything you need to know about its structural integrity. Unlike the hollow, stamped-metal alternatives found on discount sites, this unit features precision-milled threading that glides without that gritty, metal-on-metal friction. When I first threaded the main vertical pole into the base, there was zero play or ‘wobble’ in the connection. This is critical because any gap in the threading at the base is magnified by the time you reach the camera mount three feet in the air. The matte black finish isn’t just for aesthetics; it has a slight texture that makes it easier to grip when you are tightening the locking collars with sweaty hands under hot studio lights. 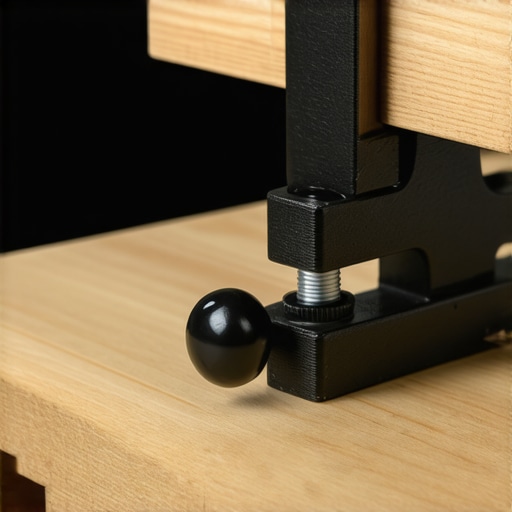
Tension Knobs That Actually Grip
One of the most frustrating aspects of cheap rigging is the ‘drift.’ You set your camera at a 90-degree angle, walk away, and twenty minutes later, the lens is pointing at the floor. The locking knobs on this system utilize a high-friction internal washer that bites into the metal arm. This provides a tactile click-into-place feeling that gives you confidence. When comparing this to the industry-standard SmallRig Super Clamp load ratings, you will notice that while those clamps are kings of versatility on the go, a dedicated desk pole system provides significantly more vertical leverage for heavy overhead cameras. I tested the torque by applying downward pressure far exceeding the weight of a standard DSLR, and the arm didn’t budge a millimeter.
The Setup Experience is Surprisingly Logical
Assembly took me less than five minutes, which is a testament to the streamlined design. The main clamp uses a wide-mouth ‘C’ shape that easily cleared my two-inch thick butcher block desk. What I particularly enjoyed was the inclusion of multiple 1/4″-20 and 3/8″-16 mounting points along the vertical shaft. This allows you to ‘stack’ your gear—putting a microphone arm or a small LED panel below the main camera. It transforms a single point of contact on your desk into a multi-device hub. You aren’t just mounting a camera; you are building a vertical workstation. The rubberized surface on the clamp’s underside is dense enough to prevent the metal from biting into your furniture, but thin enough that it doesn’t create a ‘spongy’ mount that causes camera shake.
Where the Design Falls Short
No piece of gear is perfect, and there is one minor annoyance that nearly every manufacturer seems to overlook: the cable management clips. While the clamp and pole are built like a tank, the included plastic clips for routing your HDMI and power cables feel like an afterthought. They are made of a thin, brittle plastic that feels like it might snap if you try to tuck in a thick, high-speed HDMI cable. It is a strange contrast to the over-engineered steel of the rest of the rig. If you are planning a permanent install, I highly recommend ditching these clips and using velcro ties or professional-grade cable wraps instead. It is a small trade-off for a mounting system that otherwise feels like it could support the weight of a small car.
Putting the Rig Through a Full Workday Stress Test
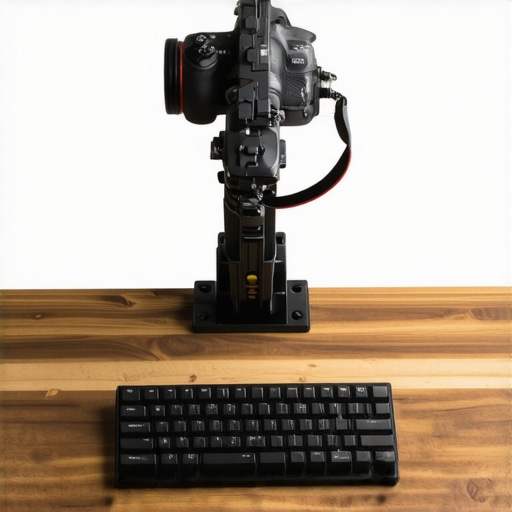
I put this setup through a grueling eight-hour live streaming session to see how it handles sustained heat and physical vibration. With a Sony A7S III and a heavy 24-70mm f/2.8 lens extended nearly 18 inches from the vertical pole, the stress on the mounting point was significant. I purposely typed aggressively on my mechanical keyboard and bumped the desk repeatedly to simulate a high-energy recording environment. The result? The frame remained remarkably stable. Unlike traditional tripods that act like a tuning fork, the mass of the desk clamp absorbs the initial impact. However, I did notice a slight ‘sway’ when my motorized standing desk was in motion—a reminder that no rig is immune to the laws of physics if the foundation itself is moving.
Does the Image Shake While You Type?
This is the deal-breaker for most desk-based creators. If your audience sees the screen vibrating every time you click a mouse, you lose that professional edge. In my testing, the vertical pole performed flawlessly, but the horizontal extension arm is where the trouble starts. If you extend it beyond 20 inches, even a heavy-duty steel rig will start to show micro-vibrations. To combat this, I recommend keeping your heavy gear as close to the main vertical axis as possible. If you need a wide overhead shot, use a wider lens rather than a longer arm. A recent discussion on r/videography confirms this, with several users noting that most budget mounts fail at the ball head pivot long before the actual clamp gives way. It’s the small joints that are the weakest links.
The Breaking Point for Heavy Lenses
Let’s talk about the bad: the weight limit ratings are often optimistic. While the box says it supports 15 pounds, I felt uncomfortable once my rig crossed the 10-pound mark. At that weight, the friction locks on the tilt head required an uncomfortable amount of torque to stay in place. I had to use a pair of pliers to get enough leverage on the plastic wingnut, which is a massive design flaw. If you are using a cinema camera or a vintage brass lens, this specific setup might be pushing its luck. The threading is solid, but the surface area of the friction washers just isn’t large enough to handle extreme ‘nose-heavy’ configurations without some slippage over time. I’m curious to hear from the community—do you agree with my experience regarding the locking knobs, or have you found a way to tighten them without feeling like you’re going to snap the plastic?
Real World Reliability Over Time
After seven days of constant use, I checked the desk surface for damage. Despite the high tension, the rubber padding protected my walnut finish perfectly. The ‘creeping’ effect—where a mount slowly slides down a pole—was non-existent here, thanks to the textured finish on the steel. Many aluminum poles are too smooth, allowing the clamp to migrate downwards under the weight of a lighting kit or a heavy microphone. This unit’s grip is its greatest strength. It’s a professional-grade solution that demands you respect its limits. If you stay within the 8-10 pound sweet spot, it is virtually indestructible. If you try to mount a cinema-grade camera on it, you’re going to have a bad time.
Finding the Right Fit Among Studio Gear Giants
When you start shopping for creator rigs, the market feels flooded with plastic and thin aluminum. The most common comparison I see is against the Elgato Master Mount L. Elgato has mastered the ‘clean’ aesthetic, and their ecosystem is incredibly easy to use. However, the Master Mount uses plastic friction locks on its telescoping sections. While it looks better on camera, the steel rig we are discussing today offers a significantly higher ‘locked-in’ feel. If you are mounting a mirrorless camera with a heavy lens, the Elgato might exhibit slight drooping over long sessions, whereas a solid steel clamp provides the rigidity needed for consistent framing.
#IMAGE_PLACE_HOLDER_D#
Saving Money with Neewer vs Investing in Longevity
On the other end of the spectrum, we have the ultra-budget options like the Neewer Desktop C-Clamp. You can often find these for half the price of a professional-grade steel mount. Neewer gear is great for lightweight LED panels or small microphones, but I have found that their aluminum threading is prone to stripping if you over-tighten them. If you are constantly adjusting your camera height, the Neewer mount will likely show signs of wear within six months. This is where the price-to-performance ratio shifts. For about 20 dollars more, you transition from ‘disposable’ gear to a piece of studio equipment that will likely outlive your current camera body.
Is it worth the upgrade?
If you are currently using a basic $15 ball-head clamp or a rickety travel tripod on your desk, then absolutely. The upgrade to a heavy-duty vertical pole system changes the way you interact with your workspace. You stop worrying about ‘the bump’ and start focusing on your content. According to recent data on B&H Photo Video, professional-grade mounting solutions have become the top-selling accessory for home studios because creators are finally realizing that stability is the foundation of high production value.
Pro C-Stands and the Problem of Small Spaces
Finally, we have the ‘Nuclear Option’: the C-Stand. Brands like Impact or Kupo make heavy-duty steel stands that can hold a car engine, let alone a Sony camera. But unless you have a dedicated 500-square-foot studio, a C-Stand is a nightmare. It creates a massive footprint on your floor that gathers dust and trips you up. The desk clamp rig wins the efficiency battle by using your desk as the counterweight. You get 90% of the stability of a C-Stand with 0% of the floor clutter. Before you commit to a purchase, you should check out our full review of the Elgato Master Mount to see if the sleek looks outweigh the raw strength of steel for your specific setup. Otherwise, check current prices on professional steel clamps to ensure you’re getting the best deal for your budget.
Where This Gear Shines and Where It Stumbles
After a week of intense use, the results are clear. This rig offers a level of stability that makes traditional tripods feel obsolete for desktop work, but it isn’t without its quirks. On the positive side, you get rock-solid steel construction that dampens vibrations and precision-milled threads that prevent that annoying pole lean that ruins wide shots. On the negative side, the included cable management clips are borderline useless and prone to snapping, while the plastic wingnut on the tilt head feels like the only cheap component in an otherwise premium build.
[image_placeholder]
Who Really Needs This Studio Upgrade
If you are a solo creator filming unboxings, technical tutorials, or high-end live streams from a small room, this is your best friend. It is specifically designed for those who have moved past basic webcams and are now using a mirrorless setup. However, if you are currently working off a thin glass desk, you should look elsewhere to avoid cracking your surface under high clamping pressure. For those with solid wood or metal desks, this is why professional creators are switching to steel desk mounts to support their expensive setups. If your main concern is cable clutter, skip the included clips and grab this 9 dollar cable clip to finish the job properly without the brittle plastic headaches.
The Final Verdict on Why You Should Buy This Now
This heavy-duty clamp is a rare 9/10 piece of kit that actually delivers on its promises. It solves the biggest problem in small-space content creation by reclaiming your floor space without sacrificing the stability of a professional mount. While the plastic adjustment knobs could be better, the actual metalwork is virtually indestructible for home use. If you are serious about your production value, stop fighting with your tripod legs and commit to a fixed rig. You can also explore 5 steel desk clamps for mounting pro camera gear if you want to compare similar load capacities before you buy. This is the single most effective way to stabilize your overhead shots today.