Bottom Line Up Front
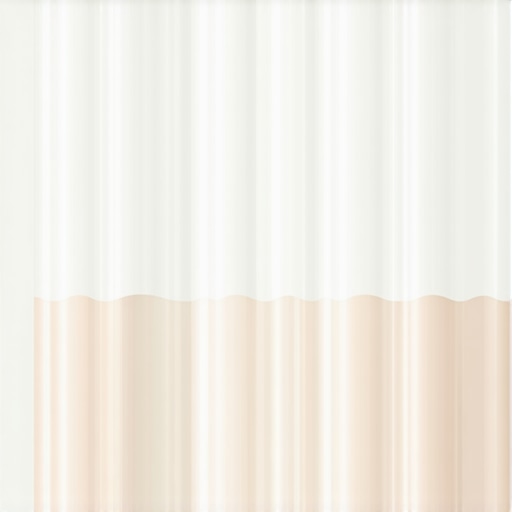
If you’re looking for an affordable and surprisingly effective method to create soft, natural-looking skin tones in your studio, using a shower curtain as a diffusion tool might just be worth a try. While it isn’t a perfect substitute for dedicated professional softboxes, the DIY approach offers a budget-friendly alternative with interesting results.
The Promise of a DIY Solution
This unconventional technique aims to solve the common problem of harsh lighting that can make skin tones appear unnatural or washed out on camera. By repurposing a household item—a shower curtain—you can soften your light source without needing expensive equipment.
At a Glance
- Cost-effectiveness: Very affordable, utilizing items you probably already have at home.
- Ease of setup: Quick to assemble and remove, suitable for quick shoots.
- Light diffusion quality: Provides a softening effect, but results vary based on curtain material and distance.
- Durability and reliability: Not designed for studio use, so long-term durability may be limited.
Assessing the Technique
My criteria for evaluating this method include light quality (diffusion and softening), ease of use, cost, and how well it reproduces realistic skin tones. I also consider whether this approach is sustainable for professional or semi-professional setups, and how it compares to traditional diffusion gear.
Transition to Detailed Analysis
With these criteria in mind, let’s delve into how this DIY diffuser performs in practice, its advantages, limitations, and whether it merits a place in your studio arsenal. To get a comprehensive understanding, I’ll examine the material options, setup process, and results compared to standard professional diffusion solutions.
The Build and Material Quality
The core component, a standard shower curtain, is surprisingly versatile for light diffusion, thanks to its generally translucent material. Typically made from polyethylene or polyester, these materials are lightweight and flexible, allowing easy draping over light sources. However, quality varies: thinner curtains tend to produce a softer, more diffuse light, but may also be more fragile and prone to tearing or warping over time. Thicker curtains offer durability and better light scattering but can introduce uneven diffusion if not properly stretched or if the material contains patterns or textures. The choice impacts the softness and consistency of light, so selecting a plain, semi-opaque shower curtain is advisable to achieve uniform diffusion.
Setting Up the DIY Diffuser
The setup process involves suspending the curtain in front of the light source—be it a continuous softbox or even an LED panel—using household items like clamps, hooks, or tension rods. The lightweight nature of shower curtains makes this straightforward: simply clamp the top edge to a stand or ceiling mount, and stretch the fabric taut to avoid wrinkles or sagging that can cause uneven lighting. Distance plays a vital role; positioning the curtain farther from the light source increases the softness, mimicking a professional softbox. However, too much distance can diminish overall brightness, requiring higher power lights or additional setup adjustments. The adaptability and low cost of this approach mean it’s especially appealing for quick setups or budget-conscious scenarios.
The Feel of Material and User Experience
The tactile quality of the shower curtain affects ease of handling. Most are smooth and flexible, allowing for easy draping and repositioning. When in use, the curtain has a slight resistance to movement, which helps keep it in place once hung, but may require frequent readjustment during a shoot. Sharp edges and metal grommets can sometimes snag or cause minor tears if not handled carefully, highlighting the importance of gentle manipulation. This makes the DIY diffuser somewhat less robust than specialized equipment, such as purpose-built diffusion fabric, but the simplicity and availability compensate for this shortcoming. For photographers, the real benefit lies in its instant, customizable diffusion, especially suitable for casual shoots or learning environments.
Design Flaws and Limitations
One minor annoyance is the exposure to environmental factors—such as humidity or heat—that can degrade or warp the curtain material over time, diminishing its effectiveness. Additionally, some curtains contain patterns, branding, or textures that can cast unwanted shadows or uneven diffusion if not carefully selected. Compared to dedicated professional diffusion fabrics, shower curtains lack consistency and may produce unpredictable results. Users should also be cautious about light leaks around the edges, which can be mitigated by using additional light-blocking measures or double layers. Despite these limitations, the low cost and accessibility make it a compelling option for experimentation, making it a practical choice for startups or hobbyists exploring soft lighting techniques.
Testing the Limits of Production Equipment
When creators push their gear in demanding scenarios, the true performance emerges. From shooting high-speed action scenes outdoors to managing live streams with thousands of viewers, each piece of equipment is put to the test. The question is, how does studio gear, lighting kits, microphones, and cameras hold up under stress?
Can Lighting Kits Handle Continuous Use?
Lighting setups often need to sustain hours of operation. Professional kits with fan-cooled LEDs generally perform well, maintaining color accuracy and brightness without overheating. However, budget models without proper thermal management can overheat, leading to flickering or shutdowns—disrupting shoots or live sessions. For example, some cheap softboxes have been reported to flicker intermittently after prolonged use, highlighting the importance of quality components.
Does overheating compromise image quality or device longevity?
Overheating can reduce lumen output and cause color shifts, degrading video quality. Frequent overheating cycles may also shorten device lifespan, forcing costly replacements. Users have noted that high-end fixtures with active cooling outperform budget options significantly, providing consistent lighting during demanding sessions. Reddit discussion confirms that thermal management is critical for sustained performance.
Microphones Face Wind and Movement Challenges
In field recording scenarios, microphones often encounter wind noise and physical vibrations. Shotgun mics with proper windshields excel at cancelling wind interference, allowing clear audio capture outdoors. Conversely, budget lavalier mics tend to pick up handling noise and ambient disturbances when movement is vigorous, like during sports filming. Battery life also becomes strained during prolonged use, with some condenser mics needing extra power sources.
Do wireless mics stay reliable during long shoots?
Wireless systems can experience dropouts due to interference, especially in crowded environments. Although modern transmitters have better resilience, many users report signal degradation after several hours. A two-hour outdoor interview might see occasional audio dropouts, emphasizing the need for reliable channels. These issues are well-documented in Quora thread.
Camera Durability in Harsh Conditions
Robust cameras designed for outdoor adventure filming feature weather sealing and ruggedized bodies. They handle rain, dust, and shocks better than standard models. Still, extreme conditions can challenge the internal components, leading to lens fogging, sensor malfunctions, or overheating. High-end cameras with active cooling systems perform better during extended recording sessions in hot environments. Budget models without such features risk shutdowns due to thermal constraints, or even permanent damage if moisture penetrates sealed compartments.
Are affordable cameras worth risking damage?
While cheaper cameras may survive mild conditions, pushing them in tough environments often results in failure. Creators commonly mitigate this by using external rain covers and heat shields. According to a DPReview forum, investing in well-sealed gear pays off in reliability for demanding shoots.
Final Thoughts
In high-pressure scenarios, the resilience of creator gear varies widely. Proper thermal management, wind protection, and ruggedization are key features distinguishing professional equipment from consumer-grade alternatives. Many users report that quality investment reduces downtime and maintains image and audio quality, while cheaper gear often leads to glitches and failures. If you’re considering equipment for demanding projects, prioritize durability and field-tested features. Do you agree with my experience regarding the importance of thermal management in lighting kits? Share your thoughts below!
Balancing Cost and Performance: Basic versus Premium Equipment

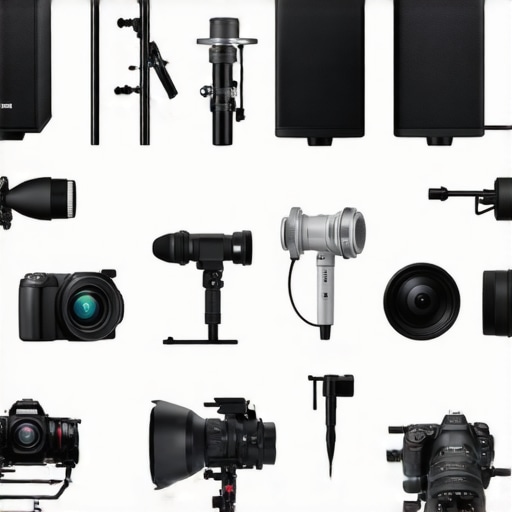
When comparing creator rigs, lighting kits, microphones, camera gear, and studio equipment, one of the primary considerations is budget against feature set. Budget-friendly options like the Neewer 660 LED Lighting Kit offer decent light quality for less, making them perfect for amateurs or those just starting out. In contrast, premium setups such as the Aputure Light Storm series provide high color accuracy, better build quality, and advanced controls, catering to professional studios demanding the best results. Similarly, entry-level microphones like the Rode Videomic GO are affordable and easy to use, whereas high-end solutions like the Sennheiser MKH 416 deliver superior noise rejection and clarity, ideal for broadcasting or film production.
Comparison of Camera Choices: Versatility versus Specialization
When it comes to cameras, affordable models like the Canon EOS 2000D are suitable for beginners, offering acceptable image quality at a lower price point. They are lightweight, user-friendly, and ideal for content creators on a budget. On the other hand, professional-grade cameras such as the Sony FX6 boast excellent low-light performance, dynamic range, and durability, justifying their higher cost for demanding productions. If you’re considering an upgrade, ask yourself if the benefits of a more advanced camera align with your production needs and growth prospects.
Studio Gear: DIY Solutions versus Dedicated Professional Equipment
For studio gear, some creators opt for DIY diffusion methods, like using shower curtains, which are cost-effective but less consistent and durable. Alternatively, professional diffusion fabrics from brands like Rosco or Lee Filters are engineered for longevity and uniform light spread. The same applies to stands, mounts, and support gear—cheaper options may save money upfront but can compromise safety and stability during shoots. The choice often boils down to whether you prioritize immediate savings or long-term reliability.
Is It Worth the Upgrade? Making the Switch
Upgrading from entry-level to professional equipment involves weighing the benefits against costs. For example, moving from a basic light kit to a high-end LED system can transform your studio’s light quality, but is it justified at your current stage? If your content demands broadcast-level clarity or you’re seeking greater creative control, then investing in top-tier gear is worth considering. Check current prices on trusted retailer sites like B&H or Adorama to gauge if the investment makes sense for your your setup.
Compare with the Competition
For a deeper understanding, it’s beneficial to compare these options with competitors like Godox lighting kits or the Blackmagic Design Pocket Cinema Camera. These alternatives often offer similar performance at different price points or with unique features. Reviewing their specs and user feedback can help you decide whether the current gear you’re considering provides the best value or if a different brand might better suit your needs. Remember, choosing gear isn’t just about specs—it’s about what works within your workflow and budget.
The Good, The Bad, and The Ugly
- Pros: Very budget-friendly, easy to set up, customizable diffusion level, lightweight and flexible material.
- Cons: Inconsistent light quality, potential environmental degradation, limited durability, possible uneven diffusion due to material patterns.
Who Is This For? Practical and Budget-Conscious Creators
This DIY diffuser is ideal for beginner filmmakers, hobbyists, or anyone working with a tight budget who needs soft, natural-looking light without investing in expensive equipment. It’s perfect for quick setups, test shoots, or learning environments. However, professionals relying on consistent, high-end results should look elsewhere, as this method falls short of studio-grade diffusion and durability.
Final Verdict: 6.5/10
If you’re seeking an affordable and creative way to soften your lighting, a shower curtain can be a clever temporary solution. It offers ease of use and significant savings but sacrifices consistency and long-term reliability. For serious projects, investing in purpose-built diffusers will pay off in better light quality and durability. Still, for sparking experimentation or tight budgets, it’s a recommendation worth considering—just be aware of its limitations. If this DIY approach appeals to your style, explore more affordable options and see how far you can push your setup. For more ways to optimize your studio lighting on a budget, check out our review of diffusion alternatives.