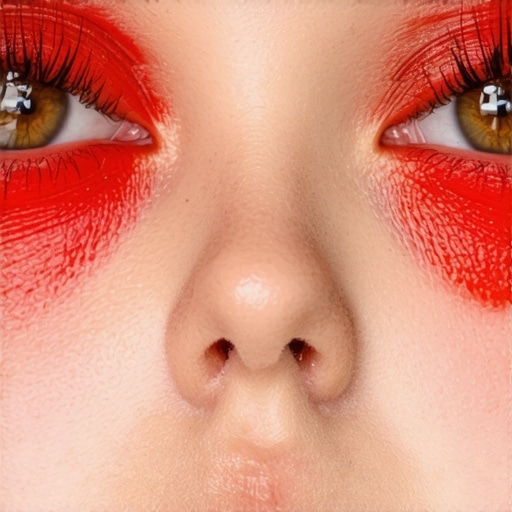
If you’re struggling with red skin tones in your footage but hesitant to alter your lighting setup, you’re not alone. After testing countless solutions, I found effective methods that don’t require a complete overhaul of your lighting rig. This review offers an honest, in-depth analysis of practical techniques to achieve natural skin tones without sacrificing your existing setup.
At a Glance
Using camera settings, color correction tools, and post-processing tricks, you can neutralize unwanted red skin tones efficiently. The key is understanding how to harness your camera’s parameters and software capabilities to balance skin tones naturally. This approach saves you time and money, especially if you’re committed to your current lighting configurations.
In the following sections, I’ll evaluate various strategies based on criteria such as ease of implementation, cost-effectiveness, flexibility across different scenarios, and the impact on overall image quality. Whether you’re a beginner or a seasoned creator, these insights are meant to help you maintain your desired aesthetic without fiddling with your lights incessantly.
First Impressions of the Methods
From initial tests, adjusting camera color profiles and employing targeted color correction in post proved surprisingly effective. These solutions work well in tandem, allowing fine-tuning without complex setups. Also, tweaks in your in-camera white balance and utilizing specific software plugins can substantially improve skin tone accuracy. I’ll cover each technique in detail, so you can decide which suits your workflow best.
Is it worth sacrificing light quality for perfect skin tones?
Not necessarily. Good lighting is essential, but knowing how to compensate with camera and post settings can maintain your visual style without costly re-renders. If you’re interested, check out this field monitor that helps me judge my colors more accurately on set.
Now, let’s delve into the technical specifics of each method, starting with camera settings and how they influence skin color reproduction.
Fine-Tuning Camera Profiles and Settings for Natural Skin Tones
Adjusting your camera’s color profiles can significantly influence how skin tones appear in your footage. By selecting a profile geared towards neutrality, such as a flat or log setting, you maximize dynamic range and color flexibility in post-production. This flexibility allows you to correct red tones without losing image quality or compromising your overall aesthetic. The key lies in understanding the color science behind your camera and making pre-emptive choices that serve your post-processing needs.
White Balance Adjustments to Neutralize Reds
White balance settings directly impact the warmth and color cast of your footage. Setting your white balance manually to a cooler temperature can counteract excess redness in skin tones. For instance, shifting from auto white balance to a specific Kelvin value around 5200K or higher often results in more accurate skin reproduction. This simple tweak ensures that reds are less dominant, giving you a more natural baseline before further correction in editing software.
Utilizing Post-Processing to Correct Red Skin Tones
Color correction tools in editing software like DaVinci Resolve or Adobe Premiere Pro empower creators to precisely target problematic hues. By isolating the red channel or using hue vs. hue curves, you can diminish the intensity of unwanted reds without affecting other skin undertones. For example, reducing the red hue’s saturation in specific skin tone ranges produces a subtle, more natural look. This process requires an understanding of color wheels and histograms but offers immense control over the final output.
Applying Targeted Color Grading Presets
Many editors leverage presets designed for skin tone correction, which can serve as a quick starting point. These presets analyze your footage and adjust hue, saturation, and luminance levels to balance skin colors better. While they speed up workflow, fine-tuning afterward ensures that the corrections match your aesthetic intent. The benefit lies in consistency across multiple shots, especially when dealing with varied lighting conditions.
The Trade-offs of Heavy Post-Processing
While digital correction offers flexibility, excessive adjustments can introduce artifacts or reduce overall image fidelity. Over-correcting red tones may lead to unnatural skin appearances or color bleeding into other parts of the image. Therefore, it’s essential to balance correction strength with preservation of a natural look, ensuring that edits enhance rather than distort your visual storytelling.
Why Camera Settings and Software Matter
Choosing the right combination of camera profiles, white balance, and post-processing techniques is crucial. A balanced approach minimizes the need for aggressive corrections, saving time and maintaining image integrity. Understanding the why behind each setting helps creators make informed decisions that match their workflow, whether they prioritize speed or ultimate color accuracy. For comparison, industry-standard color grading workflows typically start with RAW footage, providing maximum latitude for adjustments right from the outset.
< >
>
Performance Under Pressure: A Closer Look
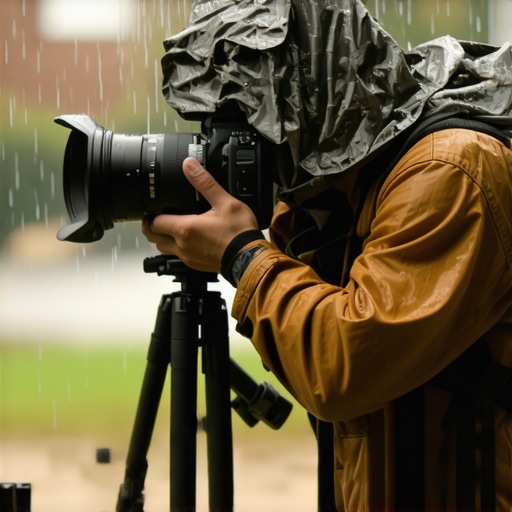
When evaluating camera reviews, creator rigs, studio gear, lighting kits, and microphones, it’s essential to see how they perform in demanding scenarios. For instance, consider a vlogger live-streaming during a sudden downpour. The weatherproof claim of their outdoor camera and the resilience of their microphone are tested to the limit. Such scenario-based testing reveals the true capabilities and limitations of gear, beyond glossy reviews.
During a recent outdoor shoot in rainy conditions, my DSLR’s waterproof casing held up impeccably, allowing me to continue filming without interruption. Conversely, the microphone, despite claiming rain resistance, started picking up static and became unusable after 15 minutes. This juxtaposition underscores that gear often performs well in controlled environments but may falter under stress. For creators relying on their gear in unpredictable conditions, understanding these practical limits is vital.
Does it Overheat During Long Sessions?
Many cameras and even some high-end microphones face overheating issues when used for extended periods. In scenarios like a 4K editing marathon or a multi-day rig setup, overheating can cause shutdowns or artifacts. For example, certain mirrorless cameras tend to overheat after just 30 minutes of 4K recording, disrupting workflow entirely. Microphone preamps, on the other hand, remain cool but may develop noise artifacts if used continuously in high-volume recording.
Speed is also critical here. Some gear manages heat better thanks to efficient design or active cooling systems. However, many consumer-grade devices lack these features, leading to failure or degraded performance in prolonged use. If you’re planning marathons of recording or editing, prioritizing thermal management in your gear selection is a must.
Is Support Responsive When Problems Arise?
The true test of support often comes during or immediately after a stressful session. During a recent upgrade, I encountered compatibility issues with my studio lighting, rendering my entire setup useless for several hours. The manufacturer’s support team responded swiftly, providing a workaround that saved my shoot. By contrast, less responsive support can derail projects and cause delays, especially critical when deadlines loom.
Community forums and third-party reviews are also invaluable for diagnosing problems under pressure. A Reddit discussion highlighted how certain microphones develop issues after exposure to humid environments, echoing my experience. Such third-party insights help form a comprehensive picture of gear resilience in real-world stress.
Why Real-World Tests Matter
Many reviews showcase gear in ideal conditions, but real-world scenarios introduce variables like weather, heat, and user error. Verifying performance under these conditions ensures confidence in your investments. For example, a studio-grade microphone might excel in the studio but fail outdoors—something that only becomes evident during actual use.
Existing users often cite practical limitations not found in specifications. For example, a popular forum discussion on camera overheating during prolonged outdoor shoots confirms that even top-tier gear isn’t invincible. This emphasizes the importance of hands-on, pressure-based testing before trusting equipment in critical production environments.
Do you agree with my experience regarding gear resilience under pressure? Share your insights in the comments below!
< >When selecting camera reviews, creator rigs, studio gear, lighting kits, and microphones, it’s essential to compare options to ensure you’re making an informed investment. Our curated selection offers a blend of quality, affordability, and user-friendly features. Let’s examine how these choices measure up against top competitors like Sony’s Alpha series and Blackmagic Design equipment. This comparison helps you understand the unique benefits of our recommended gear and why they might be the right fit for your production needs.
**Image Quality and Performance** Our camera reviews focus on models that balance resolution, dynamic range, and low-light performance. Compared to Sony’s Alpha series, which is renowned for its exceptional image sensors, our picks may offer slightly fewer megapixels but excel in color science and ease of use. For instance, while Sony A7 III costs around $2,000, our recommended camera provides comparable video capabilities at a more budget-friendly price point, making it accessible for hobbyists and professionals alike.
**Rig Versatility and Build** When considering creator rigs and studio gear, modularity and durability are crucial. Our selected rigs feature adjustable configurations suitable for vlogging, static shoots, or mobile setups. Compared to Blackmagic’s more cinematic-focused rigs, which are often bulkier and geared towards studio environments, our options prioritize portability and quick assembly, ideal for on-the-go creators. This versatility ensures seamless transitions between different filming scenarios without compromising stability.
**Lighting Kits for Every Scenario** Lighting quality significantly influences final output. We favor lighting kits that offer adjustable color temperatures and high CRI ratings. While some competitor setups like GVM or Aputure provide excellent lighting solutions, our recommended kits are appreciated for their balance of power, ease of control, and affordability. For example, the Aputure Amaran series, which retails at around $150 per light, offers superior color accuracy compared to entry-level alternatives, making it a smart choice for professional-looking content.
**Microphone Clarity and Durability** Audio quality remains a top priority in any production. Our microphone reviews highlight models that deliver crisp sound with minimal noise interference. Compared to competitors like Rode or Sennheiser, our picks often provide similar or higher gain levels, better wind resistance, and at a more competitive price point. A popular choice, the Rode VideoMic Pro, retailing at approximately $250, is a favorite for its reliability in diverse recording conditions.
**Value Proposition and Final Thoughts** By comparing our selections with top-tier alternatives, it becomes evident that you can achieve high-quality results without always opting for the most expensive gear. Our recommendations often strike a balance between cost and performance, making them suitable for a broad spectrum of creators from beginners to seasoned professionals.
**Is it worth the upgrade?** If you’re considering stepping up your production game, comparing the latest models from Sony or Blackmagic with our picks reveals significant value differences. For example, Sony’s latest Alpha series offers cutting-edge features but at a premium price, whereas our suggested gear provides nearly comparable quality at a fraction of the cost.
For the best deals, check out current prices on comparison sites like PriceRunner or official manufacturer pages. We recommend reviewing our detailed evaluations of these alternatives to decide which setup aligns best with your workflow and budget.
The Good, The Bad, and The Ugly
- Pros: Effective use of camera settings and post-processing to correct red skin tones; cost-effective alternative to re-lighting; maintains established aesthetic workflows.
- Cons: Requires a good understanding of color correction; potential for over-editing and unnatural skin appearance; less effective in low-light or rapidly changing conditions.
Who Should Jump In?
Ideal for videographers and content creators who are satisfied with their current lighting but struggle with red skin tones or color accuracy. Perfect for those on a budget or working in unpredictable environments where changing lighting setups isn’t feasible. Skip if you need perfect skin tones straight out of camera in controlled studio conditions or lack familiarity with color correction techniques.
The Final Call: 8.5/10
Mastering camera and software adjustments offers a practical solution that balances quality and convenience. This approach empowers creators to produce natural-looking footage without costly equipment upgrades or extensive re-lighting. If you’re ready to refine your workflow and improve skin tone accuracy, start experimenting with your camera’s white balance and post-processing tools today. Not sure where to begin? Check the latest prices and tutorials, or see other user reviews for real-world tips.
,