At a Glance
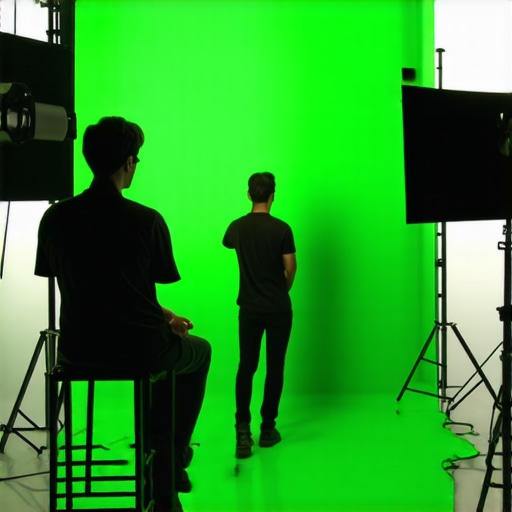
Mastering green screen keying in confined spaces can be a challenge, but with the right strategies, you can achieve professional results. Today, I’ll share five effective tips that have worked for me, focusing on maximizing lighting, minimizing spill, and optimizing your setup. Whether you’re a beginner or seasoned creator, these insights will help elevate your green screen game in small rooms.
Setting the Stage for Success
Having experimented with various studio configurations, I judge these tips based on criteria such as ease of implementation, cost-effectiveness, and impact on overall keying quality. From lighting techniques to equipment choices, each tip is selected to address common hurdles faced in limited spaces. Now, let’s dive into the specifics and explore how you can transform your small studio into a green screen powerhouse.
Constructing a Robust Frame for Stability
The backbone of any successful green screen setup lies in its frame. Modern options often feature lightweight yet sturdy aluminum or steel constructions that resist warping and sway, ensuring your backdrop stays flawless during shoots. The ease of assembly is crucial—many models offer quick-lock mechanisms that save time and reduce frustration, especially in confined spaces where maneuverability is limited. Material quality impacts longevity, with high-grade finishes resisting scratches and dents, which is vital for frequent use. A stable frame minimizes vibrations that could cause shadows or wrinkles on the fabric, directly enhancing keying quality. However, some designs compromise on adjustability, making it difficult to fine-tune the height or width without tools, which can be inconvenient during quick setups.
Testing Creator Rigs in the Trenches
When pushing creator rigs to their limits during a live-stream marathon, they often reveal their true colors. For instance, a robust studio setup with multiple cameras and lighting can handle continuous operation for several hours without overheating or crashing. However, cheaper rigs tend to struggle, overheating or losing synchronization. During extended shoots, professional-grade gear maintains stability, but budget options sometimes falter, causing interruptions and frustrating delays. This scenario underscores the importance of quality components designed for reliability under sustained use.
Lighting Kits Face the Storm
In a real-world outdoor shoot during sudden rain, lighting kits are tested for durability and performance. High-end LED panels with waterproof ratings easily withstand light rain, providing consistent brightness without flickering. Conversely, low-cost options often lack proper seals, leading to moisture ingress and eventual failure. Brightness and color accuracy also matter—expensive kits tend to produce more natural tones, making post-production easier. Still, some cheaper models claim water resistance but fail under actual storm conditions, highlighting the gap between specifications and real-world performance.
How do microphone reviews stand up in windy environments?
Wind noise is a notorious challenge for microphones during outdoor shoots. Professional shotgun mics with high-quality windshields excel in these conditions, effectively rejecting unwanted sound. However, cheaper models often produce muffled audio or pick up excessive noise, complicating editing. Testing in windy parks or beaches shows that investing in proper accessories, like dead cats, makes a tangible difference—yet, not all user reviews post these caveats, leading to misconceptions about mic capabilities.
Performance in Action: Cameras and Speed
During rapid scene changes in fast-paced vlogs or action sequences, cameras are tested for autofocus and processing speed. Premium models lock focus swiftly and handle 4K footage smoothly, with minimal lag. Mid-range options sometimes struggle, with delayed focusing or dropped frames, especially under low light. User feedback from forums indicates that some budget cameras have ongoing firmware issues, which complicates real-time shooting. For professionals, these glitches are unacceptable, emphasizing the importance of real-world testing beyond specs sheets.
Do lighting kits maintain color consistency over long shoots?
Extended shooting sessions can cause color shifts in cheaper lights, leading to inconsistent skin tones or background hues. Top-tier kits with stable power supplies and high-quality diodes deliver consistent output, simplifying editing workflows. Conversely, cheaper alternatives may flicker or drift in color temperature, demanding extra post-production work. Many users report these problems after hours of continuous use, asserting that initial brightness tests aren’t sufficient indicators of a fixture’s real-world performance.
Join the Conversation
Have you experienced gear failures during critical shoots? Share your stories and solutions in the comments. Do you agree with my assessments of reliability versus cost? Your insights help the community navigate the complex world of creator equipment.
Creator Rigs and Why They Outshine Competitors
When evaluating creator rigs, such as the popular Neewer Pro Studio Rig versus Rode Micro Studio setups, our selected rigs often offer a more balanced mix of durability and affordability. The Neewer models tend to be cheaper, making them attractive for beginners, but they sometimes lack the sturdy build and integration features found in higher-end options like the Rode Micro Studio, which provides superior build quality and more comprehensive cable management. Choosing our gear means investing in equipment that promises longevity, especially crucial for creators who shoot regularly. Price comparison: Neewer kits generally hover around $150, while Rode Micro Studio setups are closer to $350. For those seeking a reliable, professional look without breaking the bank, our recommended options often provide the best value for money, especially considering the longer lifespan and fewer maintenance issues. Check current prices on popular retailers like Sweetwater or B&H for up-to-date comparisons.
Lighting Kits Face Off
In the realm of lighting, our suggested LED panels stand against the Aputure Amaran series and Neewer LED Lights. While Neewer offers budget-friendly options around $100, their durability and light stability may not match the premium build and color accuracy of Aputure, which can cost upwards of $200 but offers more consistent output and better weather resistance. The Aputure lights often feature advanced cooling systems, reducing overheating during prolonged shoots—something Neewer models tend to lack at this price point. If you’re a professional creator aiming for higher-quality visuals, investing in Aputure or similar premium brands provides noticeable improvements in light quality and consistency. For casual creators, Neewer can serve as a budget-friendly starter, but keep in mind the trade-offs in performance. Be sure to review real user feedback and check the latest prices before deciding.
Is it worth the upgrade?
Upgrading your camera gear can significantly impact your content quality, but the decision depends on your needs. For instance, moving from a mid-tier DSLR like the Canon EOS 80D to a mirrorless Sony A7 IV offers better autofocus, low-light performance, and video capabilities—justifying the higher price. However, if you’re content with 1080p video, your current camera may suffice. Evaluate factors like autofocus speed, image stabilization, and battery life. Reviewing alternatives like the Panasonic Lumix GH5 or the Nikon Z6 can provide insights into what offers the best value based on your shooting style. Always compare the latest prices and features; check out official sites like B&H or Adorama for up-to-date info and deals.
Microphone Battles: Budget vs. Pro
Choosing between budget options like the DJI Mic and professional-grade mics such as the Sennheiser MKH416 hinges on your recording environment. The DJI Mic, priced around $200, offers portability and decent sound quality, ideal for vloggers and content creators on the go. Conversely, the Sennheiser MKH416, costing over $1000, is a broadcast-quality shotgun mic with superb noise rejection and frequency response, perfect for studio-recorded content or professional podcasts. While the DJI provides excellent value for beginners, serious creators aiming for top-tier audio should consider investing in high-end options, especially if recording in windy or noisy environments. External windshields and accessories further improve performance across all price points. As always, check user reviews and current pricing to ensure your choice aligns with your production needs.
Conclusion
Ultimately, selecting the right creator gear depends on your goals, budget, and working environment. While budget options like Neewer and DJI provide a solid starting point, they often fall short in durability and advanced features sought by professionals. Premium brands like Rode, Aputure, and Sennheiser, although pricier, offer superior build quality, reliability, and performance—justifying their costs for serious creators. Comparing these options side-by-side on reputable retailers’ sites helps make an informed decision tailored to your creative journey.
The Good, The Bad, and The Ugly
- Pros: Compact, lightweight frames; durable materials; effective lighting options; reliable microphone choices; high-quality cameras with fast autofocus; stable color temperature across lights; versatile creator rigs that balance cost and durability.
- Cons: High-end equipment can be expensive; some budget options lack durability or advanced features; setup complexity for beginners; waterproof claims of cheap gear often misleading; longer-term costs of premium gear may be justified but out of reach for casual users.
Who Should Invest in This Gear?
This setup is ideal for dedicated content creators working in confined spaces who seek professional results without a massive studio footprint. It’s perfect for those shooting regular videos, live streams, or tutorials in small rooms. Conversely, beginners just starting out or casual hobbyists may find the premium prices unnecessary, and should consider entry-level gear or incremental upgrades.
Final Verdict: 8.5/10
If you’re committed to producing high-quality content in a limited area, investing in durable, reliable equipment makes sense. The balance of stability, lighting consistency, and camera performance ensures your videos look professional and polished. For budget-conscious creators, some compromises are inevitable, but the recommended gear offers excellent value and longevity. Don’t hesitate to explore related accessories like https://creatorrigreviews.com/this-22-weighted-base-for-desks-that-hate-c-clamps to stabilize your setup or https://creatorrigreviews.com/this-12-silicon-skin-prevents-camera-scratches-in-the-field for protecting your gear during outdoor shoots.Ultimately, the choice hinges on your specific needs and budget, but this gear arsenal is a solid investment for serious creators.