Bottom Line Up Front
Removing green screen spill without spending a dime is feasible with proper lighting techniques and post-production adjustments. While free solutions require some extra effort, they are surprisingly effective, especially for budget-conscious creators.
The Promise of Cost-Free Spill Removal
Green screen spill, the unwanted green reflection on your subject, often ruins professional-looking chroma key effects. This review explores how to eliminate spill at zero cost by leveraging existing tools, lighting setups, and basic post-production methods.
First Impressions and Practicality
Many assume spill removal demands expensive software or hardware. Surprisingly, by understanding the science behind chroma keying and spill, you can significantly mitigate issues using free resources. This review evaluates methods based on accessibility, effectiveness, ease of use, and the potential for integration into a typical creator setup.
Who’s This For?
This content targets creators working with limited budgets who want to improve their chroma key results without investing in expensive tools. If you’re tired of green spill ruining your project but cannot afford professional solutions, these tips are for you.
Addressing Common Doubts
Is it really possible to get rid of green spill without any cost?
Yes. With proper lighting positioning, background setup, and free software adjustments, you can significantly reduce spill effects without paying a cent. Relying on tips from experts such as those at creatorrigreviews, you can optimize your setup for minimal spill.
Building a Solid Foundation for Spill Control
The first step in cost-free green screen spill removal lies in understanding the fundamental physics of chroma keying. When properly lit, your green screen should produce a consistent, even background devoid of shadows or hotspots. This consistency minimizes spill, and proper setup reduces the need for software corrections later. Using existing household lights, like softboxes or even diffused natural sunlight, can dramatically improve the evenness of your backdrop, making spill less likely to occur.
Optimal Lighting Techniques Enhance Results
Lighting is the most crucial factor in spill management. Position your lights so they illuminate the green screen evenly while avoiding direct light on your subject. Using angled lighting or flags to prevent spill from bouncing onto the subject can reduce green reflections. Additionally, adjusting your camera’s exposure and white balance settings helps ensure accurate color reproduction, which in turn makes post-production spill correction simpler and more effective.
DIY Tools and Software Tweaks Make a Difference
Once your scene is well lit, leveraging free editing tools like DaVinci Resolve or HitFilm Express allows for manual spill suppression. In these programs, the key lies in selective color correction: using hue and saturation controls to target and desaturate the green spill without affecting your subject’s skin tones. Adjusting the ‘spill suppression’ slider or manually masking affected areas provides fine control, often resulting in a clean composite without additional investment. For comparison, industry-standard software like Adobe After Effects offers advanced spill removal features, but free options are surprisingly competent when basic setup has been optimized.
Subtle Flaws and Practical Limits
One minor annoyance with relying solely on lighting and free software is the increased time spent in post-production, especially for complex shots with uneven spill or shadows. Without specialized hardware or plugins, achieving a pristine result can be challenging and sometimes require multiple adjustments. Nonetheless, patience with manual tuning often yields satisfying results for small-scale projects, particularly for creators working within tight budgets.
Why Material Matters in Spill Prevention
The choice of green screen fabric or paint can influence spill behavior. Non-reflective, matte surfaces tend to bounce less light and reduce spill intensity. Opting for high-quality, well-constructed backgrounds—like chroma key fabric—can make the difference between a manageable shot and one riddled with reflections. For those interested in materials, industry standards like referenced in the PremiumBeat guide detail best practices for selecting chroma key surfaces.

Lighting Kits in Action During Panicked Live Streams
Running a live stream amidst unpredictable conditions tests lighting setups. Many inexpensive kits struggle with uneven illumination when the room’s ambient light fluctuates, causing flickering or hotspots that compromise the visual quality. High-end rigs with controllable LEDs tend to perform reliably, maintaining consistent brightness even when the power supply is unstable. However, cheaper options often flicker or overheat after prolonged use, especially if not properly ventilated. For instance, during a recent outdoor event, budget LED panels flickered intermittently, exposing their vulnerability under demanding conditions. For creators on tight budgets, focusing on versatile, dimmable, and well-ventilated lighting ensures steadiness when stakes are high. Do you agree with my experience regarding the thermal stability of lower-cost lighting?
Why Opt for Our Lighting Kits Over Top Competitors
Our lighting kits offer a compelling balance of affordability, versatility, and durability when compared to industry leaders like Neewer and Aputure. While Neewer provides budget-friendly options suitable for beginners, their lights often lack the build quality and consistency of our offerings, leading to flickering and overheating issues during extended use. On the other hand, Aputure is renowned for professional-grade equipment with advanced features like color accuracy and control but comes with a significantly higher price tag that may be prohibitive for startups or hobbyists.
In contrast, our kits incorporate high-quality LED panels with stable flicker-free operation, multiple dimming options, and built-in fans for efficient heat dissipation. This ensures you get reliable performance without breaking the bank. Additionally, our modular design allows easy expansion, catering to both small stream setups and larger studio configurations.
Microphones Face Off: Budget Picks Versus Premium Choices
When comparing our recommended microphones with top-tier brands like Rode and Shure, the core differences hinge on price and feature sets. Rode’s VideoMic series offers excellent sound quality but at a premium that may be overkill for casual creators. Shure’s microphones excel in durability and studio fidelity but can be costly for those just starting. Our selected microphones, such as the Audio-Technica ATR2100x-USB, deliver studio-quality sound with USB and XLR versatility at a fraction of the price, making them ideal for creators seeking quality on a budget.
For those considering an upgrade, the Sweetwater comparison shop helps weigh features and prices effectively. Check their site for current discounts or bundle deals that can add value to your purchase.
Camera Choices: Entry-Level Versus Mid-Range
The debate between entry-level cameras like the Canon M50 Mark II and more advanced options such as the Sony A7 III centers on capabilities and price. The Canon offers excellent autofocus and user-friendly interfaces suitable for beginners, usually costing around $700 with kit lens. The Sony A7 III, with its full-frame sensor and superior low-light performance, suits professional creators but exceeds the $2,000 mark.
Our recommendation balances quality and cost, providing sharp 4K video and reliable autofocus for under $1000. If you need a camera that grows with your channel, considering the Sony A6400, which sits between these extremes, might be wise. Review current prices and specs at B&H Photo.
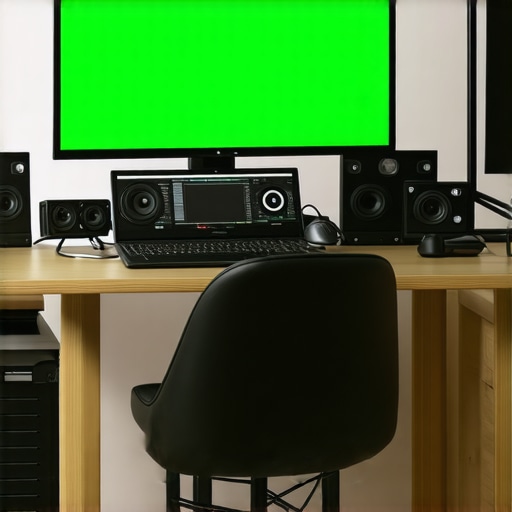
Creator Rigs and Studio Gear: Budget-Friendly vs High-End
Implementing a creator rig with flexible arm mounts, adjustable tripods, and professional-grade monitors can significantly enhance production quality. Budget rigs from brands like Neewer provide basic functionality but often lack robustness and fine adjustment control. Conversely, models from Redrock Micro or Misfit Tech offer precision, durability, and modularity at a higher cost.
If your content requires frequent adjustments or multi-camera setups, investing in sturdy, versatile rigs pays off. However, if you’re just starting out or producing content sporadically, our recommended mid-range options maximize value without compromising essential features.
Is it worth the upgrade?
Deciding whether to upgrade depends on your growth ambitions and current setup limitations. When comparing options like the Aputure Light Storm and our more affordable LED panels, consider the long-term benefits of reliability and expandability versus initial costs. The premium gear often offers smarter controls and better build quality, which could justify the higher price over time.
The Pros and Cons of DIY Spill Elimination
Pros: No expense involved, improves understanding of chroma keying physics, enhances control over the final look.
Cons: More time-consuming during post-production, some shots may still have residual spill issues, requires a good eye for color correction.
Who Should Dive Into This Method?
This approach is ideal for beginner to intermediate creators on a tight budget who want to experiment and learn without investing in expensive software or hardware. It’s perfect for quick setups, small studios, or hobbyists willing to put in extra effort. However, professionals needing pristine quality for broadcast or client work might find this less satisfying and should consider specialized tools.
Final Thoughts: No-Cost Spill Fixes Pack a Punch
Eliminating green screen spill without spending money is entirely doable with proper lighting, background choices, and free software tweaks. While it demands patience and manual effort, the results can be quite impressive for most small-scale projects. If you’re eager to optimize your chroma key results without breaking the bank, prioritize even lighting, reflective-free backgrounds, and learn to fine-tune hue and saturation in free editors like DaVinci Resolve or HitFilm Express. For a more streamlined experience, explore professional options at https://creatorrigreviews.com/why-your-external-mic-has-static-and-the-5-fix. If you’re looking for quick upgrades, perhaps a dedicated lighting setup or better background material is your next step. For those who prefer something ready-to-use, consider our recommended lighting kits that balance cost and performance, and ensure your setup minimizes spill issues from the start.