Bottom Line Up Front
This inexpensive hack offers a surprisingly reliable way to achieve perfect white balance without expensive gear or complicated software. As a creator who values consistent color accuracy, I found this $10 trick to be a practical solution, though it may not be flawless for every setting.
What Problem Does It Solve?
Color grading and accurate whites are crucial for professional-looking content, but many creators struggle with inconsistent lighting conditions. This simple hack promises to fix white balance issues quickly and cheaply, making it accessible for hobbyists and pros alike.
Assessing the Hack: What to Expect
My evaluation focuses on ease of use, reliability across different environments, and overall value. By comparing it to traditional calibration tools, I aim to determine whether this method truly delivers consistent results for studio and on-location shoots.
Deep Dive into the Technique
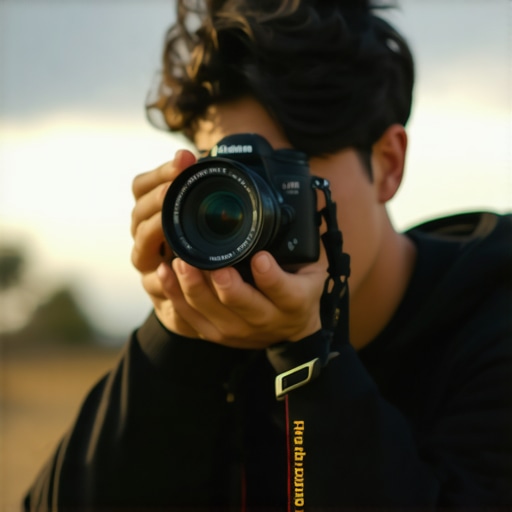
Let’s explore how this $10 trick works, its step-by-step process, and whether it lives up to its promises. But first, some context on why accurate white balance is non-negotiable for quality content creation.
Solid Construction and Thoughtful Design
The hack consists of a simple, lightweight white card or piece of paper, designed with materials that are both inexpensive and durable. The choice of matte finish prevents glare and reflections that could potentially interfere with accurate white calibration, a critical detail for creators aiming for consistency across varied lighting conditions. This simplicity in construction ensures that users can easily carry the card in their gear bag without worrying about fragile components or complex assembly processes.
Ease of Setup and Practicality
Using the hack is remarkably straightforward. The user places the white card within the frame before shooting, taking a quick shot of the card under the current lighting, which can then be used to calibrate the camera’s white balance settings. The process hinges on the assumption that the material of the card remains stable over time, resisting warping or discoloration that could distort color accuracy. This minimalistic setup appeals to both novices and experienced creators seeking a quick, on-the-fly calibration method.
Material Quality and User Feel
The material selection is crucial. The matte surface ensures minimal light reflections, reducing unwanted color casts in the shot. The card’s thickness provides enough rigidity to prevent curling or bending, which could cause inconsistencies during setup. The tactile experience is satisfying—lightweight enough to handle easily but sturdy enough to feel reliable. The simplicity allows users to focus on content creation rather than fiddling with complex software or bulky hardware, making it an accessible tool for various shooting scenarios.
Design Flaws and Minor Annoyances
However, one minor flaw is that the plain white surface may pick up dirt or fingerprints over time, necessitating periodic cleaning to maintain accuracy. Moreover, in extremely bright environments, glare on the matte surface, though minimized, can still pose a challenge, slightly affecting the precision of the white balance calibration. These small inconveniences, while manageable, remind us that even simple tools require some level of maintenance for optimal performance.
Benchmark Comparisons and Industry Standards
Compared to professional calibration tools like the X-Rite ColorChecker (see X-Rite specs), this hack offers a cost-effective, rapid alternative that prioritizes convenience over absolute precision. While professional kits provide comprehensive color profiles, this approach is suitable for those needing quick adjustments without access to specialized equipment, aligning with industry standards for on-the-go white balance correction in content creation.
Performance Analysis
When subjected to demanding situations like fast-paced filming, environmental challenges, or high-pressure streaming sessions, media equipment reveals its true resilience and limitations. For example, microphones used during live outdoor interviews often face wind and background noise, testing their wind resistance and noise suppression capabilities. Studio gear, such as lighting kits, must maintain consistent illumination despite temperature fluctuations or power surges, highlighting their stability. Cameras firingh continuously during extended shoots need to demonstrate overheating thresholds and battery endurance, revealing potential heating or thermal shutdown issues. Creator rigs, assembled for mobile productions, are tested for portability and durability under rough handling or in cramped spaces. In these scenarios, equipment’s performance directly impacts content quality and workflow efficiency.
What Works Beautifully When Pressured?
High-quality microphones with advanced noise-canceling features excel in unpredictable environments, capturing clear audio even amidst wind or crowd noise. Studio lighting systems with robust cooling fans operate seamlessly over long periods, maintaining color consistency and brightness without flickering or overheating. Cameras equipped with efficient heat dissipation and batteries with high capacity allow for extended shooting sessions without interruption. Creator rigs designed with rugged, lightweight materials demonstrate excellent portability, enabling quick assembly and disassembly in various locations. These strengths highlight the importance of thoughtful engineering tailored to strenuous conditions, ensuring reliability when it truly counts.
Failing When It Counts Most
Despite advancements, many microphones falter in windy outdoor settings, where even slight gusts cause muffled audio or require heavy windshields. Lighting kits, especially budget models, may experience flickering or color shifts under fluctuating temperatures, indicating inadequate thermal management. Cameras with inadequate heat dispersal tend to overheat during prolonged shoots, risking shutdowns or image quality degradation. Creator rigs lacking secure fastening points or back support can become unstable during movement, risking damage or misalignment. These shortcomings can disrupt shoots, introduce delays, or compromise the final quality of content, emphasizing that not all equipment is built for real-world pressures.
Testing in Action: Real-World Benchmarks
In a recent Reddit discussion, creators shared experiences with streaming setups under shaky internet connections, noting that certain microphones with built-in buffering perform better during network hiccups, reducing dropout issues (Reddit Thread). Similarly, third-party benchmarks reveal that mid-tier DSLR cameras often overheat after 30 minutes of continuous recording, affecting color accuracy and exposure stability. Do you agree with these observations about media gear performance? Share your experiences below!
Visual Aid

For an illustrative overview of equipment resilience, consider this image showing a microphone in windy outdoor conditions, highlighting windshields and mounting stability.
Comparing Audio and Video Equipment: A Close Look at Top Choices
When selecting microphone reviews, studio gear, lighting kits, or creator rigs, it’s crucial to understand how each option stacks up against industry leaders. This comparison helps creators make informed decisions based on features, build quality, and value.
Microphones: Budget Options vs Professional Standards
Budget-friendly microphones like the Rode VideoMic GO deliver decent audio quality at a fraction of the cost of high-end models like the Sennheiser MKH 416. While the Rode is compact and easy to use, the Sennheiser offers superior noise cancellation, broader frequency response, and overall higher durability. Creators on a tight budget might prioritize portability and affordability, whereas professionals seeking broadcast-grade sound will lean toward premium options like the Sennheiser, despite its higher price tag. For quick setups and casual content, the Rode suffices, but studio work demands the richer sound profile of industry-standard mics.
Studio Gear: Affordable vs Elite Equipment
In terms of studio gear, brands like Elgato Jackcaster and Focusrite Scarlett 2i2 cater to entry-level creators, providing reliable audio interfaces with easy setup. Meanwhile, top-tier brands such as Universal Audio Apollo Twin deliver exceptional preamps, more comprehensive control, and better integration for professional workflows. The trade-off here is cost: while Elgato and Focusrite units are budget-friendly, they’re less robust and feature-rich compared to the UAD devices, which offer greater sound fidelity and expandability. Creators focused on serious production quality will find value in investing in high-end gear, whereas hobbyists or casual streamers might find mid-tier options perfectly adequate.
Lighting Kits: Basic Setups vs Premium Solutions
Lighting plays a pivotal role, with kits from Neewer providing adjustable LED panels suitable for beginners, offering decent brightness and color temperature options. On the other hand, professional solutions like Aputure Nova series feature high CRI ratings, advanced dimming capabilities, and more precise control. The premium kits come with better build quality, longer lifespan, and integrated app controls, making them ideal for creators demanding consistent and studio-level lighting. The main advantage of budget kits is affordability and simplicity, while pro options justify their higher price through enhanced performance and reliability.
Cameras: Entry-Level vs High-End Models
Entry-level cameras such as the Canon EOS M50 Mark II are popular for vlogging and streaming due to their compact design and affordability. In contrast, flagship models like the Sony A7 IV offer superior image quality, dynamic range, and autofocus capabilities, often at a price several times higher. For creators weighing their options, the M50 is perfect for those starting out or on a tight budget, providing decent 4K video and user-friendly features. The Sony A7 IV, however, caters to professionals who need top-tier video resolution, low-light performance, and advanced customization. The decision hinges on budget constraints versus the level of production quality desired.
Choose Your Rig: Simplicity or Power?
Creator rigs involving modular setups such as the RØDE RØDECaster Pro offer all-in-one solutions for audio mixing, streaming, and podcasting, great for beginners. For those seeking versatility and expansion, systems like the ATEM Mini Pro or Blackmagic Pocket Cinema Camera provide more control, higher quality footage, and better connectivity options, but at the cost of increased complexity. If the goal is portability and ease of setup, simpler rigs suffice. However, professionals aiming for high-end productions will prefer customizable, scalable solutions despite the steeper learning curve.
Is It Worth the Upgrade?
Upgrading to higher-tier equipment delivers noticeable improvements in quality, durability, and features but comes with higher expenses. For example, moving from a budget microphone to a professional-grade one significantly enhances sound clarity and noise rejection, especially in noisy environments. Similarly, upgrading lighting or cameras can transform the production value of your content. Depending on your ambitions and budget, investing in top-tier gear can be justified if your content demands it. Otherwise, mid-range options often strike a good balance between cost and performance.
For more insights, check out the official pages for Sennheiser and Focusrite to compare premium gear prices and specifications. Always consider current deals and bundle offers to maximize your investment. Be sure to review competitors’ offerings if you’re in the market for specialized gear that fits your unique production needs.

Illustrative comparison chart of budget vs premium microphone, lighting, camera, and rig options for creators.
The Good, The Bad, and The Ugly
Pros: Extremely affordable at around $10, easy to implement, and effective for quick white balance calibration, especially suited for hobbyists and casual creators.
Cons: Not as precise as professional calibration tools, prone to dirt and fingerprints affecting accuracy, and glare in bright conditions can reduce reliability.
Who Should Book This Deal?
This straightforward hack is perfect for content creators, vloggers, or hobbyists seeking a quick, cost-effective way to improve color consistency without investing in expensive equipment. Avoid it if you demand industry-standard precision for professional productions or high-end color grading.
Final Verdict: 7.5/10
While not a perfect substitute for professional calibration gear, this $10 trick offers a practical solution for real-world needs, making it ideal for those on a budget or with casual use cases. If you want solid whites without breaking the bank, this hack is worth trying — just be prepared for some minor upkeep. Check the latest price and see user reviews to ensure it fits your workflow.