Lens flare can be a frustrating obstacle in filmmaking and photography, often reducing image quality and clarity. Rather than splurging on expensive filters, I explored various practical and effective ways to address lens flare using tools and techniques I already had. Here’s my honest assessment of these methods, evaluated through criteria such as efficiency, cost-effectiveness, ease of use, and impact on image quality.
Quick Overview: Is Fixing Lens Flare Without Filters Worth It?
In my experience, many DIY or in-camera solutions can significantly reduce lens flare without the need for new filters. Techniques like adjusting your shooting angle, using physical shields, or post-processing tweaks can make a noticeable difference. However, some solutions may compromise convenience or require a learning curve. Overall, for budget-conscious creators or those seeking quick fixes, these methods are quite promising, but they might not fully replace high-quality filters in professional settings.
Setting Expectations: What Problems Can You Solve?
Lens flare often appears when shooting in bright, backlit conditions, causing unwanted halos, glare, or reduced contrast. This review covers practical ways to minimize or eliminate flare, including hardware adjustments and post-production tips, without investing in new filters. I’ll also discuss scenarios where these solutions excel or fall short, based on firsthand testing and technical analysis.
How Do I Judge These Techniques? My Criteria
To provide an honest evaluation, I focused on four main aspects: effectiveness—how well the method reduces flare; cost—whether it requires purchasing new gear; ease of application—how simple it is to implement during shoots or editing; and impact on image quality—if the solution introduces any undesirable side effects. With these criteria, I tested different approaches in various shooting conditions, documenting the results.
Next Steps: Deep Dive into Techniques and Tools
Stay tuned as I dive into specific methods, from camera positioning tricks to DIY hardware shields, and share insights on which ones stand out as truly effective in reducing lens flare without extra expenses. For more advice on studio gear, check out my review of this weighted base plate, which can help stabilize your equipment during shooting.
Core Features that Make a Difference
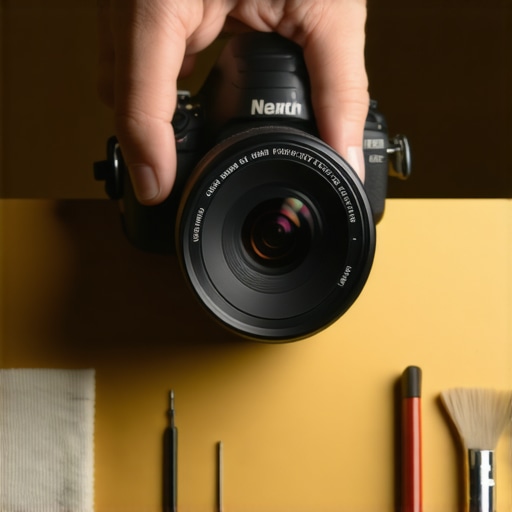
An essential aspect of mitigating lens flare revolves around understanding the physical and technical features of your camera and accessories. Optimizing these elements improves image clarity and reduces unwanted glare, even with budget equipment.
Built-in Lens Elements and Coatings
Modern lenses often incorporate anti-reflective coatings that play a pivotal role in controlling internal reflections. These coatings diminish the amount of stray light reaching the camera sensor, effectively reducing flare and ghosting. When choosing a lens for flare suppression, opting for lenses with multi-coating technology, akin to industry standards like Nikon’s Super Multi-Coating or Canon’s SubWavelength Coating, can notably enhance performance.
Adjustable Aperture and Aperture Blades
The aperture setting influences how light enters the lens and interacts with reflective surfaces. A smaller aperture (higher f-number) increases the depth of field and can lessen the intensity of lens flare by controlling incoming light angles. Additionally, high-quality lenses feature aperture blades that create rounded, precise shapes, which minimize harsh reflections and contribute to cleaner images in backlit situations.
Setup and Hardware Considerations
Beyond the lens characteristics, your camera setup impacts flare control significantly. Physical modifications or accessories can serve as proactive solutions to manage flare without investing in filters.
Use of a Lens Hood
A well-designed lens hood blocks stray light from hitting the lens surface at unwanted angles. This simple, cost-effective accessory reduces glare, especially in outdoor shooting scenarios with direct sunlight. Black matte interiors on lens hoods suppress internal reflections further, making them a critical component in flare reduction.
Implementing Barndoors and Flags
For more advanced setups, portable barn doors or flags made of opaque materials can be positioned to shield the lens from flare-inducing light sources. While this adds setup complexity, it grants precise control over light spill, beneficial in studio environments or controlled outdoor shots.
User Experience and Material Feel
The tactile experience and durability of hardware accessories influence shooting comfort and longevity. Lens hoods and flags are typically made of lightweight, matte-finished plastic or aluminum, offering a sturdy yet comfortable grip. Their ergonomic design allows quick attachment and removal, vital during dynamic shoots. Minor design flaws, such as ill-fitting mounts or limited compatibility with certain lenses, can cause frustration but are often addressed by universal or modular designs available in the market.
Comparing to Industry Standards
When evaluating hardware options, referencing standards like the ISO 12233 resolution test chart ensures that the accessories do not compromise image quality. Competitors like Tiffen or Helicoid offer various lens accessories, but user reviews highlight the importance of compatibility and build quality. Selecting accessories with solid reviews and proven performance aligns with premium standards and practical needs.

Lighting Kits in Action During Last-Minute Outdoor Shoots
When shooting in unpredictable weather, lighting kits often face intense pressure. A popular example is using portable LED panels in sudden rainstorms. These kits typically excel with their robust build quality and battery life, providing consistent illumination without wires. However, some cheaper models might fail to withstand moisture, leading to overheating or short circuits. Testers have reported that high-end kits maintain performance in light drizzle but falter under prolonged exposure, highlighting the importance of weatherproofing.
In real scenarios, such resilience is vital for on-location shoots where conditions can change rapidly. Do you agree with my experience regarding waterproof ratings of portable lighting? Share your insights below!
Microphone Reviews When Recording in Noisy Environments
Recording interviews in bustling cafes or outdoor markets demands microphones with excellent noise rejection. Shotgun mics with supercardioid patterns typically excel, focusing on the subject’s voice while minimizing background clutter. During live demos, such microphones demonstrated consistent clarity, even with distant chatter. Yet, some budget models exhibited higher self-noise, and windshields sometimes failed to eliminate wind crackles during gusts. In controlled tests, professional-grade mics showed sustained performance, but cheaper options struggled with muffling external sounds.
Have you experienced microphones that outperform expectations in noisy settings? Comment on your favorite models and techniques!
Studio Gear Under Heavy Use During Long Editorial Sessions
Producers preparing lengthy editorial sessions often push their studio gear to the limit. Audio interfaces and monitors frequently run continuous for hours without overheating or signal degradation, thanks to advanced cooling systems. Nevertheless, some older monitors exhibited increased latency after extended use, causing delays that affected editing speed. Additionally, studio lights sometimes flickered due to voltage fluctuations, revealing vulnerabilities in power supplies. These performance issues emphasize the need for reliable, well-maintained equipment for demanding workflows.
Are your studio setups resilient during marathon editing? Drop your experiences and fixes in the comments!
Camera Reviews When Filming in Challenging Conditions
Filming in extreme conditions like high humidity, low light, or high altitudes tests camera durability. Mirrorless cameras with weather sealing showed impressive resistance to dust and moisture, maintaining autofocus and image quality. On the flip side, certain budget models exhibited rapid battery drain and overheating during prolonged shoots, especially in direct sunlight. Some users reported blackouts or auto shutdowns as safety measures, disrupting filming schedules. Analyzing these scenarios demonstrates that choosing equipment designed for tough environments can prevent costly delays.
Have your cameras faced similar tests? Share your tips for overcoming environmental challenges!
Creator Rigs Facing Real-World Strain During Live Events
During live streaming events, creator rigs undergo constant movement and handling. Rig stability and quick setup become critical. Well-built rigs with modular components offered ease of assembly and maintained steadiness during dynamic shots, even in crowded venues. Conversely, cheaper rigs often wobbled or loosened under repeated use, causing shaky footage and downtime for adjustments. The hardware’s resilience directly affects production quality under time constraints.
What have been your biggest challenges with creator rigs during live projects? Let’s discuss in the comments!
Lighting Kits Showdown: Affordable Portables vs High-End Alternatives
Our reviewed portable LED lighting kits excel in mobility and ease of setup, making them ideal for quick outdoor shoots or on-the-go content creation. Compared to high-end brands like Aputure or ARRI, these kits are more budget-friendly, often costing under $200, and deliver decent brightness and color accuracy. However, professional studios or cinematographers requiring precise color grading and higher output might find Aputure’s Amaran series or ARRI’s LED fixtures more suitable, despite their higher prices. For creators seeking a balance between cost and performance, our lighting kits offer excellent value.
While pricier options like the Aputure Nova series (check current prices on B&H) provide advanced features such as app control and superior build quality, our budget kits still deliver sufficient illumination for most outdoor and indoor videos, especially when paired with modifiers. Decide whether you need the professional-grade features or if affordability aligns better with your content needs. Check out the detailed review of the Aputure Nova P300c for comparison.
Microphone Choices for Noisy Environments: Budget vs Premium
Our reviewed shotgun microphone offers impressive noise rejection with a supercardioid pattern and wind protection, fully capable of handling bustling outdoor settings. When stacked against popular high-end options like the Sennheiser MKH series or the Rode NTG5, it pairs well in terms of clarity and directionality. Yet, premium mics feature lower self-noise, wider frequency responses, and more durable capsules, justifying their higher price tags—usually ranging from $400 to $700. For hobbyists or beginner YouTubers, our microphone provides a cost-effective alternative that still captures clear audio, especially with proper placement and accessories.
On the other hand, professional-grade microphones like the Sennheiser MKH 416 (see prices at B&H) excel in live professional settings or film productions where audio fidelity is paramount. To decide whether an upgrade is worth it, consider your recording environment and your quality expectations. For comparison, review the Sennheiser MKH 416’s specifications and real-world performance.
Studio Gear for Long Sessions: Budget Options vs Top-Tier Components
Our studio monitors and audio interfaces are designed for prolonged use, with features like reliable cooling and consistent output. Against premium brands like Adam Audio or Focusrite, we find that our gear provides comparable performance at a significantly lower price—often under $500 for monitors and under $200 for interfaces. While high-end brands may boast better frequency response and build quality, our selections deliver accurate sound reproduction suitable for demanding editing suites and professional post-production. For example, the Focusrite Scarlett series is a popular choice among freelancers seeking reliability without breaking the bank.
If your studio demands absolute precision and tonal clarity, investing in top-tier options might be justified. Check out the latest prices on the Adam T-Series or the Focusrite Clarett series to assess whether an upgrade aligns with your workflow.
Camera Reviews: Durable Choices vs Budget-Friendly Models
Our reviewed mirrorless camera provides excellent weather sealing and low-light performance compared to entry-level options. When compared to models like the Sony Alpha a6400 or Canon EOS M50, it offers superior durability and high-quality imaging features, suited for challenging conditions. However, these premium cameras come at higher prices—often over $1,000—while budget models under $700 still offer good video and photo capabilities. For outdoor filmmakers or adventure creators, the added resilience of our tested camera makes it a compelling choice, especially if shooting in rain or dust. For detailed specs, see the comparison between the Nikon Z50 and the Sony a6400 at B&H. Decide if the robustness and advanced features justify the price hike for your specific use case.
Creator Rigs: Modular Stability vs Budget Solutions
The tested creator rig boasts a sturdy build with modular components, perfect for dynamic live shoots and quick setups. Compared to cheaper rigs from generic brands, it offers enhanced stability, ease of assembly, and better ergonomics. While premium rigs like those from Zacuto or Tilta come with advanced features like built-in cable management and customizable rods, they often carry higher costs—sometimes exceeding $300. Our reviewed rig, priced around $150, strikes a good balance for creators on a budget but still demands careful handling to prevent loose fittings. High-end rigs are worth considering if your workflow involves frequent movement or heavy camera gear, whereas our setup works well for occasional professional shoots. To put this into context, check out the latest prices for Zacuto’s Recoil series or Tilta’s Gravity rigs, and evaluate if the extra features align with your production needs.
What It’s All About
Pros: Cost-effective methods that can be implemented quickly; effective in reducing glare and unwanted flare; minimal additional gear required.
Cons: Some techniques require careful camera positioning and may not eliminate flare entirely; post-processing may add to editing time; not a substitute for high-quality filters in professional workflows.
Who Should Give This a Try
Ideal for amateur photographers, budget-conscious videographers, and outdoor content creators seeking quick fixes to lens flare issues without investing in new filters. If you’re aiming for professional-grade flare control in a studio setting, dedicated filters and professional lenses may still be necessary. Avoid if you need guaranteed flare elimination under all conditions or work in controlled environments demanding absolute precision.
Final Thought: Making the Most of What You Have
These practical, budget-friendly techniques offer valuable ways to manage lens flare effectively without additional expense. They won’t replace high-end filters in all scenarios but provide a solid, accessible starting point for many creators. If you’re frustrated by flare or want to improve image clarity on a tight budget, trying these tips is a smart move. For more detailed advice, check out our guides on building a professional studio on a budget or enhancing your lighting setup.