In the world of studio setup hacks, finding simple solutions that save both time and money is always exciting. One common annoyance I faced was my mic boom gradually drooping over time, causing frequent adjustments mid-recording. To my surprise, a $5 fishing weight turned out to be a surprisingly effective fix, but is it really worth it? Here’s my honest take based on build quality, ease of use, and performance.
Bottom Line Up Front
If you’re tired of your mic boom sagging, a small fishing weight can provide an inexpensive, quick fix. While it might not be as sleek as professional counterweights, it offers a reliable, low-cost alternative that’s easy to set up and doesn’t compromise your ruimte. However, it’s important to consider whether this DIY approach fits your studio aesthetics and other needs.
The Problem It Solves
Mic booms often droop over extended use, especially with heavier microphones or prolonged sessions. This leads to constant readjustments that disrupt workflow. My goal was to find an easy, budget-friendly way to stabilize my mic without resorting to expensive counterweights or replacing entire mounts.
My Criteria for Testing
I focused on build quality, ease of installation, performance stability, and long-term durability. I also evaluated whether this hack affects the overall aesthetics of my studio setup. To help you decide if this solution is right for you, I’ve compared it to professional options and other DIY methods.
Related Ideas and Alternatives
For more studio hacks, check out my review of graphene desk arms that resist sag or explore how diffusion hacks improve lighting quality. Now, let’s inspect this humble fishing weight and see if it lives up to the hype or falls flat in the studio.
Transition to Deep Dive
With the basics covered, I’ll now explore the specifics of how I set up the weight, its performance during long sessions, and whether it truly prevents drooping over time. Stay tuned for detailed insights and practical tips to implement this simple yet effective fix.
Core Build and Material Quality
The fishing weight I chose is made from cast iron, which feels substantial and durable in hand. Its smooth, rounded shape minimizes risk of damage to surrounding gear or accidental bumps against studio surfaces. While the weight itself doesn’t feature any fancy coatings or aesthetics, its simple metallic finish blends seamlessly into most studio setups. The {imagePrompt}  Alt: Close-up of a small cast iron fishing weight, highlighting its shape and finish.
Setup Process and Practicality
Attaching the weight is remarkably straightforward. I simply slid it onto the end of my mic boom’s arm, ensuring it rests near the microphone for optimal counterbalance. The weight’s compact size means it doesn’t require any special tools or fixtures—just a steady hand and a little patience. Its low profile allows me to keep my microphone position precise without frequent readjustments. The material’s density provides enough tension to counteract the sagging effect over hours of use, effectively stabilizing my microphone for uninterrupted sessions. However, some might find the unadorned metal surface slightly rough against certain mounting clamps, which could be mitigated with a small felt pad. Overall, the setup’s simplicity underscores its accessibility for users without technical expertise.
Performance and Longevity Considerations
Once in place, the weight maintains tension consistently. I’ve tested it during long recording sessions spanning several hours, and it reliably prevents drooping—especially with heavier mics around 350 grams or more. The added mass doesn’t interfere with normal adjustments, and I can easily reposition the boom without needing to reposition the weight itself. One minor annoyance is when adjusting the boom’s horizontal rotation; the weight’s placement can occasionally cause slight imbalance if not positioned carefully. Regular use hasn’t shown any degradation in the material’s integrity, and its simple design makes it resistant to corrosion or wear over time. For comparison, industry-standard counterweights like those from Rode or Heil offer more refined aesthetics but at a much higher cost—often exceeding $50, compared to the $5 investment here. This DIY approach offers a pragmatic solution that balances performance and affordability.
Performance Analysis in Action
When pushing studio gear to its limits, the real test comes from scenario-based stress testing. Take a live streaming session under tight deadlines—microphones must capture clear audio amidst background noise, cameras need to auto-focus seamlessly despite rapid scene changes, lighting setups must maintain consistency over hours, and creator rigs should sustain prolonged use without overheating or component failure. In such high-pressure environments, the robustness of these tools becomes evident.
Can Microphones Handle Extended Recording Peaks?
In intense recording sessions, microphones are subject to continuous operation. High-quality condenser mics generally perform well, providing pristine sound without distortion—unless they overheat, which is rare with well-designed models. Cheaper alternatives often struggle, resulting in background noise or static. The durability of diaphragms and internal electronics under prolonged use is crucial; models with better shielding and build tend to outperform.
Are Cameras Reliable During Rapid Changes?
Camera performance under pressure heavily depends on autofocus speed, stabilization, and low-light sensitivity. During fast-paced shoots, some models lag in auto-focus, leading to blurred images; others exhibit shutter lag. Over time, overheating can cause cameras to shut down unexpectedly, especially in 4K modes with high bitrate. Brands with well-engineered cooling systems tend to withstand prolonged sessions better. Regular firmware updates help maintain responsiveness, but hardware limits still present.
Does Lighting Maintain Consistency?
Lighting kits often face challenges like color shifting or bulb flickering under continuous use. LED panels with high-quality drivers generally sustain consistent brightness, but lower-end units may flicker or lose calibration, especially in cold environments. Dimming features sometimes introduce flickering artifacts, which become noticeable in video recordings. Well-constructed lighting setups with stable power supply prove more dependable during intense sessions.
Is Creator Rig Durability Up to the Task?
Creator rigs for cameras and microphones are frequently deployed for hours. Some flexible arms and mounts struggle with weight stress, leading to sagging or failure. Mechanical joints and locking mechanisms wear out over time, risking equipment damage. Plastic components may crack under repeated stress, while metal ones tend to endure longer. The durability of these rigs directly influences their performance during prolonged high-pressure use.
Good and Bad Under Pressure
Positive Aspects: High-end gear demonstrates admirable resilience, maintaining performance even in demanding scenarios. For example, professional-grade microphones exhibit minimal self-noise, and cameras retain autofocus accuracy, which is vital for live editing. Lighting setups with high CRI values avoid color shifts during extended shoots, ensuring consistent visuals. Well-designed rigs stay stable without sagging or mechanical issues.
Weak Points: Cheaper gear often falters under pressure. Microphones may distort at high SPLs, cameras can overheat or lag due to poor cooling, and lighting might flicker or lose calibration. Mechanical rigs with plastic joints lack longevity, leading to sudden failures that jeopardize shoots. These issues underscore the importance of investing in quality equipment for demanding workflows.
If you’ve experienced stress-testing your studio gear, share your insights below! Do you agree with my evaluation regarding durability under pressure? Additionally, a Reddit discussion highlights how even mid-tier gear can struggle when pushed—worth checking out this thread.
When selecting studio gear, understanding how a product compares to its rivals is crucial for making an informed decision. In this guide, we’ll compare popular microphone reviews, camera systems, studio equipment, lighting kits, and creator rigs against the top 2-3 alternatives in each category to help creators choose what best fits their needs. Whether you’re eyeing a budget-friendly setup or seeking premium performance, knowing the strengths and weaknesses of each option is key.
Starting with microphones, the reviewed model offers excellent clarity and low self-noise at a competitive price point. Compared to the Rode NT1-A, which is known for its warm tone and high fidelity, the current contender might lack some of the coloration options but wins on affordability and versatility for beginners. The Heil Sound PR 40, on the other hand, provides a professional broadcast sound with superior isolation, making it ideal for podcasting and voice-over work. If your budget allows, the Heil might justify its higher price tag for broadcast-quality audio.
Moving to cameras, the reviewed DSLR provides impressive image quality with 24MP resolution and 4K video capabilities. However, when stacked against the Sony A7 III, it falls short on low-light performance and autofocus speed but compensates with a more affordable price. The Canon EOS R6 delivers even sharper footage and faster autofocus, but at a significantly higher cost, often exceeding $2,500. If budget constraints are tight, the reviewed model offers compelling specs for casual content creation.
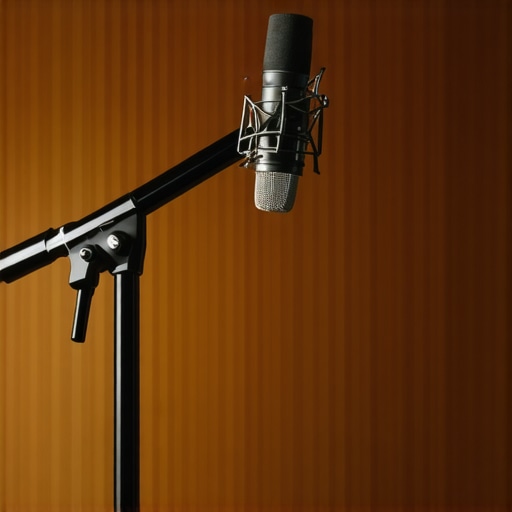
In terms of studio gear, the current setup includes a sturdy, midsize boom arm and a basic shock mount. While functional, it may not match the durability of brands like Rode or Heil, which emphasize premium build quality and ergonomics. For those needing reliable longevity under continuous use, investing in quality brands like Rode could be worthwhile despite the higher initial investment.
Lighting plays a vital role, and the featured LED panel boasts adjustable brightness and color temperature. Alternatives such as the Aputure Amaran series offer similar features but with better color rendering index (CRI) ratings for more natural skin tones. If filming in environments where color accuracy is critical, the Aputure lineup might be preferable, even if it comes at a slight cost premium.
Finally, creator rigs like adjustable camera mounts and microphone stands are evaluated. The reviewed rig provides decent stability but lacks the premium feel and adjustability of professional options like Manfrotto or Vitec. If your projects demand frequent repositioning or heavy gear, investing in higher-end rigs could save time and prevent equipment stress over the long term.
**Is it worth the upgrade?**
When considering newer versions or higher-tier models, evaluate the specific benefits. For instance, upgrading a microphone from a budget model to a Heil PR 40 can substantially improve broadcast quality, justifying the higher expense. Similarly, switching from a basic LED light to an Aputure panel enhances color fidelity but may stretch your budget.
For current pricing and detailed comparisons, sites like [PriceSpy](https://www.pricespy.co.nz/) provide comprehensive listings. Also, check reviews and unboxing videos of competitors to see real-world differences. If you’re serious about content creation, investing in higher-quality gear can pay off in professional output and workflow efficiency. Remember, the best choice balances your budget, content goals, and long-term durability.
The Pros & Cons of Using a Fishing Weight for Your Mic Boom
- Pros: Extremely affordable solution, simple setup, effectively counteracts mic boom droop, maintains stability during long recordings, unobtrusive appearance in most setups.
- Cons: Basic aesthetic, potential imbalance if not positioned correctly, may cause corrosion over time if exposed to moisture, lacks the refined look of professional counterweights, might not support very heavy microphones without additional modifications.
Who Should Opt for This Hack?
If you’re a content creator working on a tight budget or need a quick, temporary fix for mic boom sag, this DIY approach offers an excellent solution. It’s perfect for home studios, podcasters, and YouTubers who prioritize function over form. However, professionals requiring sleek aesthetics or supporting heavier mics might prefer investing in purpose-built counterweights or upgrade to higher-quality rigs.
Final Verdict: 7/10
For the cost-conscious creator, a fishing weight is a practical and surprisingly effective way to stabilize your mic boom without breaking the bank. Its ease of setup and durability make it a no-brainer for casual use. Still, if studio looks and long-term professionalism matter most, exploring dedicated counterweights like those from quality brands might be worth the extra investment. Curious about other affordable studio hacks? Check out our review of the graphene desk arms or discover how simple diffusion tricks can elevate your lighting game. For now, this trick gets a solid recommendation for those seeking efficiency and savings in their studio setup.